manuals.online logo
Brands
  1. Home
  2. •
  3. Brands
  4. •
  5. Croydex
  6. •
  7. Bathroom Fixture
  8. •
  9. Croydex STICK 'N' LOCK PREMIUM User manual

Croydex STICK 'N' LOCK PREMIUM User manual

CONTACT DETAILS
UK: Croydex, Central Way, Andover, Hampshire, SP10 5AW, UK
EU: MIL, Unit 8 Purcellsinch Ind Est, Dublin Road, Kilkenny, R95 HP71, Ireland
Tel: +44 (0)1264 365 881 Email: info@croydex.co.uk Web: www.croydex.co.uk
R&R 079 R021
STICK 'N' LOCK PREMIUM
SHOWER ROD
ALL PRODUCT DIMENSIONS DETAILED IN THIS
INSTALLATION AND MAINTENANCE MANUAL ARE
APPROXIMATE
ALL ILLUSTRATIONS OF THE PRODUCT ARE FOR
REFERENCE ONLY. COMPONENTS SUPPLIED WITH
INDIVIDUAL PRODUCTS MAY DIFFER
SECTION 1 - INTRODUCTION
• Please follow the instructions provided to ensure that your product is assembled and fitted safely, and
retains it’s high quality finish.
• Before attempting to fit or use this product, ensure that it can be properly installed in the desired
location.
PLEASE RETAIN THIS MANUAL FOR FUTURE REFERENCE
SAFETY & PRODUCT CARE
1. YOU MUST clean the wall surfaces before installation. Ensure surfaces are clean, dry and free of dust,
grease or any other contaminants.
2. YOU MUST extend the rod against the walls fully before locking in place.
3. YOU MUST ensure the rod is fully locked before applying a load to it.
4. Suitable for use with two heavy-duty shower curtains. Maximum load evenly distributed.
5. YOU MUST ensure that you are happy with the position of the rod before sticking it in place.
6. DO NOT apply any weight to the rod until 24 HOURS after installation to allow the adhesive to fully cure.
7. DO NOT use this product as a grab bar.
8. YOU SHOULD clean this product regularly with a soft damp cloth but do not use abrasive or chemical
cleaners as these may damage the product.
9. DO NOT exceed the maximum weight limit of 15Kg.
10. DO NOT use tile cleaning chemicals on or around this product as they may eect adhesion.
11. DO NOT attempt to install this product onto unfinished surfaces such as brick, block-work, wood, emulsion
paint, loose, flaky surfaces or surfaces contaminated with grease, wax or dust. Avoid joints or grout lines in
wall surfaces.
12. DO NOT use this product on decorative wall paper finishes.
13. The self-adhesive wall bracket can ONLY BE USED ONCE, IT CANNOT BE REAPPLIED. Spare brackets can
be purchased from www.croydex.com or by contacting our customer services department.
x1
15kg
MAX
FIXING PACK
ALWAYS CHECK THE PACKAGING FOR FIXINGS AND PARTS BEFORE
THROWING AWAY AND RECYCLING.
ENSURE YOU HAVE ALL THE FIXINGS AND PARTS BEFORE ATTEMPTING TO
ASSEMBLE OR FIT THIS PRODUCT.
fig. 2B
fig. 2A
R&R 079 R022
SECTION 2 - ASSEMBLY
1.First, carefully cut the O-rings that are securing the end caps
together. Separate the pressure plate (1) from the decorative cap
(2). Then slide one wall bracket (3) over each end of the rod with
the red backing tape facing the end of the rod. Then position
both of the O-rings in the recesses of the end caps (4).
(See Fig. 1A, 1B & 1C)
2.PEEL OFF the red backing from both brackets, cut the
backing tape and remove without disturbing the rod. Press the
brackets firmly to the wall at both ends. Avoid grout lines.
(See Fig. 4A & 4B)
3. Ensure the pins on the end cap (1) align with the slots (2)
in the pressure plate, locate the pressure plates over the self-
adhesive wall brackets and rotate to apply force. Repeat this
for both ends of the shower rod.
DO NOT OVER TIGHTEN!
(See Fig. 5A, 5B & 5C)
4.Slide the decorative caps over both pressure plates and
snap into place. (See Fig. 6)
IMPORTANT! YOU MUST WAIT 24 HOURS BEFORE
APPLYING ANY WEIGHT TO THE ROD! This will allow the
adhesive tape to cure and reach it's full bond strength.
fig. 1A
fig. 5A
fig. 5B fig. 5C
TWIST TO UNLOCK
fig. 3A
Smaller diameter tube
2
1
fig. 1B
1
23
5.When installing your shower curtain rings. Install them
over the smaller section of the tension rod, this will be easier
than installing over the larger diameter section and will reduce
the risk of damaging the surface finish of the rod.
Your shower curtain & rod are now ready for use!
fig. 4B
SECTION 3 - INSTALLATION
IMPORTANT INFORMATION!
The rod must be installed straight and level (See Fig. 2A).
The rod must not be installed across grout lines (See Fig. 2B).
Wall surfaces must meet the criteria outlined in 'Safety &
Product Care' notes 1, 10 & 11. (See front page).
1.Tension fit the rod into place. (See Fig. 3A, 3B & 3C)
EXTEND TO THE WALLS
fig. 3B TWIST TO LOCK
fig. 3C
WARNING!
YOU MUST TIGHTEN THE ROD UNTIL
IT CANNOT BE TIGHTENED ANY
FURTHER. Failure to do this will result
in the rod not being secured fully.
fig. 1C
4
fig. 4A
fig. 6
24 HOURS

Other Croydex Bathroom Fixture manuals

Croydex AM302021 User manual

Croydex

Croydex AM302021 User manual

Croydex AJ900041 User manual

Croydex

Croydex AJ900041 User manual
Croydex QM950022 User manual

Croydex

Croydex QM950022 User manual
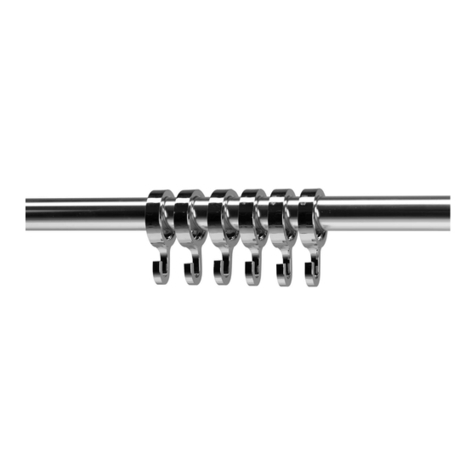
Croydex Luxury Round Shower Curtain Rod AD116541 User manual
Croydex

Croydex Luxury Round Shower Curtain Rod AD116541 User manual

Croydex FLEXI FIX AJ402041 User manual
Croydex

Croydex FLEXI FIX AJ402041 User manual

Croydex QM770341 User manual

Croydex

Croydex QM770341 User manual

Croydex PA670100 User manual

Croydex

Croydex PA670100 User manual
Croydex AD179441 Installation guide

Croydex

Croydex AD179441 Installation guide

Croydex QM950122 User manual

Croydex

Croydex QM950122 User manual

Croydex QM781941 User manual

Croydex

Croydex QM781941 User manual
Croydex FLEXI FIX User manual

Croydex

Croydex FLEXI FIX User manual
Croydex MM700100 User manual

Croydex

Croydex MM700100 User manual

Croydex QM391941 Manual

Croydex

Croydex QM391941 Manual

Croydex Hampstead Wall Mounted Accessory User manual

Croydex

Croydex Hampstead Wall Mounted Accessory User manual

Croydex QM391941 Manual

Croydex

Croydex QM391941 Manual

Croydex AP2300 User manual

Croydex

Croydex AP2300 User manual
Croydex LUXURY SQUARE ROD AD116441 User manual

Croydex

Croydex LUXURY SQUARE ROD AD116441 User manual

Croydex Flexi-Fix Riser Rail AM182041 Installation guide
Croydex

Croydex Flexi-Fix Riser Rail AM182041 Installation guide

Croydex QM361941 User manual

Croydex

Croydex QM361941 User manual

Croydex DG400341 User manual

Croydex

Croydex DG400341 User manual

Croydex ATTRACTIVE PREMIUM QM770321 User manual

Croydex

Croydex ATTRACTIVE PREMIUM QM770321 User manual

Croydex GP78100 Manual

Croydex

Croydex GP78100 Manual

Croydex WC266205E User manual

Croydex

Croydex WC266205E User manual

Croydex SLIMLINE GP87000SF User manual

Croydex

Croydex SLIMLINE GP87000SF User manual

Popular Bathroom Fixture manuals by other brands

Pacific Bay JetStream PB-S07 manual

Pacific Bay

Pacific Bay JetStream PB-S07 manual

Helvex 110-38-4.8-AHOSP installation guide

Helvex

Helvex 110-38-4.8-AHOSP installation guide

Welltime Texas 216782-1021896 Installation instruction

Welltime

Welltime Texas 216782-1021896 Installation instruction

Oras Cubista 2870 manual

Oras

Oras Cubista 2870 manual

Kermi Therm X2 installation manual

Kermi

Kermi Therm X2 installation manual

Franke CMPX502N Installation and operating instructions

Franke

Franke CMPX502N Installation and operating instructions

Viega 8326.1 Instructions for use

Viega

Viega 8326.1 Instructions for use

Zitta Glax 48" installation manual

Zitta

Zitta Glax 48" installation manual

baliv WA-5160 manual

baliv

baliv WA-5160 manual

Lefroy Brooks TEN TEN TT 4973 installation guide

Lefroy Brooks

Lefroy Brooks TEN TEN TT 4973 installation guide

Pulse Shower Spas AquaPower 1054-CH owner's manual

Pulse Shower Spas

Pulse Shower Spas AquaPower 1054-CH owner's manual

Dallmer ORIO quick start guide

Dallmer

Dallmer ORIO quick start guide

Fontana Showers EMILIA FS3362 installation instructions

Fontana Showers

Fontana Showers EMILIA FS3362 installation instructions

Spectrum Brands Pfister Verve LG16-VRV Quick installation guide

Spectrum Brands

Spectrum Brands Pfister Verve LG16-VRV Quick installation guide

Kohler K-T944-4 Homeowner's guide

Kohler

Kohler K-T944-4 Homeowner's guide
Signature Hardware DREA 953914 manual

Signature Hardware

Signature Hardware DREA 953914 manual

Fackelmann 82951 Instructions for mounting and use
Fackelmann

Fackelmann 82951 Instructions for mounting and use

Omnires PM7444BL Installation and Maintenance

Omnires

Omnires PM7444BL Installation and Maintenance

manuals.online logo
manuals.online logoBrands
  • About & Mission
  • Contact us
  • Privacy Policy
  • Terms and Conditions

Copyright 2025 Manuals.Online. All Rights Reserved.