manuals.online logo
Brands
  1. Home
  2. •
  3. Brands
  4. •
  5. CRU Dataport
  6. •
  7. Enclosure
  8. •
  9. CRU Dataport 2U User manual

CRU Dataport 2U User manual

RTX220 QR - Manual
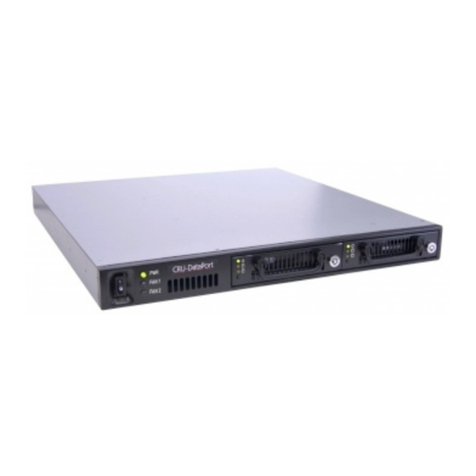
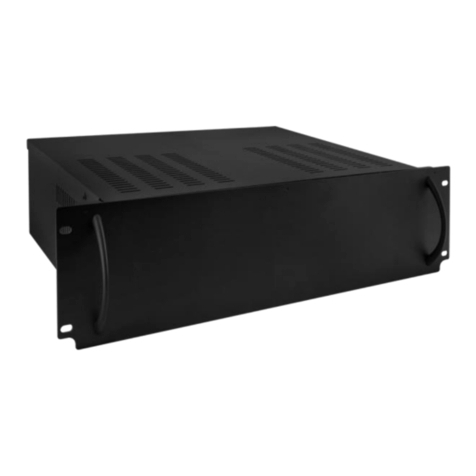
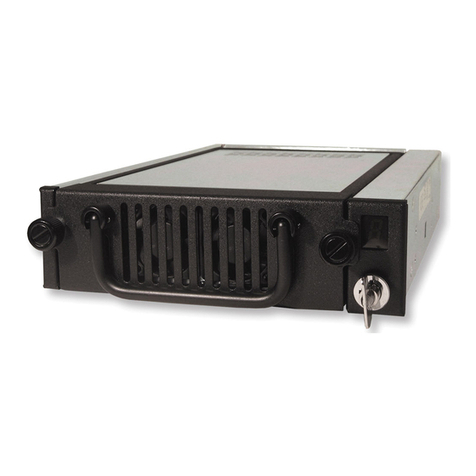
2U Enclosure with Open Bays Quick Start Guide
1. Installation Steps
1.1 Receiving Frame Installation
a. Power off the host computer and disconnect the power cord from the 2U enclosure.
b. Use a Phillips-head screwdriver to remove the cover of the 2U enclosure. There are a
total of 11 screws securing the enclosure on the top and sides of the chassis.
c. Unscrew the screws securing the device brackets to the chassis to remove them from
the 2U enclosure.
d. Fasten the brackets onto the sides of the devices to be installed into the enclosure
with the provided screws, using the position of the brackets to adjust the depth and
height of the devices so that they will fit properly into the enclosure. When finished,
there should be two sets of two devices coupled together by the device brackets.
e. Install each set of frames into both open bays by refastening the device brackets to
the 2U enclosure. First, start all four screws, but do not screw them all the way in.
Make sure the frames are flush with the face of the chassis and then tighten the
screws.
f. Use the four SATA data cables bundled with the enclosure to connect each device to
the host board. These tables show port assignments for each device:
Product Warranty
CRU-DataPort (CRU) warrants this product to be free of significant defects in material and workmanship for a period of one year from the original date of purchase.
CRU’s warranty is nontransferable and is limited to the original purchaser.
Limitation of Liability
The warranties set forth in this agreement replace all other warranties. CRU expressly disclaims all other warranties, including but not limited to, the implied war-
ranties of merchantability and fitness for a particular purpose and non-infringement of third-party rights with respect to the documentation and hardware. No CRU
dealer, agent, or employee is authorized to make any modification, extension, or addition to this warranty. In no event will CRU or its suppliers be liable for any costs
of procurement of substitute products or services, lost profits, loss of information or data, computer malfunction, or any other special, indirect, consequential, or
incidental damages arising in any way out of the sale of, use of, or inability to use any CRU product or service, even if CRU has been advised of the possibility of such
damages. In no case shall CRU’s liability exceed the actual money paid for the products at issue. CRU reserves the right to make modifications and additions to this
product without notice or taking on additional liability.
FCC Compliance Statement: “This device complies with Part 15 of the FCC rules. Operation is subject to the following two conditions: (1) This device may not cause
harmful interference, and (2) this device must accept any interference received, including interference that may cause undesired operation.”
This equipment has been tested and found to comply with the limits for a Class B digital device, pursuant to Part 15 of the FCC Rules. These limits are designed to pro-
vide reasonable protection against harmful interference when the equipment is operated in a home or commercial environment. This equipment generates, uses, and
can radiate radio frequency energy and, if not installed and used in accordance with the instruction manual, may cause harmful interference to radio communications.
In the event that you experience Radio Frequency Interference, you should take the following steps to resolve the problem:
1. Ensure that the case of your attached drive is grounded.
2. Use a data cable with RFI reducing ferrites on each end.
3. Use a power supply with an RFI reducing ferrite approximately 5 inches from the DC plug.
4. Reorient or relocate the receiving antenna.
A5-002-0003-1 Revision: 1.0
Additional product information can be found at www.cru-dataport.com and www.wiebetech.com.
WiebeTech is a brand of CRU.
Models Covered:
2U Enclosure with Open Bays
2U Enclosure - SATA Version
Frame Position Port# Frame Position Port#
Top Left 1 Top Right 2
Bottom Left 3 Bottom Right 4
FOR OFFICE OR COMMERCIAL USE
RTX220 QR - Manual
3. Technical Specification
*Infiniband host connections will not function.
**The host system must support port multiplication on the port that this product is intended to be used.
IT Power Systems
This enclosure is intended for use on a TN power system. This enclosure was evaluated for use
on an IT power system in accordance with Norway National Differences to IEC60950-1.
g. Attach the power cables from the power supply to each device.
h. Refasten the 2U enclosure cover with the screws removed in Step a.
1.2 Operating Your 2U Enclosure
a. Power off the host computer and disconnect the
power cord.
b. Connect the host computer to the 2U Enclosure
with an external cable (not provided).
c. Power on the 2U Enclosure. For best results, power on the enclosure before powering on
the system.
Your 2U Enclosure is now ready to use! If you are
using hard drives inside the enclosure and they
are already formatted, you can begin using it right
away. If the hard drives are brand new or their
format is not compatible with your computer, you’ll
need to format the drives before you can use them.
2. Rack Mounting Warnings
Elevated Operating Ambient Temperature: The operating ambient temperature of the
rack environment may be greater than the room ambient temperature if the 2U Enclosure
is installed in a closed or multi-unit rack assembly. Install the equipment in an environment
compatible with the maximum ambient temperature of 40° C.
Reduced Air Flow: Do not block or inhibit the air flow required for safe operation of the
2U Enclosure.
Mechanical Loading: Use care when mounting the rack in order to prevent injury.
Circuit Overloading: Do not overload the circuits. Refer to the name plate ratings on the
equipment.
Reliable Grounding: Maintain reliable grounding of rack-mounted equipment by using
indirect connections to the branch circuit (i.e. UPS battery backups, power strips).
Product Name 2U Enclosure with Open Bays
Interface Types & Speeds • SATA with SFF-8470: up to 300 MB/s
• eSATA: up to 150 MB/s
Compatibility 5.25” half-height SATA devices with 15-pin SATA power
Data Connectors One (1) SATA with SFF-8470* connector
or One (1) eSATA port multiplier**
Operating System
Requirements
• Windows 7, Vista, or XP
• Mac OS X
• Linux distributions that support SFF-8470 or eSATA connections
Compliance EMI Standard: FCC Part 15 Class A, CE
EMC Standard: EN55022, EN55024
Shipping Weight 20.5 pounds (includes accessories)
Product Dimensions 23.23” x 21.65” x 9.06” (590mm x 550mm x 230mm)
Technical Support We don’t want anything to go wrong with your CRU-DataPort product. But if it
does, Tech Support is standing by and ready to help. Contact us at http://www.cru-
dataport.com/technical-support/customer-technical-support.php
NOTE: The 2U Enclosure requires
slide rails to be rack mounted.
NOTE: The 2U Enclosure
supports hot swapping of the
hard drives in the carriers. When
hot swapping drives, ensure
activity has stopped before
powering down the drive carriers.

Other CRU Dataport Enclosure manuals

CRU Dataport DataPort 350 User manual

CRU Dataport

CRU Dataport DataPort 350 User manual

CRU Dataport DE100 Ultra320 SCA User manual

CRU Dataport

CRU Dataport DE100 Ultra320 SCA User manual

CRU Dataport DataPort 3 User manual

CRU Dataport

CRU Dataport DataPort 3 User manual

CRU Dataport DE200 SCSI User manual

CRU Dataport

CRU Dataport DE200 SCSI User manual

CRU Dataport TT-Q User manual

CRU Dataport

CRU Dataport TT-Q User manual

CRU Dataport Data Express DE275 User manual

CRU Dataport

CRU Dataport Data Express DE275 User manual

CRU Dataport ToughTech Duo-QR User manual

CRU Dataport

CRU Dataport ToughTech Duo-QR User manual

CRU Dataport DE75i-SW160 User manual

CRU Dataport

CRU Dataport DE75i-SW160 User manual

CRU Dataport RTX800-XJ User manual

CRU Dataport

CRU Dataport RTX800-XJ User manual

CRU Dataport HotDock Secure User manual

CRU Dataport

CRU Dataport HotDock Secure User manual

CRU Dataport DE110 User manual

CRU Dataport

CRU Dataport DE110 User manual

CRU Dataport RTX110-3Q User manual

CRU Dataport

CRU Dataport RTX110-3Q User manual

CRU Dataport Data Express DE200 SCSI User manual

CRU Dataport

CRU Dataport Data Express DE200 SCSI User manual

CRU Dataport RJR400 User manual

CRU Dataport

CRU Dataport RJR400 User manual

CRU Dataport Data Express DE110 Ultra ATA133 User manual

CRU Dataport

CRU Dataport Data Express DE110 Ultra ATA133 User manual

CRU Dataport ToughTech Q Operating and maintenance instructions

CRU Dataport

CRU Dataport ToughTech Q Operating and maintenance instructions

CRU Dataport Data Express DE75 SAS User manual

CRU Dataport

CRU Dataport Data Express DE75 SAS User manual

CRU Dataport ToughTech m3 User manual

CRU Dataport

CRU Dataport ToughTech m3 User manual

CRU Dataport Data Express DX115 SATA User manual

CRU Dataport

CRU Dataport Data Express DX115 SATA User manual

CRU Dataport 25 Secure User manual

CRU Dataport

CRU Dataport 25 Secure User manual

CRU Dataport DE100 ATA 33 User manual

CRU Dataport

CRU Dataport DE100 ATA 33 User manual

CRU Dataport DE100 Series User manual

CRU Dataport

CRU Dataport DE100 Series User manual

CRU Dataport 10 USB-to-SATA User manual

CRU Dataport

CRU Dataport 10 USB-to-SATA User manual

CRU Dataport DataPort 5 User manual

CRU Dataport

CRU Dataport DataPort 5 User manual

Popular Enclosure manuals by other brands

StarTech.com SAT1810U2 user manual

StarTech.com

StarTech.com SAT1810U2 user manual

CommScope FOSC-ACC-B-TRAY-12-RBN Installation instruction

CommScope

CommScope FOSC-ACC-B-TRAY-12-RBN Installation instruction

Vertiv XTE 802 Series Description and installation manual

Vertiv

Vertiv XTE 802 Series Description and installation manual

Popp p8 manual

Popp

Popp p8 manual

Antec PLUSView1000 AMG User’s user manual

Antec

Antec PLUSView1000 AMG User’s user manual

Vertiv NetXtend Flex 20 Description and installation manual

Vertiv

Vertiv NetXtend Flex 20 Description and installation manual

Addonics Technologies External USB2.0 user guide

Addonics Technologies

Addonics Technologies External USB2.0 user guide

Ritron LMH-100 installation instructions

Ritron

Ritron LMH-100 installation instructions

hager New VegaD Technical manual

hager

hager New VegaD Technical manual

Renkforce 1346299 operating instructions

Renkforce

Renkforce 1346299 operating instructions

Unibos BR-TB3-X4 user guide

Unibos

Unibos BR-TB3-X4 user guide

Renkforce 2526460 operating instructions

Renkforce

Renkforce 2526460 operating instructions

Tescom TC-5910DP user manual

Tescom

Tescom TC-5910DP user manual

OWC data doubler installation guide

OWC

OWC data doubler installation guide

Dorman Smith Loadbank 250 installation instructions

Dorman Smith

Dorman Smith Loadbank 250 installation instructions

General DataComm Metroplex 6000 MP 6960 Installation and operation

General DataComm

General DataComm Metroplex 6000 MP 6960 Installation and operation

Thermaltake V3 BlacX Edition VL800M Series user manual

Thermaltake

Thermaltake V3 BlacX Edition VL800M Series user manual

enphase IQ Combiner 5 Quick install guide

enphase

enphase IQ Combiner 5 Quick install guide

manuals.online logo
manuals.online logoBrands
  • About & Mission
  • Contact us
  • Privacy Policy
  • Terms and Conditions

Copyright 2025 Manuals.Online. All Rights Reserved.