manuals.online logo
Brands
  1. Home
  2. •
  3. Brands
  4. •
  5. CTC Union
  6. •
  7. Switch
  8. •
  9. CTC Union ITP-G800SM-8PH24 User manual

CTC Union ITP-G800SM-8PH24 User manual

Introduction
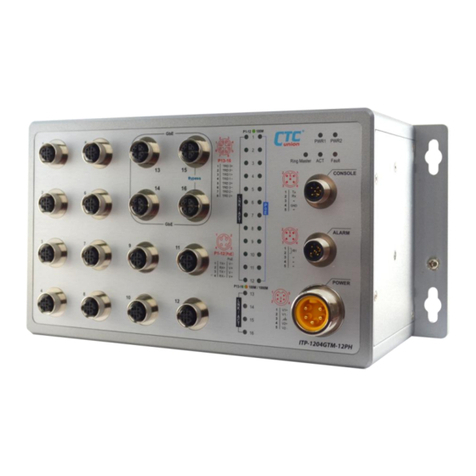
ITP-G800M/G802SM-8PH(E)24 Series are managed industrial grade
Gigabit Ethernet PoE+ switches with 8 x 10/100/1000Base-T Gigabit
Ethernet PoE ports plus 2 x 100/1000Base-X SFP Fiber (For ITP-G802SM
Series). ITP-G800M/G802SM-8PH(E)24 switches equipped with PoE (Power
over Ethernet) function utilize M12 connectors to ensure tight and robust
connections and to guarantee reliable operation against environmental
disturbances such as vibration and shock.
Housed in IP67 grade rugged and wall mountable housing, ITP-
G800M/G802SM-8PH(E)24 switches are able to protect against dust and
water submersion. Besides, these switches comply with EN50155 standard
that covers strict demands on operating temperature, power input voltage,
surge, ESD, vibration, and shock, thus making them suitable for industrial
applications such as vehicle, rolling stock and railway.
Packing List
ITP-G800M-8PH(E)24 or G802SM-8PH(E)24 Device
Protective caps for M12 Gigabit Ethernet, console, and alarm ports.
2 Sets of Fiber Cable Gland for SFP ports (ITP-G802SM Series only)
Console cable (M12 to DB9)
CD-ROM (Manual, SmartConfig, MIB file)
Quick Installation Guide
Features
Use M12 & M23 anti-vibration and shock connector
24/48VDC redundant dual input power and built-in power booster
design up to 55VDC for PoE output
Regulate PoE output voltage (55VDC) to stabilize PoE device and
guarantee delivery PoE power distance to 100meter
PoE output power budget maximum 180W
Wide temperature range -40°C~75°C ("-E" models only)
IP67 grade rugged housing against water, dust and oil
Support many advanced Ethernet L2 functions
CE, FCC, EN50155 and EN50121-4 certified
Industrial grade EMS, EMI, EN61000-6-2, EN61000-6-4 certified
Specifications
Interface
Port 1~8 support 10/100/1000Base-T M12 (8-Pin, A-Code Female)
Port 9~10 fiber cable glands support 100/1000Base-X SFP slot with DDMI
(ITP-G802SM Series only)
Support Auto MDI/MDI-X
Support 802.3x Flow Control
Full/Half Duplex
Store & Forward Mode
Switch
MAC Address Table: 8K
Packet Buffer Size: 256K Bytes
Jumbo Frame: 9.6KB
Switching Fabric: 16Gbps (ITP-G800M Series) , 20Gbps (ITP-G802SM
Series)
Quick Installation Guide
ITP-G800SM-8PH24/ITP-G800M-8PHE24
EN50155 IP67 Managed 8 x 10/100/1000Base-TX with 8 PoE+ Ethernet
Switch (-10°C~60°C/-40°C~75°C)
ITP-G802SM-8PH24/ITP-G802SM-8PHE24
EN50155 IP67 Managed 8 x 10/100/1000Base-TX + 2 x 100/1000Base-X
SFP with 8 PoE+ Ethernet Switch (-10°C~60°C/-40°C~75°C)
Specifications (cont.)
Power over Ethernet
8 x PoE enabled ports, M12 (8-Pin) A-Code Female
End-Span Alternative A Mode
Supports IEEE802.3af 15.4watts PoE per port
Supports IEEE802.3at 30watts PoE+ per port (180W budget)
Pin Assignments: 4, 6 (Positive Pins); 5, 7 (Negative Pins);
1, 2, 3, 4, 5, 6, 7, 8 (Data)
Power
Connector Type: 1 x M23 (5-Pin) Male
Power Supply: Redundant Dual DC 24/48V (20~57VDC) input power
Reverse Polarity Protection: Yes
Overload Current Protection: Yes
Consumption:
Model
Input
Voltage
Total Power
Consumption
Device Power
Consumption
PoE
Budget
Boost
Efficiency
ITP-G800M-
8PH(E)24
24VDC
197.6W
8.9W
180W
95.30%
48VDC
198.3W
10.6W
180W
95.80%
ITP-G802SM-
8PH(E)24
24VDC
198.5W
9.8W
180W
95.30%
48VDC
199.2W
11.5W
180W
95.80%
Mechanical
Housing: IP67 Waterproof Protection
Fanless Design
Dimensions: 70 mm (D) x 240 mm (W) x 168 mm (H)
Mounting: Wall mounting, DIN-Rail mounting (Optional Accessory)
Weight: 2.055kg (ITP-G800M Series), 2.17kg (ITP-G802SM Series)
Environmental
Operating Temperature:
-10°C~60°C (ITP-G800M-8PH24, ITP-G802SM-8PH24)
-40°C~75°C (ITP-G800M-8PHE24, ITP-G802SM-8PHE24)
Storage Temperature: -40°C~85°C
Humidity: 5%~95% (Non-condensing)
Certifications
EMC: CE
EMI (Electromagnetic Interference): FCC Part 15 Subpart B Class A, CE
EN55022 Class A
Railway Traffic: EN50155, EN50121-4
Immunity for Heavy Industrial Environment: EN61000-6-2
Emission for Heavy Industrial Environment: EN61000-6-4
EMS (Electromagnetic Susceptibility) Protection Level:
EN61000-4-2 (ESD) Level 3, Criteria B
EN61000-4-3 (RS) Level 3, Criteria A
EN61000-4-4 (Burst) Level 3, Criteria A
EN61000-4-5 (Surge) Level 3, Criteria B
EN61000-4-6 (CS) Level 3, Criteria A
EN61000-4-8 (PFMF, Magnetic Field) Field Strength: 300A/m, Criteria A
Shock: IEC 61373
Freefall: IEC 60068-2-32
Vibration: IEC 61373
MTBF (MIL-HDBK-217): 197,455 (ITP-G800M Series); 184,205 Hours (ITP-
G802SM Series)
V1.0
- 2 -
[email protected]
© 2015 CTC Union Technologies Co., Ltd.
All trademarks are the property of their respective owners.
Technical information in this document is subject to change without notice.
CTC Union Technologies Co., Ltd.
Far Eastern Vienna Technology Center
(Neihu Technology Park)
8F, No. 60, Zhouzi St., Neihu District, Taipei 114
Taiwan
T +886-2-26591021
F +886-2-26590237
E [email protected]
- 1 -
www.ctcu.com
ITP-G800M-8PH(E)24 Panels
Index No.
Description
1
M12 Gigabit Ethernet port 1~8
2
M12 Console port
3
M12 Alarm port
4
M23 Power input port
5
Link/ACT & PoE LEDs for M12 Gigabit Ethernet ports
6
Power, Fault, ACT, Ring LEDs
7
Pin assignment tables
8
Wall mounting holes
9
Earth grounding
Table 1: Panel reference table
Step 1. Prepare one suitable ground screw and one grounding cable.
Step 2. Attach the grounding screw to the ring terminal of the grounding
cable. Make sure that the grounding cable is long enough to
reach the earth.
Step 3. Use a screwdriver (or other tools) to fasten the grounding screw
on the earth ground hole securely.
CLI & Web Basic Operation
ITP-G800M/G802SM-8PH(E)24 Series are managed Gigabit Ethernet
PoE+ switches for industrial uses. Initial configuration (assignment of IP
address) may be accomplished via the M12 to DB-9 console port and a
PC or laptop running terminal emulation software.
First, use the provided console cable to connect the M12 to the
"CONSOLE" port and the DB9 to PC COM port. Then, apply power to the
switch. Run terminal emulation software and configure the terminal as
follows:
115200 speed, 8 data bits, no parity, 1 stop bit, no flow control
At the "Username:" prompt, enter 'admin' (lower case, no quotes). Just
press Enter when prompted for password.
ITP-G800/G802SM-8PH(E)24 switches use a command line interface
(CLI) through the serial port. Once the IP address has been configured, a
web browser can be used to configure the device through a more easy-
to-use GUI (graphical user interface). Please refer to the operation
manual on the CDROM for Web management.
To set the IP address and subnet mask, issue the following commands:
# config terminal
(config)# interface vlan 1
(config-if-vlan)# ip address 192.168.0.10 255.255.255.0
(example: sets VID 1 to 192.168.0.10, subnet 255.255.255.0)
NOTE: The factory default IP address is 10.1.1.1 with mask
255.255.255.0
ITP-G802SM-8PH(E)24 Panels
Index
No.
Description
Index
No.
Description
1
M12 Gigabit Ethernet port 1~8
8
Power, Fault, ACT, Ring
LEDs
2
Gigabit Ethernet SFP slot 9~10
9
Wall mounting holes
3
M12 Console port
10
Pin assignment tables
4
M12 Alarm port
11
Earth grounding
5
M23 Power input port
6
Link/ACT & PoE LEDs for M12 Gigabit Ethernet port 1~8
7
Link/ACT LEDs for Gigabit Ethernet SFP slot 9~10
Table 2: Panel reference table
Earth Ground Connection
An earth ground hole is provided on side panel. Grounding the device
can help to release leakage of electricity to the earth safely so as to
reduce injuries from electromagnetic interference (EMI).
Prior to connecting to the power, it is important to connect the
ground wire to the earth. Follow steps in Page 5 to install ground wire:
LED Indicators
LED
Color
Status
Description
PWR1
PWR2
Green
On
Lit if power 1 or power 2 is
connected and active.
Fault
Amber
On
Lit when one or more of the
programmable alarm
conditions is active.
ACT
Green
On
During normal use, this LED
will be lit, indicating a
healthy condition of the
running CPU.
Blinking
Blinking when firmware is
being upgraded.
Ring
Yellow
On
Lit when this unit is the
'master' in a fiber ring and
all units are configured for
u-Ring or ERPS (Ethernet
Ring Protection Switching
or G.8032).
100M/1000M
LNK/ACT for
Port 1~8
Green
On
Lit when the LAN
connected speed is 100M.
Blinking
Blinking when there is
Ethernet traffic.
Amber
On
Lit when the LAN
connected speed is 1000M.
Blinking
Blinking when there is
Ethernet traffic.
LNK/ACT for
Port 9 & 10
(ITP-G802SM
Series only)
Green
On
Lit when the fiber
connected speed is 100M
Blinking
Blinking when there is
Ethernet traffic.
Amber
On
Lit when the fiber
connected speed is 1000M
Blinking
Blinking when there is
Ethernet traffic.
PoE
Green
On
Lit when the respective LAN
port has successfully
negotiated PoE and is
supplying output power to
the remote connected PD
device.
- 3 -
Figure 1: Front panel
Figure 2: Side panel
8
2
8
8
8
4
11
6
- 5 -
- 4 -
Figure 3: Front panel
Figure 4: Side panel
9
11
9
1
7
Figure 5: Grounding the device
3
4
7
9
1
6
9
5
11
8
2
- 6 -
5
3
9
www.ctcu.com
10
9
PIN Assignment
M12 Gigabit Ethernet Port
Port 1~8 Gigabit Ethernet
PoE
Pinout
M12 Pin
No.
Pinout
RJ-45
Pin No.
1
TDR2-
5
2
TDR3+
7
3
TDR3-
8
4
TDR0-
2
V+
5
TDR1+
3
V-
6
TDR0+
1
V+
7
TDR1-
6
V-
8
TDR2+
4
M12 Console Port
M12 Pinout
DB-9 (Female) Pinout
1
TX
2
RX
2
RX
3
TX
3
-
-
-
4
GND
5
GND
5
-
-
-
Fiber Cable Gland Installation for ITP-G802SM Series
ITP-G802SM-8PH(E)24 Series offer two metal fiber cable glands on the
bottom panel that provide watertight seals for the cable embedded
inside so that fiber transmission loss due to external factors can be
reduced to minimum. Before assembling fiber cable glands, make sure
your cable gland kit have the following components:
Assembly Steps:
Step 1. Loosen and remove the protective cap of the fiber port by
turning counter-clockwise using a coin.
Step 2. Insert the fiber transceiver.
Step3. Thread the components of cable gland over the fiber cable in the
order as indicated below and keep them loose in this step.
Step 4. Connect the fiber cable to the fiber transceiver.
M12 Alarm Port
M12 Pin No.
Description
Color of
Open Cable
1
Black
2
Blue
3
-
Red
4
-
Orange
5
-
Yellow
M23 Power Input Port
M23 Pin No.
Pinout
Description
Color of
Open Cable
1
V1+
24/48VDC
Black
2
V1-
Blue
3
C-GND
Green
4
V2+
24/48VDC
Brown
5
v2-
White
Step 5. Attach the body of the gland to the device and tighten by turning
clockwise.
Step 6. Attach the split seals to the cable.
Step 7. Slide the split seals along the cable and into the body. Press
firmly to ensure the split seals are completely seated on the
body.
Step 8. Slide the clip along the cable and make sure that it is firmly
attached to the split seals.
Step 9. Finally, move along the sealing nut and attach it to the body.
Firmly attach the sealing nut by turning clockwise.
Table 4: Console cable pin assignment
Table 6: Power cable pin assignment
- 7 -
- 8 -
- 3 -
- 9 -
- 10 -
Table 3: Gigabit Ethernet cable pin assignment
Table 5: Alarm cable pin assignment
Figure 9: Connect the fiber cable to the transceiver
Figure 10: Install the body component
Figure 11: Install the split seals
Figure 12: Attach split seals to the body component
Figure 13: Attach the clip to the split seals
Figure 14: Tighten the sealing nut
www.ctcu.com
R1
Figure 7: Insert the fiber transceiver
Split seals
Clip
Body
Sealing nut
Figure 6: Remove the protective cap
1 2 3
Figure 8: Thread the components over the fiber cable
M12 Cable Connector Installation
Before assembling M12 cable, make sure you have the
following M12 cable connector components and cable at hand.
Assembly Steps:
Step 1. Thread the screw nut, O-ring, and housing over the cable
in the order shown below and keep them loose in this step.
Step 2. Strip the cable and the individual cores to fit the
connector. Insert the stripped wires into the opened
contact clamps.
Step 3. Tighten the connector by turning clockwise, making sure
that the wires inside the connector are not twisted as the
screwed housing is assembled.
Use a flat-head screwdriver to unlock and remove the device from the
din rail when un-mounting.
Insert the flat-head screwdriver into the indicated din rail snap level
hole.
Push up the flat-head screwdriver to pull the din rail snap level open.
Figure 21: Un-mounting
Application
Wall-Mounting and DIN Rail
The ITP-G800M/G802SM-8PH(E)24 Series come with both wall
mount (standard accessory) and DIN rail hardware brackets
(optional accessory). The wall mount bracket has been attached
to the device. Therefore, there is no need to install wall mount
bracket.
Figure 18: Wall mounting
When installing the DIN rail bracket, be sure to correctly align
the orientation pin (Figure 19). The DIN Rail bracket has a steel
spring in the upper rail of the bracket. This spring is compressed
for mounting and un-mounting by applying downward force.
Figure 19: Din rail installation
Figure 20: Mounting
- 11 -
Figure 15: Thread components over the cable
Figure 16: Insert the stripped wires to contact clamps
Screw Nut
Housing
Male Contact
Connector
O-Ring
Figure 17: Tighten the connector
- 12 -
www.ctcu.com
- 13 -
- 14 -
Figure 22: Onboard train application for ITP Series
NOTES:
Wall mounting
holes
Wall mounting
holes




This manual suits for next models

3

Other CTC Union Switch manuals

CTC Union IGS-2408SM-24PH User manual

CTC Union

CTC Union IGS-2408SM-24PH User manual

CTC Union MSW-4424C Series User manual

CTC Union

CTC Union MSW-4424C Series User manual

CTC Union GSW-3208M1 User manual

CTC Union

CTC Union GSW-3208M1 User manual

CTC Union SB282 Series User manual

CTC Union

CTC Union SB282 Series User manual

CTC Union SB202 Series User manual

CTC Union

CTC Union SB202 Series User manual

CTC Union IFS-402GSM-4PH24 User manual

CTC Union

CTC Union IFS-402GSM-4PH24 User manual

CTC Union GSW-1005MS User manual

CTC Union

CTC Union GSW-1005MS User manual

CTC Union IFS-803GSM-8PH24 User manual

CTC Union

CTC Union IFS-803GSM-8PH24 User manual

CTC Union FRM220A-GSW/SNMP User manual

CTC Union

CTC Union FRM220A-GSW/SNMP User manual

CTC Union JB130 Series User manual

CTC Union

CTC Union JB130 Series User manual

CTC Union IFS-803GSM User manual

CTC Union

CTC Union IFS-803GSM User manual

CTC Union ITP-1204GTM-12PHE User manual

CTC Union

CTC Union ITP-1204GTM-12PHE User manual

CTC Union IGS-800C-8PH User manual

CTC Union

CTC Union IGS-800C-8PH User manual

CTC Union SB152 Series User manual

CTC Union

CTC Union SB152 Series User manual

CTC Union IGS-1608SM-SE User manual

CTC Union

CTC Union IGS-1608SM-SE User manual

CTC Union JB120 Series User manual

CTC Union

CTC Union JB120 Series User manual

CTC Union JB110 Series User manual

CTC Union

CTC Union JB110 Series User manual

CTC Union TSB6000 Series User manual

CTC Union

CTC Union TSB6000 Series User manual

CTC Union JB210 Series User manual

CTC Union

CTC Union JB210 Series User manual

CTC Union IGS-803SM-8PH24 User manual

CTC Union

CTC Union IGS-803SM-8PH24 User manual

CTC Union ITP-800A User manual

CTC Union

CTC Union ITP-800A User manual

CTC Union MX262 Series User manual

CTC Union

CTC Union MX262 Series User manual

CTC Union IGS?401F?4PH24 User manual

CTC Union

CTC Union IGS?401F?4PH24 User manual

CTC Union JB230 Series User manual

CTC Union

CTC Union JB230 Series User manual

Popular Switch manuals by other brands

QNO QMS1024G user manual

QNO

QNO QMS1024G user manual

Mellanox Technologies InfiniScale III M2401G 20Gb/s InfiniBand user manual

Mellanox Technologies

Mellanox Technologies InfiniScale III M2401G 20Gb/s InfiniBand user manual

Kramer VP-719xl user manual

Kramer

Kramer VP-719xl user manual

ZyXEL Communications XGS-4528F Specifications

ZyXEL Communications

ZyXEL Communications XGS-4528F Specifications

Raritan PC-Share Installation and operation

Raritan

Raritan PC-Share Installation and operation

AJAX Hub 2 quick start guide

AJAX

AJAX Hub 2 quick start guide

foxunhd FX-SW07 operating instructions

foxunhd

foxunhd FX-SW07 operating instructions

CTS SWH-2109FX user guide

CTS

CTS SWH-2109FX user guide

TRENDnet TPE-T160 Specifications

TRENDnet

TRENDnet TPE-T160 Specifications

Allied Telesis XS910/8 manual

Allied Telesis

Allied Telesis XS910/8 manual

Tenda TEG1210P user guide

Tenda

Tenda TEG1210P user guide

Monoprice 33416 user manual

Monoprice

Monoprice 33416 user manual

Niko 10-825 manual

Niko

Niko 10-825 manual

H3C S5150-EI Series Configuration guide

H3C

H3C S5150-EI Series Configuration guide

Digital Extender DS-41R user manual

Digital Extender

Digital Extender DS-41R user manual

LEGRAND 672 34 quick start guide

LEGRAND

LEGRAND 672 34 quick start guide

3Com PathBuilder S200 Series user manual

3Com

3Com PathBuilder S200 Series user manual

Disaster Area Designs DPC.micro user manual

Disaster Area Designs

Disaster Area Designs DPC.micro user manual

manuals.online logo
manuals.online logoBrands
  • About & Mission
  • Contact us
  • Privacy Policy
  • Terms and Conditions

Copyright 2025 Manuals.Online. All Rights Reserved.