D-Link DCH-M225 User manual
DCH-M225
User Manual
Wi-Fi Audio Extender
Version 1.00 | 02/25/2014
iD-Link DCH-M225 User Manual
D-Link reserves the right to revise this publication and to make changes in the content hereof without obligation to notify any
person or organization of such revisions or changes.
Manual Revisions
Trademarks
D-Link and the D-Link logo are trademarks or registered trademarks of D-Link Corporation or its subsidiaries in the United
States or other countries. All other company or product names mentioned herein are trademarks or registered trademarks of
their respective companies.
Copyright © 2013 by D-Link Corporation.
All rights reserved. This publication may not be reproduced, in whole or in part, without prior expressed written permission
from D-Link Systems, Inc.
Revision Date Description
1.0 December 2, 2013 • Initial release
Preface

iiD-Link DCH-M225 User Manual
Table of Contents
Preface ................................................................................. i
Manual Revisions ........................................................................... i
Trademarks ...................................................................................... i
Product Overview .............................................................. 1
Package Contents ......................................................................... 1
System Requirements ................................................................. 2
Introduction ................................................................................... 3
Features .................................................................................... 3
What is a Wireless Extender? ............................................ 4
Hardware Overview ..................................................................... 5
Front/Top ................................................................................. 5
Side and Bottom ................................................................... 6
QRS Mobile App Setup ............................................................... 9
Web-based Conguration .......................................................13
Setup Wizard ....................................................................14
Using the WPS Method ....................................................16
Using the Manual Method ..............................................17
Home Screen ........................................................................20
Wi-Fi Settings .......................................................................22
Extended Wi-Fi Settings ...................................................23
Audio Renderer ...................................................................24
Network Settings ................................................................25
Advanced Settings ........................................................25
Maintenance ................................................................................28
Admin .....................................................................................28
System ....................................................................................29
Upgrade .................................................................................30
Statistics .................................................................................31
Connecting a Wireless Client ..........................................32
WPS Button ...................................................................................32
Connect to a Wireless Network .............................................33
Windows® 8 ...........................................................................33
WPA/WPA2 .......................................................................33
Windows® 7 ...........................................................................35
WPA/WPA2 .......................................................................35
Windows Vista® ....................................................................38
WPA/WPA2 .......................................................................39
Windows® XP ........................................................................41
WPA/WPA2 .......................................................................42
Troubleshooting ..............................................................44
Wireless Basics .................................................................46
Tips ...................................................................................................47
Technical Specications ..................................................48
Warranty ...........................................................................49
Table of Contents

1D-Link DCH-M225 User Manual
Section 1 - Product Overview
Product Overview
Package Contents
DCH-M225 Wi-Fi Audio Extender
Wi-Fi Conguration Card
If any of the above items are missing from your package, please contact your reseller.

2D-Link DCH-M225 User Manual
Section 1 - Product Overview
Network Requirements
• A wireless router with an active Internet connection.
• IEEE 802.11n, 802.11g, or 802.11b wireless clients/devices
Web-based Conguration
Utility Requirements
Computer or Mobile Device with the following:
• A Windows®, Macintosh, Android, or Linux-based operating
system
• Wireless adapter or Wi-Fi functionality
Browser Requirements:
• Internet Explorer 7 or later
• Firefox 12.0 or later
• Safari 4 or later
• Google Chrome 20.0 or later
System Requirements

3D-Link DCH-M225 User Manual
Section 1 - Product Overview
Introduction
Features
Easily Extend Your Existing Network and Audio Setup
The DCH-M225 Wi-Fi Audio Extender is a portable plug-in repeater that lets you extend an existing wireless network. It also
has the ability to stream your music library to anywhere within your extended wireless network. Tiny yet powerful, it supports
Wireless N speeds of up to 300 Mbps in a device that ts in the palm of your hand.
Compact, Convenient Design
The DCH-M225 ‘s compact design is ideal for use at home or a small oce, as it does not take up much space and is ready to
use by simply plugging it in. The repeater’s small form means it can easily be plugged into a power outlet without blocking
other outlets while its wall wart design saves you the hassle of dealing with a power cord. Its sleek, unobtrusive appearance
means it blends easily into the background.
Conveniently Stream Audio
Expanding your audio capabilities has never been easier with the help of the DCH-M225. With support for both DLNA and
AirPlay, simply plug in your speakers and you’ll be able to stream audio to anywhere within your wireless network. The Wi-Fi
WMM quality of service protocol ensures that you’ll have no issues with bandwidth when streaming audio and performing other
tasks such as surng the Internet, checking email, or online gaming.
Simple Setup
Through its easy-to-use web-based user interface, you can quickly and easily connect the DCH-M225 to an uplink router,
congure the extender wireless network, and manage the administrative settings. The setup wizard will even guide you through
the setup process, getting your extended wireless network up and running in no time.
* Maximum wireless signal rate derived from IEEE Standard 802.11n and 802.11g specications. Actual data throughput will vary. Network conditions and environmental factors,
including volume of network trac, building materials and construction, and network overhead, lower actual data throughput rate. Environmental conditions will adversely
aect wireless signal range.

4D-Link DCH-M225 User Manual
Section 1 - Product Overview
What is a Wireless Extender?
The DCH-M225 acts as a repeater to extend the range of an existing wireless network to provide better signal for parts of
your home or oce that may have poor or no reception. Your existing wireless signal will be re-broadcast by the DCH-M225,
allowing you to reach the farthest corners of your home or oce . The extended network can simply use the same network
credentials as the existing network, or you can specify a dierent network name and password, giving you the exibility to
control network access.
This purpose of this product is to create a constant network connection for your devices. As such, it does not have a standby
mode or use a power management mode. If you wish to power down this product, please simply unplug it from the power
outlet.
5D-Link DCH-M225 User Manual
Section 1 - Product Overview
Hardware Overview
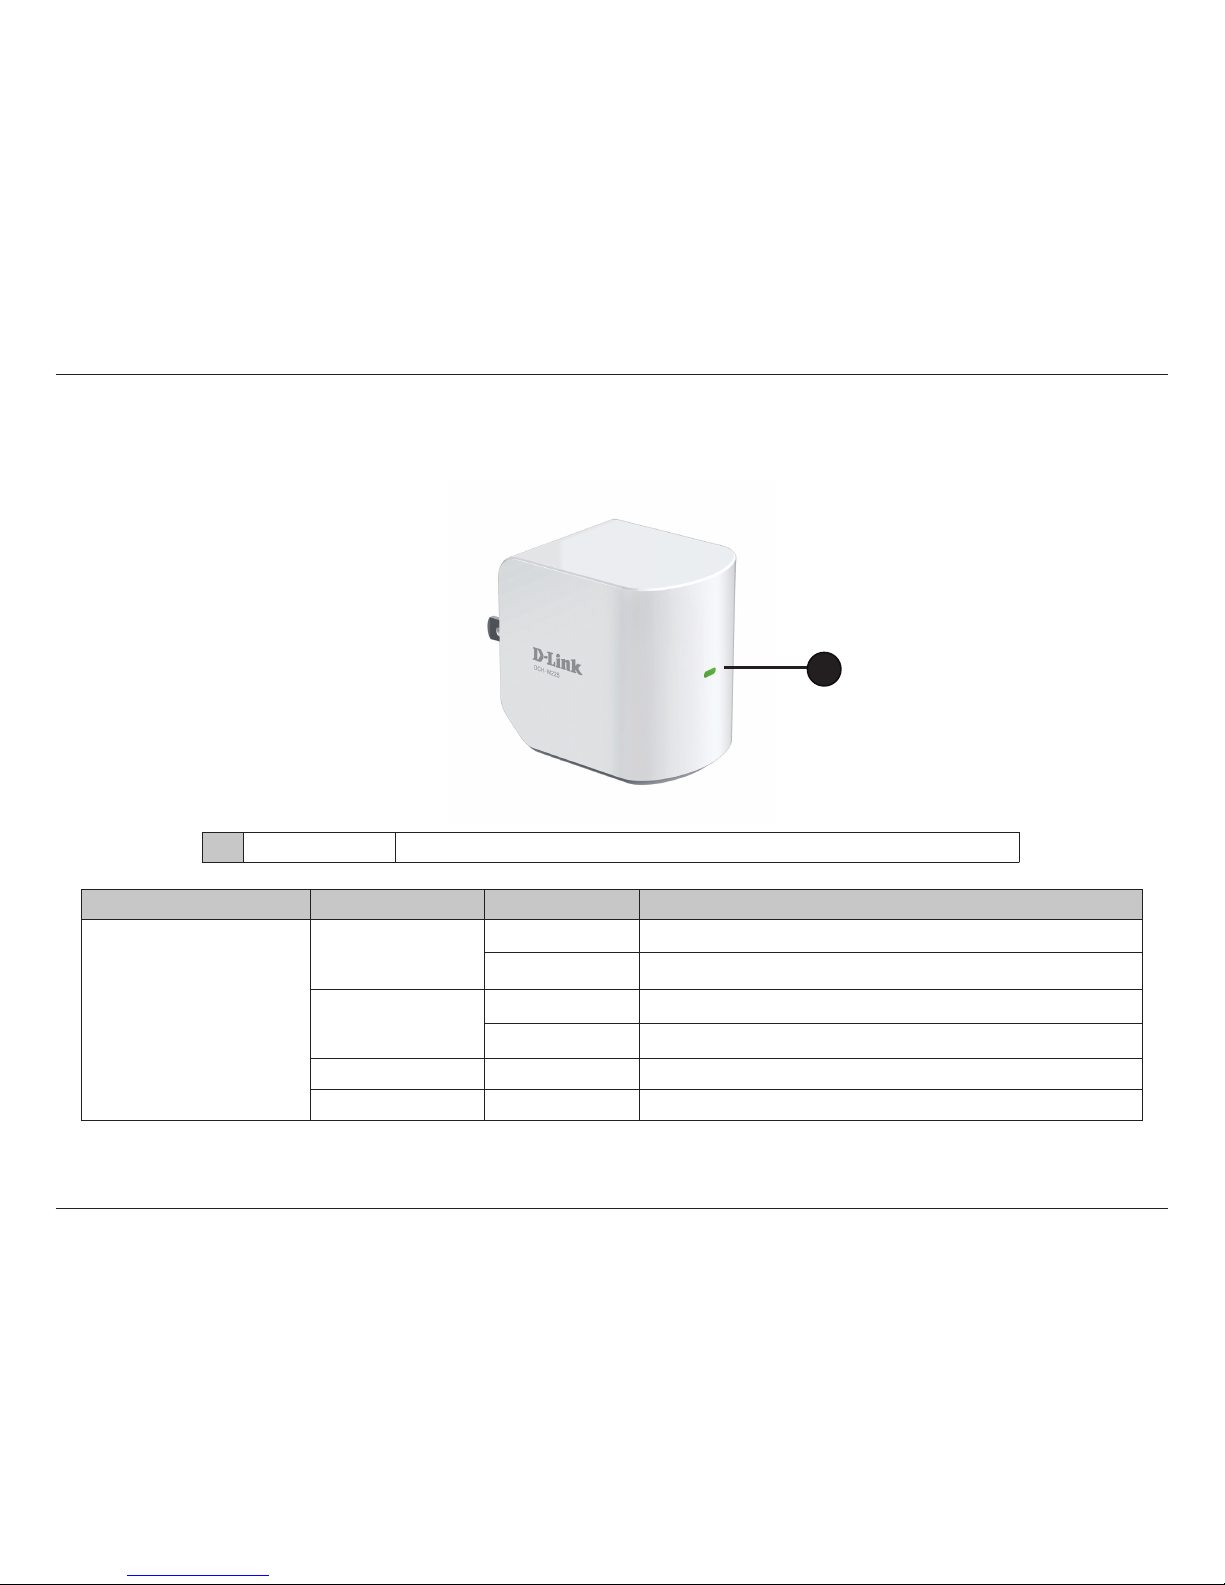
Front/Top
LED Indicator Color Status Description
Power/Status
Green
Solid Green The device is powered ON and operating normally
Blinking Green The device is processing WPS
Red
Solid Red Device is powering ON or system is defective
Blinking Red The device is in recovery mode or the device has malfunctioned
Orange Blinking Orange Cannot connect or provision an IP address from the uplink router
None O Device is not receiving power. Check the power outlet
1
1LED Indicator This indicates the current status of the DCH-M225, as detailed in the table below.

6D-Link DCH-M225 User Manual
Section 1 - Product Overview
Hardware Overview
Side and Bottom
1WPS Button Pressing the WPS button for 1 second allows you to connect with Wi-Fi clients using Wi-Fi Protected Setup
2Audio Line Out Audio line out jack for connecting an external speaker
3Reset Button Pressing the reset button will reset the DCH-M225 to the factory default settings
13
2
Input: 100-240VAC, 50-60Hz, 0.3A
FCC ID:KA2CHM225A1
IC: 4216A-CHM225A1
Model: DCH-M225A1
CAN ICES-3 (B)/NMB-3(B)
P/N: BCHM225LNA...A1
S/N:RZEP1YMXXXXXX
H/W Ver.: A1 F/W Ver.:1.00
DCH-M225
Wi-Fi Name(SSID):dlink-XXXX
Wi-Fi Password:XXXXXXXXXX

7D-Link DCH-M225 User Manual
Section 2 - Conguration
Wireless Installation Factors
The Wi-Fi Audio Extender lets you extend the reach of your existing wireless network, allowing you to work wirelessly from
more places in your home or oce. Keep in mind, however, that the number, thickness, and location of walls, ceilings, or
other objects that the wireless signals must pass through, may limit the range. Typical ranges vary depending on the types
of materials and background RF (radio frequency) noise in your home or business. The key to maximizing wireless range is to
follow these basic guidelines:
1. Keep the number of walls and ceilings between the extender and other network devices to a minimum - each wall or ceiling can
reduce your adapter’s range by up to 98 feet (30 meters). Position your devices so that the number of walls or ceilings is minimized.
2. Be aware of the direct line between network devices. At a 45-degree angle, a wall that is 0.5 meters thick (1.5 feet) appears to be
almost 1 meter (3 feet) thick. At a 2-degree angle it can appear over 14 meters (45 feet) thick! Position devices so that the signal
will travel straight through a wall or ceiling (instead of at an angle) for better reception.
3. Building materials make a dierence. A solid metal door or aluminum studs may have a negative eect on range. Try to position
access points, wireless routers, and computers so that the signal passes through drywall or open doorways. Materials and objects
such as glass, steel, metal, walls with insulation, water (sh tanks), mirrors, le cabinets, brick, and concrete can degrade your
wireless signal.
4. Keep your product away (at least 3-6 feet or 1-2 meters) from electrical devices or appliances that generate RF noise.
5. If you are using 2.4 GHz cordless phones or X-10 (wireless products such as ceiling fans, lights, and home security systems), your
wireless connection may degrade dramatically or drop completely. Make sure your 2.4 GHz phone base is as far away from your
wireless devices as possible. The base transmits a signal even if the phone in not in use.
Other manuals for DCH-M225
4
Table of contents
Other D-Link Extender manuals

D-Link
D-Link DAP-1330 User manual

D-Link
D-Link DAP-1860 User manual

D-Link
D-Link DAP-1320 Manual

D-Link
D-Link DAP-1950 User manual

D-Link
D-Link DPE-302GE User manual

D-Link
D-Link DRA-2060 Manual

D-Link
D-Link DHP-701AV User manual

D-Link
D-Link DAP-1325 User manual

D-Link
D-Link DAP-1720 User manual

D-Link
D-Link DAP-1330 User manual

D-Link
D-Link DAP-1320 User manual

D-Link
D-Link DHP-W310AV User manual

D-Link
D-Link DHP-W310AV User manual

D-Link
D-Link Covr User manual

D-Link
D-Link DAP-X1870 User manual

D-Link
D-Link DIR-505 Manual

D-Link
D-Link DHP-W311AV User manual

D-Link
D-Link AirPlus G DWL-G710 User manual

D-Link
D-Link DAP-1360 User manual

D-Link
D-Link AirPlus DWL-800AP+ User manual


