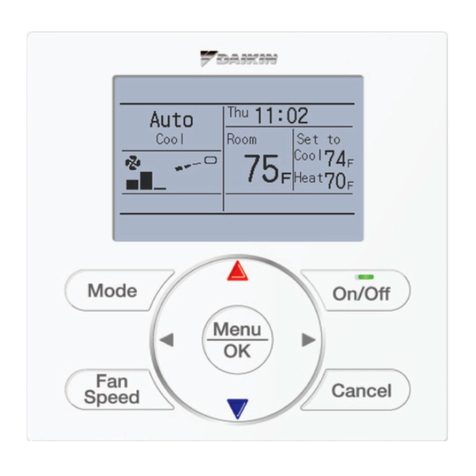
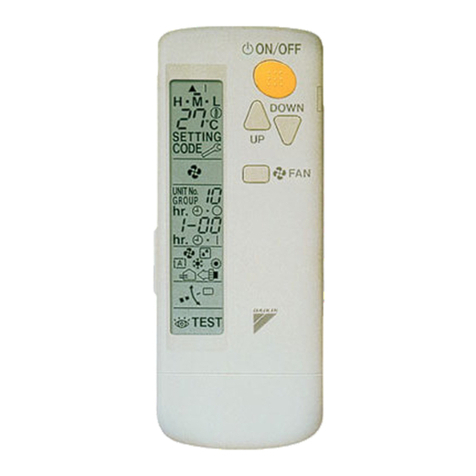
Daikin BRC7M675 User manual

OPERATION &
INSTALLATION MANUAL
Wireless Remote Controller and
Wireless Receiver Kit
MODELS:
BRC7M675
BRC7M676
Thank you for purchasing this product.
Carefully read this manual to ensure proper operation and installation.
Afterreadingthemanual,leitawayforfuturereference.
Furthermore,makecertainthatthismanualishandedtoanewuserwhenhetakesovertheoperation.
00_CV_4P457494-6L.indd 1 26/02/2019 20:45:21

[1]
13
2
6
1
3
7
8
12
10
9
11
4
5
18
14
19
17
20
15
16
Fig. 1-1
Fig. 1-3
Fig. 1-2
Fig. 2
27
28
COOL/HEAT CHANGEOVER
REMOTE CONTROL SWITCH
24 23
22
26 25
21
00_CV_4P457494-6L.indd 2 26/02/2019 20:45:22

[2]
PRIOR TO USE
Thismanualisexclusivelyforinstructionsonhowtousethewirelessremotecontroller.
Read also the operation manual attached to the indoor unit and to the outdoor unit for safe usage of the
system and maintenance.
Disposal requirements
ourproductandthebatteriessuppliedwiththecontrolleraremarkedwiththissymbol.
This symbol means that electrical and electronic products and batteries shall not be mixed
withunsortedhouseholdwaste.
For batteries, a chemical symbol can be printed beneath the symbol. This chemical symbol
meansthatthebatterycontainsaheavymetalaboveacertainconcentration.
Possible chemical symbols are:
Pb: lead (>0.004%)
Do not try to dismantle the system yourself: the dismantling of the product, treatment of the refrigerant,
ofoilandofotherpartsmustbedonebyaqualiedinstallerinaccordancewithrelevantlocaland
national legislation.
Unitsandwastebatteriesmustbetreatedataspecializedtreatmentfacilityforre-use,recyclingand
recovery.
Byensuringcorrectdisposal,youwillhelptopreventpotentialnegativeconsequencesforthe
environmentandhumanhealth.
Please contact the installer or local authority for more information.
00_CV_4P457494-6L.indd 3 26/02/2019 20:45:22

1
Wireless Remote Controller and Wireless
Receiver Kit
Operation and
Installation Manual
CONTENTS
Wireless Remote Controller
For operation
ILLUSTRATIONS.......................................................... [1]
PRIOR TO USE ............................................................ [2]
1. SAFETY PRECAUTIONS ....................................... 1
2. WHAT TO DO BEFORE OPERATION .................... 4
3. NAMES AND FUNCTIONS OF THE
OPERATING SECTION
(Refer to Fig. 1-1, 1-2, 1-3, 2 on page [1])............... 4
4. HANDLING FOR WIRELESS REMOTE
CONTROLLER........................................................ 5
5. OPERATION RANGE.............................................. 6
6. INSTALLATION SITE............................................... 6
7. OPERATION PROCEDURE.................................... 6
8. OPERATION CHARACTERISTICS....................... 13
9. OPTIMUM OPERATION........................................ 13
10. MAINTENANCE
(FOR SERVICE PERSONNEL) ............................ 13
11. NOT MALFUNCTION OF THE AIR
CONDITIONER ..................................................... 14
12. HOW TO DIAGNOSE TROUBLE SPOTS ............. 14
13. HOW TO CHECK THE INITIAL SET VALUE......... 16
For installation
1. SAFETY PRECAUTIONS ..................................... 16
2. BEFORE INSTALLATION...................................... 17
3. REMOTE CONTROLLER INSTALLATION............ 17
4. INITIAL SETTING ................................................. 18
Wireless Receiver Kit
For installation
1. REMOTE CONTROLLER INITIAL SETTING........ 18
2. RECEIVER INSTALLATION .................................. 19
3. FIELD SETTING ................................................... 24
4. TEST OPERATION ............................................... 25
Wireless Remote Controller
For operation
1. SAFETY PRECAUTIONS
To gain full advantage of the air conditioner’s functions
and to avoid malfunction due to mishandling, please
read this operation manual carefully before use.
This product comes under the term “appliances
not accessible to the general public”.
This appliance is intended to be used by
expert or trained users in shops, in light
industry and on farms, or for commercial
use by lay persons.
This appliance can be used by children
aged from 8 years and above and persons
with reduced physical, sensory or mental
capabilities or lack of experience and
knowledge if they have been given
supervision or instruction concerning
use of the appliance in a safe way and
understand the hazards involved.
Children shall not play with the appliance.
Cleaning and user maintenance shall only
be done by persons described in manual.
The appliance is not intended for use by
unattended young children or persons who
are incompetent to operate air conditioners.
It may result in injury or electric shocks.
• This manual classies the precautions into
WARNINGS and CAUTIONS. Be sure to
follow all the precautions below: They are
all important for ensuring safety.
WARNING...... Indicates a potentially
hazardous situation which,
if not avoided, could result
in death or serious injury.
CAUTION ...... Indicates a potentially
hazardous situation which,
if not avoided, may result in
minor or moderate injury.
It may also be used to alert
against unsafe practices.
•
After reading, keep this manual in a convenient
place so that you can refer to it whenever
necessary. If the equipment is transferred to a
new user, be sure also to hand over the manual.
WARNING
When the air conditioner is malfunctioning
(giving off a burning odor, etc.), turn off the
power to the air conditioner and contact
your local dealer.
Continued operation under such circumstances
mayresultinafailure,electricshocksorare.
01_EN_4P457494-6L.indd 1 13/03/2019 11:07:40

2
Consult your local dealer regarding
modication, repair and maintenance of the
air conditioner.
Improper workmanship may result in water
leakage,electricshocksorare.
Be sure to use fuses with the correct ampere
reading.
Do not use improper fuses, copper or other wiring
as a substitute, as this may result in electric shocks,
are,injuryordamagetotheairconditioner.
Consult your local dealer if the air
conditioner submerges owing to a natural
disaster, such as ood or typhoon.
Do not operate the air conditioner in that case,
or otherwise a malfunction, electric shocks, or a
remayresult.
Start or stop the air conditioner with the
remote controller. Never use the power
circuit breaker for this purpose.
Otherwise,itmaycauseareorwaterleakage.
Furthermore, if an automatic restart control is
provided against power failure and the power is
recovered, the fan will rotate suddenly and may
cause injury.
Do not use the air conditioner in the
atmosphere contaminated with oil vapor,
such as cooking oil or machine oil vapor.
Oil vapor may cause crack damage to the air
conditioner,electricshocks,orare.
Do not use ammable materials (e.g., hairspray
or insecticide) near the air conditioner.
Do not clean the air conditioner with organic
solvents such as paint thinner.
The use of organic solvents may cause crack
damage to the air conditioner, electric shocks,
orare.
Do not use the air conditioner in places with
excessive oily smoke, such as cooking
rooms, or in places with ammable gas,
corrosive gas, or metal dust.
Using the air conditioner in such places may
causeareorairconditionerfailures.
Beware of a re in case of refrigerant leakage.
If the air conditioner is not operating correctly,
i.e. not generating cool or warm air, refrigerant
leakage could be the cause. Consult your local
dealer for assistance. The refrigerant used for
the air conditioner is safe and normally does not
leak. However, if the refrigerant leaks and gets
in contact with a naked burner, heater or cooker,
it may generate hazardous compounds.
Turn off the air conditioner and call your local
dealer. Turn on the air conditioner after the
qualiedservicepersonmakessuretoconrm
that the leakage is repaired.
Do not place objects, including rods, your
ngers, etc., in the air inlet or outlet.
Injury may result due to contact with the air
conditioner’s high speed fan blades.
Consult your local dealer regarding cleaning
the inside of the air conditioner.
Improper cleaning may cause breakage of
plastic parts, water leakage and other damage
as well as electric shocks.
Be aware that prolonged, direct exposure to
cool or warm air from the air conditioner, or to
air that is too cool or too warm can be harmful
to your physical condition and health.
Consult your local dealer about installation work.
Doing the work yourself may result in water
leakage,electricshocksorare.
Contact professional personnel about
attachment of accessories and be sure to use
only accessories specied by the manufacturer.
If a defect results from your own workmanship, it
mayresultinwaterleakage,electricshocksorare.
Consult your local dealer regarding relocation
and reinstallation of the air conditioner.
Improper installation work may result in leakage,
electricshocksorare.
Be sure to earth the air conditioner.
Do not earth the air conditioner to a utility piping,
lightning conductor or telephone earth lead.
Imperfect earthing may result in electric shocks
orare.
A high surge current from lightning or other
sources may cause damage to the air conditioner.
Be sure to install an earth leakage breaker.
Failure to install an earth leakage breaker may
resultinelectricshocksorare.
Be sure to use a dedicated power supply for
the air conditioner.
The use of any other power supply may cause
heatgeneration,are,orairconditionerfailures.
Consult your local dealer regarding what to
do in case of refrigerant leakage.
When the air conditioner is installed in a small
room, it is necessary to take proper measures
so that the amount of any leaked refrigerant
does not exceed the concentration limit in the
event of a leakage. Otherwise, this may lead to
an accident due to oxygen depletion.
01_EN_4P457494-6L.indd 2 13/03/2019 11:07:40
3
CAUTION
Children should be watched so that they do
not play with the indoor unit or its remote
controller.
Accidental operation by a child may result in
injury or electric shocks.
Do not allow a child to mount on the outdoor
unit or avoid placing any object on it.
Falling or tumbling may result in injury.
Do not let children play on or around the
outdoor unit.
If they touch the unit carelessly, injury may be
caused.
Be sure that children, plants or animals are
not exposed directly to airow from the
indoor unit, as adverse effects may ensue.
Do not place ammable sprays or operate
spray containers near the air conditioner as
this may result in a re.
Do not wash the air conditioner or the
remote controller with water, as this may
result in electric shocks or re.
Do not place water containers (ower vases,
etc.) on the indoor unit, as this may result in
electric shocks or a re.
Do not put ammable containers, such as
spray cans, within 1 m from the air outlet.
The containers may explode because the warm
air from the indoor or outdoor unit will affect them.
Turn off the power when the air conditioner
is not used for long periods of time.
Otherwise, the air conditioner may get hot or
catchonareduetodustaccumulation.
Do not place objects in direct proximity of
the outdoor unit and do not let leaves and
other debris accumulate around the unit.
Leaves are a hotbed for small animals which can
enter the unit. Once in the unit, such animals can
causemalfunctions,smokeorarewhenmaking
contact with electrical parts.
Before cleaning, be sure to stop the air
conditioner operation, turn the power circuit
breaker off.
Otherwise, an electric shocks and injury may
result.
To avoid electric shocks, do not operate with
wet hands.
Never touch the internal parts of the remote
controller.
Touching certain internal parts will cause electric
shocks and damage to the remote controller.
Consult your local dealer about checking and
adjustment of internal parts.
To avoid oxygen deciency, ensure that the
room is adequately ventilated if equipment
such as a burner is used together with the
air conditioner.
Do not leave the remote controller wherever
there is a risk of wetting.
If water gets into the remote controller there is a
risk of electrical leakage and damage to electronic
components.
Watch your steps at the time of air lter
cleaning or inspection.
High-place work is required, to which utmost
attention must be paid.
If the scaffold is unstable, you may fall or topple
down, thus causing injury.
Do not remove the outdoor unit’s outlet side
grille.
The grille protects against the unit’s high speed
fan, which may cause injury.
To avoid injury, do not touch the air inlet or
aluminum ns of the air conditioner.
Do not place objects that are susceptible to
moisture directly beneath the indoor or
outdoor units.
Under certain conditions, condensation on the
unitorrefrigerantpiping,airlterdirtordrain
blockage may cause dripping, resulting in
fouling or failure of the object concerned.
Do not place heaters directly below the
indoor unit, as resulting heat can cause
deformation.
Do not place appliances that produce naked
ames in places exposed to the airow from
the air conditioner as this may impair
combustion of the burner.
Do not block air inlets nor outlets.
Impairedairowmayresultininsufcient
performance or trouble.
Do not use the air conditioner for purposes
other than those for which it is intended.
Do not use the air conditioner for cooling
precision instruments, food, plants, animals or
works of art as this may adversely affect the
performance, quality and/or longevity of the
object concerned.
01_EN_4P457494-6L.indd 3 13/03/2019 11:07:40

4
Do not install the air conditioner at any place
where there is a danger of ammable gas
leakage.
In the event of a gas leakage, build-up of gas
neartheairconditionermayresultinare.
Carry out drain piping properly to ensure
complete drainage.
If drain piping is not carried out properly, drain
willnotowout.Then,dirtanddebrismaybe
accumulated in the drain piping and may cause
water leakage. If it occurs, stop the air conditioner
and call your local dealer for assistance.
When using the wireless remote controller,
do not put a strong light beam or install an
inverter uorescent lamp near the receiving
section on the indoor unit.
A malfunction may occur.
The batteries must be removed from the
appliance before it is scrapped and they are
disposed of safely.
2. WHAT TO DO BEFORE
OPERATION
Refer to the operation manual attached to the
indoor unit.
3. NAMES AND FUNCTIONS OF
THE OPERATING SECTION
(Refer to Fig. 1-1, 1-2, 1-3, 2 on
page [1])
1DISPLAY “”(SIGNAL TRANSMISSION)
This blinks when a signal is being transmitted.
2
DISPLAY “ ” “ ” “ ” “ ” “ ”
(OPERATION MODE)
This display shows the current OPERATION
MODE. Operation modes supported depend
on the model that is connected.
3
DISPLAY “NOT AVAILABLE” (displayed
when operation is not supported)
When a button for a function that is not
supported on the connected model is
pressed, this displays for 2 seconds.
4DISPLAY “ ” (SET TEMPERATURE)
This display shows the set temperature.
5
DISPLAY “ ” (PROGRAMMED TIME)
This display shows PROGRAMMED TIME
of the air conditioner start or stop.
6DISPLAY “ ” (AIRFLOW BLADE)
Refer to page 9, 10.
7DISPLAY “ ” (FAN SPEED)
The display shows the set fan speed.
8
DISPLAY “ ” (INSPECTION)
When the INSPECTION BUTTON is pressed,
the display shows the system mode is in.
Do not operate this button during normal use.
9
ON/OFF BUTTON
Press the button and the air conditioner will
start. Press the button again and the air
conditioner will stop.
10 FAN SPEED CONTROL BUTTON
Press this button to select the fan speed.
11 TEMPERATURE SETTING BUTTON
Use this button for SETTING TEMPERATURE.
12 BACKLIGHT BUTTON
Press this button to turn the backlight on or off.
13 SIGNAL TRANSMITTER
This sends the signals to the indoor unit.
14
PROGRAMMING TIMER BUTTON
Use this button for programming “START
and/or STOP” time.
15 TIMER MODE ON/OFF BUTTON
Refer to page 10.
16 TIMER RESERVE/CANCEL BUTTON
Refer to page 11.
17 AIRFLOW DIRECTION ADJUST BUTTON
Refer to page 9, 10.
18
OPERATION MODE SELECTOR BUTTON
Press this button to select OPERATION
MODE. “ ” (COOLING), “ ” (HEATING),
“ ” (AUTOMATIC), “ ” (FAN),
“ ” (PROGRAM DRY).
19
FILTER SIGN RESET BUTTON
Refer to the section of MAINTENANCE in the
operation manual attached to the indoor unit.
20
INSPECTION BUTTON
Thisbuttonisusedonlybyqualiedservice
persons for maintenance purposes.
Do not operate this button during normal use.
21
EMERGENCY OPERATION SWITCH
This switch is readily used if the remote
controller does not work.
22
RECEIVER
This receives the signals from the remote
controller.
23
OPERATING INDICATOR LAMP (Red)
This lamp stays lit while the air conditioner
runs.Itasheswhentheairconditionerisin
trouble.
01_EN_4P457494-6L.indd 4 13/03/2019 11:07:40
5
24 TIMER INDICATOR LAMP (Green)
This lamp stays lit while the timer is set.
25
AIR FILTER CLEANING TIME INDICATOR
LAMP (Red)
Lightsupwhenitistimetocleantheairlter.
26
DEFROST OPERATION LAMP (Orange)
Lights up when the defrosting operation has
started.
27
FAN/AIR CONDITIONING SELECTOR
SWITCH
Set the switch to “ ” (FAN) for FAN and
“ ” (A/C) for HEAT or COOL.
28
COOL/HEAT SELECTOR SWITCH
Set the switch to “ ” (COOL) for COOL and
“ ” (HEAT) for HEAT.
NOTE
• For the sake of explanation, all indications
are shown on the display in Fig. 1-1 contrary
to actual running situations.
• Fig. 1-2 shows the remote controller with the
front cover opened.
• Fig. 1-3 shows this remote controller can be
used in conjunction with the one provided
with the VRV system.
• If the AIR FILTER CLEANING TIME
INDICATORLAMPlightsup,cleantheairlter
as explained in the operation manual attached
to the indoor unit.
• Aftercleaningandreinstallingtheairlter,
press the FILTER SIGN RESET BUTTON on
the remote controller. The AIR FILTER
CLEANING TIME INDICATOR LAMP on the
receiver will go out.
• TheDEFROSTOPERATIONLAMPwillash
when the power is turned on. This is not a
malfunction.
• Do not place the remote controller where
subject to direct sunlight. The display of the
remote controller will get discolored and may
fail to display information.
[CAUTIONS]
Make sure to turn off the unit and
disconnect the power supply breaker
when taking care of the air conditioner.
Unless the power supply is disconnected,
it may cause electric shocks and injuries.
4. HANDLING FOR WIRELESS
REMOTE CONTROLLER
[Precautions in handling remote controller]
Direct the transmitting part of the remote
controller to the receiving part of the air
conditioner.
If something blocks the transmitting and receiving
path of the indoor unit and the remote controller
as curtains, it will not operate.
Receiver
2 short beeps from
the receiver indicates
that the transmission
is properly done.
Types of receiving tone
The following receiving tones sound when remote
controller signals are detected by the receiver.
2 SHORT BEEPS:
Signal from the remote controller was received
successfully.
1 LONG BEEP:
(Error tone) The selected function is not supported
on this indoor unit.
3 SHORT BEEPS:
(Error tone) Setting/change cannot be made using
this remote controller as centralised control is in
operation.
NOTE
• After settings are changed or operation is
turned ON/OFF, make sure that the receiving
tone of the indoor unit makes a beeping sound.
The maximum transmitting distance is 7 m.
This depends on the installation condition of the
indoor unit.
Do not drop or get it wet.
It may be damaged.
Never press the button of the remote controller
with a hard, pointed object.
The remote controller may be damaged.
01_EN_4P457494-6L.indd 5 13/03/2019 11:07:41

6
Installation site
• It is possible that signals will not be received in
roomsthathaveelectronicuorescentlighting.
Please consult with your local dealer before
buyingnewuorescentlights.
• If the remote controller operated some other
electrical apparatus, move that machine away
or consult your local dealer.
• Do not install the remote controller in places
exposed to direct sunlight. Doing so could
result in discolouration and failure of the LCD.
Loading the batteries
1.
Slide the front cover
and remove it.
2.
Put 2 dry cell
batteries AAA. LR03
(alkaline).
3. Replace the front
cover.
2
3
1
Position and
correctly!
Mounting the remote
controller holder on a
wall
1. Select a place from
where the signals
will reach the unit.
2.
Use locally purchased
screws to fasten the
holder to a wall, pillar
or similar surface.
3. Place the remote
controller in the
remote controller
holder.
Wireless remote
controller
Remote
controller holder
Screws
When to change batteries
Under normal use, batteries last about a year.
However, change them whenever the indoor unit
doesn’t respond or responds slowly to commands,
or if the display becomes dark.
[CAUTIONS]
• Replace all batteries at the same time, do
not use new and old batteries intermixed.
• In case the remote controller is not used for
a long time take out all batteries in order to
prevent liquid leak of the battery.
IN THE CASE OF CENTRALIZED
CONTROL SYSTEM
If the indoor unit is under centralized control, it is
necessary to switch the remote controller’s setting.
In this case, contact your local dealer.
5. OPERATION RANGE
If the temperature or the humidity is beyond the
operation range*, safety devices may work and the
air conditioner may not operate, or sometimes, water
may drop from the indoor unit.
*Refer to the operation range shown in the operation
manual attached to the indoor or outdoor unit.
6. INSTALLATION SITE
Refer to operation manual attached to the indoor
unit.
7. OPERATION PROCEDURE
• Operation procedure varies with heat pump
type and cooling only type. Contact your local
dealertoconrmyoursystemtype.
• To protect the unit, turn on the main power
switch 6 hours before operation.
• Do not shut off the power supply during
seasonal use of the air conditioner.
This is required in order to activate the air
conditioner smoothly.
• If the main power supply is turned off during
operation, operation will restart automatically
after the power turns back on again.
COOLING, HEATING, AUTOMATIC,
FAN, AND PROGRAM DRY OPERATION
Operate in the following order.
• Operation modes supported depend on the
model that is connected.
•
For cooling only type, “COOLING”, “FAN” and
“PROGRAM DRY” operation are able to select.
FOR SYSTEMS WITHOUT COOL/HEAT
CHANGEOVER REMOTE CONTROL
SWITCH
Refer to Fig. 1-2 on page [1]
1OPERATION MODE
SELECTOR
Press OPERATION MODE SELECTOR button
several times and select the OPERATION
MODE of your choice as follows.
COOLING OPERATION ............................ “ ”
The recommended set temperature is 26 to 28°C.
HEATING OPERATION .............................
“ ”
The recommended set temperature is 18 to 23°C.
01_EN_4P457494-6L.indd 6 13/03/2019 11:07:41

7
AUTOMATIC OPERATION........................ “ ”
• In this operation mode, COOLING/HEATING
changeover is automatically conducted.
• AUTOMATIC OPERATION controls the
temperature based on the set temperature,
so it maintains a comfortable temperature
throughout the year.
<Example>
When the indoor temperature decreases to
23°C or less when the set temperature is at
25°C in the AUTOMATIC COOLING
OPERATION, the operation is changed over
to the AUTOMATIC HEATING OPERATION.
When the indoor temperature reaches 27°C
or more, the operation is changed over to the
AUTOMATIC COOLING OPERATION.
FAN OPERATION ...................................... “ ”
Air in the room is circulated.
PROGRAM DRY OPERATION .................. “ ”
• The function of this program is to decrease
the humidity in your room with the minimum
temperature decrease.
• The set temperature is the indoor
temperature when starting operation by
PROGRAM DRY OPERATION.
• Micro computer automatically determines
TEMPERATURE and FAN SPEED.
• This system does not go into operation if the
room temperature is below 16°C.
2ON/OFF
Press ON/OFF button.
OPERATING INDICATOR LAMP (Red) lights up or
goes off and the system starts or stops OPERATION.
• The fan may keep on running for about 1 minute
after the heating operation stops for removing
the heat in the indoor unit.
NOTE
• Do not turn OFF power immediately after the
unit stops. Then, wait no less than 5 minutes.
Water is leaking or there is something else
wrong with the unit.
FOR SYSTEMS WITH COOL/HEAT
CHANGEOVER REMOTE CONTROL
SWITCH
(Refer to “Switching operations on VRV system”
on page 11, 12.)
Refer to Fig. 1-1, 1-3 on page [1]
1OPERATION MODE
SELECTOR
(1)
Select OPERATION MODE with the COOL/
HEAT CHANGEOVER REMOTE CONTROL
SWITCH as follows.
COOLING OPERATION ....................... “ ”
HEATING OPERATION ..........................“ ”
FAN OPERATION ...............................“ ”
PROGRAM DRY OPERATION ............. “ ”
(2)
In the case of PROGRAM DRY OPERATION,
press OPERATION MODE SELECTOR button
on the wireless remote controller several
times until “ ” appears on the display.
AUTOMATIC OPERATION is not available.
2ON/OFF
Press ON/OFF button.
OPERATING INDICATOR LAMP (Red) lights up or
goes off and the system starts or stops operation.
• The fan may keep on running for about 1 minute
after the heating operation stops for removing
the heat in the indoor unit.
NOTE
• Do not turn OFF power immediately after the
unit stops. Then, wait no less than 5 minutes.
Water is leaking or there is something else
wrong with the unit.
01_EN_4P457494-6L.indd 7 13/03/2019 11:07:42

8
CHARACTERISTICS OF THE COOLING
OPERATION (COOLING OPERATION AND
AUTOMATIC COOLING OPERATION)
• Aftercontinuousoperationwiththeairow
horizontally or downward, the air conditioner
operateswithdifferentairowdirectionfora
certain period of time to prevent condensation
build-upontheairowdirectionblades.
(Theremotecontrollerdisplaystheairow
direction that is set.)
• If the COOLING OPERATION is used when the
indoor temperature is low, frost adheres to the
heat exchanger of the indoor unit. This can
decrease the cooling capacity. In this case, the
system automatically switches to DEFROST
OPERATION for a while.
During DEFROST OPERATION, the low fan
speed is used to prevent the discharge of
meltwater. (The remote controller displays the
fan speed that is set.)
• When the outside temperature is high, it takes
some time until the indoor temperature reaches
the set temperature.
CHARACTERISTICS OF THE HEATING
OPERATION (HEATING OPERATION AND
AUTOMATIC HEATING OPERATION)
START OF OPERATION
•
It generally takes a longer time for indoor
temperature of the HEATING OPERATION to reach
the set temperature compared to the COOLING
OPERATION. It is advisable to start operation in
advance using the TIMER OPERATION.
After operation is stopped
• The fan operates for about 1 minute to dispel
heat inside the indoor unit.
Perform the following operation to prevent
heating capacity decrease and discharge of
cool air.
AT THE START OF OPERATION AND
AFTER DEFROST OPERATION
• A warm air circulating system is employed, and
therefore it takes some time until the entire
room is warmed up after the start of operation.
• The indoor fan runs to discharge a gentle wind
automatically until the temperature inside the
air conditioner reaches a certain level. At this
time, the DEFROST OPERATION LAMP on the
light receiving unit indicator lights. Leave it as it
stands and wait for a while.
(The remote controller displays the fan speed
that is set.)
• The air discharge direction becomes horizontal
to prevent a draft of cool air to the inhabitants.
(The remote controller will display the set
airowdirection.)
DEFROST OPERATION (Frost removal
operation for the outdoor unit)
• As the frost on the coil of an outdoor unit
increase, heating effect decreases and the
system goes into the DEFROST OPERATION.
• The warm air stops, and the DEFROST
OPERATION LAMP on the light receiving unit
turn on. (The remote controller displays the fan
speed that is set.)
• After maximum 10 minutes of the DEFROST
OPERATION, the air conditioner returns to the
HEATING OPERATION.
• Theairowdirectionbecomeshorizontal.(The
remotecontrollerdisplaystheairowdirection
that is set.)
• During or after the DEFROST OPERATION,
white mist comes out from the air inlet or outlet
of the air conditioner.
• A hissing and “Shuh” sound may be heard
during this particular operation.
Regarding outside air temperature and
heating capacity
• The heating capacity of the air conditioner
declines as the outside air temperature falls. In
such a case, use the air conditioner in
combination with other heating systems.
(When a combustion appliance is used,
ventilate the room regularly.)
Do not use the combustion appliance where
the air from the air conditioner is blown directly
toward it.
• When the warm air stays under the ceiling and
your feet are cold, we recommend that you use
a circulator (a fan to circulate the air inside the
room). For details, consult your local dealer.
• When the indoor temperature exceeds the set
temperature, the indoor unit discharges a
gentle breeze (switches to gentle wind). The
airowdirectionbecomeshorizontal.(The
remote controller displays the fan speed and
airowdirectionthatareset.)
FAN OPERATION
• Only the fan inside the indoor unit operates,
and the air in the room is circulated.
01_EN_4P457494-6L.indd 8 13/03/2019 11:07:42

9
CHARACTERISTICS OF THE PROGRAM
DRY OPERATION
• This operation lowers the humidity without
lowering the indoor temperature. The indoor
temperature when the operation button is
pressed will be the set temperature. At this time,
the fan speed and temperature are set
automatically, so the remote controller does not
display the fan speed and set temperature.
To efcientlylowertheindoortemperatureand
humidity,rstusetheCOOLINGOPERATION
to lower the indoor temperature, and then use
the PROGRAM DRY OPERATION. When the
indoortemperatureislowered,airowfromthe
indoor unit may stop.
• When operating continuously at downward
airowdirection,airblowsintheautomatically
set direction for a period of time to prevent
condensation on the horizontal blades.
• If the PROGRAM DRY OPERATION is used
when the indoor temperature is low, frost forms
on the heat exchanger of the indoor unit. In this
case, the system automatically switches to the
DEFROST OPERATION for a while.
ADJUSTMENT
For programming TEMPERATURE, FAN SPEED
and AIRFLOW DIRECTION, follow the procedure
shown below.
TEMPERATURE SETTING
Press TEMPERATURE SETTING button
and program the set temperature.
Each time this button is pressed, set
temperature rises 1°C.
Each time this button is pressed, set
temperature lowers 1°C.
• Temperature cannot be set in FAN OPERATION
and PROGRAM DRY OPERATION modes.
In case of AUTOMATIC OPERATION
• In AUTOMATIC OPERATION mode, the relative
temperature as compared to the standard set
temperature is displayed.
Remote controller display
Set temperature [°C]
STD -3 19
STD -2 20
STD -1 21
STD 22
STD +1 23
STD +2 24
STD +3 25
NOTE
• The set temperature range of the remote
controller is 16°C to 32°C.
FAN SPEED CONTROL
Press FAN SPEED CONTROL button.
Fan speed can be selected.
• The micro computer may sometimes control
the fan speed in order to protect the unit.
• The fan speed may be changed automatically
depending on the indoor temperature.
The fan may be stopped, but this is normal.
• Itmaytakesometimeuntiltheairowswitchis
completed, but this is normal.
• Fan speeds supported depend on the model
that is connected.
• In “ ” (Auto), the fan speed is adjusted
according to the set temperature and the
temperature in the room.
However, in FAN OPERATION mode, fan
speed is the same as that in “High”.
• The fan speed will not be displayed if the indoor
unit does not have fan speed control function.
UP AND DOWN AIRFLOW
DIRECTION ADJUSTMENT
Theup/downairowdirectionpositionswitches
eachtimetheup/downairowdirectionbuttonis
pressed.
P0
P0 P1 P2
P4 P3
Swing
01_EN_4P457494-6L.indd 9 13/03/2019 11:07:43

10
Movement of the airow direction blades
Under the operating conditions described below,
airowdirectioniscontrolledautomatically,soit
maydifferfromtheairowdirectiondisplayedon
the remote controller.
Operation
mode
• COOLING
• AUTOMATIC
COOLING
•
PROGRAM DRY
• HEATING
• AUTOMATIC
HEATING
Up and
down
direction
Air blows in the
automatic set
direction for a
period of time to
prevent
condensation on
the horizontal
blades.
• When operating
continuously at
downward
airowdirection
Theairow
direction becomes
horizontal so that
it does not blow
directly toward
your body.
• When room
temperature is
higher than the
set temperature
• When the
HEATING
OPERATION
starts or during
DEFROST
OPERATION
(if frost forms on
the outdoor unit)
Description of airow direction settings
and operation
Therangeofmovementoftheairowdirection
blades varies by indoor unit model. Consult the
dealer of purchase for details.
Airow
direction
settings
Wall mounted
Up/downairow
Fixed
Theairowdirectioncanbexedin
any position in the range Position 0
to Position 4.
Indoor unit
(Desired position)
Swing
Theairowdirectionblades
automatically move up/down or left/
right within the range of Position 0
to Position 4.
Indoor unit
(Swing)
PROGRAM TIMER OPERATION
Operate in the following order.
• The timer is operated in the following two ways.
Programming the stop time ( OFF)
.... The air conditioner stops operating after the
set time has elapsed.
Programming the start time ( ON)
.... The air conditioner starts operating after the
set time has elapsed.
• The start and the stop time can be
simultaneously programmed.
• The timer setting is effective only once. When
using the TIMER operation every day, the
setting is required before each use.
Setting the timer
1TIMER MODE ON/OFF
Press the TIMER MODE ON/OFF button.
Thedisplayashes.
For setting the timer stop .... “ OFF”
For setting the timer start .... “ ON”
2PROGRAMMING TIMER
Press the PROGRAMMING TIMER button
and set the time for stopping or starting the
air conditioner.
When this button is pressed, the
time advances by 1 hour.
When this button is pressed, the
time goes backward by 1 hour.
• Keep pressing the button to change the
setting time continuously.
• The timer can be programmed a maximum
of 72 hours.
3TIMER RESERVE
Press the TIMER RESERVE button.
The timer setting procedure ends.
Thedisplaychangesfromashinglighttoa
constant light.
• Make sure that the receiving tone of the
indoor unit makes a beeping sound.
If the receiving tone does not sound, cancel
the timer according to the steps below, and
then set the timer following steps 1to 3
above again.
01_EN_4P457494-6L.indd 10 13/03/2019 11:07:43

11
Cancelling the timer
1ON/OFF TIMER
When the on TIMER MODE ON/OFF button
is pressed, the screen display ashes as
described below.
For the off timer .... “ OFF”
For the on timer .... “ ON”
2TIMER CANCEL
When the TIMER CANCEL button is pressed,
the timer setting that is blinking is cancelled.
• Check that the indoor unit’s receiving tone
beeps twice. If the receiving tone does not
sound, select the timer you want to cancel
again, and then cancel it.
For example.
When the timer is
programmed to stop the
system after 3 hours and
start the air conditioner
after 4 hours, the air
conditioner will stop after 3
hours and then 1 hour later
the air conditioner will start.
NOTE
• After the timer is programmed, the display
shows the remaining time.
Switching operations on VRV system
In the case of VRV system, the COOL/HEAT
CHANGEOVER REMOTE CONTROL SWITCH
may be provided for the outdoor unit (or BS unit) to
allow temperature adjustment (cooling and heating)
and FAN OPERATION to be switched for all indoor
units at once. (Refer to Aon page 11)
In systems where the COOL/HEAT CHANGEOVER
REMOTE CONTROL SWITCH is not provided, the
privilege to activate cool/heat operations for all
indoor units can be assigned to a single indoor unit,
allowing cooling and heating operations to be
managed centrally. (Refer to Bon page 12)
A. When the COOL/HEAT CHANGEOVER
REMOTE CONTROL SWITCH is provided
Set the COOL/HEAT CHANGEOVER
REMOTE CONTROL SWITCH according to
the table below before switching operations
using the wireless remote controller.
Outdoor unit
Indoor unit
COOL/HEAT CHANGEOVER REMOTE CONTROL SWITCH
Outdoor unit
Indoor unit
BS unit
COOL/HEAT CHANGEOVER REMOTE CONTROL SWITCH
COOL/HEAT CHANGEOVER
REMOTE CONTROL SWITCH
Operation modes and
setting of the COOL/
HEAT CHANGEOVER
REMOTE CONTROL
SWITCH
Operation modes
that can be
switched using the
wireless remote
controller
Cooling/
Program
dry
Upper switch:
Lower switch:
Cooling/
Program dry/
Fan
Heating
Upper switch:
Lower switch:
Heating/
Fan
Fan
Upper switch:
Lower switch:
–
Fan only
* AUTOMATIC OPERATION is not possible when
the COOL/HEAT CHANGEOVER REMOTE
CONTROL SWITCH is provided.
01_EN_4P457494-6L.indd 11 13/03/2019 11:07:44

12
B. When the COOL/HEAT CHANGEOVER
REMOTE CONTROL SWITCH is not provided
Usingthewirelessremotecontroller,rstfollow
the below procedure to assign the privilege to
set cool/heat operations for other units to a
indoor unit.
Outdoor unit
Indoor unit
Assign cool/heat selection
privilege to an indoor unit
Outdoor unit
Indoor unit
Assign cool/heat selection
privilege to an indoor unit
BS unit
1
Press and hold the OPERATION MODE
SELECTOR button on the wireless
remote controller for about 4 seconds.
The TIMER INDICATOR LAMP (Green) on the
displays of all the indoor units connected to the
sameoutdoorunitorBSunitwillstartashing.
2
Point the wireless remote controller at the
indoor unit to which cool/heat privilege is
to be assigned and press the OPERATION
MODE SELECTOR button again.
Setting is complete when the TIMER INDICATOR
LAMP (Green) on the displays of all indoor units
youaretryingtosetstopashing.
TIMER INDICATOR LAMP
To switch the operation using the wireless remote
controller, point it at the indoor unit to which cool/heat
selection privilege has been assigned. The operation
of the indoor units without cool/heat selection privilege
switches in accordance with the operation of the
indoor unit assigned with cool/heat selection privilege.
To change the cool/heat selection privilege settings,
perform steps
1
to
2
again.
* If the wireless remote controller is operated while
pointed at an indoor unit without cool/heat selection
privilege, operation switching cannot be performed
and an error tone (long beep) will sound.
01_EN_4P457494-6L.indd 12 13/03/2019 11:07:44

13
EMERGENCY OPERATION
When the remote controller does not work due to
battery failure or the absence thereof, use the
switch on the receiver of the indoor unit. When
the remote controller does not work, even if the
batteries are replaced, contact your local dealer.
[START]
1Press the EMERGENCY OPERATION
SWITCH on the receiver.
•
The air conditioner operates in the previous mode.
• The air conditioner operates with the previously
set fan speed.
1 2
Refer to Fig. 2 on page [1].
[STOP]
2Press the EMERGENCY OPERATION
SWITCH again.
PRECAUTIONS FOR GROUP
CONTROL SYSTEM OR TWO REMOTE
CONTROLLER CONTROL SYSTEM
This system provides two other control systems
beside individual control (one remote controller
controlsoneindoorunit)system.Conrmthe
following if your system is of the following control
system type.
Group control system
• One remote controller controls up to 16 indoor
units.
• All indoor units are equally set.
Indoor unit
Remote controller
Two remote controller control system
Two remote controllers (wired and wireless)
control one indoor unit. (In case of group
control system, one group of indoor units)
The air conditioner follows individual operation.
• Cannot have two remote controller control
system with only wireless remote controllers.
(It will be a two remote controller control
system having one wired and one wireless
remote controllers.)
• Under two remote controller control system,
wireless remote controller cannot control timer
operation.
•
When set the timer by the wired remote
controller, the TIMER INDICATOR LAMP (Green)
of the receiver of the indoor unit is not light up.
• If the wired remote controller is used for
operation, the display on the wireless remote
controller does not change.
Indoor unit
Remote controller
NOTE
• Contact your local dealer in case of changing
the combination or setting of group control and
two remote controller control systems.
• Please do not change the combination and
settings for the group operation and two remote
controller control systems by yourself, but be
sure to ask your local dealer.
8.
OPERATION CHARACTERISTICS
Refer to the operation manual attached to the
indoor unit.
9. OPTIMUM OPERATION
Refer to the operation manual attached to the
indoor unit.
10. MAINTENANCE
(FOR SERVICE PERSONNEL)
Refer to the operation manual attached to the
indoor unit.
01_EN_4P457494-6L.indd 13 13/03/2019 11:07:45

14
11. NOT MALFUNCTION OF THE
AIR CONDITIONER
Refer to the operation manual attached to the
indoor unit.
And the following symptoms do not
indicate air conditioner malfunction
I.THE AIR CONDITIONER DOES NOT
OPERATE
• The receiving tone of the indoor unit
makes a triple beeping sound (normally,
“beep-beep”).
This is because the air conditioner is under
centralized control.
• After the HEATING OPERATION is started,
the DEFROST OPERATION LAMP located
on the indoor unit lights up.
The indoor fan runs to discharge a gentle
wind automatically until the temperature
inside the air conditioner reaches a certain
level. At this time, the DEFROST
OPERATION LAMP on the light receiving
unit indicator lights. Leave it as it stands and
wait for a while.
II.COOLING AND HEATING OPERATIONS
CAN NOT BE SWITCHED
• The receiving tone of the indoor unit
makes a long beeping sound.
An unavailable mode was set for the indoor
unit under operation changeover control.
III.THERE IS NO DISPLAY OR ALL PARTS
ARE DISPLAYED
• When a button on the remote controller
is pressed.
The batteries have run out.
12. HOW TO DIAGNOSE TROUBLE
SPOTS
I. IN CASE BESIDES EMERGENCY STOP
1.
The air conditioner does not operate at all.
• Check if the receiver is exposed of
sunlight or strong light. Keep receiver
away from light.
• Check if there are batteries in the remote
controller. Place the batteries.
•
Check if the indoor unit number and wireless
remote controller number are equal.
For example.
Number
Number
Operate the indoor unit with the remote controller of
the same number.
Signal transmitted from a remote controller of a
different number cannot be accepted. (If the number
is not mentioned, it is considered as “1”.)
2. The air conditioner operates but it does
not sufciently cool or heat.
• Check if the set temperature is not proper.
(Refer to page 9)
• Check if the FAN SPEED is set to LOW
SPEED. (Refer to page 9)
• Checkiftheairowdirectionisnotproper.
(Refer to page 9, 10)
If the problem is not solved after checking
the above points, please do not try to repair
it yourself. In such cases, always consult
your local dealer. At this time, please tell the
symptom and model name (written on the
manufacturer’s label).
Contact your local dealer in the following case.
WARNING
When you detect a burning odor, shut OFF
power immediately and contact your local dealer
purchase. Using the equipment in anything but
proper working condition can result in
equipment damage, electric shock and/or a re.
01_EN_4P457494-6L.indd 14 13/03/2019 11:07:45

15
II. EMERGENCY STOP
When the air conditioner stops in emergency,
the OPERATING INDICATOR LAMP on the
indoor unit starts blinking.
Take the following steps yourself to read the
malfunction code that appears on the display.
Contact your local dealer with this code. It will
help pinpoint the cause of the trouble,
speeding up the repair.
1
3 5
7
2 4
6
1
Press the INSPECTION button to select
the inspection mode “ ”.
“ ” appears on display and blinks.
“UNIT No.” appears.
2
Press PROGRAMMING TIMER button and
change the unit number.
Press to change the unit number until the indoor
unit beeps and perform the following operation
according to the number of beeps.
Number of beeps
3 short beeps...........Perform all steps from
3to 6.
1 short beep ............Perform 3and 6steps.
1 long beep..............Normal state
3
Press OPERATION MODE SELECTOR
button.
“ ” on the left-hand of the malfunction code blinks.
4
Press PROGRAMMING TIMER button and
change the malfunction code.
Press until the indoor unit beeps twice.
5
Press OPERATION MODE SELECTOR
button.
“ ” on the right-hand of the malfunction code
blinks.
6
Press PROGRAMMING TIMER button and
change the malfunction code.
Press until the indoor unit makes a long beep.
Themalfunctioncodeisxedwhentheindoor
unit makes a long beep.
7Reset of the display
Press the OPERATION MODE SELECTOR
button to get the display back to the
normal state.
[Trouble]
The OPERATING INDICATOR LAMP of the indoor
unitisashingandtheunitdoesnotworkatall.
(Refer to page 4)
Malfunction
Code
Unit No.
which
sensed
trouble
INSPECTION display
01_EN_4P457494-6L.indd 15 13/03/2019 11:07:46

16
[Remedial action]
Check the malfunction code on the remote
controller and contact your local dealer. (Refer to
page 14, 15)
13. HOW TO CHECK THE INITIAL
SET VALUE
Further question regarding to the available
functions, contact your local dealer with your initial
settingvalueconrmedbyusingtheremote
controller with the following steps.
1
Press the INSPECTION button to select
the inspection mode “ ”.
The initial set value
Press the button 2 times to return
to normal operation mode.
For installation
1. SAFETY PRECAUTIONS
Please read these “SAFETY PRECAUTIONS”
carefully before installing air conditioning
equipment and be sure to install it correctly.
Thismanualclassiestheprecautionsinto
WARNINGS and CAUTIONS.
Be sure to follow all the precautions below.
They are all important for ensuring safety.
WARNING...... Indicates a potentially
hazardous situation which,
if not avoided, could result
in death or serious injury.
CAUTION ...... Indicates a potentially
hazardous situation which,
if not avoided, may result in
minor or moderate injury.
It may also be used to alert
against unsafe practices.
After the installation is completed, test the air
conditioner and check if the air conditioner operates
properly. Give the user adequate instructions
concerning the use and cleaning of the indoor unit
according to the operation manual. Ask the user to
keep this manual in a handy place for future reference.
WARNING
• Make sure to turn off the power supply
before starting the installation.
• Due to high voltage, do not open control
box lid for ten minutes after the safety
breaker is switched off.
• Do not touch live parts when carrying out
this work.
CAUTION
• Refer also to the installation manual
attached to the indoor unit.
• Conrm that following conditions are
satised prior to installation.
-
Ensure that nothing interrupts the operation of
the wireless remote controller. (Ensure that
there is neither a source of light nor uorescent
lamp near the receiver. Also, ensure that the
receiver is not exposed of direct sunlight.)
-
Ensure that the operation indicator lamp and
other indicators are easy to see.
•
The wireless remote controller kit is not intended
for use in a potentially explosive atmosphere.
01_EN_4P457494-6L.indd 16 13/03/2019 11:07:46

17
2. BEFORE INSTALLATION
2-1
ACCESSORIES
Check if the following accessories are
attached to this kit.
Name
Receiver
(1) Receiver
assembly
(2) Transmission
printed circuit
board
Quantity
1 set 1 pc.
Shape
Name (3) Wire harness
- long
(4) Wire harness
- short
Quantity
1 pc. 1 pc.
Shape
Name Wireless remote
controller
Screw for
installing remote
controller holder
Quantity
1 pc. 2 pcs.
Shape
M3.5×16
Name Remote controller
holder (5) Unit No. label
Quantity
1 pc. 1 pc.
Shape
1
1
1
2
2
2
3
3
3
Name (6) Control panel
(with label)
Dry cell battery
AAA. LR03 (alkaline)
Quantity
1 pc. 2 pcs.
Shape
Name (7) Clamp Sealing
material (8)
Operation &
Installation
manual
Quantity
1 pc. 1 pc. 1 pc.
Shape
2-2
OPTIONAL ACCESSORIES
For this Wireless Receiver Kit, the wireless
remote controller is separately required.
Refer to the catalog for the applicable model.
(Refer to also the installation manual attached to
the wireless remote controller for how to install.)
2-3
NOTE TO THE INSTALLER
• Have the customer actually operate the system
while looking at the operation manual.
Instruct the customer how to operate the system.
3. REMOTE CONTROLLER
INSTALLATION
<Installing wireless remote controller>
• Do not throw the remote controller or impose
large shocks. Also, do not store where it may
be exposed to moisture or direct sunlight.
•
When operating, point the transmitting part of the
remote controller in the direction of the receiver.
(Refer to the operation manual attached to this
kit.)
• The maximum transmitting distance is 7 m.
This depends on the installation condition of
the indoor unit.
• The signal cannot be transmitted if something
such as curtains blocks the receiver and the
remote controller.
• Mounting the remote controller holder on a
wall
1. Fix the remote controller holder with the
screws.
2. Slide the wireless remote controller into the
remote controller holder from the top.
2
1Fig. 1
Screw
Wireless remote
controller
Remote
controller
holder
01_EN_4P457494-6L.indd 17 13/03/2019 11:07:48
This manual suits for next models
1
Table of contents
Other Daikin Remote Control manuals

Daikin
Daikin T9000 Manual

Daikin
Daikin BRC1E71 User manual

Daikin
Daikin BRC7EA631 User manual

Daikin
Daikin OM-GS02-0112 User manual

Daikin
Daikin BRC2A71 User manual

Daikin
Daikin BRC1D61 User manual

Daikin
Daikin BRC1E61 Instruction Manual

Daikin
Daikin BRC7C528W User manual

Daikin
Daikin BRC7EA629 User manual

Daikin
Daikin BRC1E51 User manual

Daikin
Daikin G15 User manual

Daikin
Daikin BRC1H81W User guide

Daikin
Daikin ARC417A14 User manual

Daikin
Daikin BRC944A2B User manual

Daikin
Daikin BRC1D527 User manual

Daikin
Daikin BRC1D71 User manual

Daikin
Daikin BRC230Z4B User manual

Daikin
Daikin DCS303A51 User manual

Daikin
Daikin FTXN-L9 User manual

Daikin
Daikin BRC2E52C7 User manual