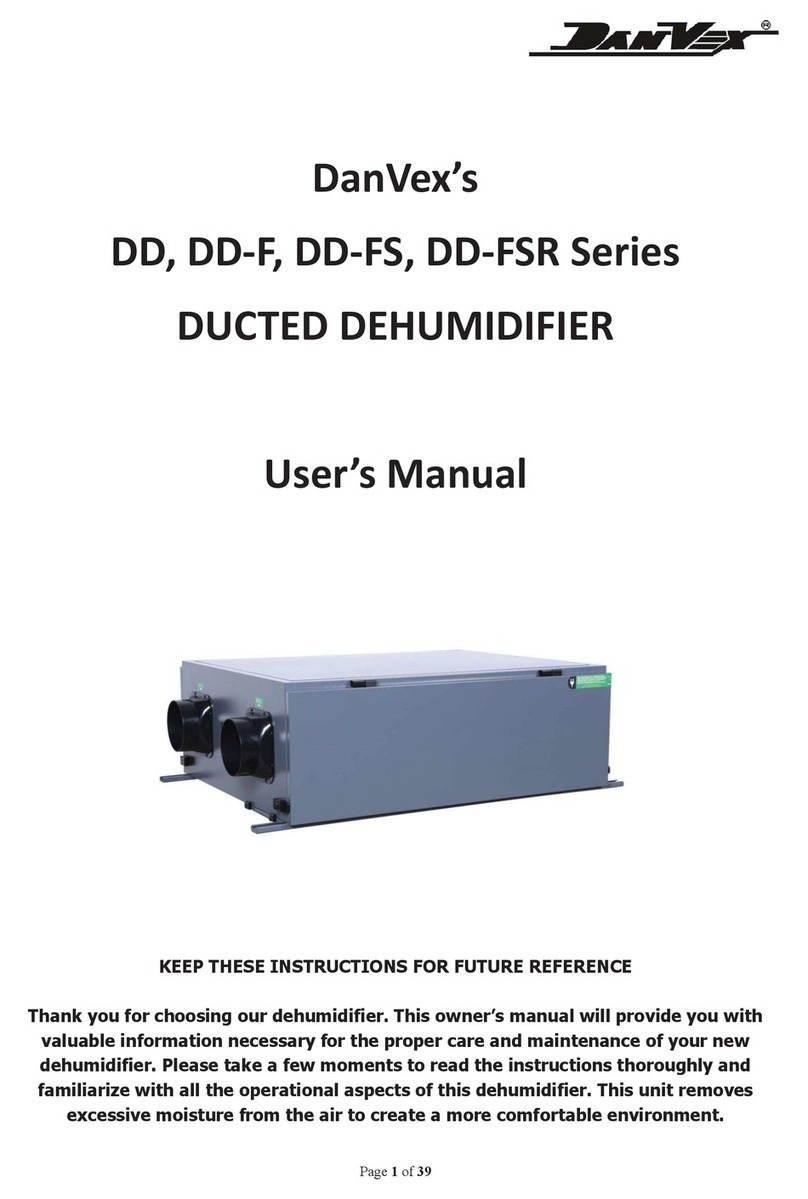
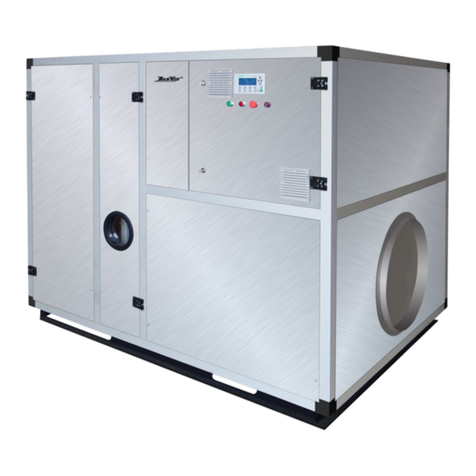
DanVex DEH-1700wp User manual

Dehumidifiers for swimming pools
DEH-1700wp
DEH-2000wp
Instruction manual

R
www.danvex.fi
1
Please read this instruction manual carefully and save it before using the dehumidifier. If you
have any questions about using the dehumidifier, please contact Your dealer.

R
www.danvex.fi 2
INTRODUCTION .............................................................................................................................
PRECAUTIONARY MEASURES .....................................................................................................
DESCRIPTION OF THE DEHUMIDIFIER .......................................................................................
WIRING DIAGRAMS .......................................................................................................................
INSTALLATION NOTE ....................................................................................................................
START-UP AND OPERATION (DESCRIPTION OF THE CONTROL PANEL) ................................
REMOTE CONTROL AND ERROR CODES ...................................................................................
DEHUMIDIFIER MAINTENANCE ....................................................................................................
TECHNICAL SPECIFICATIONS ......................................................................................................
WARRANTY TERMS AND WARRANTY CARD ..............................................................................
CONTENTS
3
4
6
7
8
9
11
12
13
14

R
www.danvex.fi
INTRODUCTION
MODELS:
DEH-1700wp
DEH-2000wp
All the dehumidifiers described in this manual are designed to maintain the relative
humidity of indoor air in the range from 40% to 99%, at air temperature from +10°C to
+32°C.
3

R
www.danvex.fi 4
Read this manual carefully for safety before
you start operating the dehumidifier. Below are
the symbols used in this manual.
If dirt sticks to the plug of the power cord
or plug and socket connection is loose, it
may cause fire or electric shock.
PRECAUTIONARY MEASURES
CAUTION
Remove any dirt from the plug
of the power cord.
There should be no breaks in the cord
or its artificial extensions.
Do not scratch or bend the power cord.
Do not place heavy objects on the power
cord, heat it, or expose to other factors. The
cable may be damaged, which can lead to fire
or electric shock.
Consult Your dealer on installation
of the device.
Do not insert fingers or any objects
into the air intake/ outlet.
Do not attempt self-repair or re-installation
of the device.
If this is done incorrectly, it may cause fire,
electric shock, water leakage, etc.
Contact Your dealer.
Strictly forbidden
Be sure to follow the
instructions
Provide grounding
Unplug the power cord from
network
Never store anything on the
device
Electric shock hazard
Never insert fingers
or any items
Do not disconnect / do not connect
power supply during operation
If during operation there is something
unusual (burning smell, etc.), turn
off the device and disconnect it from
the network
Use grounding.
In case of incorrect operation of the device,
contact Your dealer.
Avoid contact of the grounding
wire with gas and water pipes,
lightning rod or telephone cable. If
the grounding is made incorrectly,
it can lead to defeat electric shock
hazard.

R
www.danvex.fi
5
This may cause fire or deformation.
PRECAUTIONARY MEASURES
CAUTION
Do not use insect repellent or solvents.
Before cleaning the device switch it off
and disconnect the power cable from
the mains.
It can cause a short circuit that may result
in electric shock or fire.
Do not clean the device with water.
●This can lead to electric shock.
As the fan rotates at high speed, cleaning of
operating device can cause injury.
If the device is installed in a damp
location, ensure its isolation from
moisture.
If you do not provide isolation
of the device from moisture, it may
cause electric shock.
If You do not, the device may accumulate dirt
and cause a fire.
If You are not going to use the device
during a long period, unplug it from
the mains.
Do not install the device in a place where
there is flammable gas.
Do not install the device where in unsafe
operation conditions.
Do not press the switches with wet hands.
This may cause electric shock.
Unassisted installation of the device is
forbidden.
If this is performed incorrectly, it may cause
fire, electric shock, water leakage, etc.
Please contact Your dealer or technician.
Do not pull on the power cord.

R
www.danvex.fi 6
DEHUMIDIFIER DESCRIPTION
AIR DEHUMIDIFIERS: DEH-1700wp and DEH-2000wp
Power cordPower cord
Moist air input
Mounting bracket
Dry air output Control panel
Drain hose

R
www.danvex.fi 7
WIRING DIAGRAM
DEH-1700wp, DEH-2000wp
SINGLEPHASE (1PH/50 Hz)
Датчик
Датчик системы
Вывод на дисплей PCB
Главный контроллер PCB
вентилятора
Компрессо
Main controller PCB
Humidity detector
Air temperature sensor
System defrost sensor
PCB display representation
Compressor
Fan motor
Power source
Transformer
Protection from low pressure
Protection from high pressure

R
www.danvex.fi 8
INSTALLATION NOTE
Mounting of the dehumidifier on the wall:9
Step 1: Select the correct position for mounting on the wall, depending on the size of the
holes set and the holes positions of the wall mount bracket. The place of installation should
guarantee the vertical position of the dehumidifier. Mark places for drilling.
Step 2: Use hammer drills to drill holes with depth of 8 ± 0.5 cm Then use the anchor bolts
and install them into the holes with a hammer.
Step 3: Install the wall bracket with anchor bolts in the correct position. Please, provide
secure fixing of the bracket using nuts and washers. Don't forget to hold the bracket in the
correct position during installation.
Step 4: Install the dryer on the wall bracket.
Step 5: Connect the drain hose to the dehumidifier. Turn on the dehumidifier for trial use.
Check the device for presence of abnormal vibration and noise.
Step 6: Installation is finished and the dehumidifier is ready for use.
Installation diagram.
In case of indoor installation of the device, provide availability of free space for its
maintenance. The premises, where the device is installed, must be ventilated.
Before installation of the dehumidifier:
Before shipment from the factory all the dehumidifiers are subject to tests. Unpack the box
and check for damage on the surface of the device, as well as for completeness of
components in accordance with the list specified in the instructions. If You find any damage,
do not attempt to install the humidifier and immediately contact the supplier.
IF DURING TRANSPORT THE DRYER WAS LYING ON THE SIDE, IT NEEDS
TO BE LEFT UPRIGHT FOR AT LEAST 24 HOURS BEFORE THE START OF
ITS OPERATION!!!
(failure to perform this may cause damage to the dryer and void your warranty)
CAUTION!!!

R
www.danvex.fi
9
Control panel.
Button Function
1. “Power” / ”ON/OFF button
Press this button to start the machine, it enters start-up mode after the buzzer buzzes twice
Press this button to stop the machine, it enters stop mode after the buzzer buzzes once
2. “Timer” button(for 2G controller)
A,In standby mode, press “timer” to set Auto starting time, “on time”will flash in screen, and click “+”
or “-” to adjust the time;
B, In working mode, press “timer” to set Auto stop time, “off time”will flash in screen, and click “+” or
“-” to adjust the time;
3. “+” button
Press this button directly to increase the set humidity. Buzzer buzzes once for each pressing and the
set humidity decreases by 1% RH. Successive operation can be achieved by pressing this button
successively. Press “Time” button before pressing this button, the time (hour) can be increased.
4. “-” button
Press this button directly to decrease the set humidity. Buzzer buzzes once for each pressing and the
set humidity decreases by 1%RH. Successively operation can be achieved by pressing this button
successively. Press “Time” button before pressing this button, the time (minute) can be decreases.
Operating the machine
1.. Energize the power, the dehumidifier will beep for onc
2.
. Press the “On/Off” button for once, the LCD display is light. After all displays are normal, the LCD
displays current environment humidity;
3.
. Setting of humidity: press “+” and -” buttons to set the required humidity.
When the set humidity is 3% less than current humidity, the dehumidifier works; when the set
humidity is 3% more than current humidity,the dehumidifier stops.
4.
. When the set humidity is less than 30%, the dehumidifier enters the mo of successive
dehumidification.
5.. Setting of preset tim
Press the “Time” button for the first time, the “hour” time on the display flashes,press “+”and“-”to
adjust the current hour and minute time;Press the “Time” button for the second time,the “Start-up
time” on the LCD flashes, press “+”and“-”to adjust the current hour and minute time;Press the
“Time” button for the third time , the “Stop time” on the LCD flashes , Press
“+”and“-”to adjust the current hour and time;Press the “Time” button for the forth time,the mode
of “preset time ”can be canceled.
6.. After setting the mode of preset time, if the dehumidifier is shut off, it wi operate the whole mode of
preset time; if it is in operation, it will operate the mode of “preset stop time”.
R
www.danvex.fi 10
Please carefully review the control functions and make all necessary
adjustments before using the dehumidifier.
Operation Notices
1.. When moving the machine, do not incline the machine for over 45° to avo damaging the
compressor.
2.. Temperature for operation of this machine is 10 - ℃.
3.. When it is operati,the compressor gives off heat when it works,and ambient temperature
may rise by 1-3℃.Such phenomenon is normal and is safe to use.
4.. When ambient temperature is below ℃ and absolute humidity is relatively low,there is no
need to use dehumidifier.
5.. The air inlet and outlet must be away from the wall for at least 10 cm in order not to impair
dehumidification effect.
6.. Working environment shall be as airproof as possible to maximize dehumidification on effec
7.. Dust on the air purification filter mesh may impair its effect or even cause failure. Please cle
regularly for at least once a month. If there is much dust in the environment,it must be cleared
once a week or once a day. Pull down the front panel,clear the filter mesh. Tap the filter mesh
slightly or eliminate the dust by vacuum cleaner or place the mesh in warm water(≤40℃ and
add appropriate neutral scour)and brush and then wash with clear water and dry it.
Direct sunlight or baking shall be avoided to prevent deformation.
Instruction on Code of Failure
This dehumidifier is able to automatically judge failure. If there is any failure,
there will be failure code displayed on the humidity display window.
FailureFailure Display
E1
E2
E3
E4
E5
Temperature sensor failure
Humidity sensor failure
Phase sequence failure(for 380V power supply devices only)
Water tank full(for the devices equipped water tank only)
High temp./pressure
Low pressure alarm (leakage may happen inside) E6

R
www.danvex.fi
11
REMOTE CONTROL AND ERROR CODES
REMOTE CONTROL
The scope of supply includes the infrared
remote control. The remote buttons
duplicate some of the functions of the
control panel of the dehumidifier. To start
using the remote you need to insert the
battery R232 (supplied separately).
Button up
Button down
Оn/off button

R
www.danvex.fi 12
DEHUMIDIFIER MAINTENANCE
When You are not going to use the
dehumidifier for a long time.
When you are going to operate
the dehumidifier again.
Start the process of air drying for 3-
4 hours, setting the humidity levels
at the level of 80% to dry the
dehumidifier from inside.
Switch off the dehumidifier, then
remove plug from outlet.
Make sure the air intake and outlet are
not blocked.
Make sure the ground wire is connected
properly
CAUTION
Switch off the dehumidifier or remove the
plug from the socket if you are not going
to use it for a long time.
CAUTION
Use grounding.
Avoid contact of the grounding wire with
gas and water pipes, lightning rod or
telephone cable. If grounding was
performed incorrectly, this may result in
electric shock.
Remove the batteries from the remote control.

R
www.danvex.fi
13
TECHNICAL SPECIFICATIONS
NOTE:
1. The nominal value of the noise level recorded in the laboratory.
2. In case of difference between the characteristics shown in the table above and
the characteristics specified directly on the manufacturer label, you need to rely
on the characteristics of the manufacturer's label.
3. Test data: air temperature 30°C, humidity 80%.
SPECIAL INSTRUCTIONS:
1. For expert installation and repair, contact the special Service department.
2 If a flexible cable is damaged, contact the special Service Department to replace it
with the original cable.

WARRANTY CARD AND WARRANTY OBLIGATIONS
ITEM TYPE, MODEL: ____________________________________________________
PURCHASE DATE:__________________
Warranty scope and equipment, to which warranty is applied:
The equipment covered by this warranty is listed below:
The supplier will provide a replacement part in case of its failure during normal use in non-
aggressive dust-free environment and regular maintenance during the warranty period
specified below, in accordance with the terms of this warranty.
The date of delivery of warranty replacement parts is 30 days.
The warranty for the replaced item will be given only for the remaining period of the
original warranty period.
Equipment subject to guarantees:
The warranty is applied to all equipment DanVex and its components.
Date of entry into force and guarantee terms:
Start date of warranty period is the date of sale. The warranty period for dehumidifiers
DanVex of the series "wp" is 24 months.
Exceptions -
THIS WARRANTY DOES NOT COVER:
1. Equipment, which was not installed in accordance with the manual.
2. Equipment, which is not operated in accordance with the manual, for example, in
aggressive environments (oils, salts, chlorine, etc. high temperature), multiple cover
damages.
3. Items returned not through the distributor of the Manufacturer.
4. Items returned later than 30 days after failure.
5. Items returned after the date of expiration of the warranty period, including the items,
gone out of operation during the warranty period, but returned after its expiration.
6. Damage, malfunction or failure that occurred during or as a result of transportation or
movement, improper operation, accidental accidents, fires, floods and other similar
situations.
7. Equipment in dirty state.
8. Damage, malfunction or failure occurring as a result of installation, operation or
maintenance of the unit, produced not in accordance with the Manufacturer's instructions
outlined in the installation manual, in violation of the accepted manufacturing practices and
any applicable local, state and national standards.
9. Damage, malfunction or failure occurring as a result of using additional equipment,
accessories, or parts that have not received approval and authorization of the Manufacturer.
R
www.danvex.fi 14

Compliance with the declared characteristics:
The manufacturer guarantees the compliance of the technical characteristics of the equipment
stated in the instruction manual, only subject to clean state of the equipment, and its operation
under normal conditions (humidity and temperature of the environment is not more/ less than
that specified in the operating instructions).
Transportation costs:
The manufacturer is not responsible for the costs of transportation of equipment and spare
parts.
Cost of works:
The manufacturer is not responsible for costs of dismantling and replacement of equipment.
Costs of examination:
If it is determined that the returned items are not defective and are operable within design
standards, the manufacturer reserves the right to receive payment for the examination in the
amount of 50 Euro in addition to the transportation costs.
THIS CONTRACT WARRANTY EXCLUDES ALL OTHER WARRANTIES OR
REPRESENTATIONS, EXPLICIT OR IMPLIED, IN/BY ANY DOCUMENTS, DATA, OR
PERSONS. THE MAXIMUM LIABILITY OF THE SUPPLIER UNDE THIS EXCLUSIVE LEGAL
REMEDY MAY NOT EXCEED THE COST OF PRODUCTION, AND THE SUPPLIER
RESERVES THE RIGHT, IN SOLE DISCRETION, TO REIMBURSE THE COST OF
PURCHASED EQUIPMENT INSTEAD OF ITS REPAIR OR REPLACEMENT. THE SUPPLIER
IS NOT LIABLE FOR ANY DIRECT, INDIRECT, ASSOCIATED WITH THE PARTICULAR
CIRCUMSTANCES OR INCIDENTAL DAMAGES CAUSED BY BREACH OF WARRANTY,
OR COMING FROM OTHER LEGAL BASIS, INCLUDING LOST PROFITS, LOSS OF
REPUTATION, TIME, INCONVENIENCE, FUEL AND LABOR COSTS, OR OTHER
INCIDENTAL OR CONSEQUENTIAL LOSS OR DAMAGE INCURRED BY PERSONS,
COMMERCIAL ORGANIZATIONS, OR THEIR PROPERTY, AS A RESULT OF BREACH OF
WARRANTY, NEGLIGENCE, AND OTHER CONDITIONS. THIS WARRANTY IS DEFINED
AND LIMITED BY THE FOREGOING SPECIFIC CONDITIONS AND IS THE ONLY LEGAL
REMEDY.
R
www.danvex.fi 15

Details of the seller:
Name of the organization:_________________________________________________
__________________________________________________________
Address:__________________________________________________________________
Telephone number:__________________________________________________________
Details of the buyer:
Full name (Organization): ____________________________________________________
__________________________________________________________________________
Address:__________________________________________________________________
Telephone number:__________________________________________________________
www.danvex.fi
Seal
(for the legal person)
THE MANUFACTURER DOES NOT GUARANTEE COMPATIBILITY OF THE PURCHASED
EQUIPMENT WITH THE EQUIPMENT OF THE BUYER. THE SELLER GUARANTEES
SERVICEABILITY OF EACH OF ACCESSORIES SEPARATELY, BUT IS NOT RESPONSIBLE
FOR THE QUALITY OF THEIR JOINT FUNCTIONING, EXCEPT WHEN PURCHASED IN THE
SET AND INSTALLED ACCORDING TO THE RECOMMENDATIONS OF THE DISTRIBUTOR.
IN ACCORDANCE WITH THE LAW OF THE RF “ON PROTECTION OF CONSUMER RIGHTS”
AS AMENDED AND THE REGULATIONS OF THE GOVERNMENT OF THE RUSSIAN
FEDERATION NO. 55 of JANUARY 19, 1998 "LIST OF NON-FOOD PRODUCTS OF GOOD
QUALITY, ARE NOT SUBJECT TO RETURN OR EXCHANGE FOR SIMILAR GOODS OF
OTHER SIZE, SHAPE, DIMENSIONS, STYLE, COLOR OR CONFIGURATION" (AS AMENDED
ON OCTOBER 20, 1998), THE SELLER IS NOT OBLIGED TO TAKE BACK DEFECTIVE
EQUIPMENT IF IT FOR ANY REASONS HAS TURNED OUT TO BE UNSUITABLE FOR THE
BUYER.
Warranty card shall only be valid if completely filled, in the presence of the seal of the service
center or the seller, the signature of the consumer, and in the presence of an act of assembly,
issued by the dealer or service center DanVex (for dehumidifiers of AD series, requiring
professional installation).
R
www.danvex.fi 16
ВНИМАНИЕ!!!
CAUTION!!!

This manual suits for next models
1
Table of contents
Other DanVex Dehumidifier manuals

DanVex
DanVex DEH-3K User manual

DanVex
DanVex DEH-900i User manual

DanVex
DanVex DEH-500i User manual

DanVex
DanVex AD-10000 User manual

DanVex
DanVex DD Series User manual

DanVex
DanVex DEH-600P User manual

DanVex
DanVex DEH-1700P User manual

DanVex
DanVex DEH-400P User manual

DanVex
DanVex DEH-600wp User manual

DanVex
DanVex AD-550 User manual