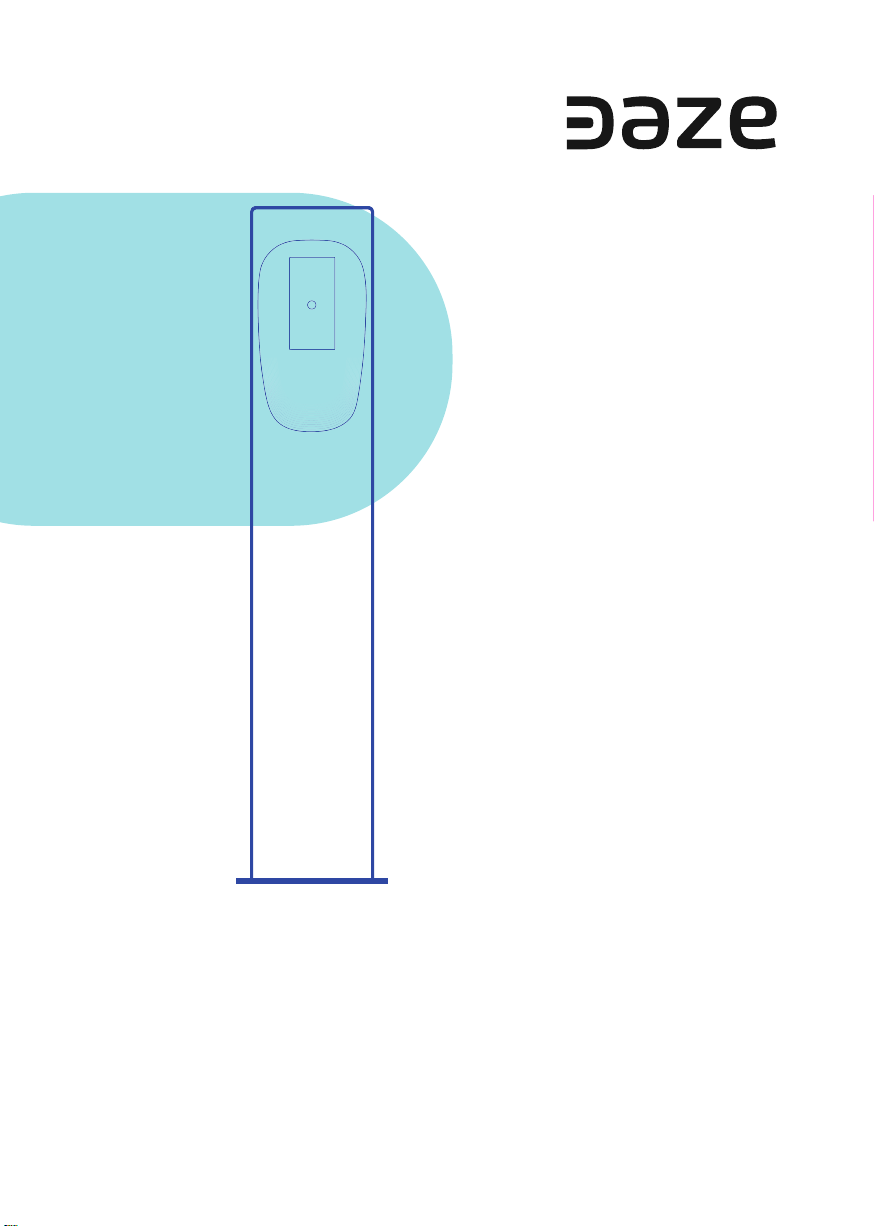
DazeTechnology Totem User manual

V.1
07/06/2023
IT - EN - FR - DE
Totem
Manuale di installazione
Installation manual
Manuel d'installation
Installationsanleitung


01 - Introduzione
02 - Informazioni di sicurezza
04 - Preparazione all'installazione
03 - Scheda tecnica
4
5
8
7
9
10
Indice
Summary - Index - Index
Introduction - Introduction - Einführung
Safetyinformation - Informations sur la sécurité - Informationen zurSicherheit
Preparingto install - Préparation de l'installation - Vorbereitung fürden Einbau
““ˆˆ)„ˆˆ„ ˆ“ˆ‚“p
Package contents - Contenu du paquet -Verpackungsinhalt
Installation -Assemblée - Montage
04.1 - Contenuto della confezione
04.2 - Montaggio

Totem
4.
01 - Introduzione
Introduction - Introduction - Einführung
FR
IT
DE
EN
Le informazioni contenute in questo Manuale di
Installazione sono destinate all’installatore del to-
temdiDazebox.Questaguidaèunsupplementoal
Manuale di Dazebox.Le informazioni e le istruzioni
presenti nel manuale sulla scelta dell’ubicazione,
sull’installazione e sul collegamento della stazio-
ˆ¿„“„“¿ˆ,ˆˆˆˆp“ˆ`E“,ˆˆ
più recente e aggiornata di questo manuale è pre-
sente sul sito internet di Daze.
Les informations contenues dans ce Manuel
d'Installation sont destinées à l'installateur du
totem de Dazebox. Ce guide est un complément
au Manuel de Dazebox.Les informations et les in-
structions concernant le choix de l'emplacement,
l'installation et le raccordement de la station
de recharge doivent être respectées. Laversion
la plus récente et mise à jour de ce manuel est
disponible sur le site internet de Daze.
The information contained in this Installation
Manual is intended forthe installer ofthe Dazebox
totem.This guide is a supplement tothe Dazebox
Manual.The information and instructions in the
manual regarding the choice of location, installa-
tion, and connection of the charging station must
be followed.The most recent and updated version
ofthis manual is available on the Dazewebsite.
Die Informationen in diesem Installationshandbu-
ch sind fürden Installateur des Dazebox-Totems
bestimmt.Diese Anleitung ist eine Ergänzung
zum Dazebox-Handbuch. Die Informationen und
-ˆ ˆ: h“¿o-“´4““ ¿
Verkabelung der Ladestation müssen beachtet
-ˆ¿ˆ`ˆˆ ˆˆ ¿“ “ˆoˆˆ
¿ˆˆ1“¿‚ „k¿ˆhˆ“ —¿ˆˆ‚ˆ,
Daze.
4¿,¿ˆ,ˆˆˆˆ““ˆ„ ,“ıˆˆ¿“ˆ“ˆ “k„“`
EØ““:ˆ¿ˆ¿p¿ˆ,ˆˆˆˆˆˆ “ˆ ˆ¿“pˆ“ıˆˆˆ -
zioni fornite in questo manuale.
oˆ¿ˆ,„ˆı ‚ˆ“ˆ¿ˆ2„ ,ˆ3‚3 “kˆ¿ˆˆ`
The installation ofthe product must be carried out by carefully following the
instructions provided inthis manual.
Eˆ¿—¿˙ˆ“˜ˆ2„ ,ˆıˆ“¿ ˆˆ “k˜`
E““¿ ¿ ¿˙ˆˆhˆ„ ˜ˆˆ ,““pˆ,ˆıˆˆ -
structions fournies dans ce manuel.
“*ˆfi¿“n , “k:ˆoˆıaˆ““ˆo-ˆ¿ˆ`
Die Installation des Produkts muss sorgfältig gemäß denAnweisungen in diesem
1“¿‚ „ˆnˆ`
IT
EN
FR
DE
!

Totem
5.
02 - Informazioni di sicurezza
Safetyinformation - Informations sur la sécurité - Informationen zurSicherheit
4ˆı¸ˆ“ˆı“¿“:¿„“„“ˆ“ ˆˆp„ˆ“:ˆ -
box in uno spazio libero, ove non è presente un muro.Non è permesso montare un
apparecchio che non sia Dazebox.
The totem is designed forinstalling Dazebox electricvehicle charging stations in
ˆ“„ˆ-ˆˆˆˆ-““,““‚ˆ`4ˆıpˆ¿““¿ˆ,„ˆ
otherthan Dazebox.
Letotem est conçu pourl'installation de stations de recharge pourvoitures él-
ectriques Dazebox dans un espace libre, où il n'y a pas de mur. Il n'est pas autorisé
d'installer un appareil autre que Dazebox.
DerTotem ist für die Montage von Dazebox Ladestationen fürElektrofahrzeuge
ˆˆı—ˆˆd“ ı,ˆˆˆ´¿ˆıˆˆ“¿,“¿ˆ`„
ˆ“pˆ´ˆ*ˆfi: ıˆˆ´¿“„,“:ˆ‚2`
IT
EN
FR
DE
Prima di intervenire sul dispositivo per operazioni di manutenzione o pulizia, con-
“ˆ„ˆ„ˆ“ıˆ““ˆ“ˆˆp„““¿“p,““ıˆØˆ pˆ
ˆ “¿ˆˆp„`
o pˆˆˆ“:¿““:ˆ´ ˆı“ ˆ:ˆ¿ˆ¿p¿ˆ,
ˆˆˆˆhˆp “ˆˆ„ ,“ıˆˆ¿“ˆ“ˆ “k„“`
ˆ—ˆˆnı“3ı“ˆ“„ˆ„ˆ“ˆ“ˆ¿ˆ,„ˆ´ı“ˆ
ˆ“ˆ-ˆ„ˆ„-„ˆ¿h ˆ-„ˆˆˆ„„“
panel.
All installation,usage, and maintenance operations ofthe product must be carri-
ˆ¿ ˆ2„ ,ˆ3‚3 “kˆ¿ˆˆ`
Avant d'intervenirsur l'appareil pourdes opérations de maintenance ou de net-
toyage,assurez-vous que le raccordement à la ligne électrique est désactivévia
l'interrupteurdans le tableau électrique.
Toutes les opérations d'installation, d'utilisation et de maintenance du produit
¿,ˆ˙ˆˆhˆ„ ˜ˆˆ2„ ,ˆıˆ“¿ ˆˆ “k˜`
ˆ,hˆ“o ¿ˆdˆ “‚ˆˆ“¿ˆı*ˆfi¿ „—$ˆ´ˆˆ
Sie sicher, dass dieVerbindung zur Stromleitung über den Schalterim Stromver-
ˆˆ¿ˆ“,ˆo`
ˆ4““ˆ´ˆ-ˆ¿ ˆ ¿“o “‚ˆˆ¿ˆa¿ ı$ˆ
“ „ˆ„, “k:ˆoˆıaˆ“¿ „ˆ—$o-ˆ¿ˆ`
IT
IT
EN
EN
FR
FR
DE
DE

Totem
6.
EØ““:ˆ´“ı“ ˆ:ˆˆ““:ˆˆ ˆı¿„ˆp
„ıo“ˆ„ˆØ ::“ˆ`
Se la colonnina è danneggiata,deve essere immediatamente scollegata e
“`o“ı“,ˆ¿ˆ,ˆˆˆˆhˆp “ˆˆ„ ,“ıˆˆ¿“ˆ“ˆ
“k„“`
pˆˆ“ˆ :¿“ˆˆ“„ˆ“¿ˆ ¿““:ˆo“ˆˆ
manuale di Dazebox.
L¸„ˆ““ı¿k„“¿“o¿ˆ„ıˆØ“ “¿“pˆ::“ ˆ
facoltative al dispositivo.
Improperinstallation,maintenance, orrepairs can pose risksto the user.
Ifthe charging station is damaged,it must be immediately disconnected and
ˆ“„ˆ¿`oˆˆ„ˆ¿ ˆı ‚ˆ„“ˆ¿ ˆ2„ ,ˆ3‚3 “kˆ¿ˆˆ`
Follow the instructions provided in the Dazebox manual forselecting the installa-
tion location.
Modifying components oradding optional equipment tothe device is not allowed.
E““´“ı“ˆ“„ˆ ˆ˜““ˆhˆ„ ˜ˆ¿ˆı“¸ˆ„ˆ„ˆ
peuvent présenter des risques pourl'utilisateur.
Si la borne est endommagée, elle doit être immédiatement déconnectée et rem-
“„˜ˆ`ˆ˜“¿,ˆ˙ˆˆhˆ„ ˜ˆˆ2„ ,ˆıˆ“¿ ˆˆ
“k˜`
Veuillez suivre les instructions fournies dans le manuel de Dazebox pour le choix
de l'emplacement d'installation.
E“ı¿k„“¿ˆ„ı“ “Ł ¿˜ ˆıˆˆ“ ¿—
n'est pas autorisée.
ˆ “„ˆıfiˆ4““´“o ¿ˆdˆ““ “*ˆ—“ˆ—$¿ˆ
Benutzerverursachen.
ˆ¿ˆhfi ˆ‚ˆ„fi¿´ı ˆ—o“‚ˆ„“ˆ ¿“ ˆ“ „
-ˆ¿ˆ`ˆˆK““ıˆ¿$nˆ , “k:ˆoˆıaˆ“¿ „ˆ—$o
werden.
pˆ‚ˆ“„ˆhˆ¿ˆ-ˆ ˆ: h“¿o-“ı“:ˆ‚21“¿‚ „`
ˆK¿k“,Cıˆˆ¿ˆ¿“1: —$ˆ“ˆ*ˆfiˆ: ı
Gerät ist nicht zulässig.
IT
IT
IT
IT
EN
EN
EN
EN
FR
FR
FR
FR
DE
DE
DE
DE
!

Totem
7.
03 - Scheda tecnica
““ˆˆ)„ˆˆ„ ˆ“ˆ‚“p
Speciche generali
Dimensioni
1
2
3
4
5
6
Peso
Materiale
Passaggio cavi alimentazione
Dazebox compatibili
N° Dazebox pertotem
1450x320x180 mm
12 kg
Acciaio con doppia verniciatura
hp“„„“´„“,¿p
Dazebox C, Dazebox Home T/ Home S
Fino a 2
General specications
1.Dimensions
x`ˆ
3. Material: Steel with double coating
4.Cable passage: Subtrack, in conduit
5. Compatible Dazebox models
6. N° of Dazebox for totems: Up to 2
Allgemeine Spezikationen
1.Abmessungen
2.Gewicht
3. Material: Stahl mit doppelter Beschichtung
z`C“‚ˆ¿ „“ˆtˆ‚“ˆ´Eˆˆ
{`Cı“‚ˆ“:ˆ‚2K¿ˆˆ
6.Anzahl der Dazebox fürTotems: Bis zu 2
Spécications générales
1.Dimensions
2.Poids
3. Matériau : Acieravec double revêtement
4.Passage de câble : Sous-piste, dans une
conduite
5. Modèles Dazebox compatibles
6. Nombre de Dazebox pourtotems : Jusqu'à 2
EN DEFR

Totem
8.
FR
IT
DE
EN
4ˆı¸ oˆ“:ˆ‚2´¿,ˆ
“„“„“¿ˆ,ˆ„ˆˆp„‚¿ `a
essere usato per installazione libera in ambienti
interni ed esterni, come alternativa al montaggio
della stazione di ricarica a parete.
Eˆˆıˆ o “:ˆ‚2´
dispositif de recharge pourvéhicules électriques
ou hybrides rechargeables. Il peut être utilisé
pour une installation autonome en intérieur et en
extérieur, en alternative au montage de la station
de recharge murale.
The totem is a stand forDazebox,a device for
charging electric orplug-in hybrid vehicles. It can
be used forfree-standing installation in indoor
and outdoor environments as an alternative to
wall-mounted charging stations.
Das Totem ist eine Halterung fürDazebox, ein
Gerät zurLadung von Elektro- oderPlug-in-Hy-
bridfahrzeugen.Es kann als eigenständige Instal-
lation sowohl im Innen- als auch imAußenbereich
verwendetwerden und stellt eineAlternative zur
“¿ı“ˆ¿ˆE“¿ˆ“¿“`
04 - Preparzione all'installazione
Preparingto install - Préparation de l'installation - Vorbereitung fürden Einbau
EØ““:ˆ¿ˆ,ˆˆˆˆˆˆ “¿“ˆ“ˆ “k„“`$ˆ„ˆ“ˆ -
,“ˆ pˆ ¿ ‚„“:ˆˆˆˆK“ “ˆ¿“:ˆ‚2`
oˆ““ı ‚ˆ„“ˆ¿ ‚3 “kˆ¿ˆˆ`4ˆ„ˆ“3
‚ˆ,ˆ“ˆ„“ˆ ˆıˆˆ„kˆ¿ˆ“:ˆ‚2K“ “`
E““¿˙ˆ˜“˜ˆ“¿ ˆˆ “k˜`4ˆ˜„ˆ“ˆ¿ˆˆ -
spectertoutes les exigences de localisation indiquées dans le Manuel de Dazebox.
ˆ4““ı , “k:ˆoˆıaˆ“¿ „ˆ—$o-ˆ¿ˆ`
ˆn¿ˆ„´“ˆh“¿o“—¿ˆ ˆˆıfi¿ˆı“:ˆ‚21“¿‚ „:
beachten.
IT
EN
FR
DE
d„¿„“ˆˆp„“˘c ““ˆ“:ˆ¿““:ˆ´ı“ ˆ:ˆ
ı“¿ˆ,ˆˆˆˆˆhˆp ““ˆ„ ,“ıˆˆ¿“,ˆ“„„““„ˆ -
ˆˆˆp„“ “¿ˆˆp„`
d—ˆˆ„„„˘3““´ı“ˆ“„ˆ´¿“ˆı‚3ˆ“
must be carried out exclusively afterdisconnecting the powerfrom the electrical
panel.
d ˆ¿ˆ„„˜ˆ„ ˆ˘o ˆ˜“¿““´¿ˆı“ˆ“„ˆ
¿ˆ¿˜ı“ˆ¿˙ˆˆhˆ„ ˜ˆ ˆıˆ“¸“,„ ˜“ıˆ“
électrique sur letableau électrique.
*ˆ—“ˆˆˆˆ„ˆh„“˘@ˆ„ˆ4““´“o ¿ˆˆ -
ı“ˆ“‚ˆˆ¿$nˆ “„‚„“ˆ¿ˆhı“ıh„ˆ “ˆ
¿ „ˆ—$o-ˆ¿ˆ`
IT
EN
FR
DE

Totem
9.
Package contents - Contenu du paquet -Verpackungsinhalt
04.1 - Contenuto della confezione
FR
IT
DE
EN
All’interno dell’imballo viene fornito:
1.Totem
2. Manuale di installazione
3.Viti M5x10 mm (x4) con adesivo pre-applicato
per installazione Dazebox S e T
4.Viti M5x50 mm (x4) perinstallazione Dazebox
S e T
5.Viti M5x25 mm (x3) per installazione Dazebox C
6.Tappo Ø 32 (x2)
7.Tappo Ø 19 (x2)
8.Membrana passacavo M32 (x2)
9. Rondella M10 (x4)
wv`S„„ˆˆˆıˆ““ˆ“ˆˆp“¿ˆ -
ˆ““K{´„“„¿“K{2x´ˆp“““K{´
ˆp“ˆ“„“*-ˆK{´¿“¿K{`
ˆk„“ˆ„ˆ“؈¿ˆ“„—ˆ:ˆ„“
p„„ˆ¸ˆˆ„“ˆ„ˆ„“¿“`
À l'intérieur de l'emballage, vous trouverez:
1.Totem
2. Manuel d'installation
3.Vis M5x10 mm (x4) avec adhésifpré-appliqué
pour l'installation de Dazebox S etT
4.Vis M5x50 mm (x4) pourl'installation de Daze-
box S etT
5.Vis M5x25 mm (x3) pour l'installation de Daze-
box C
6.Bouchon Ø 32 (x2)
7. Bouchon Ø 19 (x2)
8.Membrane passe-câble M32 (x2)
9. Rondelle M10 (x4)
10.Équipement de mise à la terre : cosse crantée
M5, embout de câble M5 (x2), rondelle plate M5,
rondelle Grower élastique M5,écrou M5.
˜kˆ: ˆ „ˆ ˆ˜ ı˜˜ˆ˜ˆ
dans l'emballage et qu'il n'y a pas de dommages.
The following items are included in the packaging:
1.Totem
2. Installation manual
3.M5x10 mm screws (x4)with pre-applied adhesi-
ve for Dazebox S and Tinstallation
4.M5x50 mm screws (x4) for Dazebox S andT
installation
5. M5x25 mm screws (x3)forDazebox C installa-
tion
6.Ø 32 plug (x2)
7. Ø 19 plug (x2)
8.M32 cable gland (x2)
9. M10 washer (x4)
10. Grounding accessories: toothed washer
K{´K{ˆı“ 2x´l“-“ˆK{´ˆ“„
Growerwasher M5, M5 nut.
Please check that all the listed items are included
in the package andthat there are no damages.
Im Lieferumfang enthalten sind:
1.Totem
2.Installationsanleitung
3.Schrauben M5x10 mm (x4) mit voraufge-
‚“„ˆıCˆ‚h—$¿ˆ4““,
Dazebox S undT
5. Schrauben M5x50 mm (x4) für die Installation
von Dazebox S und T
6.Schrauben M5x25 mm (x3) fürdie Installation
von Dazebox C
7.Abdeckkappe Ø 32 (x2)
8.Abdeckkappe Ø 19 (x2)
`C“‚ˆ¿ „—$ ıˆı‚“Kyx2x
10.Unterlegscheibe M10 (x4)
ww`¿ : ‚ˆˆˆ:“ˆK{1$ˆ´K{C“ -
‚ˆ„ 2x´l“„ˆK{tˆˆ„ˆ‚ˆ´ˆ“ -
„ˆ*-ˆK{tˆˆ„ˆ‚ˆ´K{K pˆ`
x‚ˆ$—ˆhˆ´‚“ˆ“ —ˆ—$oˆoˆˆ¿ˆ
Verpackung enthalten sind und ob keine Schäden
vorliegen.

Totem
10.
Installation -Assemblée - Montage
04.2 - Montaggio
FR
IT
DE
EN
aˆØ““:ˆ¿ˆˆı o¸ˆ„ˆ“
l’utilizzo degli utensili seguenti:
1.Trapano con punta da muro Ø10 mm
2.Matita
3.Brugola n° 3 e n° 4
4.Chiave torx TX25
5. Cacciavite a croce (Phillips)
6.Livella a bolla d’aria
7. Metro
~`)‚„¿“ˆˆp„“
9. Occorrente per tasselli otasselli chimici
10.Trapano con fresa conica Ø32 mm
11. Chiave inglese da 8 mm
Les outils suivants sont nécessaires pourinstaller
le totem:
1. Perceuse avec mèche murale Ø10 mm
2.Crayon
3.Clé Allen n° 3 et n° 4
4.Clé TorxTX25
5.Tournevis Phillips
6.Niveau à bulle
7. Mètre
8.Ciseaux d'électricien
9. Outils pourchevilles ou bouchons chimiques
10.Foret avec fraise conique Ø32 mm
11. Clé de 8 mm
)ˆ““—ˆˆı o´ˆ
followingtools are required:
1. Drillwith a Ø10 mm wall bit
2.Pencil
3.Allen wrench size 3 and size 4
4.Torx keyTX25
5. Phillips screwdriver
6.Spirit level
7.Tape measure
8.Electrician's scissors
9. Necessary items for plugs or chemical anchors
wv`-“„„“„ pˆyxıı
11. 8 mm wrench
Fürdie Installation des Totempfahls werden die
—ˆ¿ˆˆ:ˆ ˆ‚ˆˆ
w`ˆı]wvıı“¿‚ˆ
2.Bleistift
3.Inbusschlüssel Nr. 3 und Nr. 4
4.Torx TX25-Schlüssel
5.Phillips-Schraubendreher
|`“ˆ-““ˆ
7.Messgerät
8.Elektrikerschere
`ˆ:ˆ ˆ—$$‚ˆ¿ˆ„ˆı„ˆh—ˆ
10.Bohrer mit konischer Schneide Ø32 mm
11.8-mm-Schraubenschlüssel

Totem
11.
FR
IT
DE
EN
4„ˆ“ıˆˆˆp„ˆ“¿“ıˆ“:ˆ
deve essere stato preparato.
1. Per l’installazione deve essere preparata una
fondazione in calcestruzzo. L'opera di ingegneria
p “ˆ¿ˆ,ˆˆˆˆˆˆ ““ˆ“¿“oˆ´
ˆo“ˆ
- Il calcestruzzo utilizzato deve avere una densità
di 350 kg/m3e deve essere a prova di gelo.
E““:ˆ¿„“„“¿ˆ,ˆˆˆˆk“““ˆ“
ˆˆnˆp“ıˆˆ,ˆ““`
h“„„ı“¿“¿“:“ˆ o“&
di 5 cm da terra nel punto in cui si posizionerà
l'utente.
Durante la realizzazione della fondazione in
„“„ˆ ::´„“,¿ˆ,ˆˆˆˆp¿“
eventuali danni impiegando le misure appropriate
(es. un tubo di protezione corrugato). Iltubo di
protezione corrugato deve fuoriuscire di circa 25
cm dal basamento in calcestruzzo.
4 o ˆˆˆ“““„ˆıˆ¿“ˆ
tasselli chimici.
Di seguito vediamo i passaggi per questi.
Le raccordement électrique (ligne d'alimentation)
doit être préparé.
1. Pour l'installation,une fondation en béton doit
être préparée.Les travaux de génie civil doivent
˙ˆ˜“˜„—ı˜ıˆ“ 2¸ˆ¿ˆ“o´
donc:
- Le béton utilisé doit avoir une densité de 350
kg/m3et doit être résistant au gel.
E““¿ˆˆ„“ˆ¿˙ˆk2˜ˆ“ ˆ
“n“ˆıˆ¿ˆ,ˆ“ `
4ˆˆ„ıı“¿˜¿ˆˆ“˜ˆ,ˆˆ o
de plus de 5 cm du sol à l'endroit où l'utilisateurse
positionnera.
Lors de la réalisation de la fondation en béton, les
câbles doivent être protégés contre d'éventuels
dommages en utilisant les mesures appropriées
(parexemple, untube de protection ondulé). Le
tube de protection ondulé doit dépasser d'environ
25 cm de la base en béton.
Eˆ oˆ ˜“ˆıˆ˙ˆ“˜“¿ˆ¿ˆ
chevilles chimiques.
Voici les étapes pour cela.
The electrical connection (power line) must be
prepared.
1. For installation, a concrete foundation must be
prepared.The structural engineering work must
be done accordingto best practices,therefore:
- The concrete used must have a densityof 350
kg/m3and must befrost-resistant.
oˆ„““ı ‚ˆˆ„ ˆ3k2ˆ¿
ˆ ¿“¿ˆnˆ„3ˆ,ˆˆ¿`
4ˆ„ııˆ¿ˆ¿“ˆˆ oıˆ
than 5 cm fromthe ground at the user's position.
During the construction ofthe concretefounda-
tion, cables must be protected from any damage
using appropriate measures (e.g., a corrugated
protective tube). The corrugated protective tube
should protrude approximately25 cm fromthe
concrete base.
oˆ o„““‚ˆ“ˆ¿ „ˆı„“
anchors.
Below are the steps for these installations.
Die elektrische Verbindung (Stromversorgungslei-
tung) mussvorbereitet sein.
1. Für die Installation muss eine Betonfundament
vorbereitet werden.Die Bauarbeiten müssen
—“„ˆˆ„¿ „ˆ—$o-ˆ¿ˆ´¿“ˆˆ
- Derverwendete Beton muss eine Dichte von 350
kg/m3haben und frostsicher sein.
- Die Ladestation muss am Boden befestigt und
ˆnˆ“ ˆ„ˆˆ`
- Es wird empfohlen,die Halterung nicht mehr als
5 cm über dem Boden anzuheben,an dem der
ˆ :ˆˆo-¿`
fiˆ¿¿ˆˆ ¿ˆˆ— ¿“ıˆ -
ı$ˆ¿ˆC“‚ˆ,ı„ˆh„fi¿ˆ
geschützt werden, indem geeignete Maßnahmen
ˆhˆ-ˆ¿ˆ:``ˆˆˆ-ˆˆh„ :`
Das gewellte Schutzrohr sollte etwa 25 cm aus
dem Betonfundament herausragen.
Die Halterung kann auch mit chemischen Dübeln
“ˆo-ˆ¿ˆ`
4ı)ˆ¿ˆk¿ˆhˆ¿ˆh„pˆ¿“—$`

Totem
12.
Non è consentito montare il totem sull'asfalto.
K ˆˆıˆ““ˆıpˆ¿`
Il n'est pas autorisé de monterle totem sur l'asphalte.
„ˆ“pˆ´¿ˆoˆı“ —“: ıˆˆ`
IT
EN
FR
DE
!
FR
IT
DE
EN
2. Praticare i 4 fori (interassi 280 x 150 mm) sulla
‚“ˆ¿„“„ˆ ::ˆˆ‚“ˆkˆp“ˆKwv`
oˆˆˆ„¿ˆ“—¿¿ˆ“ˆn“:ˆ
richiesta.
y`hi“ˆˆ—ˆˆı“ˆˆ¿ ¿p
dal trapano.
z`4ˆp“ˆ““:““¿ˆ,“:“¿¿““
base dei fori.
{`4¿ ˆˆ‚“ˆkˆp“ˆKwv ‚¿“
sostanza adesiva.
|`dˆ“ˆ“¿“:“¿ˆ“‚““kˆp““ˆ
“pˆ¿ˆˆˆı¿¿ ıˆ`w{ıı`
}`aˆ¿ˆ„“,¿p„ “„„“,ˆ„ˆ -
sari (due alimentazioni per installazione di due
Dazebox sultotem).I cavi devono sporgere dal
piano di un’altezza di circa 160 cm.
2. Percez les 4 trous (entraxe de 280 x 150 mm) sur
“‚“ˆˆ‚˜ ˆˆkˆ˜ˆKwv`oˆˆ:
compte de la profondeur de perçage requise.
y`h jˆ:¿“ˆ ˜ıˆˆ˜¿
produits par le foret.
4.Injectez la substance adhésive en commençant
par la base destrous.
5. Insérez immédiatement après la substance
“¿˜,ˆˆˆkˆ˜ˆKwv`
|`d˜ˆ:“¿“„ˆ¿ˆ“ˆkˆ˜ˆˆ“pˆ¿ˆ:
ˆˆı¿ˆ¿ „ˆıˆ`w{ıı`
7. Préparez les conduits ondulés avec les câbles
nécessaires (deux alimentations pourl'installation
de deux Dazebox surle totem). Les câbles doivent
dépasser du plan d'une hauteur d'environ 160 cm.
2. Drillthe 4 holes (centre distances 280 x 150
mm) inthe concrete baseforthe M10 threaded
rods.Takethe required drilling depth into account.
3.Blow outthe holes to remove drill residue.
z`4Łˆ„“¿ˆ,ˆ“o“ˆ‚“ˆ—ˆˆ`
{`4ˆoˆKwvˆ“¿ˆ¿¿ııˆ¿“ˆ3“—ˆ
the adhesive substance.
6.Adjust the distance of thethreaded rod and
-“—ˆ„ ıˆ`w{ıı`
7. Preparethe corrugated cable ducts withthe
necessary cables (two feeds perinstallation of
two Dazeboxes on the totem pole).The cables
must protrude from the top by approx. 160 cm.
2. Bohren Sie die 4 Löcher(Achsabstand 280 x 150
mm) in die Betonbasis für die Gewindestangen
Kwv`ˆ“„ˆhˆ¿ˆˆn¿ˆ„ˆoˆ—ˆ`
3.Blasen Sie die Löcheraus, um dievom Bohrer
erzeugten Rückstände zu entfernen.
z`4Ł:ˆˆhˆ¿ˆCˆ‚h´‚ˆˆ¿“¿ˆ
Basis der Löcher.
{`)$ˆhˆ ıpˆ‚““„¿ˆıCˆ‚h¿ˆ
Gewindestangen M10 ein.
6.Stellen Sie den Abstand der Gewindestange ein
¿-“oˆhˆ“ —¿ˆ fioˆ:ˆ`w{ıı`
}`ˆˆˆhˆ¿ˆˆˆ ˆı¿ˆ
ˆn¿ˆ„ˆC“‚ˆ,:-ˆˆ ˆ—$
die Installation von zwei Dazeboxen am Totem).
ˆC“‚ˆˆ,¿ˆS‚ˆnfi„ˆˆˆ1ˆ
von etwa 160 cm überstehen.

Totem
13.
IT
a.Lamiera;
b.Vite metrica M5;
„`ˆ„ˆ¿““ˆp“¿ˆˆ““˜
¿`dˆp“¿ˆˆ““˜
e. Cavo di terra giallo-verde con capocorda
collegato a Dazebox;
f. Cavo di terra giallo-verde con capocorda
in arrivo con l’alimentazione;
`dˆp“““tL4|{y˜
`dˆp“ˆ“„“*-ˆtL4w}{w˜
i. Dado M5 UNI 5588.
a. Sheet metal;
b. M5 metric screw;
„`L„ˆ¿ˆpˆ“ˆ“˜
¿`L„ˆ¿ˆpˆ
˜ˆ`ˆ-ˆˆˆ“o„“‚ˆ- „ -
nected to Dazebox;
—`ˆ-ˆˆˆ“o„“‚ˆ-„“‚ˆ
incoming with power supply;
g. Flat washer UNI 6593;
h. Grower elastic washer UNI 1751;
i. M5 nut UNI 5588.
a.Blech;
b. M5 Metrische Schraube;
c. Durch die gezahnte Unterlegscheibe
eingekerbter Bereich;
d. Gezahnte Unterlegscheibe;
ˆ`*ˆ‚$ˆ¿ “‚ˆıC“‚ˆ„ ´
verbunden mit Dazebox;
—`*ˆ‚$ˆ¿ “‚ˆıC“‚ˆ„ ´
von derStromversorgung kommend;
g. Flache Unterlegscheibe UNI 6593;
h. Elastische Grower-Unterlegscheibe UNI 1751;
`K{K pˆtL4{{~~`
a.Tôle;
b.Vis métrique M5;
c. Zones entaillées par la rondelle dentelée;
d. Rondelle dentelée;
ˆ`)¿ˆˆˆŁ“ ˆ,ˆo“,ˆ„„ˆ´ˆ˜
à Dazebox;
—`)¿ˆˆˆŁ“ ˆ,ˆo“,ˆ„„ˆ´,ˆ“
de l'alimentation;
g. Rondelle plate UNI 6593;
h. Rondelle élastique Grower UNI 1751;
i. Écrou M5 UNI 5588.
EN DEFR

Totem
14.
FR
IT
DE
EN
8.Le singole fasi devono essere liberate dalla
guaina esterna del cavo multipolare per una
lunghezza di circa 50 cm e inserite all’interno
¿ˆ“ p “`
9. Collegare il cavo di protezione giallo/verde alla
vite nella lamiera (PE)tramite un capocorda.
10.Con un pezzo di cavo giallo/verde lungo 40-50
cm collegarsi tramite un capocorda alla vite sulla
lamiera (PE).L’altro capo del cavo, insieme agli altri
„“,—“ˆˆ ,“““-“‚2“p“,ˆ
l’asola B (oppurefori M nel caso di DazeboxT).
ww`aˆk““““ıˆ“´ˆ ˆ“„„ ““ıˆˆ
“ı¿“¿ˆ„p“ˆ“k “ˆ“ˆ„ˆ -
dente pagina: inserire sullavite di messa a terra
“ˆp“¿ˆˆ““´x„“„¿“„„“,
¿ˆ:ˆ´ „„ˆ,“ıˆˆˆp“““´
ˆp“ˆ“„“ˆˆkˆ¿“¿`
wx`a:“ˆØ“ˆıˆ p “¿ˆˆı“
la 4 barre M10 che sporgono dal pavimento.
Bloccarlo inserendo prima le rondelle di plastica
incluse in confezione e poi avvitare i dadi M10.
13.Nel caso di installazione di Dazebox C oppure
Dazebox S inserire i tappi in dotazione (tappo Ø32
e tappo Ø19 mm) nei fori M, perché non utilizzati.
8.Les conducteurs individuels doivent être libérés
de la gaine extérieure du câble multipolaire sur
une longueur d'environ 50 cm et insérés à l'in-
térieur de la structure.
`ˆ„ˆ:ˆ„›‚ˆ¿ˆˆ„Ł“ ˆ˛,ˆo“
vis sur latôle (PE) à l'aide d'un embout de câble.
wv`,ˆ„ ı„ˆ“ ¿ˆ„›‚ˆŁ“ ˆ˛,ˆo¿ˆ,
40-50 cm de long, connectez-vous à la vis sur
la tôle (PE) à l'aide d'un embout de câble. L'autre
extrémité du câble, ainsi que les autres câbles
(phases et neutre),vont vers la wallbox à travers la
boucle B (ou les trous M dans le cas de Dazebox T).
ww`a ˆk2ˆ“ˆ´ ,ˆ:“pˆ,ˆıˆˆ
ı¿ˆ¿ˆı¿˜„¿““k ˆ¿ˆ““ˆ
˜„˜¿ˆˆˆ˜ˆ:“ˆpˆ¿ˆˆ˜ˆ “,
de mise à la terre, puis les 2 embouts de câble
avec les câbles de protection, ensuite la rondelle
“ˆ´“¿ˆˆ*-ˆ˜“ ˆˆˆk˜„ `
12. Placez l'ensemble de la structure dutotem sur
les 4 barres M10 qui dépassent du sol.Fixez-le en
insérant d'abord les rondelles en plastique four-
nies, puis serrez les écrous M10.
13.Dans le cas de l'installation de Dazebox C ou
Dazebox S, insérez les bouchons fournis (bouchon
Ø32 et bouchon Ø19 mm) dans les trous M,car ils
ne sont pas utilisés.
8.The individual phases must be freedfrom the
outer sheath ofthe multi-core cable to a length of
“2`{v„ı“¿ˆoˆ¿ˆ „ ˆ`
9. Connect the yellow/green protection cable to
the screwin the sheet metal (PE)via a cable lug.
10.Connect a 40-50 cm long piece of yellow/gre-
en cable tothe screw inthe sheet metal (PE) via
a cable lug.The other end ofthe cable, together
with the othercables (phase and neutral) go to
the wallbox via slot B (or holes M inthe case of
DazeboxT).
ww`o“p“„ˆˆˆıˆ“´„“ˆ— 3—-ˆ
„ˆ¿ ˆ¿ˆ„‚ˆ¿ˆk ˆˆˆ,
“ˆˆˆoˆ„ˆ¿-“ˆˆˆ“o
screw, thenthe 2 cable lugs with the protective
„“‚ˆ´ˆˆl“-“ˆ´-“ˆ“¿
k“3ˆ `
12. Position the totem structure assembly overthe
zKwv‚“ ¿—ıˆl`hˆ„ ˆ‚3
kˆoˆ“„-“ˆ„ ¿ˆ¿ˆ
package and then tighten the M10 nuts.
13.In the case ofDazebox C or Dazebox S installa-
´ˆoˆ ˆ¿ ]yx “¿]w
mm plug) into the M holes, asthey are not used.
8.Die einzelnen Phasen müssen von deräußeren
Hülle des Mehrleiterkabels aufeine Länge von ca.
{v„ı—ˆˆˆ ¿¿ˆh ˆˆ—$o
werden.
9.Verbinden Sie das gelb-grüne Schutzkabel mit
¿ˆh„“ ‚ˆ“ —¿ˆıˆ„aıˆˆC“‚ˆ -
schuhverbindung.
wv`Kˆˆıh$„ˆ‚$ˆC“‚ˆ,
etwa 40-50 cm Längeverbinden Sie sich über
ˆˆC“‚ˆ„ ,ˆ‚¿ ı¿ˆh„“ ‚ˆ
“ —¿ˆıˆ„a`““¿ˆˆ¿ˆ¿ˆC“‚ˆ´
: “ııˆı¿ˆ“¿ˆˆC“‚ˆa“ˆ ¿
Lˆ “ˆˆ´—$o: “‚2$‚ˆ¿ˆh„“ —ˆ
B (oder M-Bohrungen im Fall von Dazebox T).
11. Um sich am Blech zu befestigen,folgen Sie
sorgfältig derin der Abbildung aufder vorherigen
Seite beschriebenen Methode: Setzen Sie die ge-
zahnte Unterlegscheibe auf die Erdungsschraube,
¿“¿ˆxC“‚ˆ„ ˆı¿ˆh„ :“‚ˆ´
“„ˆˆ¿¿ˆl“„ˆtˆˆ„ˆ‚ˆ´¿ˆˆ“ -
stische Grower-Unterlegscheibe und zum Schluss
¿ˆK pˆ`
12. Positionieren Sie die Strukturdes Totems über
den 4 M10-Stangen, die aus dem Boden ragen.
Sichern Sie es, indem Sie zuerst die im Lieferu-
ı—“ˆ“ˆˆC h ˆˆ„ˆ‚ˆ
ˆˆ:ˆ ¿¿“¿ˆKwvK pˆ—ˆ:ˆˆ`
13.Im Falle derInstallation von Dazebox C oder
“:ˆ‚2h´ˆ:ˆhˆ¿ˆıˆˆ—ˆoˆh—ˆ
(Ø32 und Ø19 mm) in die M-Bohrungen ein,da sie
nicht verwendet werden.

Totem
15.
HomeT
Dazebox C
Home S

Totem
16.
FR
IT
DE
EN
14. Forare il retro di Dazebox con una fresa conica
tazza Ø32 mm seguendo le illustrazioni nelle
k ˆ“ˆ„“„ ““:ˆ‚2`
15.Applicare nel foro la membrana passacavo
M32 fornita efar passare i cavi provenienti dall’a-
sola B (oppure foro M).
w|`t::“ˆˆ,¿“:ˆˆk“¿
Dazebox:
“:ˆ‚2oˆhk“ˆ “p—ˆk“ˆ
prima le due viti M5x10 con adesivo pre-applicato
ˆ—“w´“,,“¿k““„“ˆ “
¿“:“¿yıı““ˆ“¿ˆ“,ˆˆ“ ˆn -
cie del totem, appendere lawallbox e successiva-
ıˆˆk““„ˆ¿ ˆ,K{2{vııx`
“:ˆ‚2k“ˆˆ—ˆ ::“ˆˆ,
K{2x{ııˆk“`
14. Percer l'arrière de la Dazebox avec une fraise
conique de diamètre Ø32 mm en suivant les illu-
“¿“ˆk ˆ„¿ˆ „“ ˆ
Dazebox.
15.Appliquer la membrane de passage de câble
M32 fournie dans letrou etfaire passerles câbles
provenant de la boucle B (ou dutrou M).
w|`tˆˆ,— ˆ k2ˆ““:ˆ‚2ˆ
Eˆ“:ˆ‚2oˆhk2˜ˆ¿“ˆ “ˆ
ˆk2ˆ¿“‚¿ˆ¿ˆ 2,K{2wv“,ˆ„
adhésif pré-appliqué dans les trous supérieurs
(V1),en vissant jusqu'à ce qu'il reste une distance
¿ˆyııˆˆ“˙ˆ¿ˆ“,ˆ“ n“„ˆ¿ -
ˆı´ ˆ¿ˆ“-“‚2ˆ“k2ˆˆ ˆ“,ˆ„
les deux vis M5x50mm (V2).
E““:ˆ‚2ˆk2˜ˆ¿“ˆ ˆ
ˆˆ,K{2x{ıı “k2“`
14. Drill the backof Dazebox with a Ø32 mm
„„“„ „ pˆ—-ˆ “ˆ
k ˆ“‚,ˆ—ˆ“„“:ˆ‚2`
15. Placethe supplied M32 cable gland membrane
in the hole and feed the cables through from slot
B (or hole M).
16. Use the screws provided to fasten the Daze-
box:
- DazeboxT and S arefastened in thefour
ˆˆk—“ˆˆ-K{2wv„ˆ--
pre-applied adhesive inthe holes at thetop (V1),
screwingthem in until there is a distance of 3 mm
‚ˆ-ˆˆˆ„ˆ-ˆ“¿“¿ˆ n“„ˆ—ˆ
totem,hang the wallbox andthen fasten itwith
the two M5x50mm screws (V2).
- Dazebox C isfastened in thethree holes C: use
the M5x25mm screws forfastening.
14. Bohren Sie die Rückseite der Dazebox mit ei-
nem konischen Schälbohrer Ø32 mm gemäß den
Abbildungen oben fürjede Dazebox.
w{`hˆ:ˆhˆ¿ˆıˆˆ—ˆoˆC“‚ˆ¿ -
chführungsmembran M32 in das Loch ein und
—$ˆhˆ¿ˆC“‚ˆ“ ¿ˆh„“ —ˆ¿ˆ¿ˆı
Loch M) hindurch.
w|`ˆ-ˆ¿ˆhˆ¿ˆıˆˆ—ˆoˆh„“ ‚ˆ
zur Befestigung der Dazebox:
- DazeboxT und S werden in den vierD-Löchern
befestigt: Befestigen Sie zuerst die beiden
K{2wvh„“ ‚ˆı,ˆˆ‚ˆıCˆ‚h
in den oberen Löchern (V1), indem Sie sie so
weit einschrauben,dass ein Abstand von 3 mm
:-„ˆ¿ˆıh„“ ‚ˆ— ¿¿ˆS‚ˆnfi„ˆ
¿ˆoˆı‚ˆ‚`1fiˆhˆ¿ˆ“‚2“ — ¿
befestigen Sie sie anschließend mit den beiden
M5x50 mm-Schrauben (V2).
- Dazebox Cwird in den drei C-Löchern befestigt:
Verwenden Sie die M5x25 mm-Schrauben zur
Befestigung.

Totem
17.
FR
IT
DE
EN
w}`4““ˆ“:ˆ‚2ˆ ˆ¿“pˆ“ıˆˆˆ
istruzioni contenute nel manuale di installazione
di Dazebox.
w~`4ˆıˆıˆpˆ“„ˆØ““:ˆ¿ “
s8conda Dazebox sul retro.In questo caso è
necessario togliere il pannello posteriore svitando
ˆ “p,ˆˆˆˆ“ˆ„ˆ¿ˆ¿“
punto 13 al 17.
w}`4“ˆ““:ˆ‚2ˆ ,““pˆ,ˆıˆ
les instructions contenues dans le manuel d'in-
stallation de la Dazebox.
18.Le totem permet également l'installation
d'une deuxième Dazebox à l'arrière. Dans ce cas,
il est nécessaire de retirerle panneau arrière en
dévissant les quatre vis et de répéter les étapes
précédentes du point 13 au 17.
17. Install Dazebox bycarefullyfollowing the in-
structions in the Dazebox installation manual.
18.The totem also allows the installation ofa Da-
zebox onthe rearpanel. Inthis case it is necessary
to remove the rearpanel by unscrewing the four
screws and repeat steps 13 to 17 above.
17. Installieren Sie die Dazebox sorgfältig gemäß
den Anweisungen im Dazebox-Installationshan-
dbuch.
18.DerTotem ermöglicht auch die Installation ei-
ner zweiten Dazebox aufder Rückseite. In diesem
Fall müssen Sie die Rückwand entfernen,indem
Sie die vierSchrauben lösen,und die vorherigen
h„pˆ,a wy‚w}-ˆ¿ˆˆ`

Pege des Produkts
oˆˆhˆ,“ˆ“o “‚ˆˆ¿ˆ“‚2¿ „ˆfi -
en des Hauptschalters am Schaltschrank vom Stromnetz.Die
“:ˆ‚2 oˆı‚ˆ¿“nˆˆ‚ˆ¿ˆˆ“o `4ı)“ˆ
ˆˆˆ„fi¿ ¿ˆ*ˆfi-ˆ¿ˆhˆ„‚pˆ ıˆˆ¿
“ˆˆ)“„ı“´¿ˆ¿“*ˆfiˆ“ˆo¿ˆ‚ˆˆ““‚ˆ
Schäden die Außerbetriebnahme des Geräts veranlasst.
Reinigen Sie den Ständer nurmit einem feuchtenTuch.Verwenden
Sie keinen Hochdruckreiniger. Verwenden Sie keine alkalischen
Kpˆ´“„ˆ¿ˆE ıpˆ`
Entsorgung
ˆˆı“ˆ¿“n ,ˆˆˆ—“„“—¿ „ˆ—$o
werden.
Die für dieVerpackung dieses Produkts verwendeten Materialien
¿-ˆ¿ˆ,ˆ-ˆo‚“ ¿ı$ˆˆıfi¿ˆˆˆ¿ˆ -
schriften des Landes, in dem das Gerät verwendet wird, entsorgt
werden.
ˆ¿“*ˆfi“ ˆˆˆ‚ˆııˆ-¿´ı$ˆ“ˆCı -
ˆˆ ¿K“ˆ“ˆ¿ˆk:ˆo ¿ˆˆ-ˆ¿ˆ´ ı
ˆ ı-ˆ—ˆ ¿„ˆˆ¿ˆ,ˆ-ˆ¿ ¿˛¿ˆdˆ„3„
: ˆı„ˆ`ˆˆˆ4—ı“ˆ$‚ˆ¿ˆ“ ˆˆ -
ı„ˆˆ¿‚ˆ¿ˆo„ˆˆ¿ˆˆfi„`
ˆCˆ:ˆ„ “ —a¿ ˆ ¿˛¿ˆˆ“„ ˆ‚ˆ -
deutet, dass DazeTechnology S.r.l. die entsprechendentechnischen
Unterlagen fürdie EU-Behörden bereithält.
ˆˆˆ:„ˆˆoˆˆ´¿ˆ““ıˆ
Entretien du produit
Avant toute opération d'entretien, débranchez la wallbox en action-
“ˆ ˆ ˜˜“¿ˆ“ıˆ˜ˆ„ ˆ`Eˆ oˆı
“:ˆ‚2ˆ˜„ˆˆ“¿ˆˆˆ“o„ ˆ`„“¿ˆ¿ı -
magement de l'appareil,faites appel rapidement à un technicien
spécialisé pour le réparer ou, en cas de dommages irréparables,
ˆıˆpˆˆ,„ˆ`
Lˆp3ˆ:ˆ o ˆıˆ“,ˆ„ „h ı¿ˆ`Lˆ“
utiliser de jets d'eau à haute pression. Ne pas utiliserd'agents
alcalins, de cires ou de solvants.
Mise au rebut
Eˆ˜“¿ˆ¿˜ı“ˆ¿,ˆ˙ˆˆhˆ„ ˜ˆ“
˜ˆ„„ˆ “k˜`
Les matériaux utilisés pourl'emballage de ce produit sont
recyclables et doivent être éliminés conformément à la réglement-
ation en vigueurdans le pays d'utilisation.
Lors de la mise hors service de l'équipement, tous les composants
ˆı“˜“ 2¿,ˆ˙ˆ¿ˆk˜ˆ˜“˜“k¿ˆˆıˆpˆ
leur réutilisation et/ou leurrecyclage dans le respect de l'environ-
nement. De plus amples informations sur les installations d'élimin-
ation actuelles peuvent être obtenues auprès des autorités locales.
Eˆı“ “ˆ ˆ¿ ˆ˛ ˆˆı‚““ˆkˆ ˆ
“:ˆoˆ„3h```ˆˆ¿ˆˆ„ ˆˆoˆ“
disposition des autorités de l'UE.
Le représentant légal,Andrea Daminelli
Cura del prodoo
Prima di intervenire per qualunque operazione di manutenzione,
scollegare la wallbox dalla linea di alimentazione, azionando l’inter-
pˆ„“ˆ Ø“ı“¿ˆˆp„`
4ˆı o¿“:ˆ‚2ˆ„ˆ“¿ı“ ˆ:ˆ“o -
colare.In caso di apparecchio danneggiato chiamare intempi rapidi
un tecnico specializzato perché proceda alla riparazione o, in caso
di danno irreparabile, predisponga l’eventuale messa fuori servizio
dell’apparecchio.
a ˆ o“ıˆˆ„ “ ı¿`L “ˆˆp
d’acqua ad alta pressione. Non usare agenti alcalini, cere o solventi.
Smaltimento
Per eseguire le operazioni di smantellamento è necessario un elet-
„“ “k„“`
4ı“ˆ“ “ˆØı‚““¿ ˆ¿p„„“‚
e devono essere smaltiti in accordo con le normative in vigore nel
Paese di utilizzo.
c “¿Ø“““,ˆˆ¿ıˆ p„ıˆˆı“ˆ“
¿ˆ,ˆˆˆ¿ˆk„“ˆˆ““ˆ„ˆˆ ::
ˆ˛„„ˆˆp¿ˆØ“ı‚ˆˆ`tˆ—ı“: “ -
tuali impianti di smaltimento possono essere richieste alle autorità
locali.
E“ı“„“ “ ¿pˆ˛ ı‚““k„“„ˆ“:ˆ -
Technology S.r.l. tiene a disposizione delle autorità dell’Unione Euro-
pea i relativi fascicoli tecnici.
Il Legale Rappresentante,Andrea Daminelli
Product Care
Before carrying out any maintenance work, disconnect the wallbox
from the power supply by operating the main switch on the electri-
„“„“‚ˆ`oˆ“:ˆ‚2 oˆı¿ˆˆ ˆ“3ˆ„“
maintenance. In the event of a damaged appliance, call a specialist
technician as soon as possible to repair it or, in the event of irrepa-
rable damage,to arrange forthe appliance to be taken out of servi-
ce.Cleanthe stand with a damp cloth only. Do not use high pressure
water jets. Do not use alkaline agents,waxes orsolvents.
Disposal
“kˆ¿ ˆˆ„„“ ˆ ˆ¿ „“3 ¿ı“ ˆ -
rations.The materials used for the packaging of this product are
recyclable and must be disposed of in accordance with the regu-
“—„ˆˆ„ 3— ˆ`ˆˆˆ ıˆ¿ˆ -
„ııˆ¿´ “ „ıˆ “¿ ı“ˆ“ ı ‚ˆ ¿ˆkˆ¿
and separated to enable their environmentally friendly reuse and/
ˆ„3„`) oˆ—ı“„ ˆ¿“—“„ˆ„“‚ˆ
obtained fromthe local authorities.
CE marking on products and/or packaging means that DazeTechno-
3h```ˆˆˆˆˆ,“ˆ„„“kˆ“,““‚ˆ—ˆ“ -
ties ofthe European Union.
The Legal Representative,Andrea Daminelli
IT EN
FR DE


+39 035 1983 1355
info@daze.eu
Daze HQıˆh““oıˆˆ“ı´4“3
daze.eu
+34 911 47 60 74
contacto@daze.eu
Daze Ibérica - San Sebastián de los Reyes - Madrid Spain
Table of contents
Other DazeTechnology Batteries Charger manuals