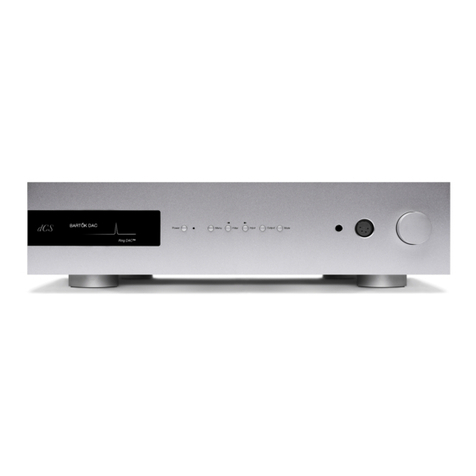
DCS Elgar Plus User manual

© dCS Ltd. 1999 - 2004 Price UK £17.50 / Euro 25.00
All rights reserved. No part of this publication may be reproduced, stored in or
introduced into a retrieval system, or transmitted in any form, or by any means
(electronic, mechanical, photocopying, recording or otherwise) without the prior
written permission of dCS1. Any person who does any unauthorised act in
relation to this publication may be liable to criminal prosecution and civil claims
for damages.
Information contained in this manual is subject to change without notice, and
whilst it is checked for accuracy, no liabilities can be accepted for errors.
1dCS is Data Conversion Systems Ltd. Company registered in England No. 2072115.
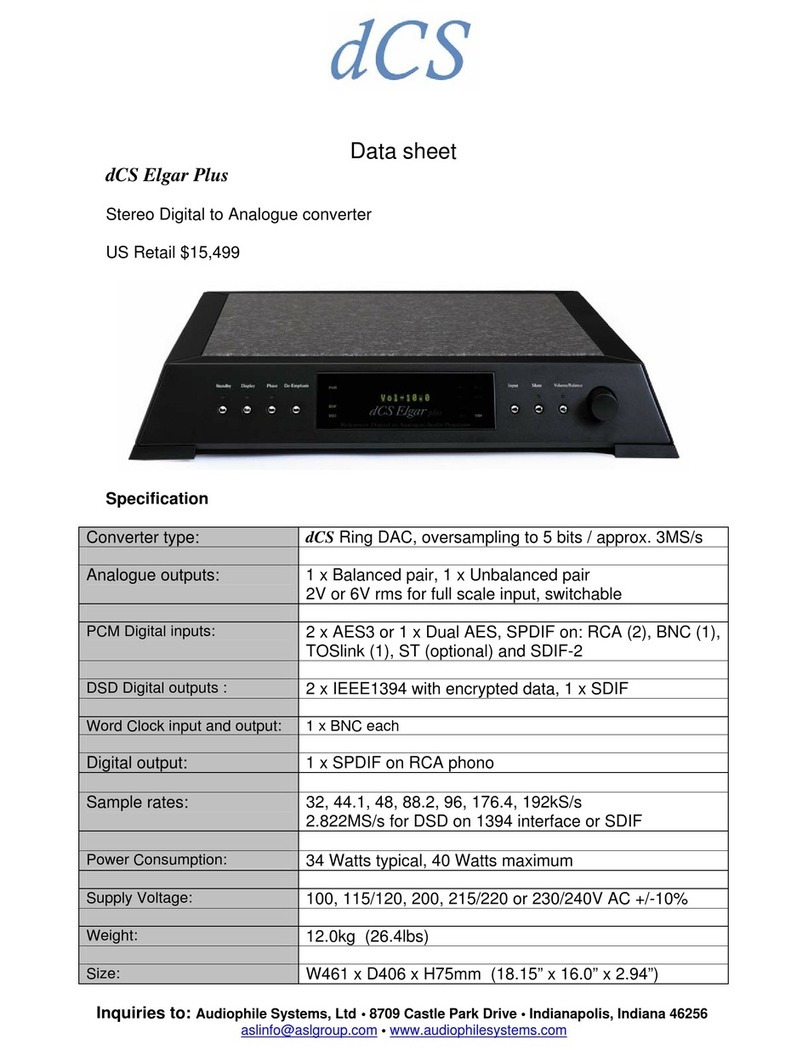
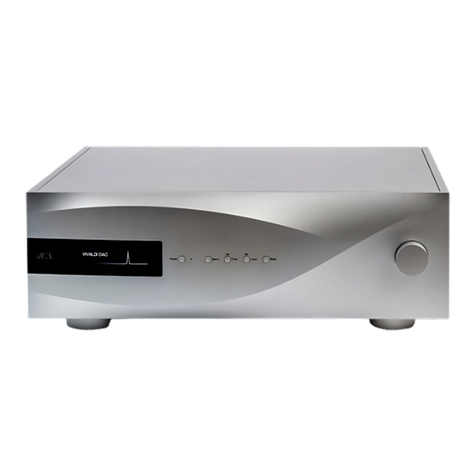
dCS Elgar Plus
Stereo Digital to Analogue Converter
User Manual
Software Release 4.4x
August 2005

dCS Elgar Plus User Manual Manual for Software Issue 4.3x
dCS Ltd August 2005
English version web-site: www.dcsltd.co.uk

dCS Elgar Plus User Manual Manual for Software Issue 4.3x
dCS Ltd August 2005
English version web-site: www.dcsltd.co.uk
PRODUCT OVERVIEW
The dCS Elgar Plus is derived from our award winning dCS Elgar, the world’s
first 24/96 and 24/192 audiophile D/A converter. Elgar Plus offers many
improvements over the standard Elgar, the most important being the ability to
handle DSD from IEEE 1394 or SDIF-2 interfaces, the ability to slave to a Word
Clock or act as a Master Clock, a digital output and a substantially expanded
Function Menu.
All dCS DACs feature our patented dCS Ring DAC technology. This unveils the
intricate low level musical detail that is dCS’ hallmark.
Elgar Plus will accept digital data at 44.1kS/s from your CD player and
interpolate the 16 bits, giving your CD collection a new lease of life. Elgar Plus
will also convert 24 bit 96kS/s data from DVD players, revealing the increased
depth and spaciousness inherent in the more complex source information. With
the current software version, Elgar Plus also has the ability to act as a master
clock for your transport, increasing the clocking precision of the overall system.
Units fitted with the IEEE 1394 interface option can convert DSD data (a single
bit data stream, sampled at 2.822MS/s) from a suitably equipped Upsampler or
SACD player to extra wide-band audio, taking advantage of the extended
bandwidth inherent in the DSD format.
All dCS DACs use the same digital processing engine running the same DSP
code.The extensive use of programmable logic makes dCS products extremely
flexible and easy to upgrade. You can load updated Elgar Plus software from a
dCS CD using a CD player, or dCS service agents can download software to the
SUC port, using a PC.

dCS Elgar Plus User Manual Manual for Software Issue 4.3x
dCS Ltd August 2005
English version web-site: www.dcsltd.co.uk
CONTENTS
Product Overview..............................................................................................3
Contents.............................................................................................................4
About this Manual 7
What does the coloured text mean? 7
About Sample Rates x7
Step-by-Step Guide ...........................................................................................8
Preliminaries 8
Step 1 – Selecting a Digital Input 9
Connecting to a Single AES or SPDIF source 9
Connecting to a Dual AES Source x9
Connecting to an IEEE 1394 DSD Source 9
Connecting to an SDIF/DSD Source 9
Step 2 – Connecting the Analogue Outputs 11
Using a preamplifier x11
Using a power amplifier directly x11
Step 3 - Setting the Output Level 12
Step 4 - Using Elgar Plus in Master Mode 13
Other Settings 13
Typical Applications........................................................................................14
Using an Elgar Plus in Master Mode with Verdi 14
Using Elgar Plus and a 1394-Equipped Purcell with Verdi 15
Using Elgar Plus with a Standard Purcell and a CD Player 16
The Software – The Menu...............................................................................18
Using the Function Menu 19
Opening the Menu 19
Types of Menu Page 19
Closing the Menu 19
Menu Sequence 20
Filter – Anti-Imaging Filter Setting 20
Selecting a Filter x20
MS – Master/Slave Operation 21
Setting to Master Mode x21
Mute - Mute Fade Time 22
Fade – Fade Behaviour After Re-Lock 22
Dual AES – Dual AES Mode 23
Swap - Swap Channels 24
Disp - Default Display 24
Bal Mode - Balance Information Display 24
Global – Global/Local Volume 24
TimeOut – Menu Time Out Setting 25
PLL - PLL Tracking bandwidth 25
NAud - Non Audio Muting 26
Override Non-Audio Muting x26
Disabling Non-Audio Muting x26
Restoring Non-Audio Muting x26
Ch.Check - Channel Check Test 27
Ph.Check - Phase Check Test 27
Burn In - Burn-In Signal Generation 28
Test - Display Test 28
Issue – Software Issue State 29
Temp – Unit Internal Temperature 29
Serial – Unit Serial Number 29
Contact - Contact information 29
CDUpdate – Software Update By CD 30
Factory – Restoring Factory Defaults 32
Rst Sync – Setting all Inputs to Slave Mode 32

dCS Elgar Plus User Manual Manual for Software Issue 4.3x
dCS Ltd August 2005
English version web-site: www.dcsltd.co.uk
The Hardware – Controls and Connectors ...................................................34
Front Panel 34
Key to Front Panel 34
Standby Button x34
Display button (Menu Step)35
Phase button x35
De-Emphasis button x35
Status Indicator x36
Remote Control Sensor x36
Main Display x36
Input Button and Input Indicator x37
Mute Button x37
Volume / Balance button (Menu Select)37
Rotary Control x37
Rear Panel 38
Key to Rear Panel 38
Output Level Switch 38
Balanced Analogue Outputs 39
Unbalanced Analogue Outputs 39
AES/EBU Digital Inputs 39
SPDIF Digital Inputs 39
Toslink and ST Optical Inputs 39
REC Digital Output 40
1394 Interface 40
DSD / SDIF Interface 40
Wordclock Digital Output 41
SUC 41
IEC Power Inlet 41
Mains Fuse 41
Additional Information 41
Remote Control 42
Standby Button 42
Function Button 42
Input Selector Buttons 43
Vol/Bal Button 43
Mute Button 43
Purcell Button and LED 43
Phase Button 43
Filter Button 43
Display button 43
Up and Down (↑/ ↓)buttons 43
Elgar Plus Technical Information ....................................................................44
Converter Type 44
Digital Interface Specifications 44
Sample Rates 45
Frequency Response (set to Filter 1) 45
Volume Control 46
Balance Control 46
De-Emphasis 46
Analogue Outputs 46
Clocking 46
Synchronising to source x46
Power requirements 47
Size and Weight 47
Operating Conditions 47
General Technical Information.......................................................................48
IEEE 1394 Overview 48
Synchronising IEEE 1394 interfaces 48
Automatic Input Selection 48
dCS IR Remote Control Codes 50
Upsampler 50
DACs 51
Transports 52

dCS Elgar Plus User Manual Manual for Software Issue 4.3x
dCS Ltd August 2005
English version web-site: www.dcsltd.co.uk
Using your dCS Purcell for the first time ........................................................54
What’s in the Box? 54
Safety Notice 54
Mains Voltage Setting 55
Positioning the Unit 55
Options.............................................................................................................56
Mains Supply Voltage 56
Having Your Options Changed 56
Maintenance and Support...............................................................................58
Service & Maintenance 58
Obtaining Service 58
Mains Fuse 58
Replacing a Blown Fuse x58
Fitting or Replacing the Batteries in the Remote Control 59
Opening the battery compartment and removing batteries 59
Fitting new batteries and closing the case 59
dCS Limited Warranty 60
What This Warranty Covers 60
What This Warranty Does Not Cover 60
How To Obtain Service 60
Updating your Purcell 61
Software Updates x61
Hardware Updates x61
Safety and Electrical Safety 62
Cleaning the Case 62
Troubleshooting ..............................................................................................64
Fault Indication 64
Power interruption 64
Power up test errors 64
Non-Audio disk 64
The unit is overheating 64
Troubleshooting Guide 65
The unit fails to power up 65
The unit fails to lock to a digital audio source or displays “No Input” 65
The unit locks but the audio output is low or absent 65
The output is monophonic 65
The unit fails to respond to the controls 66
The Main Display turns on briefly when a control is operated, then turns off 66
The Left and Right channels are swapped 66
One audio output channel is low or absent 66
The sound has a peculiar tonal balance 66
Crackles or pops occur while playing music 66
Erratic operation when locked to 96 or 88.2kS/s on Toslink or ST inputs 67
The unit will not decode Dual AES 67
The unit drops out of Dual AES mode into AES1 or AES2 67
A digital recorder fails to record from the REC Output 67
The Remote Control fails to control the unit 68
While playing a DVD, a burst of noise is heard, Elgar Plus mutes and changes
sample rate 68
CD Update is interrupted or fails 68
CD Update is interrupted and fails to recover 68
Troubleshooting the IEEE 1394 Interface 69
Upsampler or Transport displays “Inactive”69
The Unit keeps displaying “No Comms” 69
The Unit keeps displaying “Search..” 69
The DAC displays “Verdi Wordclock Missing” 69
The DAC displays “Missing Wordclock between Clk Out & Verdi Clk In” 69
The DAC displays “Please check source slaved to DAC Wordclock Out” 69
The DAC displays “Wrong Wordclock @ Verdi Clk In” 69
The DAC remains muted 70
The DAC takes a long time to unmute 70
If You Need More Help ....................................................................................71
Other Information 71

dCS Elgar Plus User Manual Manual for Software Issue 4.3x
dCS Ltd August 2005
English version web-site: www.dcsltd.co.uk
Indexes and Software Version Numbers.......................................................72
Software History 72
Definitions and Abbreviations 73
Key to Cable Identification 74
List of Tables 75
List of Figures 75
Keywords and Phrases 76
About this Manual
If you have not used a Elgar Plus before, please read the section “Using your
dCS Elgar Plus for the first time” on page 54.
This manual has been arranged with the most commonly used sections placed
first:
•table of contents (page 4)
•step-by-step (page 8) and applications guides (page 14)
•detailed software and hardware information (page 18)
•technical information (page 44)
•information for first time users (page 54)
•options, maintenance and troubleshooting (page 56)
•index section (page 72)
What does the coloured text mean?
If you are reading a colour print or a soft copy of this manual, you will notice that
some types of text are in colour:
•Brown text in bold is a reference to another section or page. Sometimes, if
you are reading a soft copy of the manual, page numbers are hyperlinks –
click on them and you will go there.
•Blue text is used for controls and connectors, described in the hardware
section.
•White text in bold on black is used for alternative control functions, such
as menu operation.
•Pink text is a menu page or setting.
•Green text in bold shows what appears on the display.
•Purple text in bold is used for indicators.
IMPORTANT! Important information is presented like this - ignoring this may cause you to
damage the unit, or invalidate the warranty.
The manual is designed to be helpful. If there are points you feel we could cover
better, or that we have missed out - please tell us.
About Sample Rates x
All references to sample rates in this manual use the unit kS/s (kilo Samples per
second) rather than the technically incorrect kHz.

dCS Elgar Plus User Manual Manual for Software Issue 4.3x
dCS Ltd August 2005
English version web-site: www.dcsltd.co.uk
STEP-BY-STEP GUIDE
This section guides you through setting up the unit for basic operation. You may
find this useful if you have not used the Elgar Plus for a while.
Preliminaries
The Control Summary sheet details the menu structure and outlines the use of
the front panel controls. For more information, see the Function Menu section
on page 18.
For digital interfaces, use with cables designed for digital audio:
•for AES/EBU interfaces use 110Ωscreened, twisted pair cables fitted with
one male XLR connector and one female XLR connector.
•for SDIF, Wordclock or SPDIF BNC interfaces, use 75Ωcoax cables fitted
with BNC plugs.
•for SPDIF RCA interfaces, use 75Ωcoax cables fitted with RCA Phono
plugs.
•for TOSLINK optical interfaces, use Toslink fibre-optic cables.
•for ST optical interfaces, use ST style fibre optic cables.
•for IEEE 1394 interfaces, use the IEEE 1394 cable provided with the unit.
For analogue inputs / outputs, use with screened cables of the correct type:
•for balanced inputs / outputs, use screened, twisted pair cables fitted with
one male XLR connector and one female XLR connector.
•for unbalanced inputs / outputs, use coax cables fitted with RCA Phono
plugs.
do this: Connect the power cable supplied to the power inlet on the Elgar Plus rear
panel, plug the other end into a convenient power outlet.
IMPORTANT! Please do not use an excessively thick power cable as this may damage the
power inlet connector.
do this: Press the Standby button and wait about 30 seconds while Elgar Plus
configures itself.
The display will show in sequence: Elgar +, Testing ... and No Input.
If the unit is likely to be set in an unfamiliar state, you can reset it as follows:
do this: Hold down the Display button and press the Vol/Bal button to open the menu,
then press the Display button repeatedly until the display shows Factory.
Press the Vol/Bal button and wait while the unit reboots.
The PWR, MUTE and one of the input indicators will be lit.

dCS Elgar Plus User Manual Manual for Software Issue 4.3x
dCS Ltd August 2005
English version web-site: www.dcsltd.co.uk
Step 1 – Selecting a Digital Input
Switch on the source equipment. If appropriate, load a disk / tape and set the
machine in PLAY mode to ensure it is generating a digital audio data stream.
Choose one of the following sections:
Connecting to a Single AES or SPDIF source
Most source equipment (such as CD transports, DVD players) is fitted with a
single wire digital output, usually on an RCA phono connector.
do this: Connect your source equipment to the matching input on the Elgar Plus rear
panel using a suitable cable.
do this: Press the Input button repeatedly until your chosen input is displayed on the
input indicator, to the right of the display. This will be either AES 1, AES 2,
RCA1, RCA2, TOS, ST or BNC.
The unit will lock to the source, displaying in sequence Locking, d xxx (the
sample rate) then the default display (probably 16/44, depending on the Disp
menu setting and the source format).
Connecting to a Dual AES Source x
do this: Check that your source equipment is capable of Dual AES operation.
do this: Connect the AES 1 (or AES A) output on your source equipment to the AES 1
input on the Elgar Plus rear panel and the AES 2 (or AES B) output to the
AES 2 input, using two XLR cables. Ensure the cables are not swapped.
do this: Press the Input button repeatedly until both AES 1 AND AES 2 input indicators
are lit.
The unit will lock to the source, displaying in sequence Locking, d xxx (the
BASE sample rate) then the default display (probably 24/192 depending on the
Disp menu setting and the source format).
Connecting to an IEEE 1394 DSD Source
do this: Check that your source equipment (probably a dCS SACD Transport or a dCS
Upsampler) is capable of DSD operation over a 1394 link, generates a 44.1kHz
wordclock and is set up correctly.
do this: Connect one 1394 output on your source equipment to one 1394 input on the
Elgar Plus rear panel. Also connect the wordclock output on your source
equipment to the Wordclock In connector on the Elgar Plus rear panel.
do this: Press the Input button repeatedly until the 1394 input indicator is lit.
The unit may display Wait ..., No-WClk or Search.., messages before finally
settling down to the source name (probably Verdi or Purcell). If necessary, use
the Input button to select the 1394 source you want to listen to. You may find
Elgar Plus settles more quickly if you set it to 1394 mode before setting the
source to DSD mode (or switching the source on).
Connecting to an SDIF/DSD Source
do this: Check that your source equipment is capable of SDIF PCM or DSD operation.
do this: Connect the CH1 output on your source equipment to the CH1 input on the
Elgar Plus rear panel and the CH2 output to the CH2 input, using two BNC
cables. Connect the Wordclock output on your source equipment to the
Wordclock In connector on the Elgar Plus rear panel. Ensure the cables are not
swapped.
do this: Press the Input button repeatedly until either the SDIF or DSD input indicators
(to the left of the display) are lit.

dCS Elgar Plus User Manual Manual for Software Issue 4.3x
dCS Ltd August 2005
Manual filename: Elgar Manual v4.4x.doc Page 10 email: more@dcsltd.co.uk
English version web-site: www.dcsltd.co.uk
PCM or DSD mode is automatically detected. The unit will lock to the source,
displaying in sequence Locking, d xxx (the BASE sample rate) then the default
display (probably 16/44.1 or DSD depending on the Disp menu setting and the
source format).
do this: Proceed to Step 2.

dCS Elgar Plus User Manual Manual for Software Issue 4.3x
dCS Ltd August 2005
Manual filename: Elgar Manual v4.4x.doc Page 11 email: more@dcsltd.co.uk
English version web-site: www.dcsltd.co.uk
Step 2 – Connecting the Analogue Outputs
Choose one of the following two sections:
Using a preamplifier x
do this: Set the preamplifier volume control to minimum.
do this: Connect either the balanced (XLR connectors) or unbalanced (RCA phono
connectors) outputs on Elgar Plus rear panel to matching line level inputs on
your preamplifier (probably labelled CD or AUX).
do this: Turn Elgar Plus rotary control clockwise to set the Volume to maximum (Vol 0.0
on the display).
do this: Slowly increase the preamplifier volume until the music is at the right level.
Using a power amplifier directly x
do this: Turn Elgar Plus rotary control counter-clockwise to set the Volume to minimum
(Vol -60.0 on the display).
do this: Connect either the balanced (XLR connectors) or unbalanced (RCA phono
connectors) outputs on Elgar Plus rear panel to matching inputs on your power
amplifier. Switch on the power amplifier.
do this: Turn Elgar Plus rotary control slowly clockwise until the music is at the right
level.
IMPORTANT! If you connect the Elgar Plus directly to a power amplifier, DO NOT use the
Burn-In routine while the power amplifier is switched on with the
loudspeakers connected as this may cause loudspeaker damage.
A basic setup with a CD player is shown below.
do this: Proceed to Step 3.
16 bit / 44.1kS/s
LR
Balanced
Outputs
Unbalanced
Outputs
- or -
LR
To Power Amplifier or Preamplifier
Elgar Plus
PUSH PUSH
L R OUTPUT
LEVEL
HIGH
LOW
L
R
AES 1 AES 2 RCA1 ST
TOSLINKRCA2
CH1
DSD / SDIF
REC OUT
SUC POWER
1394
CH2
IN - WORDCLOCK - OUT
BNC
AB
DIGITAL OUT
L
R
Hand Crafted by
The Red Hot CD Player Co.
Figure 1 – Basic setup with a CD player

dCS Elgar Plus User Manual Manual for Software Issue 4.3x
dCS Ltd August 2005
Manual filename: Elgar Manual v4.4x.doc Page 12 email: more@dcsltd.co.uk
English version web-site: www.dcsltd.co.uk
Step 3 - Setting the Output Level
If the preamplifier volume setting for a comfortable listening level is too high or
too low, you may need to change the Output Level setting. Similarly, if you are
driving a power amplifier directly and Elgar Plus Volume setting for a
comfortable listening level is higher than –10.0 or lower than –20.0 try changing
the Output Level setting.
do this: The Output Level switch is located on the back panel. If the Volume setting is
too high, set it to the Low position. If the Volume setting is too low, set it to the
High position.
PUSH PUSH
LROUTPUT
LEVEL
HIGH
LOW
L
R
AES 1 AES 2 RCA1 ST
TOSLINKRCA2
CH1
DSD / S DIF
REC OUT
SUC POWER
1394
CH2
IN - WORDCLOCK - OUT
BNC
AB
Figure 2 – Output Level switch

dCS Elgar Plus User Manual Manual for Software Issue 4.3x
dCS Ltd August 2005
Manual filename: Elgar Manual v4.4x.doc Page 13 email: more@dcsltd.co.uk
English version web-site: www.dcsltd.co.uk
Step 4 - Using Elgar Plus in Master Mode
If your CD transport (or other source equipment sampling at 44.1kS/s) has a
Wordclock input, you can reduce the jitter in your system by using Elgar Plus in
Master mode and slaving the source to it. If not, you can miss out this step.
IMPORTANT! You can only use Master Mode if your source sample rate is 44.1kS/s.
do this: Connect Elgar Plus Wordclock Out connector to the wordclock input on the
source equipment. You may need to set the source equipment to slave to
wordclock.
do this: Hold down the Display button and press the Vol/Bal button to open the menu,
then repeatedly press the Display button until the display shows MS:Slav.
Press the Vol/Bal button repeatedly until the display changes to MS:Mastr.
do this: Allow the menu to time-out.
IMPORTANT! If you are using an Upsampler, this MUST be set to convert a 44.1kS/s source
to either 44.1kS/s, 88.2kS/s, 176.4kS/s or DSD. If not, Elgar Plus will be
unable to lock.
The equipment will take several seconds to re-lock and settle down, then Elgar
Plus will unmute.
A Master mode setup using a CD player is shown below.
16 bit / 44.1kS/s
LR
Balanced
Outputs
Unbalanced
Outputs
- or -
LR
To Power Amplifier or Preamplifier
Elgar Plus
PUSH PUSH
L R OUTPUT
LEVEL
HIGH
LOW
L
R
AES 1 AES 2 RCA1 ST
TOSLINKRCA2
CH1
DSD / SDIF
REC OUT
SUC POWER
1394
CH2
IN - WORDCLOCK - OUT
BNC
AB
DIGITAL OUT
L
R
Hand Crafted by
The Red Hot CD Player Co.
WORDCLOCK
44.1kHz Wordclock
Figure 3 – Using Master Mode with a CD player
Other Settings
The basic set-up procedure is complete. Many more features are available
through the Menu. See the Menu section starting on page 18 for more
information.

dCS Elgar Plus User Manual Manual for Software Issue 4.3x
dCS Ltd August 2005
Manual filename: Elgar Manual v4.4x.doc Page 14 email: more@dcsltd.co.uk
English version web-site: www.dcsltd.co.uk
TYPICAL APPLICATIONS
Using an Elgar Plus in Master Mode with Verdi
This setup allows you to play SACDs through the 1394 interface and CDs
through the AES1 interface, with Elgar Plus in Master Mode.
LR RL
Balanced
Outputs
To Power Amplifier or Preamplifier
Unbalanced
Outputs
- or -
1394
cable
PUSH PUSH
L R OUTPUT
LEVEL
HIGH
LOW
L
R
AES 1 AES 2 RCA1 ST
TOSLINKRCA2
CH1
DSD / SDIF
REC OUT
SUC POWER
1394
CH2
IN - WORDCLOCK - OUT
BNC
AB
dCS Elgar Plus DAC
BNC
cable
IN - WORDCLOCK - OUT
CH1
RCA TOSLINK
AES 1 BNC ST
1
SUC
1394
SDIF
AES 2 AES 3 CH2
CAUTION: VISIBLE AND INVISIBLE
LASER RADIATION. WHEN OPEN,
DO NOT STARE INTO BEAM.
CLASS 1
LASER PRODUCT
dCS Verdi SACD Transport
XLR
cables
RCA phono
cables
XLR
cable
Figure 4 - Using Elgar Plus in Master Mode with Verdi
do this: Connect up as shown above.
do this: Open Elgar Plus’ menu and run the Factory routine. Use the Input button to
select the AES 1 input. Set the MS page to MS:Mastr and wait for the unit to
settle.
do this: Use the Input button to select the 1394 input wait for the unit to settle. Set the
MS menu page to MS:Mastr and wait for the unit to settle again.
do this: Use the Input button to select the AES1 input for playing CDs or the 1394
interface for playing SACDs.
Verdi v1.2x with Elgar Plus v4.2x will automatically select the right input.
do this: Use the Volume control to set a comfortable listening level. Open the menu
again and choose a different Filter if you wish.

dCS Elgar Plus User Manual Manual for Software Issue 4.3x
dCS Ltd August 2005
Manual filename: Elgar Manual v4.4x.doc Page 15 email: more@dcsltd.co.uk
English version web-site: www.dcsltd.co.uk
Using Elgar Plus and a 1394-Equipped Purcell with Verdi
This setup allows you to play SACDs and CDs through the 1394 interface,
upsampling2the CDs to DSD with a Purcell.Elgar Plus is in Master Mode.
LR RL
Balanced
Outputs
To Power Amplifier or Preamplifier
Unbalanced
Outputs
- or -
dCS Purcell Upsampler
1394
cable
DIGITAL INPUTS DIGITAL OUTPUTS POWER
1
RCA
BNC
AES RCA
BNC
AES1 AES2
PUS H
SUC
1394
OPTION
TOSLINK
ST AB
IN
WORDCLOCK
OUT
XLR
cable
PUSH PUSH
L R OUTPUT
LEVEL
HIGH
LOW
L
R
AES 1 AES 2 RCA1 ST
TOSLINKRCA2
CH1
DSD / SDIF
REC OUT
SUC POWER
1394
CH2
IN - WORDCLOCK - OUT
BNC
AB
dCS Elgar Plus DAC
IN - WORDCLOCK - OUT
CH1
RCA TOSLINK
AES 1 BNC ST
1
SUC
1394
SDIF
AES 2 AES 3 CH2
CAUTION: VISIBLE AND INVISIBLE
LASER RADIATION. WHEN OPEN,
DO NOT STARE INTO BEAM.
CLASS 1
LASER PRODUCT
BNC
cable
dCS Verdi SACD Transport
1394
cable
XLR
cables
RCA phono
cables
Figure 5 - Using Elgar Plus in Master Mode with Verdi and Purcell
do this: Connect up as shown above.
do this: Open Elgar Plus’ and Purcell’s menu and run the Factory routines.
do this: Purcell set-up: Use the Input button to select the AES 1 input. Use the Output
button to select 44.1→
→→
→DSD.
do this: Elgar Plus set-up: Use the Input button to select the 1394 input and wait for the
unit to settle. Set the MS menu page to MS:Mastr and wait for the unit to settle
again. Use the Input button to select either the SACD feed (Verdi) or the
upsampled CD feed (Purcell).
Verdi v1.2x with Elgar Plus v4.2x will automatically select the active input.
do this: Use the Volume control to set a comfortable listening level. Open the menu
again and choose a different Filter if you wish.
2Yes, we know it should have no effect.

dCS Elgar Plus User Manual Manual for Software Issue 4.3x
dCS Ltd August 2005
Manual filename: Elgar Manual v4.4x.doc Page 16 email: more@dcsltd.co.uk
English version web-site: www.dcsltd.co.uk
Using Elgar Plus with a Standard Purcell and a CD Player
If your Purcell is not 1394-equipped, you can still upsample the output from a
standard CD player to 24 bit 192kS/s.
LR RL
Balanced
Outputs
To Power Amplifier or Preamplifier
Unbalanced
Outputs
- or -
dCS Purcell Upsampler
DIGITAL INPUTS DIGITAL OUTPUTS POWER
1
RCA
BNC
AES RCA
BNC
AES1 AES2
PUSH
SUC
1394
OPTION
TOSLINK
ST AB
IN
WORDCLOCK
OUT
RCA phono
cable
PUSH PUSH
LROUTPUT
LEVEL
HIGH
LOW
L
R
AES 1 AES 2 RCA1 ST
TOSLINKRCA2
CH1
DSD / SDIF
REC OUT
SUC POWER
1394
CH2
IN - WORDCLOCK - OUT
BNC
AB
dCS Elgar Plus DAC
BNC
cable
XLR
cables
RCA phono
cables
DIGITAL OUT
L
R
Hand Crafted by
The Red Hot CD Player Co.
XLR
cables
Figure 6 - Using Elgar Plus with Purcell and a CD player
do this: Connect up as shown above.
Purcell setup:
do this: Open the menu and run the Factory routine. You can connect any of Purcell’s
digital inputs to the CD player - use Purcell’s Input button to select it. Use the
Output button to set the 44.1→
→→
→192 conversion.
Elgar Plus setup:
do this: Open the menu, run the Factory and RstSync routines. Use the Input button to
select AES 1 AND AES 2 inputs. Use the Volume control to set a comfortable
listening level. Open the menu again and choose a different Filter if you wish.

dCS Elgar Plus User Manual Manual for Software Issue 4.3x
dCS Ltd August 2005
Manual filename: Elgar Manual v4.4x.doc Page 17 email: more@dcsltd.co.uk
English version web-site: www.dcsltd.co.uk

dCS Elgar Plus User Manual Manual for Software Issue 4.3x
dCS Ltd August 2005
Manual filename: Elgar Manual v4.4x.doc Page 18 email: more@dcsltd.co.uk
English version web-site: www.dcsltd.co.uk
THE SOFTWARE – THE MENU
To open the Menu, hold down "Vol / Bal" and press "Display".
To page through the Menu, press "Display".
To select, display or change an option, press "Vol / Bal".
Menu Filter x Master/Slave Mute: Fade Dual AES
First page of the
Menu
Selects an optional
filter if available
Changes the
behaviour of the
selected input
Sets the Mute fade-
out rate
Audio fades up
during unmuting
after relock
Enables Dual AES
operation
Filter 1 MS:Mast Mute:Nor Fade:On Off
Filter 2 MS:Slav Mute:Fst Fade:Off On
.... MS:Sync Mute:Slw Auto
Filter n Lock
PLL TimeOut Global Bal mode Disp Swap
Sets the PLL
tracking bandwidth
Sets the Function
Menu time-out
delay
Stores global or
input-related
settings
Sets the balance
display mode
Sets the default
display
Reverse the Left
and Right outputs
PLL:Fine Normal Vol:Glob Bal:Bar Disp:Vol Swap:Off
PLL:Wide Long Vol:Inp Bal:Num Disp:Fs Swap:On
Bal:dBs Disp:Fs+
Disp:Inp
NAud Ch.Check Ph.Check Burn In Test Issue
Controls muting
when receivin
g
non
-
audio data
(
e.
g
. CD
-
ROM)
Outputs tone on L
channel onl
y
then R
channel only
Outputs noise on
both channels then
inverts R
Outputs modulated
pink noise to burn-
in your system
Runs a display test
routine
Displays the
software version
number
CAUTION! LOUD!
NAud:Mut 4.3x
NAud:Ign Db 2.06
Use with care!
Rst Sync Factory CDUpdate Contact Serial Temp
Resets all inputs to
Slave mode
Restores standard
factory settings
Starts software
update from a dCS
CD
Displa
y
s dCS email
address
Displays the unit
full serial number
Displays the
internal
temperature
ELG-?-?-?-?-? Celsius
Fahrenheit
End
Closes the Function
Menu
= feature is not available in DSD mode
Figure 7 – Function Menu flow chart

dCS Elgar Plus User Manual Manual for Software Issue 4.3x
dCS Ltd August 2005
Manual filename: Elgar Manual v4.4x.doc Page 19 email: more@dcsltd.co.uk
English version web-site: www.dcsltd.co.uk
Using the Function Menu
The Function Menu gives the user access to a wide range of additional
features. It also allows new features and performance enhancements to be
added at a later date by software upgrades.
Opening the Menu
The Function Menu is controlled by two buttons:
•press Vol/Bal and Display buttons at the same time to open the Menu.
•the Vol/Bal button doubles as the Select button.
•the Display button pages forward through the Menu - the Step button.
If you have a dCS Remote Control, you can use this to access the menu:
•the Function button opens the Menu and doubles as the Select button.
•the ↑
↑↑
↑button pages forward through the Menu - the Step button.
•the ↓
↓↓
↓button pages backward through the Menu - the Step Back button.
When you first open the Function Menu, the display will show Menu.
Successive presses of the Step button page through the Menu. You cannot go
directly to any particular page, but must enter at the top of the Menu and then
page through until you reach the page you want.
Types of Menu Page
There are three types of page in the Menu - Parameter Pages, Information
Pages and Test Pages.
Parameter pages allow the user to check and also change the current settings
of the operating parameters, for example Filter. When a parameter page is
displayed, the first press of the Select button shows the current setting.
Subsequent presses of the Select button change the page setting.
Information pages display information about the unit, for example Software
Issue. When an information page is displayed, pressing the Select button
displays the information held on that page.
Test pages allow the user to initiate a number of useful routines, for example
Channel Check. When a Test page is displayed, pressing the Select button
starts the test routine.
Closing the Menu
There are two ways to close the menu and return to normal operation. The
easiest way is to wait 5 seconds for the unit to time-out and revert to the
standard display. Alternatively, use the Step button to page forward until the
display shows End and then press the Select button once.
If the unit times out before the operation in hand has been completed, simply re-
enter the menu, page forward (or backward) and continue where you left off. If
you find the 5 second time-out difficult to use, you can extend it to 30 seconds
by changing the TimeOut setting to Long.

dCS Elgar Plus User Manual Manual for Software Issue 4.3x
dCS Ltd August 2005
Manual filename: Elgar Manual v4.4x.doc Page 20 email: more@dcsltd.co.uk
English version web-site: www.dcsltd.co.uk
Menu Sequence
Use the flow chart (Figure 7) or the Control Summary sheet to guide you
through the Menu more quickly.
The following explanation deals with the Function Menu pages in the sequence
they occur in the Menu3. The use of each page is shown on an individual basis,
with the last operation being closing the Menu. After you have become more
familiar with the Menu, you will find it more convenient to perform all the
Function Menu operations in one go before finally closing the Menu.
Filter
FilterFilter
Filter – Anti-Imaging Filter Setting
Elgar Plus offers a choice of 4 interpolation filters for 5 sample rates (32kS/s,
44.1kS/s, 48kS/s, 88.2kS/s and 96kS/s) and 6 for two (192kS/s and 176.4kS/s).
The filters offer differing responses. In each case, Filters 1-4 are symmetrical
filters (with time response before a transition the mirror image of time response
after). Filter 1 offers the sharpest cut-off, least Nyquist imaging but longest
energy smear. Filter 4 gives the gentlest roll-off (usually with significant Nyquist
imaging) but the shortest transient response with least energy smear. Filter 5 is
a Gaussian filter, and Filter 6 is an asymmetrical filter – there is almost no time
response prior to the initial step.
For units fitted with a 1394 interface, DSD mode also offers four filters, but
these are intended to progressively reduce the out-of-band noise level. Filter 1
generally gives the widest bandwidth, but results are system dependent – if
your system gives undesirable effects with Filter 1, try (in this order) Filter 2 then
Filter 3 then Filter 4. These reduce the out-of-band energy at the expense of
reduced bandwidth. Filter 4 is really intended for metering applications, not for
listening.
Elgar Plus remembers the last filter selection made for every sample rate. So, if
you choose Filter 4 for 96kS/s and Filter 6 for 192kS/s, these separate settings
will be stored and loaded when the incoming sample rate changes (usually
when selecting a different input or changing the Upsampler settings).
Selecting a Filter x
We encourage you to experiment with the filters, to find the one that sounds
best for your particular application. Do not assume that one filter is best for all
applications!4
do this: Assume for the purpose of this illustration that the sample rate is 96kS/s and
Filter is currently set to Filter 1. Open the Function Menu and step through until
the display shows Filter 1.
do this: Press the Select button slowly several times. The display will in turn show:
Filter 2, Filter 3, ... and finally Filter 1 again. Select the filter you want to use
then wait for the Function Menu to time-out.
3A minor software update may change the order of the menu items or add an option. If this happens, the
Control Summary sheet may be updated before the manual.
4The reports we receive from users suggest that Filter 2 is well suited to some classical music, and that Filters
3 and sometimes 4 suit rock. Filters 5 and 6 are too new to have reports on, although the user may wish to
refer to “Effects in High Sample Rate Audio Material”, by M.J.Story, R.Kelly, D.A.McLeod, M.N.Harris,
presented at the 20th Tonmeister Tagung at Karlsruhe in November 1998. This paper is available from the
dCS web-site.
Other manuals for Elgar Plus
1
Table of contents
Other DCS Media Converter manuals
Popular Media Converter manuals by other brands

Vmatte
Vmatte Vmatte-HD HDL4.2 Operation manual

Beko
Beko BEKOKAT CC-360 Installation and operation manual

Miranda
Miranda ADC-191p Guide to installation and operation

Miranda
Miranda picoLink Series Guide to installation and operation

Ltech
Ltech DMX512 quick start guide

McIntosh
McIntosh MDA200 owner's manual