manuals.online logo
Brands
  1. Home
  2. •
  3. Brands
  4. •
  5. De Agostini
  6. •
  7. Toy
  8. •
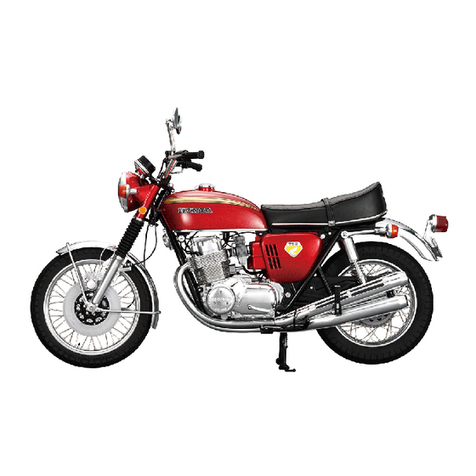
  9. De Agostini MODEL SPACE Honda CB750 FOUR User manual

De Agostini MODEL SPACE Honda CB750 FOUR User manual

17
BUILD YOUR OWN
Pack 02
TM
CONTENTS
19
Assembly Guide
Stage 5: The headlight case
Stage 6: The left fork
Stage 7: The right fork
TM
www.model-space.com
Editorial and design by Continuo Creative, 39-41 North Road, London N7 9DP.
Published in the UK by De Agostini UK Ltd, Battersea Studios 2,
82 Silverthorne Road, London SW8 3HE.
Published in the USA by De Agostini Publishing USA, Inc., 915 Broadway,
Suite 609, New York, NY 10010.
All rights reserved © 2014
Warning: Not suitable for children under the age of 14. is product is not a toy
and is not designed or intended for use in play. Items may vary from those shown.
19
Honda CB750 FOUR: Assembly Guide
Stage 5
Headlight case and fork cover
assembly
The headlight case
The indicators are attached to the headlight case and fork cover
assembly by wires. To t the left indicator, rst hold the assembly by the
left cover and push the wire into the groove along the indicator mount.
The ends of the indicator mounts t into
the holes in the fork covers, which are
shaped so that the ends can only t in
when they are the right way round. Align the end of the indicator mount with
the hole in the cover and push it into place.
Your parts
1
2
3
20
Honda CB750 FOUR: Assembly Guide
Now push the wire into the groove along the right indicator mount.
Push the end of the right indicator mount into the hole in the
fork cover.
As with the left indicator (shown here), align the end of the
right indicator with the hole in the fork cover.
4
5
6
Stage complete
21
Honda CB750 FOUR: Assembly Guide
Tools
Your CB750 model is designed to be assembled using tweezers, Phillips screwdrivers and pliers. Those are the minimum tools that
you will need, but if you want to be better prepared and have an easier time assembling your model, we recommend that you
equip yourself with the set of tools shown below.
1. Phillips screwdrivers (thick grips)
2. Precision screwdriver set (thin grips)
3. Tweezers
4. Knife
5. Instant adhesive
6. Pliers
7. Cutters
8. Tap wrench & taps (2mm/2.3mm)
9. Metal le set
1
2345
6
7
8
9
22
Honda CB750 FOUR: Assembly Guide
Instant adhesive is very useful if you
need to repair any parts that have
been damaged. Standard superglue
or instant adhesive is prone to
drying slightly white, which can spoil
the appearance of your model, so it
is best to try and nd one that is a
‘low whitening’ type.
In Stage 4, you were advised to cut a thread in the handlebar clamps using the screws
supplied. To make such tasks easier in the future, you can use a tap wrench and taps to
prepare the holes for the screws. For example, the type A screws used in Stage 4 are 2 x
6mm, so you would choose a 2mm tap to prepare the hole.
During this series, the most frequently used screwdriver is the size 1 Phillips.
Always try to use the correct size of screwdriver, as using a larger or a smaller
one can damage the head of the screw, and possibly make it impossible to
tighten or remove.
A tap wrench and two medium taps. These
are dedicated tools for cutting threads in
screw holes.
Precision screwdriver sets often have a
label showing the size of each driver.
To check if a screwdriver is the right size
for a screw, insert it into the head and
gently turn it to the left and right. If the
driver is the wrong size for the screw,
it either won’t t into it or it will t very
loosely. If so, try again with dierent size
drivers until you nd one that ts correctly.
It’s a good idea to have drivers of the same
size but with dierent grips, like the pairs
shown above, as they can be helpful for
dierent situations.
There are two types of screw used in this
series – the machine screw, which will
generally be referred to as just a ‘screw’,
and the self-tapping screw. The machine
screw is used for metal parts and the self-
tapping screw for plastic parts.
Insert the end of the tap into the hole
you want to thread and slowly turn the
wrench. The tap will screw itself into the
hole, cutting a thread as it goes. Make sure
you keep the tap straight as you turn it in.
Identify the correct size tap for the hole: it
should match the diameter of the screw.
Insert the tap into the hole in the wrench
and tighten it into place.
The thread cut into one of the handlebar
clamps using a tap and wrench, ready for a
screw to be tted.
Instant adhesive Screwdrivers and screws
Tap wrench
The pitch (space between
the threads) is narrow
and the angle is slight.
Machine screw
(often referred to
as just a ‘screw’)
Self-tapping screw
The pitch is wider
and the angle is
steeper.
23
Honda CB750 FOUR: Assembly Guide
Left fork assembly
Left fork boot
Left fork rib
Screws (type E) × 2
Left fork bolt head
Grease
The left fork
Tools
Push grease into the hole in the fork tube, as shown. Reseal the bag of grease by taping
the hole up, and place it in another bag in case it leaks.
Cut a neat hole in the bag of grease, and
squeeze a small amount of it onto the end
of a toothpick.
Apply grease around the seal (the black
plastic ring).
Phillips screwdriver (size 1)
Toothpick or similar
Prepare
Top yoke assembly (Stage 4)
Headlight case assembly (Stage 5)
Stage 6
Your parts
1
2
3
24
Honda CB750 FOUR: Assembly Guide
Hold the fork case (left) and push the tube
(right) in and out. This will spread the
grease around inside the assembly.
Take the headlight case assembly from the previous
stage, and turn the left fork so that the at side at the top
is facing towards you, away from the headlight case.
Place the left fork boot over the tube and
slide it over the seal. It should sit on the
step just below it.
Insert the smaller side of the rib into the end of the boot.
Place the left fork rib over the tube, with
the smaller side facing the boot.
Flat side facing out
4
5
6
7 8
25
Honda CB750 FOUR: Assembly Guide
Insert the end of the left fork into the left fork cover. It is
best to hold the fork by the case, rather than by the boot.
When viewed from above, the top of the fork should
appear as shown, with the D-shaped end in the
correspondingly shaped hole in the fork cover.
Take the top yoke assembly from Stage 4, and locate the
two circular recesses on the underside (circled, right).
These will be placed over the tops of the fork covers (also
circled, at the heads of the arrows). Fit the circular recesses on the underside of the top yoke
onto the tops of the fork covers. Make sure that the wires
are all out of the way, and pointing backwards.
9
10
11
12
26
Honda CB750 FOUR: Assembly Guide
When the screw is fully tightened into the
hole, line up the left fork bolt head with the
larger hole in the yoke.
Push the bolt head fully into the hole in the top yoke.
Tighten the screw until the head sits ush
against the surface of the yoke. You may
nd it easier to thread the hole rst, using
a tap and tap wrench.
Place a type E screw into the hole in the
top yoke, which should be directly above
the hole in the fork cover.
13
14
15
16 Stage complete
27
Honda CB750 FOUR: Assembly Guide
Right fork assembly
Right fork bolt head
Screws (type E) × 2
Right fork rib
Right fork boot
Tappet caps × 4
Take the grease from the previous stage and squeeze some onto the
end of a toothpick.
Apply grease around the seal where the
fork tube enters the fork case.
Push grease into the hole that goes
through the fork tube, as shown. When you
have nished applying the grease, store it
away again, as before.
The right fork
Stage 7
Tools
Phillips screwdriver (size 1)
Toothpick or similar
Prepare
Grease (Stage 6)
Headlight case, left fork and top
yoke assembly (Stage 6)
Cylinder head cover (Stage 2)
Your parts
1
2
3
28
Honda CB750 FOUR: Assembly Guide
Hold the right fork by the fork case and
push the tube in and out. This will spread
the grease around inside the assembly. Place the right fork boot over the tube,
and slide it over the seal and onto the step
below it.
Insert the rib into the end of the boot.
Place the right fork rib over the tube, with
the smaller side facing the boot.
Take the headlight case, left fork and top
yoke assembly from the previous stage.
Turn the right fork so that the at side
at the top is facing away from the
headlight case.
Insert the end of the right fork into the
right fork cover until it clicks into position
in the top of the cover. You may need to
rotate it to get the ends to align.
4
5
6
7
8
9
10
29
Honda CB750 FOUR: Assembly Guide
Place a type E screw into the hole in the top yoke. You
may prefer to thread the hole with a tap and wrench
before you do this. Tighten the screw into the hole, until it is ush against
the yoke.
When the screw is fully tightened into the hole, line up
the right fork bolt head with the larger hole in the yoke.
Push the bolt head fully into place.
11
12
13
14
30
Honda CB750 FOUR: Assembly Guide
Hold one of the tappet caps above the hole at the
end of the head cover. Make sure the higher side of
the breather cover is facing towards you.
Push the tappet cap into the hole, until it is at
against the head cover.
Insert the remaining three tappet caps into the
remaining three holes in that side of the cylinder
head cover.
Fetch the cylinder head cover assembly from
Stage 2.
15
16
17
18 Stage complete
31
Honda CB750 FOUR: Assembly Guide
The dierences between machine
screws and self-tapping screws were
mentioned briey in Stage 5. The main
dierence is the spacing of the threads:
with a machine screw, there are more
than on a self-tapping screw and they are
closer together, creating a stronger hold
between the screw and the part that it
is screwed into. The self-tapping screw
has to cut the internal thread in the hole
it’s going into, which is why its threads
are spaced further apart and at a greater
angle. In this series, they are used to x
plastic parts.
Because the instrument housing is made
of ABS plastic, a self-tapping screw was
used to secure it.
A countersunk screw (left) and a pan-head
screw (right).
The top yoke is a die-cast part, so a
machine screw was used to hold it
in place.
This is an example of where a countersunk
screw is used.
A machine screw (on the
left) and a self-tapping
screw (on the right).
Machine screws and self-tapping screws
Screw list
Screws have dierent-shaped heads, as
well as dierent type of thread. The photo
below left shows a countersunk screw,
on the left, and a pan-head screw, on the
right. Countersunk screws are used when
the top of the screw needs to be ush with
or sunk below the surface of the part it is
securing (below right), creating a stronger
hold. These screw heads are quite often
hidden from view because they are ush
or sunken. Pan-head screws are used when
parts are too thin for a countersunk screw,
or when a visible head adds authenticity to
the appearance of the model.
Countersunk and pan
Screws
Several sizes and types of screw are used in this series. They can look very similar, so you
will need to identify them carefully by referring to the table, below right. It is best to keep
screws of the same type together in a labelled plastic bag or other suitable container, to
make it easy to nd them and stop them getting mixed up with other types of screw.
Type Kind Head shape Size (W × H) Colour
A Screw Pan 2 × 6mm Black
B Screw Pan 2 × 5mm Black
C Screw Hexagonal 2 × 5mm Silver
D Screw Pan 2 × 5mm Black
E Screw Pan 2.3 × 6mm Black
F Screw Hexagonal 2 × 5mm Silver
G Self-tapping screw Pan 2 × 5mm Black
H Screw Dish 2 × 5mm Black
I Self-tapping screw Pan 2 × 5mm Black
J Self-tapping screw Pan 2.3 × 6mm Black
K Screw Cap (hex) 2 × 3mm Silver
L Screw Hexagonal 2 × 3mm Silver
M Screw Pan 2 × 5mm Silver
N Screw Pan 2 × 6mm Silver
O Self-tapping screw Pan 2 × 5mm Silver
P Screw Dish 2 × 5mm Black
Q Screw Hexagonal 2 × 5mm Silver
32
Honda CB750 FOUR:
TM

Other manuals for MODEL SPACE Honda CB750 FOUR

7

Other De Agostini Toy manuals

De Agostini Model Space C57 User manual

De Agostini

De Agostini Model Space C57 User manual

De Agostini Model Space T-72 User manual

De Agostini

De Agostini Model Space T-72 User manual

De Agostini MODEL SPACE Soleil Royal User manual

De Agostini

De Agostini MODEL SPACE Soleil Royal User manual

De Agostini MODEL SPACE Honda CB750 FOUR User manual

De Agostini

De Agostini MODEL SPACE Honda CB750 FOUR User manual

De Agostini MODEL SPACE Honda CB750 FOUR User manual

De Agostini

De Agostini MODEL SPACE Honda CB750 FOUR User manual

De Agostini Model Space MiG-29 User manual

De Agostini

De Agostini Model Space MiG-29 User manual

De Agostini Model Space Harley-Davidson FLSTF Fat Boy User manual

De Agostini

De Agostini Model Space Harley-Davidson FLSTF Fat Boy User manual

De Agostini Millennium Falcon 3 Series User manual

De Agostini

De Agostini Millennium Falcon 3 Series User manual

De Agostini Model Space T-72 User manual

De Agostini

De Agostini Model Space T-72 User manual

De Agostini Model Space D51 200 User manual

De Agostini

De Agostini Model Space D51 200 User manual

De Agostini Model Space C57 User manual

De Agostini

De Agostini Model Space C57 User manual

De Agostini Model Space H.M.S. Bounty Admiralty User manual

De Agostini

De Agostini Model Space H.M.S. Bounty Admiralty User manual

De Agostini Model Space MiG-29 User manual

De Agostini

De Agostini Model Space MiG-29 User manual

De Agostini MODEL SPACE Honda CB750 FOUR User manual

De Agostini

De Agostini MODEL SPACE Honda CB750 FOUR User manual

De Agostini Model Space T-72 User manual

De Agostini

De Agostini Model Space T-72 User manual

De Agostini Model Space T-72 User manual

De Agostini

De Agostini Model Space T-72 User manual

De Agostini Model Space HUMMER H1 User manual

De Agostini

De Agostini Model Space HUMMER H1 User manual

De Agostini Model Space MiG-29 User manual

De Agostini

De Agostini Model Space MiG-29 User manual

De Agostini Model Space ROBI Pack 03 Instruction Manual

De Agostini

De Agostini Model Space ROBI Pack 03 Instruction Manual

De Agostini Model Space T-72 User manual

De Agostini

De Agostini Model Space T-72 User manual

De Agostini MODEL SPACE Honda CB750 FOUR User manual

De Agostini

De Agostini MODEL SPACE Honda CB750 FOUR User manual

De Agostini Model Space T-72 User manual

De Agostini

De Agostini Model Space T-72 User manual

De Agostini Model Space T-72 User manual

De Agostini

De Agostini Model Space T-72 User manual

De Agostini Model Space MiG-29 User manual

De Agostini

De Agostini Model Space MiG-29 User manual

Popular Toy manuals by other brands

Eduard Yak-1b upgrade set quick start guide

Eduard

Eduard Yak-1b upgrade set quick start guide

REVELL Lamborghini Countach LP500S Assembly instructions

REVELL

REVELL Lamborghini Countach LP500S Assembly instructions

Eduard Swordfish Mk.I exterior quick start guide

Eduard

Eduard Swordfish Mk.I exterior quick start guide

iKarus VIPER 70 Series Building instructions

iKarus

iKarus VIPER 70 Series Building instructions

SkyZone Gee Bee 4377SZ Assembly manual

SkyZone

SkyZone Gee Bee 4377SZ Assembly manual

Black Horse Model Edge 540-V3 instruction manual

Black Horse Model

Black Horse Model Edge 540-V3 instruction manual

M.T.H. Premier EP-5 Electric Engine Operator's manual

M.T.H.

M.T.H. Premier EP-5 Electric Engine Operator's manual

Contixo Kids V9 user manual

Contixo

Contixo Kids V9 user manual

MTHTrains Tinplate Traditions 408E Operator's manual

MTHTrains

MTHTrains Tinplate Traditions 408E Operator's manual

Fisher-Price Caring Touch Nursery Center 71778 instructions

Fisher-Price

Fisher-Price Caring Touch Nursery Center 71778 instructions

Hasbro Sand Rider 6655390000 Specification sheet

Hasbro

Hasbro Sand Rider 6655390000 Specification sheet

Backfire F5F manual

Backfire

Backfire F5F manual

Eduard 32 502 manual

Eduard

Eduard 32 502 manual

TILLIG BAHN 01806 manual

TILLIG BAHN

TILLIG BAHN 01806 manual

Trix 24796 quick guide

Trix

Trix 24796 quick guide

Mountain Models J-3 Cub manual

Mountain Models

Mountain Models J-3 Cub manual

TufFlight Manta instruction manual

TufFlight

TufFlight Manta instruction manual

Kibri 39723 Mounting instruction

Kibri

Kibri 39723 Mounting instruction

manuals.online logo
manuals.online logoBrands
  • About & Mission
  • Contact us
  • Privacy Policy
  • Terms and Conditions

Copyright 2025 Manuals.Online. All Rights Reserved.