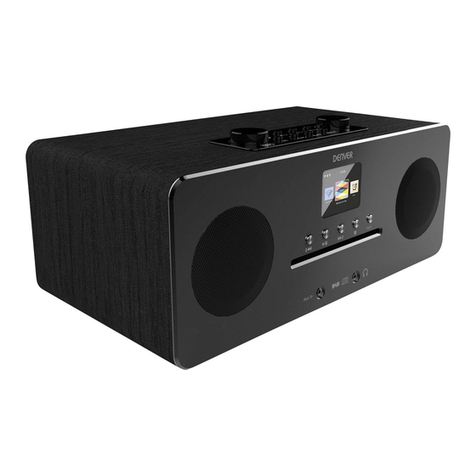
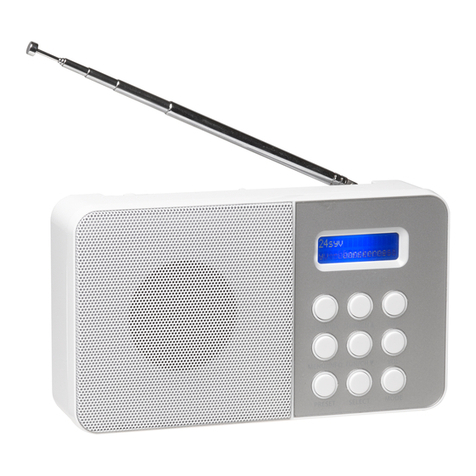
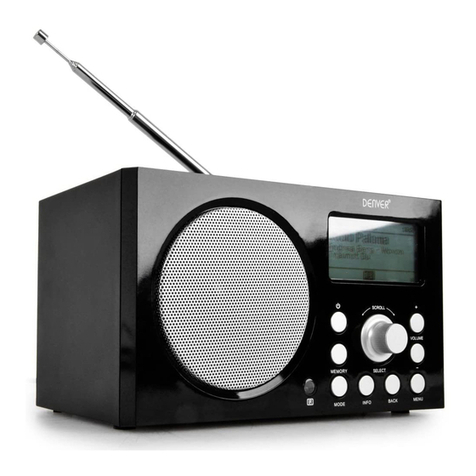
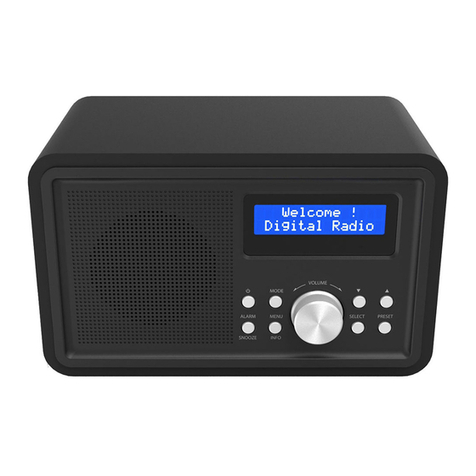
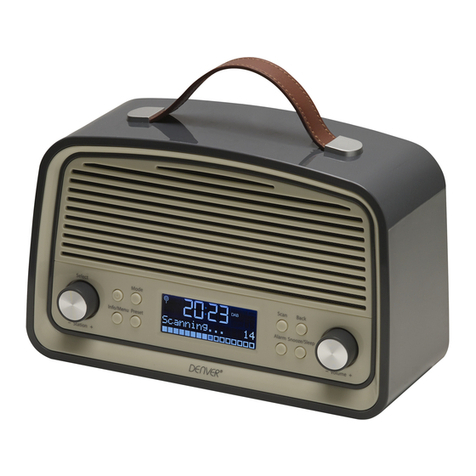
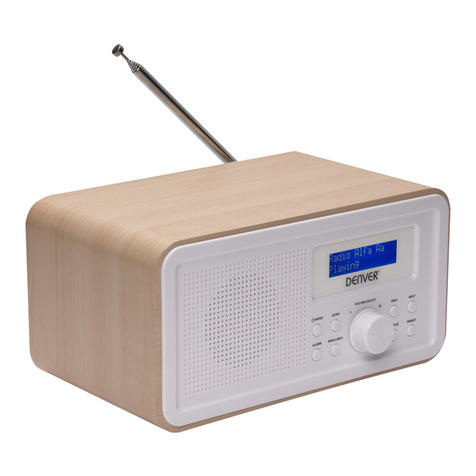
Denver DAB-25 PLUS User manual

Digitales DAB+/DAB/UKW-Radio
DAB+/DAB/FM Radio
Radio numérique DAB+/DAB/FM
Radio digitale DAB+/DAB/FM
Radio Digital DAB+/DAB/FM
DAB-25 PLUSDAB-25 PLUS
BEDIENUNGSANLEITUNG
MANUEL D'UTILISATION
MANUALE D'ISTRUZIONI
MANUAL DE INSTRUCCIONES
INSTRUCTION MANUAL

DE-1
SICHERHEITSHINWEISE
Fürbesten Hörgenuss undLeistung,sowieummitden Funktionen vertrautzuwerden,lesen Sie
diesesHandbuch bitteaufmerksamdurch,bevorSiedasGerätinBetriebnehmen.Diesgarantiert
Ihnen diebeste,fehlerfreieLeistungundHörgenuss.
WichtigeHinweise
*Bewahren SiedieSicherheits-undBedienungsanleitungen fürkünftigeNachschlagezweckeauf
*Stellen SiedasGerätnichtan den folgenden Orten auf:
§Orte,diedirekterSonneneinstrahlungausgesetztsindoderinderNähe von
wärmeabstrahlenden Geräten,wieelektrischen Heizkörpern
§Aufanderen Stereoanlagen,diezuvielHitzeabstrahlen.
§AnOrten,an denen dieBelüftunggestörtwirdoderan staubigen Orten.
§AnOrten mitpermanenten Vibrationen
§Anfeuchten odernassen Orten.
*VergewissernSiesich,dass dieLüftungsschlitzenichtverstelltwerden.
*Bedienen SiedieReglerundSchalter,wieindiesemHandbuch erläutert.
*BevorSiedasGerätdasersteMaleinschalten,vergewissernSiesich bitte,dass dasStromkabel
richtigangeschlossen ist.
AusSicherheitsgründen dürfen keine Gehäuseabdeckungen abgenommen undVeränderungen
imInneren desGerätsvorgenommen werden.
Überlassen SieWartungsarbeiten demKundendienst.
Versuchen SienichtSchrauben zuentfernen oderdasGerätegehäusezuöffnen.ImInneren
befinden sich keine vomBenutzerzuwartenden
Teile.Überlassen SieWartungsarbeiten qualifizierten Kundendienstmitarbeitern.
VORSICHT:ZURVERMEIDUNGEINES ELEKTRISCHENSCHLAGES DASGEHÄUSE (ODER
DIERÜCKSEITE)NICHTENTFERNEN,IMGERÄTBEFINDENSICH KEINEDURCH DEN
BENUTZERZUWARTENDENTEILE.WENDENSIESICH ANDENKUNDENDIENST.
GEFÄHRLICHESTROMSPANNUNG
Diegefährliche StromspannungimInneren desGerätskann elektrische Schläge
verursachen.
ACHTUNG
DiesesBedienungshandbuch enthältwichtigeBedienungs-undWartungsanleitungen.
ZuIhrereigenen Sicherheitisteswichtig,dass SiedieAnleitungen indiesemHandbuch
befolgen.
WARNUNG:ZURVERMEIDUNGEINES BRANDES ODERDERGEFAHREINES ELEKTRISCHEN
SCHLAGES DASPRODUKTKEINEMTROPF-ODERSPRITZWASSERAUSSETZEN.
Hinweis:
DiesesGerätheiztsich nach einerlängeren Betriebsdauerauf. Diesistnormalunddeutetnicht
aufeinen Gerätefehlerhin.
DiesesGerätistmitMikroprozessoren ausgestattet, diebeielektrischen Störungen oder
Geräuschen fehlerhaft arbeiten könnten Wenn dasGerätnichtkorrektarbeiten sollte,trennen Sie
esbittevon derStromquelleundschließen esdann wiederan
VARNING
RISK FÖR ELEKTRISK
STÖT ÖPPAN EJ

FUNKTIONEN UND BEDIENELEMENTE
1. DAB/FM (DAB/UKW Taste)
2. (SELECT UP) AUSWAHL
AUFWÄRTS-Taste
3. (SELECT) AUSWAHL-Taste
4. MENU-Taste
5. INFO-Taste
6. Taste RESET 1
7. Taste RESET 2
8. Taste RESET 3
9. Taste RESET 4
10. Taste RESET 5
11. VOLUME
(LAUTSTÄRKEREGLER)
12. LCD-Display
13. SELECT DN) (AUSWAHL
ABWÄRTS-Taste)
14. ON/OFF (EIN/AUS-Taste)
15. STABANTENNE
16. AC-NETZKABEL
17. BATTERIEFACHKLAPPE
18. KOPFHÖRERBUCHSE
RADIO
Tipps für besseren Empfang
Das Radio besitzt eine DAB/UKW-Teleskopantenne. Ziehen Sie Antenne für besten UKW-Empfang bitte voll aus und
drehen sie in Richtung des besten Empfangs. Für optimalen DAB-Empfang ist es ratsam, die Antenne senkrecht
auszurichten.
Netz- und Batteriebetrieb
Dieses Radio besitzt eine automatische Erkennung für Netz- oder Batterieversorgung. Wenn das Radio an eine
Steckdose angeschlossen ist, befindet es sich im Netzbetrieb. Wenn der Netzstecker gezogen wurde und die Batterien
ordnungsgemäß in das Batteriefach eingelegt wurden, wird automatisch auf Batteriebetrieb umgeschaltet.
Unabhängig von der Stromversorgung müssen Sie die ON/OFF-Taste (EIN/AUS-Taste) kräftig zum Ein- oder Ausschalten
des Radios drücken.
Anmerkung: Für beste Leistung bei Batteriebetrieb wird die Verwendung von Alkali-Batterien dringend empfohlen.
Inbetriebnahme
Wenn das Radio angeschlossen und zu ersten Mal eingeschaltet wurde,
wird’s automatisch der DAB-Modus aufgerufen und ein automatischer
Sendersuchlauf durchgeführt. Während der Suche wird auf dem Display die
Anzeige “Suche…” zusammen mit einem Fortschrittsbalken für Suche und
der Anzahl der bis dahin gefundenen Sender anzeigt. (F. 1) (F. 2)
DE-2
Sobald die Suche beendet ist, wählt das Radio den ersten, in
alphanumerischer Reihenfolge gefundenen Sender. Sie können jetzt mit der
Tas te oder die gefundenen Sender durchlaufen und dann mit der
SELECT-Taste (Auswahl-Taste) den gewünschten Sender auswählen.
Anmerkung: Wenn mit dem automatischen Suchlauf kein Sender gefunden
wurde, ruft das Radio das Tune Select-Menu (Suche-Auswahlmenü) auf und das Display zeigt „Manual tune” (Manuelle
Suche) an. Sie können jetzt mit der SELECT-Taste (Auswahl-Taste) die manuelle Suche oder mit den / Ta en
e automatischen Suchlauf-Modi auswählen.
st
di
DAB Modi automatischer Suchlauf
Es gibt zwei Modi für den automatischen Suchlauf, die Suche nach lokalen Sendern und den vollständigen Suchlauf. Die
automatische Suche nach lokalen Sendern sucht nur nach UK DAB Band III Kanälen und der vollständige Suchlauf nach
allen DAB Band III Kanälen. Sobald die Suche beendet ist, wählt das Radio automatisch den ersten, in alphanumerischer
Reihenfolge gefundenen Sender.
1. Zum Aktivieren des automatischen lokalen Suchlaufs drücken Sie die
MENÜ-Taste, um das Tune Select-Menu (Suche-Auswahlmenü)
aufzurufen und wählen mit der oder Taste die Option „Autoscan
local“ (Autom. Suche lokal). Bestätigen Sie dann mit der SELECT-Taste
(Auswahl-Taste). Das Display zeigt “Scanning …” (Suche…) zusammen
mit einem schnellen Fortschrittsbalken an. (F. 3)
1 2 3 45678 9 10 11
12
13
14
18
OPEN
15
1716
F1
F2
F3

2. Zum Aktivieren des automatischen vollständigen Suchlaufs drücken
Sie die MENÜ-Taste und wählen mit der oder Taste die Option
„Autoscan full“ (Autom. vollständige Suche). Bestätigen Sie dann mit
der SELECT-Taste (Auswahl-Taste). Das Display zeigt “Scanning …”
(Suche…) zusammen mit einem schnellen Fortschrittsbalken an.(F.4)
3. Alle gefundenen Sender werden automatisch gespeichert. Um die
gefundenen Sender zu durchlaufen, drücken Sie die oder
Taste und dann die SELECT-Taste (Auswahl-Taste), wenn Sie einen
Sender gefunden haben, den Sie hören möchten.
DAB manuelle Suche
1. Für die manuelle Suche drücken Sie zuerst die MENÜ-Taste, um das
Tune Select-Menu (Suche-Auswahlmenü) aufzurufen. Drücken Sie
dann zur Auswahl von “Manual tune” (Manuelle Suche) die
SELECT-Taste (Auswahl-Taste). ( F. 5)
2. Drücken Sie die oder Taste, um sich durch die DAB-Kanäle zu
bewegen. Das Display zeigt „5A to 13F“ (5A bis 13F) und ihre
dazugehörigen Frequenzen an. (F. 6)
3. Wenn die gewünschte Frequenz im Display angezeigt wird, bestätigen
Sie mit der SELECT-Taste (Auswahl-Taste). Der Name der
Sendergruppe (Ensemble oder dem Multiplex) wird angezeigt.
4. Zum Anhören des gewählten Senders drücken Sie erneut die
SELECT-Taste (Auswahl-Taste).
DAB Datendienste
Manchmal sehen Sie ein „>“-Symbol nach dem Sendernamen, mit dem angezeigt wird, dass Datendienste für diesen
Sender vorhanden sind. Diese Datendienste enthalten Zusatzdienste, die sich auf den Hauptsender beziehen, d.h. ein
Sportsender möchte zusätzliche Textkommentare hinzufügen. Die Datendienste befinden sich direkt nach dem
Hauptsender in der Senderliste.
DAB-Anzeigemodi
Jedes Mal, wenn Sie die INFO-Taste drücken, schalten Sie zwischen den folgenden Displaymodi um:
Zeit und Datum
Zeit und Datum werden automatisch mittels der übertragenen Informationen aktualisiert. Die Uhr muss nicht manuell
eingestellt werden. Im unwahrscheinlichen Fall, dass kein Zeitinformationen gesendet werden, zeigt das Display
„<TIME/DATE>” („<ZEIT/DATUM>) an.
Frequenz
Die Frequenz des vorbelegten Senders wird angezeigt.
Audio-Bitrate
Das Display zeigt die empfangene, digitale Audio-Bitrate an.
Signalstärke
Auf dem Display wird ein Balken zur Darstellung der Signalstärke angezeigt. Je stärker das Signal ist, umso länger wird
der Balken (von rechts nach links).
DLS
DLS steht für „Dynamic Label Segment“ (Radio-Kurztext), wobei es sich um Lauftext handelt, den der Rundfunkanbieter
seinen Sendungen hinzufügt. Der Text enthält normalerweise Informationen, wie z.B. Programmdetails usw.
Programmtyp
Beschreibung des Programmtyps der Sendung. Falls die Informationen nicht verfügbar sind, zeigt das Display
„<Programme Type>“ („<Programmtyp>“) an.
Ensemble/Multiplex (Gruppenname)
Ein Ensemble/Multiplex ist eine Sammlung von Radiosendern, die zusammengefasst und gemeinsam auf einer einzelnen
Frequenz übertragen werden. Es gibt nationale und lokale Multiplexes. Die lokalen Multiplexes enthalten Sender, die für
ein bestimmtes Gebiet gedacht sind.
Anmerkung: Zum Anzeigen der Software-Versionsnummer halten Sie die INFO-Taste länger als 2 Sekunden gedrückt.
DE-3
F5
F6
F4
Ensemble/Multiplex(Group name)
Time/Date Signal strength
DLS
Audio Bit Rate
Programme Type
Frequency

UKW-Radio
1. Wählen Sie mit der DAB/FM-Taste (DAB/UKW-Taste) die Option UKW.
Das Display zeigt „UKW“ und die Frequenz an.
2. Zum Aktivieren des automatischen Suchlaufs halten Sie die oder
Taste gedrückt, bis das Frequenzband durchsucht wird. Das
Display zeigt „Searching … >“ (Suche… >) oder „Searching …<
“ (Suche…<) an und stoppt automatisch, sobald ein Sender gefunden
wurde. (F. 7) (F.8)
3. Um die manuelle Suche zu aktivieren, drücken Sie die oder
Taste.
4. Um den Audiomodus zu wählen, drücken Sie die SELECT-Taste
(Auswahl-Taste), um zwischen der Auswahl „Auto“ oder „Mono“ zu
umzuschalten.
Anmerkung: Das Radio schaltet automatisch zwischen Stereo und Mono um, aber Sie können das außer Kraft setzen
und diese Funktion manuell umschalten. Das kann bei schwachem Empfang nützlich sein.
SPEICHERN UND AUFRUFEN GESPEICHERTER SENDER
Sie können bis zu 10 Lieblingssender (5 DAB und 5 UKW) als
Vorbelegungen speichern. Damit haben Sie mit einem einzigen
Tastendruck direkten Zugriff auf Ihren Lieblingssender.
1. Um eine Vorbelegung zu speichern, suchen Sie zuerst den
gewünschten Sender. Halten Sie dann die PRESET-Taste
(Vorbelegung-Tas t e) (1 - 5) gedrückt, bis auf dem Display „Preset #
saved“ (Vorbelegung x gespeichert) angezeigt wird. (F. 9)
2. Um einen vorbelegten Sender aufzurufen, drücken Sie die
PRESET-Taste (Vorbelegung-Taste) (1 - 5), auf der Sie den Sender
gespeichert haben.
3. Wenn der Vorbelegung kein Sender zugeordnet wurde, zeigt das
Display „Preset empty” (Vorbelegung leer). (F. 10)
WERKSEINSTELLUNGEN
Wenn Sie sich mit dem Radio in einem anderen Gebiet aufhalten, sind Ihre vorbelegten und gespeicherten DAB-Sender
nicht mehr verfügbar. In diesem Fall müssen Sie das Radio auf die Werkseinstellungen zurücksetzen. Führen Sie das
Rücksetzen auf die Werkseinstellungen wie folgt durch:
1. Schließen Sie das Radio an eine Steckdose an und schalten es mit der ON/OFF-Tast e (EIN/AUS-Taste) ein.
2. Halten Sie die MENÜ-Taste gedrückt, bis auf dem Display „Press SELECT to confirm reset“ („AUSWÄHLEN drücken,
um das Rücksetzen zu bestätigen“) angezeigt wird.
3. Lassen Sie die MENU-Taste los und drücken einmal die SELECT-Taste (Auswahl-Taste). Das Display zeigt zuerst
“Restarting …” (“Neustart …”) an und führt anschließend den vollständigen Sendersuchlauf durch.
4. Sobald die Suche beendet ist, wählt das Radio automatisch den ersten, in alphanumerischer Reihenfolge
gefundenen Sender.
Anmerkung: Bei einem Rücksetzen auf die Werkseinstellungen gehen alle gespeicherten DAB- und
UKW-Vorbelegungen verloren.
TECHNISCHE DATEN
STROMVERSORGUNG : AC/WS 230 V~50 Hz
DC 9V 1,5 V(UM3) x 6
AUSGANGSLEISTUNG : 1,0 Watt
FREQUENZBEREICH : DAB 174 - 240 MHz
FM/UKW 87,5 - 108 MHz
GERÄTEABMESSUNGEN : 200 (B) x 80 (T) x 110 (H) mm
GEWICHT: 0,98kg
DIE TECHNISCHEN DATEN UNTERLIEGEN ÄNDERUNGEN OHNEVORANKÜNDIGUNG.
DE-4
F7
F8
F10
F9
Elektrische und elektronische Geräte sowie Batterien enthalten Materialien, Komponenten und Substanzen, welche
für Sie und Ihre Umwelt schädlich sein können, sofern die Abfallmaterialien (entsorgte elektrische und elektronische
Altgeräte sowie Batterien) nicht korrekt gehandhabt werden.
Elektrische und elektronische Geräte sowie Batterien sind mit der durchgestrichenen Mülltonne, wie unten abgebildet,
kenntlich gemacht. Dieses Symbol bedeutet, dass elektrische und elektronische Altgeräte sowie Batterien nicht mit
dem Hausmüll entsorgt werden dürfen, sie müssen separat entsorgt werden.
Als Endverbraucher ist es notwendig, dass Sie Ihre erschöpften Batterien bei den entsprechenden Sammelstellen abgeben. Auf
diese Weise stellen Sie sicher, dass die Batterien entsprechend der Gesetzgebung recycelt werden und keine Umweltschäden
anrichten.
Städte und Gemeinden haben Sammelstellen eingerichtet, an denen elektrische und elektronische Altgeräte sowie Batterien
kostenfrei zum Recycling abgegeben werden können, alternativ erfolgt auch Abholung. Weitere Informationen erhalten Sie bei der
Umweltbehörde Ihrer Gemeinde.

UK-1
To achievethe utmostinenjoymentandperformance,pleasereadthismanualcarefullybefore
attemptingtooperatethe unitinordertobecamefamiliarwithitsfeatures,andassureyou years
offaithful,troublefree performance andlisteningpleasure.
ImportantNotes
*Thissafetyandoperatinginstructionsshouldberetainedforfuturereference.
*Avoidinstallingthe unitinlocationsdescribedbelow:
-Placesexposedtodirectsunlightorclosetoheatradiatingappliancessuch aselectric
heaters.
-Ontopofotherstereo equipmentthatradiatetoo much heat.
-Placeslockingventilation ordustyplaces.
-Placessubjecttoconstantvibration.
-Humidormoistplaces.
*Makesurenottoobstructthe ventilation openings.
Operatetuningcontrolsandswitchesasinstructedinthe manual.
*Beforeturningon the powerforthe firsttime,makesurethe powercordisproperlyinstalled.
Forsafetyreasons,donotremoveanycoversorattempttogainaccess tothe insideofthe
product. Referanyservicingtoqualifiedpersonnel.
Donotattempttoremoveanyscrews,oropen the casingofthe unit; thereareno userserviceable
partsinside,referall servicingtoqualifiedservice personnel.
CAUTION:TOREDUCETHERISKOFELECTRICSHOCKDONOTREMOVE COVER(OR
BACK),NOUSERSERVICEABLEPARTSINSIDE,REFERSERVICINGTOQUALIFIEDSERVICE
PERSONNEL.
DANGEROUSVOLTAGE
Conductordangerousvoltage,thatmaybeofsufficientmagnitudetoconstitutea
risk ofelectricshocktopersonsispresentwithinthisproduct’s enclosure.
ATTENTION
The owner’s manualcontainsimportantoperatingandmaintenance instructions,for
yoursafety,itisnecessarytorefertothe manual.
WARNING:TOPREVENTFIREORSHOCKHAZARD,DONOTEXPOSE THISAPPLIANCETO
RAINORMOISTURE.
CAUTION:TOPREVENTELECTRONICALSHOCK,MATCH WIDEBLADEPLUGTOWIDESLOT,
FULLYINSERT.
Note:
Thisunitwill becomewarmwhen usedforalongperiodoftime.Thisisnormalanddoesnot
indicateaproblemwiththe unit.
Thisunitincludesmicro-processorswhich maymalfunction asaresultofexternalelectricalinter-
ference ornoise.If the unitisnotworkingproperly,disconnectthe powersource andthen
reconnectit.
CAUTION
RISKOFELECTRICSHOCK
DONOTOPEN

AC & DC (battery) operation
This radio incorporates an auto-detected AC/DC operating function - when the radio is connected to AC mains,
it will be in AC operation. If the radio is disconnected from mains and with batteries properly installed in the
battery compartment, it will be automatically switched to DC battery operation mode.
In either AC or DC battery operation, firmly depress on the ON/OFF button to toggle the radio between on and
off.
Note: To obtain the best performance in DC operation, the use of alkaline batteries is highly recommended.
Getting started
When the radio is powered up and switched on for the first time, it will
automatically enter into the DAB mode and perform auto scan
function. During the scan, the display will show “Scanning …”
together with a slide bar that indicates the progress of the scan and
the amount of stations that have been found so far. (F. 1) (F. 2)
Once the scan has finished, the radio will select the first
alphanumerically found station. You can now press the ▲ or ▼
button to explore the found stations and then press the SELECT
button to select your station.
Note: If there is no station found after auto scan, the radio will enter
into the Tune Select Menu and the display will show “Manual tune”, you can now press the SELECT
button to select manual tune or the ▲ / ▼ buttons to select auto scan modes for stations.
DAB auto scan modes
There are two types of auto scan modes, one is local auto scan and the other is full auto scan. Local auto scan
will only search for the UK DAB Band III channels and full auto scan will search for all DAB Band III channels.
After the scan has finished, the first alphanumerically found station will be automatically selected.
1. To activate the local auto scan, press the MENU button to enter
into the Tune Select Menu and then press the ▲ or ▼ button to
select “Autoscan local”, then press the SELECT button to
confirm, the display will show “Scanning …” and a quick
progressing slide bar. (F. 3) F3
UK-2
FEATURES AND CONTROLS
LIST ENIN G TO YOUR RADIO
Hints for better reception
This radio is fitted with a single DAB/FM telescopic antenna, to obtain the best performance, you should fully
extend the antenna and adjust its position as well as the direction until you find the best reception. For ideal
DAB reception, a vertical upright position is highly recommended.
13. SELECT DN BUTTON
14. ON/OFF BUTTON
15. ROD ANTENNA
16. AC CORD
17. BATTERY DOOR
18. HEADPHONE JACK
1 2 3 45678 9 10 11
12
13
14
18
OPEN
15
1716
1. DAB/FM BUTTON
2. SELECT UP BUTTON
3. SELECT BUTTON
4. MENU BUTTON
5. INFO BUTTON
6. PRESET 1 BUTTON
7. PRESET 2 BUTTON
8. PRESET 3 BUTTON
9. PRESET 4 BUTTON
10. PRESET 5 BUTTON
11. VOLUME CONTROL
12. LCD DISPLAY
F1
F2

UK-3
2. To activate full auto scan, press the MENU button once and
then press the ▲ or ▼ button to select “Autoscan full”, then
press the SELECT button to confirm, the display will show
“Scanning …” and a slower progressing slide bar.(F.4)
3. All the stations that have been found will be stored
automatically, to explore the stations that have been found,
press the ▲ or ▼ buttons and then press the SELECT button
when you find a station that you would like to listen to.
DAB manual tune
1. To select manual tune, first press the MENU button to enter
into the Tune Select Menu, then press the SELECT button to
select “Manual tune”. (F. 5)
2. Press the ▲ or ▼ button to move through the DAB channels,
the display will show “5A to 13F” and their associated
frequencies. (F. 6)
3. When your desired frequency appears in the display, press the
SELECT button to confirm. The name of the station group
(ensemble/multiplex) will be displayed.
4. To listen to the station selected, press the SELECT button
again.
DAB secondary services
On some occasions you will see a “>” symbol directly after the name of the station, this indicates that there are
secondary services available to that station. These secondary services contain extra services that relate to the
primary station. E.g. a sports station may want to add extra commentaries. The secondary services are
inserted directly after the primary station.
DAB display modes
Every time you press the INFO button, the display will cycle through the following display modes:
F5
F6
Ensemble/Multiplex(Group name)
Time/Date Signal strength
DLS
Audio Bit Rate
Programme Type
Frequency
F4
Time and date
The time and date will be automatically updated by the broadcasted information; it is no need to set the clock
manually. In the unlikely event that no clock information is received, the display will show “<TIME/DATE>”.
Frequency
The frequency of the present station will be displayed.
Audio bit rate
The display will show the digital audio bit rate being received.
Signal strength
The display will show a slide bar to indicate the signal strength, the stronger the signal, the longer the bar will
be from left to right.
DLS
DLS stands for Dynamic Label Segment which is a scrolling message that the broadcaster may include in their
transmissions. The message usually includes information such as programme details …etc.
Progarmme type
This describes the style of the programme that is being broadcast. If the information is not available, the display
will show “<Programme Type>”.
Ensemble/Multiplex (Group name)
The Ensemble/Multiplex is a collection of radio stations that are bundled and transmitted together in a single
frequency. There are national and local multiplexes, local ones contain stations that are specific to that area.
Note: Press and hold the INFO button for longer than 2 seconds, the software version number will be displayed.

UK-4
F10
F9
F8
FM radio
1. To select FM, press the DAB/FM button, the display will show
FM and the frequency.
2. To activate auto search, press and hold the ▲ or ▼ button until
it starts to scan the frequency band, the display will show
“Searching … > .” or “Searching … < .”, and it will stop
automatically once a station has been found. (F. 7)(F.8)
3. To activate manual search, repeatedly press the ▲ or ▼
button.
4. To select audio mode, press the SELECT button to toggle
between the “Auto” or “Mono” selection.
Note: The radio will automatically switch between stereo and mono mode, but you can override this and switch
this function manually which is helpful for poor signal reception.
STORING A ND REC ALLI NG STORED S TATIONS
You can store up to 10 of your favourite stations (5 DAB and 5 FM) to
the presets; this will enable you to get direct access to your favourite
station at a touch of a single button.
1. To store a preset, first tune to your desired station, then press
and hold your preferred PRESET button (1 - 5) until the display
shows “Preset # saved”. (F. 9)
2. To recall a preset station, press the PRESET button (1 - 5) that
you have stored.
3. If you press a preset that hasn't been allocated a station, the
display will show “Preset empty”. (F. 10)
FACTORY RESET
When you move the radio to another part of the country, your pre-tuned and stored DAB stations may no longer
be available. If this is the case then you will need to reset your radio back to its original factory settings; to
perform a factory reset, please do the following:
1. Plug the radio to mains and press the ON/OFF button to turn the radio on.
2. Press and hold the MENU button until the display shows “Press SELECT to confirm reset”.
3. Release the MENU button and press the SELECT button once, the display will first show “Restarting …”
and then finally perform full auto scan function.
4. After the scan has finished, the radio will select and display the first alphanumerically found station.
Note: All of your stored DAB & FM presets will be lost once the reset has taken place.
SPEC IFIC ATION
POWER SUPPLY : AC 230V~50Hz
DC 9V 1.5V(UM3) x 6
OUTPUT POWER : 1.0 W
FREQUENCY RANGE : DAB 174 - 240 MHz
FM 87.5 - 108 MHz
UNIT DIMENSION : 200 (L) x 80 (W) x 110 (H) mm
WEIGHT: 0.98kg
***SPECIFICATION SUBJECT TO CHANGE WITHOUT FURTHER NOTICE.
F7
Electric and electronic equipment and included batteries contains materials, components and substances that can be
hazardous to your health and the environment, if the waste material (discarded electric and electronic equipment and
batteries) is not handled correctly.
Electric and electronic equipment and batteries is marked with the crossed out trash can symbol, seen below. This
symbol signifies that electric and electronic equipment and batteries should not be disposed of with other household
waste, but should be disposed of separately.
As the end user it is important that you submit your used batteries to the approriate and designated facility. In this manner you
make sure that the batteries are recycled in accordance with legislature and will not harm the environment.
All cities have established collection points, where electric and electronic equipment and batteries can either be submitted free of
charge at recycling stations and other collection sites, or be collected from the households. Additional information is available at
the technical department of your city.

FR-1
SÉCURITÉSÉCUSÉCURITÉ
Pour profiter pleinement des performances de votre appareil et vous familiariser avec son fonctionnement,
veuillez lire attentivement ce manuel avant toute utilisation.
Informations importantes
* Conservez soigneusement ces consignes de sécurité et de fonctionnement pour consultation ultérieure.
* Ne pas exposer cet appareil aux gouttes et aux éclaboussures. Les objets contenant du liquide, tels que des
vases, ne doivent pas être posés sur l'appareil.
* Évitez d'installer l'appareil dans les endroits :suivants
- Endroits exposés aux rayons directs du soleil ou proches d'une source de chaleur rayonnante comme un appareil de
chauffage électrique.
- Sur un autre équipement stéréo produisant de la chaleur.
- Endroits bloquant la ventilation ou endroits poussiéreux.
- Endroits sujets à une vibration constante.
- Endroits humides ou moites.
* Ne jamais placer une source de flamme nue (par ex., bougie allumée) sur l'appareil.
* Déposez les piles dans un point de collecte approprié.usagées
* Veillez à ne pas obstruer les un espace minimum de 10 cm doit être respecté autour orifices de ventilation.
de l'appareil pour assurer la ventilation.
* La ventilation ne doit pas être bloquée en couvrant les ouvertures avec des objets tels qu'un journal, des
nappes, des rideaux, etc.
* Utilisez cet appareil seulement sous climats tempérés.
* Actionnez les commandes et les commutateurs comme indiqué dans le manuel.
* assurez-vous que le cordon du secteur est correctement installé.Avant la première utilisation,
* Le cordon d'alimentation est utilisé comme dispositif de et . Pour déconnexion doit demeurer accessible
débrancher complètement , la prise de courant de l'appareil doit être débranchée du l'alimentation électrique
secteur.
Pour des raisons de sécurité, n'enlevez aucun et n'essayez pas d'accéder à l'intérieur de l'appareil. capot
Confiez l'entretien à un personnel qualifié.
N'essayez pas d’enlever les vis et d'ouvrir le boitier ; il n'y a aucune pièce réparable par l'utilisateur à l'intérieur ;
pour toute réparation, contactez le service technique qualifié.
ATTENTION : Pour réduire le risque d'électrocution, ne pas déposer le capot (ou la face arrière). L'appareil ne contient
TENSION DANGEREUSE
L'appareil contient des conducteurs de tensions dangereuses, suffisamment importantes pour
présenter un risque d'électrocution.
ATTENTION
La notice d'utilisation contient des informations importantes sur le fonctionnement et l'entretien
de l'appareil ; pour votre sécurité, il est indispensable de lire attentivement la notice.
AVERTISSEMENT : Pour éviter tout risque d'incendie ou d'électrocution, veillez à ne pas exposer l'appareil aux
projections de liquides.
Note :
Ce produit chauffera s'il est utilisé pendant une longue période. Cela est normal et n'indique pas un problème.
Dans le cas où l'affichage deviendrait illisible suite à une décharge d'électricité statique, débranchez puis
rebranchez le cordon d'alimentation ; il sera peut-être nécessaire de régler l'appareil à nouveau.
ATTENTION
RISQUE DE DECHARGE
ELECTRIQUE
aucune pièce réparable par l'utilisateur. Confiez l'entretien à un personnel technique qualifié.

FONCTIONS ET COMMANDES
1. BOUTON DAB/FM 7. BOUTON RESET 2 13. BOUTON SELECT DN
2. BOUTON SELECT UP 8. BOUTON RESET 3 14. BOUTON ON/OFF
3. BOUTON SELECT 9. BOUTON RESET 4 15. ANTENNE TIGE
4. BOUTON MENU 10. BOUTON PRESET 5 16. CORDON CA
5. BOUTON INFO 11. CONTRÔLE DU VOLUME 17. PORTE DES PILES
6. BOUTON PRESET 1 12. AFFICHAGE LCD 18. PRISE CASQUE
ÉCOUTER VOTRE RADIO
Conseils pour une meilleure réception
Cette radio est munie d'une antenne DAB/FM télescopique unique ; pour obtenir une qualité d'écoute optimale, vous
devez tirer complètement l'antenne et ajuster sa position et son orientation jusqu'à obtenir la qualité d'écoute escomptée.
Pour une réception DAB idéale, la position verticale est fortement recommandée.
Fonctionnement CA & CC (piles)
Cette radio intègre une fonction de détection automatique du fonctionnement CA/CC - lorsque la radio est branchée sur
une prise (conducteur principal) CA, elle est en fonctionnement CA. Si la radio est déconnectée des conducteurs
principaux et que les piles sont correctement installées dans leur compartiment, elle passe automatiquement au mode de
fonctionnement CC.
Que ce soit en mode de fonctionnement CA ou CC, appuyez fermement sur le bouton ON/OFF pour faire alterner la radio
entre On (activé) et Off (désactivé).
Remarque : Pour obtenir une performance optimale en mode de fonctionnement CC, l'utilisation de piles alcalines est
fortement recommandée.
Prise en main
Lorsque la radio est mise sous tension pour la première fois, et mise en
marche, le mode DAB est automatiquement sélectionné et procède au
balayage automatique des stations de radio. Pendant ce balayage,
l'affichage met en évidence le message “Scanning …” ("Balayage en
cours...") accompagné d'une barre de progression indiquant l'évolution du
balayage et le nombre de stations déjà trouvées. (F. 1) (F. 2)
FR-2
À la fin du balayage, la radio sélectionne la première station trouvée de
manière alphanumérique. Vous pouvez maintenant appuyer sur le bouton
ou pour explorer les stations trouvées et appuyer ensuite sur le
bouton SELECT pour sélectionner votre station.
Remarque : Si aucune station n'est trouvée au terme du balayage
automatique, la radio entre dans le menu Tune select (sélection du réglage d'accord), et l'affichage met “Manual tune”
("réglage d'accord manuel") en évidence ; vous pouvez maintenant appuyer sur le bouton SELECT pour sélectionner
Manual tune ou sur les boutons / pour sélectionner les modes de balayage automatique des stations.
Modes de balayage automatique DAB
Il y a deux modes de balayage automatique des stations de radio, l'un est rapide, et l'autre est complet. Le balayage
automatique local recherche uniquement les chaînes britanniques de la Bande III de DAB, tandis que le balayage
automatique complet recherche toutes les chaînes de la Bande III de DAB. À la fin du balayage, la première station
trouvée de manière alphanumérique est automatiquement sélectionnée.
1. Pour activer le balayage automatique local, appuyez sur le bouton
MENU pour entrer dans le MENU Tune select, et appuyez ensuite sur le
bouton ou pour sélectionner “Autoscan local” ("Balayage
automatique local"), puis appuyez sur le bouton SELECT pour confirmer,
l'affichage met en évidence le message “Scanning …” ("Balayage en
cours...") avec une barre de progression rapide. (F. 3) F3
F1
F2
1 2 3 45678 9 10 11
12
13
14
18
OPEN
15
1716

2. Pour activer le balayage automatique complet, appuyez une fois sur
le bouton MENU et appuyez ensuite sur le bouton ou pour
sélectionner “Autoscan full” ("Balayage automatique complet") ; puis
appuyez sur le bouton SELECT pour confirmer ; l'affichage met en
évidence le message “Scanning …” avec une barre de progression
lente.(F.4)
3. Toutes les stations trouvées sont automatiquement enregistrées ;
pour les explorer, appuyez sur les boutons ou et appuyez
alors sur le bouton SELECT lorsque vous trouvez une station que
vous aimeriez écouter.
Réglage d'accord manuel DAB
1. Pour sélectionner le réglage d'accord manuel, appuyez d'abord sur le
bouton MENU pour entrer dans le menu Tune Select, puis appuyez
sur le bouton SELECT pour sélectionner “Manual tune”. ( F. 5)
2. Appuyez sur le bouton ou pour parcourir les chaînes DAB ;
l'affichage présente celles allant de “5A à 13F” et leurs fréquences
associées. (F. 6)
3. Lorsque votre fréquence désirée apparaît à l'affichage, appuyez sur
le bouton SELECT pour confirmer. Le nom du groupe de stations
(ensemble/multiplex) est mis en évidence.
4. Pour écouter la station sélectionnée, appuyez encore sur le bouton
SELECT.
Services secondaires DAB
À certaines occasions vous verrez le symbole “>” directement après le nom d'une station ; cela indique qu'il s'agit de
services secondaires disponibles sur cette station. Ces services secondaires contiennent des services supplémentaires
se rapportant à la station principale. Par exemple, une station de sports peut vouloir ajouter des commentaires
supplémentaires. Les services secondaires sont insérés directement après la station principale.
Modes d'affichage DAB
Chaque fois que vous appuyez sur le bouton INFO, l'affichage fait défiler les modes d'affichage ci-après :
Heure et date
L'heure et la date sont automatiquement mises à jour par les informations diffusées ; il n'est pas nécessaire de régler
l'horloge manuellement. Dans le cas improbable où aucune information n'est reçue de l'horloge, l'affichage met en
évidence “<TIME/DATE>” (“<HEURE/DATE>”).
Fréquence
La fréquence de la station courante.
Débit binaire audio
L'affichage montre le débit binaire audionumérique reçu.
Force du Signal
L'affichage présente une barre de progression pour indiquer la force du signal ; plus le signal est fort, plus la barre
s'allonge de la gauche vers la droite.
DLS
DLS signifie Dynamic Label Segment ; c'est un message défilant que le diffuseur peut inclure dans ses retransmissions.
Le message contient en général des informations telles que les détails de programmes, etc.
Types de Programmes
Ce qui suit décrit le style des programmes qui sont diffusés. Si les informations ne sont pas disponibles, l'affichage met
“<Programme Type>” ("Types de programmes") en évidence.
Ensemble/Multiplex (Nom de groupe)
Ensemble/Multiplex est une collection de stations de radio qui sont groupées et retransmises sur une fréquence unique. Il
y a des multiplexes nationaux et locaux ; les locaux contiennent des stations spécifiques à la région concernée.
Remarque : Appuyez et maintenez enfoncé le bouton INFO pendant plus de 2 secondes ; le numéro de version du
logiciel s'affiche.
FR-3
Ensemble/Multiplex(Group name)
Time/Date Signal strength
DLS
Audio Bit Rate
Programme Type
Frequency
F5
F6
F4

Radio FM
1. Pour sélectionner FM, appuyez sur le bouton DAB/FM, l'affichage
met FM et la fréquence en évidence.
2. Pour activer la recherche automatique, appuyez et maintenez
enfoncé le bouton ou jusqu'au lancement de la recherche
de la bande de fréquence ; l'affichage met en évidence le message
“Searching … >.” ou “Searching …< . (”Recherche en cours… >.”
ou “Recherche en cours …< .”) ; cette recherche s'arrête
automatiquement une fois qu'une station est trouvée. (F. 7) (F.8)
3. Pour activer la recherche manuelle, appuyez à plusieurs reprises
sur le bouton ou .
4. Pour sélectionner le mode audio, appuyez sur le bouton SELECT
pour alterner entre les sélections “Auto” et “Mono”.
Remarque : La radio alterne automatiquement entre les modes stéréo et mono, mais vous pouvez ignorer cela et
procéder à des changements manuels de cette fonction ; ce qui est utile dans le cas des mauvaises réceptions du signal.
ENREGISTREMENT ET ACCÈS AUX STATIONS ENREGISTRÉES
Vous pouvez enregistrer jusqu'à 10 de vos stations favorites (5 DAB et 5
FM) dans les préréglages des stations ; cela vous permet d'avoir un
accès direct à votre station favorite en appuyant juste sur un seul
bouton.
1. Pour enregistrer un préréglage, accordez d'abord votre radio sur
votre station désirée, ensuite appuyez et maintenez enfoncé votre
bouton préféré PRESET (1 - 5) jusqu'à la mise en évidence de
“Preset # saved” (“Préréglage # sauvegardé” ) à l'affichage. (F. 9)
2. Pour accéder à une station préréglée, appuyez sur le bouton
PRESET (1 - 5) que vous avez enregistré.
3. Si vous appuyez sur un bouton de préréglage qui n'a pas été
assigné à une station, l'affichage met en évidence “Preset # empty”
(“Préréglage # vide”). (F. 10)
RESTAURATION DU RÉGLAGE D'ORIGINE
Lorsque vous déplacez la radio vers une autre partie du pays, vos stations préréglées et les stations DAB enregistrées
peuvent ne plus être disponibles. Si c'est le cas, réglez alors votre radio sur ses paramètres d'origine ; pour le faire,
veuillez suivre les étapes ci-après.
1. Branchez votre radio sur la prise et appuyez sur le bouton ON/OFF pour mettre la radio en marche.
2. Appuyez et maintenez enfoncé le bouton MENU jusqu'à ce que l'affichage fasse apparaître le message “Press
SELECT to confirm reset” (“Appuyez sur SELECT pour confirmer la réinitialisation”).
3. Relâchez le bouton MENU et appuyez une fois sur le bouton SELECT ; l'affichage fait d'abord apparaître le message
“Restarting …” ("Redémarrage en cours..."), ensuite s'effectue finalement le balayage automatique complet.
4. À la fin du balayage, la radio sélectionne la première station trouvée de manière alphanumérique.
Remarque : Tous vos préréglages enregistrés DAB & FM se perdent après la réinitialisation.
CARACTÉRISTIQUES
ALIMENTATION: AC 230V~50Hz
DC 9V 1.5V(UM3)x6
PUISSANCE DE SORTIE: 1.0 W
GAMME DE FRÉQUENCES: DAB 174 – 240 MHz
FM 87.5 – 108 MHz
DIMENSION : 200(L)x80(l)x110(H)mm
POIDS: 0.98kg
LES CARACTÉRISTIQUES SONT SUJETTES À CHANGEMENT SANS AUTRE AVERTISSEMENT.
FR-4
F10
F9
F7
F8
Les appareils électriques et électroniques et les batteries contiennent des matériaux, composants et substances qui
peuvent nuire à votre santé et à l'environnement si ces déchets ne sont pas traités de façon appropriée.
Les appareils électriques et électroniques et les batteries sont marqués par le symbole de poubelle avec roulettes et
une croix dessus, voir ci-dessous. Ce symbole indique que les appareils électriques et électroniques et les batteries
doivent être collectés et jetés séparément des ordures ménagères.
En tant qu'utilisateur final, il est important que vous jetiez les batteries usagées dans des centres de collecte appropriés. En
mettant en rebus les batteries pour être recyclées conformément à la règlementation vous contribuez à préserver l’environnement.
Dans toutes les villes existent des points de collecte où les appareils électriques et électroniques et les batteries peuvent y être
déposés sans frais pour le recyclage. Vous pouvez obtenir des informations supplémentaires auprès des autorités locales de la
ville.

IT-1
PRECAUZIONIPERLASICUREZZA
Perottenereil massimointerminididivertimentoeprestazioni,eperacquisiredimestichezzacon
lesue funzioni,leggereattentamentequestomanualeprimadiusarel’apparecchio;questogarantirà
annidiperfettofunzionamentoedifedeleriproduzione.
Noteimportanti
Conservareleistruzioniperconsultazionifuture.
Evitarediinstallarel’apparecchionelleseguentiposizioni:
-luoghiespostialuce solaredirettaoprossimiadapparecchiche emanano calorecomeradiatori
elettrici
-sullasommitàdiapparecchiaturestereo che emanano caloreeccessivo
-luoghipolverosiocon scarsaventilazione
-luoghisoggettiavibrazione costante
-luoghiumidi.
Non ostruireleaperturediventilazione.
Usareicomandiegli interruttoricomedescrittonelmanuale.
Almomentodellaprimaaccensione,verificareche il cavodialimentazione siacorrettamente
inserito.
Permotividisicurezza,non rimuovereicoperchienon tentarediaccedereall’interno delprodotto.
Perlamanutenzione,rivolgersiesclusivamenteapersonalequalificato.
Non tentaredirimuoverelevitiodiaprirel’alloggiamentodell’apparecchio;all’interno non sono
presenticomponentiriparabili dall’utente;
perlamanutenzione,rivolgersiesclusivamenteapersonalequalificato.
ATTENZIONE:
PERRIDURREILRISCHIODISCOSSE ELETTRICHE,NONRIMUOVEREICOPERCHI;
ALL’INTERNONONVISONOCOMPONENTIRIPARABILIDALL’UTENTE;PERL’ASSISTENZA
RIVOLGERSIAPERSONALEQUALIFICATO
.
TENSIONEPERICOLOSA
All’interno delprodottosono presenticonduttoriatensione pericolosa,sufficientea
trasmetterescosseelettriche allepersone.
ATTENZIONE
Ilmanualeutentecontiene importantiistruzionid’usoemanutenzione;aifinidella
sicurezza,ènecessariofarsempreriferimentoalmanuale.
AVVERTENZA:PERRIDURREILRISCHIODICHOCELETTRICO,NONESPORREQUESTO
DISPOSITIVOASPRUZZIOGOCCIOLAMENTO.
Nota:
Dopoun prolungatoutilizzo,l’apparecchiosiriscalderà.Questofenomeno ènormaleenon
rappresentaun problema.
All’interno dell’apparecchiosono presentimicroprocessoriche potrebberopresentare
malfunzionamentiinseguitoainterferenzeodisturbiesterni.Incasodimalfunzionamento,scollegare
ericollegarel‘apparecchio.
VARNING
RISK FÖR ELEKTRISK
STÖT ÖPPAN EJ

CARATTERISTICHE E COMANDI
1. PULSANTE DAB/FM 7. PULSANTE RESET 2 13. PULSANTE SELEZIONE DN
2. PULSANTE SELEZIONE SU 8. PULSANTE RESET 3 14. PULSANTE ON/OFF
3. PULSANTE SELEZIONE 9. PULSANTE RESET 4 15. ASTA ANTENNA
4. PULSANTE MENU 10. PULSANTE PRESET 5 16. CAVO AC
5. PULSANTE INFO 11. CONTROLLO VOLUME 17. VANO BATTERIA
6. PULSANTE PRESET 1 12. DISPLAY LCD 18. PRESA CUFFIE
ASCOLTO DELLA RADIO
Consigli per una migliore ricezione
La presente radio è munita di antenna telescopica singola DAB/FM al fine di ottenere la massima resa possibile. Si
consiglia pertanto di estendere l’antenna al completo e regolarne la posizione e la direzione fino ad ottenere la migliore
ricezione possibile. Per una ricezione DAB ideale, si consiglia vivamente la posizione verticale.
Funzionamento AC & DC (batteria)
La presente radio comprende una funzione operativa AC/DC automatica. Quando la radio è collegata alla rete AC,
funziona in AC. Se la radio viene scollegata dalla rete e le batterie sono idoneamente installate all’interno del vano
batteria, la radio passa automaticamente in modalità di funzionamento con batteria DC.
Con il funzionamento AC o batteria DC, esercitare una pressione sul pulsante ON/OFF per posizionare la radio su on e
off.
Attenzione: Al fine di ottenere il migliore rendimento in modalità DC, si consiglia vivamente l'utilizzo di batterie alcaline.
Avvio
Una volta collegata la radio alla fonte di alimentazione e dopo la prima
accensione, essa entra automaticamente in modalità DAB per effettuare
l’auto-scan. Durante lo scan, sul display viene visualizzato “Scanning in
corso…” unitamente ad una barra di scorrimento che indica il corso della
scansione e la quantità di stazioni trovate fino a quel momento (F. 1) (F. 2).
IT-2
Una volta terminata la scansione, la radio seleziona la prima stazione
alfanumerica trovata. Premere il pulsante o per analizzare le stazioni
trovate, quindi selezionare il pulsante SELEZIONA per selezionare la
stazione.
Attenzione: In caso non venga trovata alcuna stazione dopo l'auto-scan, la
radio entra nel menu Selezione Stazione e viene visualizzato “Sintonizzazione manuale” sul display. Premere quindi il
pulsante SELEZIONA per selezionare la stazione manualmente oppure i pulsanti / per selezionare la modalità di
auto-scan per le stazioni.
Modalità auto-scan DAB
Esistono due tipi di modalità di auto-scan, una consiste nell’auto-scan locale e l’altra nell’auto-scan completo. L’auto-scan
locale cerca unicamente i canali inglesi su banda III nel Regno Unito, mentre l’auto-scan completo cerca tutti i canali su
banda III DAB. Una volta terminata la scansione, viene automaticamente selezionata la prima stazione alfanumerica
trovata.
1. Per attivare l’auto-scan locale, premere il pulsante MENU per
accedere al menu Selezione Stazione, quindi premere il pulsante o
per selezionare “Autoscan locale”, quindi premere il pulsante
SELEZIONA per confermare; sul display viene visualizzato “Scanning
in corso…” con una barra di scorrimento a progressione rapida (F. 3).
1 2 3 45678 9 10 11
12
13
14
18
OPEN
15
1716
F1
F2
F3

2. Per attivare l’auto-scan completo, premere una volta il pulsante MENU
quindi premere il pulsante o per selezionare “Autoscan
completo”, quindi premere il pulsante SELEZIONA per confermare;
viene visualizzato sul display “Scanning in corso…” con una barra di
scorrimento a progressione lenta (F.4).
3. Tutte le stazioni trovate verranno automaticamente memorizzate; per
verificare le stazioni trovate, premere i pulsanti o quindi premere
il pulsante SELEZIONA una volta trovata la stazione che si desidera
ascoltare.
Sintonizzazione manuale DAB
1. Per selezionare la sintonizzazione manuale, premere prima il pulsante
MENU per accedere al Menu Selezione stazioni, quindi premere il
pulsante SELEZIONA per selezionare “Sintonizzazione manuale” ( F. 5).
2. Premere il pulsante o per scorrere i canali DAB, sul display viene
visualizzato “5A - 13F” con le relative frequenze (F. 6).
3. Quando sul display compare la frequenza desiderata, premere il pulsante
SELEZIONA per confermare. Il nome del gruppo stazione
(ensemble/multiplex) viene quindi visualizzato.
4. Per ascoltare la stazione selezionata, premere nuovamente il pulsante
SELEZIONA.
Servizi secondari DAB
In contemporanea, viene visualizzato il simbolo “>” direttamente dopo il nome della stazione; ciò indica la presenza di
servizi secondari disponibili per tale stazione, i quali contengono servizi extra relativi alla stazione principale, tra cui
stazioni sport con commenti fuori campo. I servizi secondari vengono direttamente riportati dopo la stazione principale.
Modalità visualizzazione DAB
Ogni qualvolta si preme il pulsante INFO, il display effettua il ciclo tra le seguenti modalità di visualizzazione:
Ora e data
L’orario e la data verranno automaticamente aggiornati dalle informazioni trasmesse; non è pertanto necessario
impostare l’orologio manualmente. Nell’improbabile caso che non vengano ricevute le informazioni sull’orario, il display
visualizza “<ORA/DATA>”.
Frequenza
La frequenza della stazione attuale viene visualizzata.
Tasso bit audio
Il display visualizza il tasso dei bit audio digitali ricevuti.
Potenza segnale
Il display visualizza una barra di scorrimento che indica la potenza del segnale; più esso è forte, più lunga è la barra da
sinistra a destra.
DLS
DLS è l’acronimo di Dynamic Label Segment. Si tratta di un messaggio a scorrimento che l’emittente può includere nella
trasmissione. Il messaggio di solito comprende informazioni tra cui dettagli sul programma, ecc.
Tipo programma
Descrive lo stile del programma trasmesso. Se le informazioni non sono disponibili, sul display viene visualizzato “<Tipo
programma>”.
Ensemble/Multiplex (nome gruppo)
Ensemble/Multiplex è un insieme di stazioni radio raccolte e trasmesse insieme in una singola frequenza. Esistono
multiplex nazionali e locali; questi ultimi contengono stazioni specifiche all’area geografica.
Attenzione: Tenendo premuto il pulsante INFO per più di 2 secondi, viene visualizzato il numero di versione del software.
IT-3
F5
F6
F4
Ensemble/Multiplex(Group name)
Time/Date Signal strength
DLS
Audio Bit Rate
Programme Type
Frequency

Radio FM
1. Per selezionare FM, premere il pulsante DAB/FM, sul display viene
visualizzato FM e la frequenza.
2. Per attivare la ricerca automatica, tenere premuto il pulsante o
fino a che non inizia la scansione della banda di frequenza; il display
mostra “Ricerca in corso… >.” oppure “Ricerca in corso …< .”, e si
ferma automaticamente una volta trovata la stazione (F. 7) (F.8).
3. Per attivare la ricerca manuale, premere ripetutamente il pulsante
o.
4. Per selezionare la modalità audio, premere il pulsante SELEZIONA per
impostare tra “Auto” e “Mono”.
Attenzione: La radio passa automaticamente tra le modalità stereo e mono, ma è possibile impostare manualmente tale
funzione, utile in caso di ricezione del segnale scarsa.
MEMORIZZAZIONE E RICHIAMO STAZIONI MEMORIZZATE
È possibile memorizzare fino a 10 stazioni preferite (5 DAB e 5 FM) nelle
preselezioni, per avere accesso diretto alle stazioni favorite toccando un
solo pulsante.
1. Per memorizzare una preselezione, sintonizzare in primo luogo la
stazione desiderata, quindi tenere premuto il pulsante PRESET
desiderato (1 - 5) fino a che sul display non viene visualizzato
“Preselezione # salvata". (F. 9)
2. Per richiamare una stazione preselezionata, premere il pulsante
PRESET (1 - 5) memorizzato in precedenza.
3. Premendo una preselezione a cui non è ancora stata assegnata una
stazione, il display mostra “Preselezione vuota”. (F. 10)
RESET DI FABBRICA
Quando viene trasportata la radio in un’altra parte del paese, le stazioni pre-sintonizzate e memorizzate DAB potrebbero
non essere più disponibili. In tal caso, sarà necessario re-impostare la radio alle impostazioni originali di fabbrica.
Pertanto, effettuare la reimpostazione, attendendosi alla seguente procedura:
1. Collegare la radio alla rete elettrica e premere il pulsante ON/OFF per accendere la radio.
2. Tenere premuto il pulsante MENU fino a che sul display non si visualizza “Premere SELEZIONA per confermare la
reimpostazione”.
3. Lasciare il pulsante MENU quindi premere una volta il pulsante SELEZIONA; il display mostra “Riavvio in corso…”,
effettuando quindi l’auto-scan completo.
4. Una volta terminato lo scan, la radio seleziona e visualizza la prima stazione alfanumerica trovata.
Attenzione: Tutte le pre-impostazioni memorizzate DAB e FM vengono eliminate una volta terminata la reimpostazione.
SPECIFICHE TECNICHE
ALIMENTAZIONE: CA 230V~50Hz
CC 9V 1,5V(UM3) x 6
POTENZAINUSCITA: 1.0Watt
GAMMADIFREQUENZA: DAB174-240MHz
FM 87,5 - 108 MHz
DIMENSIONI: 200(l)x80(p)x110(h)mm
PESO: 0.98 kg
SPECIFICA SOGGETTA A MODIFICA SENZA PREAVVISO
IT-4
F7
F8
F10
F9
L’attrezzatura elettrica e elettronica incluse le batterie contengono materiali, componenti e sostanze che possono
essere dannose per la salute e l’ambiente se il materiale di scarto (attrezzatura elettrica ed elettronica gettata e
batterie) non è gestito correttamente.
L’attrezzatura elettrica ed elettronica e le batterie sono segnate con una croce sul simbolo del cestino, visto sotto.
Questo simbolo significa che l’attrezzatura elettrica e elettronica e le batterie non dovrebbero essere eliminate con
altri rifiuti domestici ma dovrebbero esserlo separatamente.
E’ importante che inviate le batterie usate alle strutture appropriate e indicate. In questo modo vi accertate che le batterie siano
riciclate secondo la legislatura e non danneggiano l’ambiente.
Tutte le città hanno stabilito punti di raccolta dove l’attrezzatura elettronica ed elettrica e le batterie possono essere inviate senza
spese alle stazioni di riciclaggio e altri siti di raccolta o raccolti da casa. Informazioni aggiuntive sono disponibili al dipartimento
tecnico della città.

ES-1
SPRECAUCIONES DESEGURIDAD
Paralograrelmáximorendimientoydisfrute,yparafamiliarizarsecon lasfuncionesdeeste
aparato,lea estemanualdetenidamenteantesdeutilizarlaradio.Deestemodo,seaseguraráun
funcionamientocorrecto,durantemuchosañossinningúntipodefallos.
Notasimportantes
Guardeestasinstruccionesdeusoyseguridadcomoreferenciaparaelfuturo.
Noinstaleelaparatoen ubicacionescomolasque sedescriben acontinuación:
*Lugaresexpuestosalaluzsolardirectaocerca defuentesdecalor,deltipoderadiadores
eléctricos.
*Sobreaparatosestéreo que emitan un calorexcesivo.
*Lugaresdondesebloquee laventilaciónocon excesodepolvo.
*Lugaressujetosavibracionesconstantes.
*Lugarescon humedad.
Asegúresedeno obstruirlasaberturasdeventilación.
Utilice loscontrolesdesintonizaciónylosinterruptoresdeacuerdocon lasinstruccionesdel
manual.
Antesdeencenderelaparatoporprimeravez,asegúresedeque sehayainstaladocorrectamente
elcabledealimentacióneléctrica.
VAVISO:
PARA REDUCIRELRIESGO DEDESCARGASELÉCTRICAS,NORETIRELATAPA(OPARTE
TRASERA),NOHAYPIEZASENELINTERIORQUEPUEDANSERREPARADASPORELUSUARIO.
PÓNGASE ENCONTACTOCONUN SERVICIOTÉCNICOCUALIFICADO.
VOLTAJEPELIGROSO
Voltajepeligrosodeloscablesconductores,que puedeserdelamagnitudsuficiente
paracausardescargaseléctricas.
ATENCIÓN
Elmanualdelpropietariocontiene importanteinformacióndeusoymantenimiento;
parasuseguridad,consulteelmanual.
PRECAUCIÓN:PARA EVITAR ELRIESGO DEINCENDIOODESCARGASELÉCTRICASEVITE
LAENTRADADEAGUAOSALPICADURASENELAPARATO.
Nota:
La temperaturadelaparatoaumentarácuandoseutilice duranteun periodoprolongadode
tiempo.Estoesnormalyno implica ningúntipodeproblema.
Esteaparatoincluyemicroprocesadoresque puedefallarcomoresultadodeinterferencias
eléctricasoruidosexternos.Sielaparatono funciona correctamente,desconéctelodelared
eléctrica yvuelvaaconectarlo.
VARNING
RISK FÖR ELEKTRISK
STÖT ÖPPAN EJ

CONTROLES Y FUNCIONES
1. BOTÓN DE DAB/FM 7. BOTÓN DE RESET 2 13. BOTÓN DE SELECT DN
2. BOTÓN DE SELECT UP 8. BOTÓN DE RESET 3 14. BOTÓN DE ENCENDIDO/APAGADO
3. BOTÓN DE SELECT 9. BOTÓN DE RESET 4 15. ANTENA
4. BOTÓN DE MENU 10. BOTÓN DE PRESET 5 16. CABLE DE CORRIENTE ALTERNA
5. BOTÓN DE INFO 11. CONTROL DE VOLUMEN 17. COMPUERTA DE LAS BATERÍAS
6. BOTÓN DE PRESET 1 12. PANTALLA LCD 18. CONECTOR DE AURICULARES
ESCUCHA DE SU RADIO
Consejos para lograr una mejor recepción de señal
Esta radio viene dotada de una sola antena telescópica DAB/FM, para lograr el mejor rendimiento; usted debe extender
la antena y ajustar su posición y su dirección hasta lograr la mejor señal. Para una recepción ideal de DAB, se
recomienda colocar la antena en posición vertical.
Funcionamiento por corriente alterna/continua (baterías)
Esta radio incorpora una función de auto-detección de corriente alterna/continua; cuando la radio permanece conectada
a una fuente de corriente alterna, funciona en modo de corriente alterna. Si la radio se encuentra desconectada de su
fuente y con baterías adecuadamente instaladas en el compartimento de las baterías, el modo cambiará
automáticamente a corriente continua.
Tanto en modo de corriente alterna como en el de corriente continua por baterías, pulse y suelte con firmeza el botón de
ON/OFF para encender o apagar la radio.
Nota: Para obtener el mejor funcionamiento en modo de corriente continua, se recomienda el uso de baterías alcalinas.
Inicio
Al enchufar la radio y encenderla por vez primera, entrará de forma
automática en modo DAB y procederá en modo de auto escaneo. Durante
el escaneo, la pantalla mostrará “Escaneando…” junto a una barra
deslizante que indicará el progreso del escaneo y la cantidad de emisoras
que van siendo encontradas. (F. 1) (F. 2)
Una vez finalizado el escaneo, la radio seleccionará aquella emisora
alfanumérica encontrada. Podrá usted presionar en ese momento el botón
de o para explorar las emisoras encontradas y después basta con
que usted presione el botón de SELECT (SELECCIÓN) para seleccionar
su emisora.
Nota: Si no se encontró ninguna emisora tras el auto escaneo, la radio entrará en el Menú de Selección de Emisoras y la
pantalla mostrará la frase “Emisora manual”; podrá entonces presionar el botón de SELECT para seleccionar una
emisora manual o los botones de / para seleccionar los modos de auto escaneo para emisoras.
Modos de auto escaneo DAB
Existen dos tipos de modos de auto escaneo, uno llamado auto escaneo local y el otro llamado auto escaneo completo.
El auto escaneo local buscará únicamente canales para la UK DAB Band III, mientras que el auto escaneo completo
efectuará búsquedas en todos los canales DAB Band III. Una vez concluido el escaneo, la primera emisora alfanumérica
quedará automáticamente seleccionada.
1. Para activar el auto escaneo local, presione el botón de MENU y
accederá al Menú de Selección de Emisoras; presione a continuación
el botón de o para seleccionar “Auto escaneo local”, seguido
del botón de SELECT para confirmar; la pantalla mostrará la frase
“Escaneando…” y una barra deslizante de carga rápida. (F. 3)
ES-2
1 2 3 45678 9 10 11
12
13
14
18
OPEN
15
1716
F1
F2
F3

2. Para activar el escaneo completo, presione el botón de MENU una
vez y presione el botón de o para seleccionar “Auto escaneo
completo”; después presione el botón de SELECT para confirmar y la
pantalla mostrará la frase “Escaneando …” y una barra deslizante de
progreso más lenta.(F.4)
3. Todas las emisoras que fueron encontradas quedarán almacenadas
automáticamente; para explorar las emisoras encontradas, presione
los botones de o y después presione el botón de SELECT una
vez que encuentre una emisora que a usted le gustaría escuchar.
Sintonización manual DAB
1. Para seleccionar una emisora en modo manual, primero presione el
botón de MENU para acceder al Menú de Selección de Emisoras, y
después presione el botón de SELECT para seleccionar “Emisora
manual”. ( F. 5)
2. Presione el botón de o para moverse por los canales DAB; la
pantalla mostrará “de 5A a 13F” y sus frecuencias asociadas. (F. 6)
3. Cuando su frecuencia deseada aparezca en pantalla, presione el
botón de SELECT y confírmela. Se mostrará el nombre del grupo de
emisoras (ensemble/multiplex).
4. Para escuchar la emisora seleccionada, presione el botón de SELECT
una vez más.
Servicios secundarios DAB
En ocasiones, usted observará la presencia del símbolo de “>” justo detrás del nombre de cada emisora, lo cual indica
que existen servicios secundarios disponibles en esa emisora. Estos servicios secundarios contienen servicios extra que
se relacionan con la emisora primaria. Por ejemplo, una emisora deportiva que desee añadir comentarios extra. Los
servicios secundarios aparecen insertados justo detrás de la emisora primaria.
Modos de pantalla DAB
Cada vez que usted presione el botón de INFO, la pantalla circulará a través de los siguientes modos de pantalla:
Time and date (Hora y fecha)
La hora y la fecha serán actualizadas de forma automática por la información emitida; no hay necesidad de configurar la
hora de forma manual. En caso poco probable de que no se reciba ninguna información horaria, la pantalla mostrará la
frase “<TIME/DATE>” (HORA/FECHA).
Frequency (Frecuencia)
La frecuencia de la presente emisora aparecerá en pantalla.
Audio bit rate (Tasa de bits de audio)
La pantalla mostrará la tasa de bits de audio digital que esté siendo recibida.
Signal strength (Potencia de la señal)
La pantalla mostrará una barra deslizante para indicar la potencia de la señal; cuanto más potente sea la señal, más
larga será la barra de izquierda a derecha.
DLS
DLS significa Dynamic Label Segment (Segmento de Etiquetas Móviles), y consiste en un mensaje desplegable que la
emisora puede que incluya en sus retransmisiones. El mensaje incluye, por lo general, información como es el caso de
datos acerca del programa, etc.
Programme Type (Tipo de programa)
Describe el estilo del programa que esté siendo emitido. Si la información no se encontrará disponible, la pantalla
mostraría la frase “<Programme Type>”.
Ensemble/Multiplex (Nombre de grupo)
La Ensemble/Multiplex es una agrupación de emisoras de radio unidas y retransmitidas en una sola frecuencia. Existen
multiplex nacionales y locales; los locales contienen emisoras específicas de una zona.
Nota: Presione y mantenga el botón de INFO durante no más de 2 segundos; se mostrará el número de la versión del
programa.
ES-3
F5
F6
F4
Ensemble/Multiplex(Group name)
Time/Date Signal strength
DLS
Audio Bit Rate
Programme Type
Frequency
Table of contents
Languages:
Other Denver Radio manuals

Denver
Denver IR-140 User manual

Denver
Denver DAB-33 User manual

Denver
Denver DAB-60LW User manual

Denver
Denver DAB-35 User manual

Denver
Denver DAB-36 User manual

Denver
Denver DAB-23 User manual

Denver
Denver WRB-50 User manual

Denver
Denver MIR-260 User manual

Denver
Denver SCR-2010 User manual

Denver
Denver DAB-33 User manual

Denver
Denver TR-61 User manual

Denver
Denver DAB-38 User manual

Denver
Denver CR-212 User manual

Denver
Denver DAB-34 User manual

Denver
Denver CRD-506 User manual

Denver
Denver MCR-50MK2 User manual

Denver
Denver CRL-330 User manual

Denver
Denver CAD-438BT User manual

Denver
Denver MCI-100 User manual

Denver
Denver IR-110 User manual