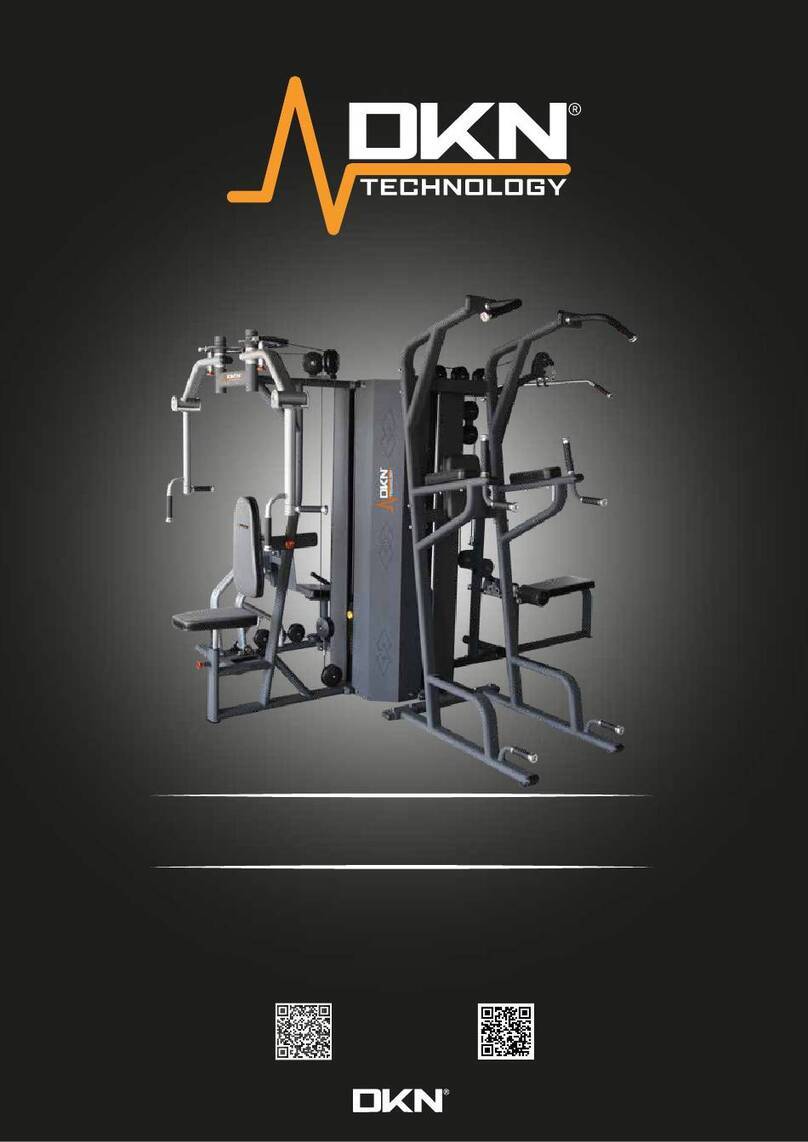
DKN technology SC PRO User manual

1
SC PRO
OWNER’S MANUAL
WEBSITE MANUAL
OWNER’S MANUAL

2
1
STAIR MACHINE

3
2
WARNING
Read all instructions carefully before using this product. Retain this owner’s
manual for future reference:
----When using this treadmill, keep attaching the safety pull pin rope to your clothes.
----When you are running, keep your hand swinging natural, stare frontward, never look
down at your feet.
----Add the speed step by step when running.
----When emergency happens, take away the “emergent stop button” immediately.
----Leave the treadmill after the running belt stop stably.
Caution: Read the assembly instruction carefully, follow the instruction
when assemble.
ATTENTION
01- Before starting any exercise program, consult with your physician or health
professional.
02- Check all the bolts locked.
03- Never put the treadmill in the wetness area, or it will cause troubles.
04- We take no responsibility for any troubles or hurts due to above reasons.
05- Dress sport clothes and shoes before running.
06- Do not do exercise in 40 minutes after meal.
07- To prevent hurts, please warm up before exercise.
08- Consult with doctor before exercise if you have high blood pressure.
09- The treadmill is only used for adults.
10- Provide the olds, children and handicapped with good care, guide and supervision.
11- Do not plug anything into any parts of this equipment, or it may damage.
12- Do not connect line to the middle of cable; do not lengthen cable or change the cable
plug; do not put any heavy thing on cable or put the cable near the heat source; forbid
using socket with several holes, these may cause fire or people may be hurt by the
power.

4
3
13- Cut off the power when the equipment is not used. When the power is cut off , do not
pull the power line to keep the wire unbroken.
14- Maximum weight of user: 180 KGS.
15- Pulse monitor data may not be accurate, can not be used for medicine. Over-exercise
may cause
injury, even death. If you have a feeling of dizziness, sickness or other abnormal
symptoms, please
stop training and consult a doctor immediately.
IMPORTANT SAFETY PRECAUSTION
1. Plug the power cord of the treadmill directly into a dedicated grounded circuit. This
product must be grounded. If it has breakdown, grounding provides a path of least
resistance for electric current to reduce the risk of electric shock.
2. Position the treadmill on a clear, level surface. Do not place the treadmill on thick
carpet as it may interfere with proper ventilation. Do not place the treadmill near water or
outdoors.
3. Position treadmill so that the wall plug is visible and accessible.
4. Never start the treadmill while you are standing on the walking belt. After turning the
power on and adjusting the speed control, there may be a pause before the walking belt
begins to move, always stand on the foot rails on the sides of the frame until the belt is
moving.
5. Wear appropriate clothing when exercising on the treadmill. Do not wear long, loose
fitting clothing that may be caught in the treadmill. Always wear running or aerobic shoes
with rubber soles.
6. Make sure the power supply is connected and the safety lock is effective before using
the treadmill. Fit one side of the safety lock on the treadmill and clip the other side on your
clothes or belt, which will enable you to pull off the safety lock promptly in an emergency.
7. Always unplug the power cord before remove the treadmill motor cover.
8. Make sure there is no less than 2*1m space behind the treadmill.
9. Keep small children away from the treadmill during operation.
10. Always hold the handrails when initially walking or running on the treadmill, until you
are comfortable with the use of the treadmill.

5
4
10. Always attach the safety pull pin rope to your clothing when using the treadmill. If the
treadmill should suddenly increase in speed due to an electronics failure or the speed
being inadvertently increased, the treadmill will come to a sudden stop when the pull pin
is disengaged from the console.
12. In case of any abnormality during the use process, please remove the safety lock
immediately, grasping the handlebar and jumping onto the two edgings, then get off the
treadmill after it stops.
13. When the treadmill is not being used, the power cord should be unplugged and the
safety pull pin removed.
14. Put the safety key away where can not be reached by the children. Minors must be
accompanied by the adults when using the treadmill.
15. Before starting any exercise program, consult with your physician or health
professional. He or she can help establish the exercise frequency, intensity (target heart
zone) and time appropriate for your particular age and condition. If you have any pain or
tightness in your chest, an irregular heartbeat, shortness of breath, feel faint or have any
discomfort while you exercise, STOP! Consult your physician before continuing.
16. If you observe any damage or wear on the mains plug or on any section of the mains
lead then please have these replaced immediately by a qualified electrician – do not
attempt to change or repair these yourself.
17. If the supply cord is damaged, it must be replaced by the manufacturer, its service
agent or similarly qualified persons in order to avoid a hazard.
18. Put your feet on the side rail before using the treadmill, and always attach the safety
pull pin rope to your clothing. Hold the handle bar before the running belt moving well
(feel the running speed by your single foot before using it). To avoid loss balance, please
slow down the speed to the lowest or take off the safety. And hold the handle bar to jump
to the side rail when emergency or the safety key is not attached.
19. Make sure the treadmill has stopped before folding. Please don’t operate it after
folding the treadmill.

6
5
WARNING! Consult your physician before starting with any exercise program. He
can advise on the kind of training and which impact is suitable.
WARNING! This machine is not suitable for therapeutic or medical purpose.
WARNING! Over exercising may result in serious injury or death. If you
experience dizziness, nausea, chest pain, or any other abnormal symptoms
STOP EXERCISING IMMEDIATELY AND CONSULT A PHYSICIAN WITHOUT
DELAY.
WARNING! Inappropriate use of this machine such as while under the influence
of drugs or alcohol, not in line with instructions or excessive usage, may result
serious injury or death.
WARNING! Incorrect/excessive training may cause health injuries.
►The owner’s manual is only for customers’ reference.
►The supplier cannot guarantee for mistakes occurring due to translation or change in
technical specification of the product.
►DKN-Technology ASSUMES NO RESPONSIBILITY FOR PERSONAL INJURY OR
PROPERTY DAMAGE SUSTAINED BY OR THROUGH THE USE OF THIS
PRODUCT

7
6
ASSEMBLY STEPS
STEP 1:
1. Open the package, take out all parts and place the main frame(1) on the flat ground.
2. Fasten the part A of pedal(40)(as P1 shows) to the part B of the main frame, please
make sure the two parts are centred.
P1

8
7
STEP 2:
1. Connecting the Console extension wire (104) to the lower wire (105);
2. Assemble the support column(5) on the main frame(1) with screw(68), and washer(95);
DO NOT TIGHTEN NOW.
3. Insert the decorative cover (58) and to the support column(5), then buckle it on the
main frame(1).

9
8
STEP 3:
1: Pass the switch upper wire 1(106) through the right decorative cover (41R)to connect
with the lower wire1 (107);
2: Insert the decorative cover (41L / R) on the support column (2L / R), assemble but not
tighten the support column (2L / R) on the main frame(1) with screw(69) and washer(95),
3:Assemble but not tighten the handrail(3L/R) on the support column (2L / R) with
screw(73) and washer(96)

10
9
STEP 4
1: Connect the pulse extension wire 1 (111) to the pulse extension wire 2 (112); connect
the key board extension wire 1 (115) to the key board extension wire2 (116);
2: Insert the rear handrail(4) to the handrail (3L / R), then assemble but not tighten the
rear handrail(4) to the handrail (3L / R) with screw(73) and washer(96);
3:Assemble but not tighten the rear handrail(4) on the support column(5) with screw(72);
4: Tighten all the screws now;
5: Fasten the decorative cover (41L / R) on the main frame (1);
6: Lock the decorative cover (44L/ R) and (45L / R) on the support column (2L / R) with
screw (79) and (82).

11
10
STEP 5:
1: As shown in Figure 1, connect the wires on the console (47) with the corresponding on
the rear handrail (4) and the console support column (5); (matched by the same wire
number)
2: Tighten the console (47) on the support column (5) with screw (78), then lock the
decorative cover(48) on the console (47) with screw(82);
3:Lock the water bottle holder (49) on the support column (5) from top to bottom, tighten
with screw(78).

12
11
Console manual
I: Start
1. Turn on the power switch, unscrew the two emergency stop switches, and
ensure that there is no obstruction in the infrared induction area
or tap the screen stepper to start in2、Press the armrest button
the lowest gear.
3、Press the armrest button as needed or tap on the screen
adjust the speed gear, the speed gear range is 1-25.
4、Press the armrest button during operation or tap the
screen the stepper stops slowly.
II、Function introduction
◆
◆
USB/Headset function/Wireless charging function/Music Bluetooth:
:
:USB interface to read the audio and video data of the USB stick
:Audio output (headphones)
:Can charge a phone with wireless charging
Music Bluetooth name: SYMK
III、Main interface
The main interface is divided into six functional modules: time and date, quick start, program
exercise, application, settings, and sports center (built-in time countdown, calorie countdown,
height countdown, step countdown, floor mode, custom)

13
12
◆
◆
The controls of the main interface are explained in detail:
:
icon Function Description icon Function Description
T
T
i
i
m
m
e
e
d
d
a
a
t
t
e
e
U
U
s
s
e
e
d
d
t
t
o
o
d
d
i
i
s
s
p
p
l
l
a
a
y
y
t
t
h
h
e
e
c
c
u
u
r
r
r
r
e
e
n
n
t
t
t
t
i
i
m
m
e
e
a
a
n
n
d
d
d
d
a
a
t
t
e
e
a
a
p
p
p
p
l
l
y
y
B
B
u
u
i
i
l
l
t
t
-
-
i
i
n
n
t
t
h
h
i
i
r
r
d
d
-
-
p
p
a
a
r
r
t
t
y
y
m
m
u
u
s
s
i
i
c
c
A
A
P
P
P
P
,
,
t
t
h
h
i
i
r
r
d
d
-
-
p
p
a
a
r
r
t
t
y
y
v
v
i
i
d
d
e
e
o
o
A
A
P
P
P
P
;
;
I
I
n
n
t
t
e
e
r
r
n
n
e
e
t
t
,
,
s
s
o
o
c
c
i
i
a
a
l
l
,
,
n
n
e
e
w
w
s
s
.
.
G
G
e
e
t
t
s
s
t
t
a
a
r
r
t
t
e
e
d
d
q
q
u
u
i
i
c
c
k
k
l
l
y
y
S
S
t
t
a
a
r
r
t
t
e
e
x
x
e
e
r
r
c
c
i
i
s
s
i
i
n
n
g
g
q
q
u
u
i
i
c
c
k
k
l
l
y
y
Program motion
Built-
in 36 kinds of
programs

14
13
S
S
p
p
o
o
r
r
t
t
s
s
c
c
e
e
n
n
t
t
e
e
r
r
B
B
u
u
i
i
l
l
t
t
-
-
i
i
n
n
6
6
w
w
a
a
y
y
s
s
o
o
f
f
e
e
x
x
e
e
r
r
c
c
i
i
s
s
i
i
n
n
g
g
:
:
T
T
i
i
m
m
e
e
C
C
o
o
u
u
n
n
t
t
d
d
o
o
w
w
n
n
,
,
C
C
a
a
l
l
o
o
r
r
i
i
e
e
C
C
o
o
u
u
n
n
t
t
d
d
o
o
w
w
n
n
,
,
H
H
e
e
i
i
g
g
h
h
t
t
C
C
o
o
u
u
n
n
t
t
d
d
o
o
w
w
n
n
,
,
S
S
t
t
e
e
p
p
C
C
o
o
u
u
n
n
t
t
d
d
o
o
w
w
n
n
,
,
F
F
l
l
o
o
o
o
r
r
M
M
o
o
d
d
e
e
,
,
C
C
u
u
s
s
t
t
o
o
m
m
S
S
e
e
t
t
u
u
p
p
B
B
u
u
i
i
l
l
t
t
-
-
i
i
n
n
b
b
a
a
s
s
i
i
c
c
s
s
e
e
t
t
t
t
i
i
n
n
g
g
s
s
(
(
b
b
r
r
i
i
g
g
h
h
t
t
n
n
e
e
s
s
s
s
a
a
d
d
j
j
u
u
s
s
t
t
m
m
e
e
n
n
t
t
,
,
v
v
o
o
l
l
u
u
m
m
e
e
a
a
d
d
j
j
u
u
s
s
t
t
m
m
e
e
n
n
t
t
,
,
l
l
a
a
n
n
g
g
u
u
a
a
g
g
e
e
s
s
e
e
l
l
e
e
c
c
t
t
i
i
o
o
n
n
,
,
m
m
a
a
c
c
h
h
i
i
n
n
e
e
m
m
a
a
n
n
a
a
g
g
e
e
m
m
e
e
n
n
t
t
,
,
f
f
a
a
c
c
t
t
o
o
r
r
y
y
m
m
o
o
d
d
e
e
,
,
o
o
n
n
e
e
-
-
c
c
l
l
i
i
c
c
k
k
c
c
l
l
e
e
a
a
n
n
u
u
p
p
)
)
a
a
n
n
d
d
W
W
I
I
F
F
I
I
s
s
e
e
t
t
t
t
i
i
n
n
g
g
s
s
.
.
W
W
I
I
F
F
I
I
i
i
c
c
o
o
n
n
:
:
U
U
s
s
e
e
d
d
t
t
o
o
s
s
e
e
e
e
i
i
f
f
t
t
h
h
e
e
s
s
y
y
s
s
t
t
e
e
m
m
i
i
s
s
c
c
o
o
n
n
n
n
e
e
c
c
t
t
e
e
d
d
t
t
o
o
a
a
W
W
I
I
F
F
I
I
n
n
e
e
t
t
w
w
o
o
r
r
k
k
◆
◆
Feature breakdown
1.1 How to manually adjust the time, date, and
geographic location:
(1) Click Weather forecast icon time display,
you can manually adjust the time and date

15
14
parameters:
2. Application
Built-in third-party music and video APP applications
◆The five functional modules of the
Internet all need to be connected to the WIFI
network to be used;
◆Support playback of MP3, MP4, MOV, APE,
and other common audio and video format files;
◆Please try not to browse web content or
watch video files when exercising, so that it
is easy to be distracted and cause accidental
injury; you can first complete the content
setting, and then start the stepper;
◆Listen to some relaxing music during the
exercise process to reduce the borin
g feeling
during the exercise process.

16
15
tapicon,Enter the application interface:
◆Introduction to the motion interface in third-party
apps

17
16
Control catalog
S
S
t
t
a
a
r
r
t
t
b
b
u
u
t
t
t
t
o
o
n
n
:
:
C
C
l
l
i
i
c
c
k
k
t
t
o
o
s
s
t
t
a
a
r
r
t
t
t
t
h
h
e
e
s
s
t
t
e
e
p
p
p
p
e
e
r
r
B
B
a
a
c
c
k
k
k
k
e
e
y
y
:
:
C
C
l
l
i
i
c
c
k
k
t
t
o
o
r
r
e
e
t
t
u
u
r
r
n
n
t
t
o
o
t
t
h
h
e
e
p
p
r
r
e
e
v
v
i
i
o
o
u
u
s
s
l
l
a
a
y
y
e
e
r
r
M
M
a
a
i
i
n
n
i
i
n
n
t
t
e
e
r
r
f
f
a
a
c
c
e
e
k
k
e
e
y
y
:
:
C
C
l
l
i
i
c
c
k
k
t
t
o
o
r
r
e
e
t
t
u
u
r
r
n
n
t
t
o
o
t
t
h
h
e
e
m
m
a
a
i
i
n
n
i
i
n
n
t
t
e
e
r
r
f
f
a
a
c
c
e
e
H
H
i
i
d
d
e
e
b
b
u
u
t
t
t
t
o
o
n
n
:
:
C
C
l
l
i
i
c
c
k
k
t
t
o
o
s
s
h
h
o
o
w
w
o
o
r
r
h
h
i
i
d
d
e
e
t
t
h
h
e
e
o
o
p
p
e
e
r
r
a
a
t
t
o
o
r
r
i
i
n
n
t
t
e
e
r
r
f
f
a
a
c
c
e
e
Displays the current
motion data
Q
Q
u
u
i
i
c
c
k
k
k
k
e
e
y
y
s
s
P
P
a
a
u
u
s
s
e
e
k
k
e
e
y
y
,
,
s
s
p
p
e
e
e
e
d
d
g
g
e
e
a
a
r
r
p
p
l
l
u
u
s
s
o
o
r
r
m
m
i
i
n
n
u
u
s
s
k
k
e
e
y
y
,
,
s
s
t
t
o
o
p
p
k
k
e
e
y
y

18
3、Get started quickly
tapicon,Start the 3, 2, 1 countdown to enter the motion interface:
Exercise
time Heart rate Cadence Step
counting Calorie Time out Stop
Accelera
tion and
decelera
tion
gears
Fast speed gear adjustment height

19
- 1 -
4、Program motion
Click icon,Go to the program motion interface (36 fixed programs built-in):
Set up any P1-P36 program, choose your exercise time and click Start.
5. Sports center
Built-in 6 exercise modes: time countdown, calorie countdown,
height countdown, step countdown, floor mode, custom.
◆Whether the speed is appropriate, there
is a simple criterion for judging, that is,
there is a feeling of sweating when exercising,
but there is no feeling of not catching up and
down, very uncomfortabl
e, that is, the speed
of this movement is the best.
◆Please be sure to check whether the emergency stop switch is effective before
exercising. Any abnormal situation during the movement, shoot the emergency stop
switch, and the ladder opportunity quickly decelerates to stop running;

20
- 2 -
◆Please pay attention to your heart rate value at any time during exercise, the
maximum heart rate value is controlled at 220 minus age (this is the limit value,
general exercise does not exceed 90% of this value as well) every minute, if it is
an older athlete, this number needs to be lowered;
◆Any strenuous exercise, please do it after about 30 to 60 minutes after meals;
5.1 On the main interface interface, click " "Go to the sports center management
interface:
Users can choose the mode of movement according to their own sports goals;
Control catalog
Time
countdown
Calorie
Countdown
Altitude
Countdown
Step
Countdown
Floor
Mode
Custom
Mode
For example; select Time Countdown
tap Time countdown icon, go to the time countdown settings page:
This manual suits for next models
1
Table of contents
Other DKN technology Fitness Equipment manuals

DKN technology
DKN technology 20538 User manual

DKN technology
DKN technology RunTech A User manual

DKN technology
DKN technology AM-6i User manual

DKN technology
DKN technology medBike SB1 User manual

DKN technology
DKN technology Xc-170i User manual

DKN technology
DKN technology FLAT BENCH User manual

DKN technology
DKN technology HM3310 User manual

DKN technology
DKN technology RB-5 User manual

DKN technology
DKN technology XG-10 Pro User manual

DKN technology
DKN technology Studio 8000 User manual