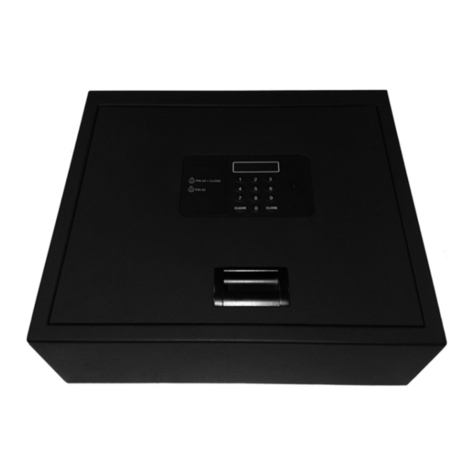
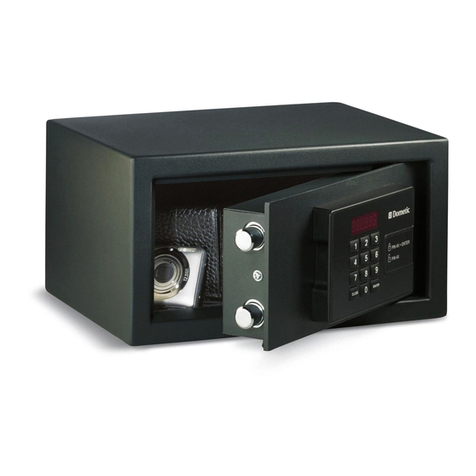
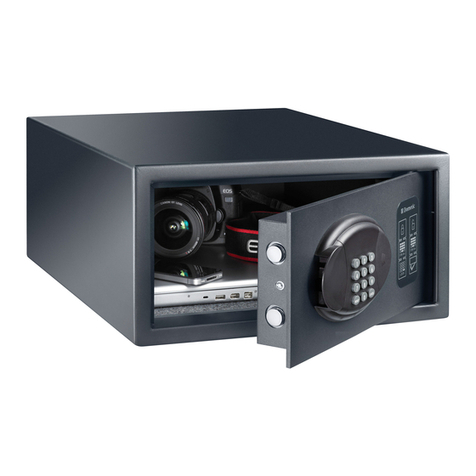
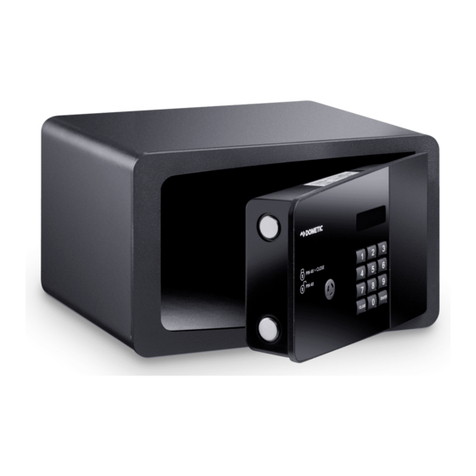
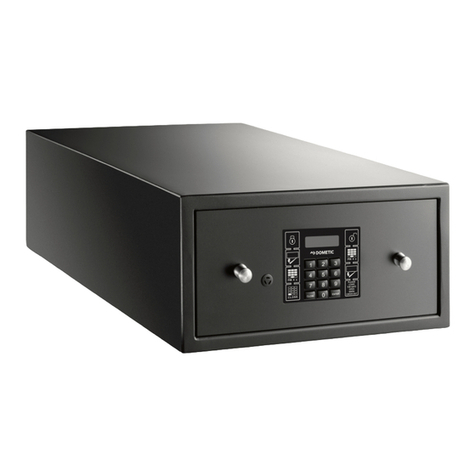
Dometic MD310 User manual

MD310, MD390, MD450
Electronic safe for hotels
Installation and Operating Manual. . . . . . . . 5
Elektronischer Hotelsafe
Montage- und Bedienungsanleitung . . . . . 16
Coffre-fort électronique pour hôtels
Instructions de montage et de service . . . .27
Caja fuerte electrónica para hoteles
Instrucciones de montaje y de uso . . . . . . .39
Cofre eletrónico para hotéis
Instruções de montagem e manual de
instruções . . . . . . . . . . . . . . . . . . . . . . . . . . . 51
Cassaforte elettronica per hotel
Istruzioni di montaggio e d’uso . . . . . . . . .62
Elektronische kluis voor hotels
Montagehandleiding en
gebruiksaanwijzing . . . . . . . . . . . . . . . . . . .73
Elektronisk safe til hoteller
Monterings- og betjeningsvejledning . . . .84
Elektroniskt kassaskåp för hotell
Monterings- och bruksanvisning . . . . . . . .96
Elektronisk safe for hoteller
Monterings- og bruksanvisning . . . . . . . . 107
Elektroninen tallelokero
hotellikäyttöön
Asennus- ja käyttöohje . . . . . . . . . . . . . . . 118
Elektroniczny sejf dla hoteli
Instrukcja montażu i obsługi. . . . . . . . . . . 129
Elektronický trezor pre hotely
Návod na montáž a uvedenie
do prevádzky. . . . . . . . . . . . . . . . . . . . . . . 140
Elektronický trezor pro hotel
Návod k montáži a obsluze . . . . . . . . . . . 151
Elektronikus hotelszéfek
Szerelési és használati útmutató . . . . . . . 163
Elektronički sef za hotele
Upute za montažu i uporabu . . . . . . . . . . 174
Oteller için elektronik kasa
Montaj ve Kullanım Kılavuzu. . . . . . . . . . . 185
Elektronski sef za hotele
Navodilo za montažo in uporabo . . . . . . 196
Seif electronic pentru hoteluri
Instrucţiuni de montaj şi operare . . . . . . . 207
Електронен сейф за хотели
Инструкция за монтаж
и експлоатация . . . . . . . . . . . . . . . . . . . . . 219
Elektrooniline seif hotellidele
Paigaldus- ja kasutusjuhend. . . . . . . . . . . 231
Ηλεκτρονικό χρηματοκιβώτιο για
ξενοδοχεία
Οδηγίες τοποθέτησης και χειρισμού. . . 242
Elektroninis viešbučių seifas
Montavimo ir naudojimo vadovas . . . . . . 255
Elektroniskais seifs viesnīcām
Uzstādīšanas un lietošanas rokasgrāmata267
EN
DE
FR
ES
PT
IT
NL
DA
SV
NO
FI
PL
SK
CS
HU
HR
TR
SL
RO
BG
ET
EL
LT
LV
COMPLEMENTARY
PRODUCTS
STANDARD

© 2023 Dometic Group. The visual appearance of the contents of this manual is pro-
tected by copyright and design law. The underlying technical design and the prod-
ucts contained herein may be protected by design, patent or pending patent. The
trademarks mentioned in this manual belong to Dometic Sweden AB. All rights are
reserved.

MD310, MD390, MD450
3
123
456
789
CLEAR
0
CLOSE
PIN 4X •ENTER
PIN 4X
2
5
1
6
3
4
1
Ø10
L1L2L1
H
H
2
L1L2L1
P
Ø10
3

MD310, MD390, MD450
4
123
456
7 8 9
CLEAR
0
CLOSE
4
MOD.Nº PROD.Nº
SER.Nº
2
1
5

EN
MD310, MD390, MD450 Explanation of symbols
5
Please read these instructions carefully and follow all instructions, guidelines, and warnings included in this product manual in order to ensure
that you install, use, and maintain the product properly at all times. These instructions MUST stay with this product.
By using the product, you hereby confirm that you have read all instructions, guidelines, and warnings carefully and thatyou understand and
agree to abide by the terms and conditions as set forth herein. You agree to use this product only for the intended purpose and application
and in accordance with the instructions, guidelines, and warnings as set forth in this product manual as well as in accordance with all appli-
cable laws and regulations. A failure to read and follow the instructions and warnings set forth herein may result in an injury to yourself and
others, damage to your product or damage to other property in the vicinity. This product manual, including the instructions, guidelines, and
warnings, and related documentation, may be subject to changes and updates. For up-to-date product information, please visit
documents.dometic.com.
Contents
1 Explanation of symbols. . . . . . . . . . . . . . . . . . . . . . . . . . . . . . . . . . . . . . . . . . .5
2 Safety instructions . . . . . . . . . . . . . . . . . . . . . . . . . . . . . . . . . . . . . . . . . . . . . . .6
3 Scope of delivery . . . . . . . . . . . . . . . . . . . . . . . . . . . . . . . . . . . . . . . . . . . . . . .6
4 Accessories . . . . . . . . . . . . . . . . . . . . . . . . . . . . . . . . . . . . . . . . . . . . . . . . . . . .6
5 Intended use . . . . . . . . . . . . . . . . . . . . . . . . . . . . . . . . . . . . . . . . . . . . . . . . . . .7
6 Technical description . . . . . . . . . . . . . . . . . . . . . . . . . . . . . . . . . . . . . . . . . . . .7
7 Installing safe . . . . . . . . . . . . . . . . . . . . . . . . . . . . . . . . . . . . . . . . . . . . . . . . . . .8
8 Using the safe . . . . . . . . . . . . . . . . . . . . . . . . . . . . . . . . . . . . . . . . . . . . . . . . .10
9 Replacing the batteries . . . . . . . . . . . . . . . . . . . . . . . . . . . . . . . . . . . . . . . . . .13
10 Display messages . . . . . . . . . . . . . . . . . . . . . . . . . . . . . . . . . . . . . . . . . . . . . .13
11 Troubleshooting . . . . . . . . . . . . . . . . . . . . . . . . . . . . . . . . . . . . . . . . . . . . . . .14
12 Maintaining and cleaning the safe . . . . . . . . . . . . . . . . . . . . . . . . . . . . . . . . .14
13 Warranty . . . . . . . . . . . . . . . . . . . . . . . . . . . . . . . . . . . . . . . . . . . . . . . . . . . . .14
14 Disposal . . . . . . . . . . . . . . . . . . . . . . . . . . . . . . . . . . . . . . . . . . . . . . . . . . . . . .15
15 Technical data . . . . . . . . . . . . . . . . . . . . . . . . . . . . . . . . . . . . . . . . . . . . . . . . .15
1 Explanation of symbols
!WARNING!
Safety instruction: Indicates a hazardous situation that, if not avoided,
could result in death or serious injury.

EN
Safety instructions MD310, MD390, MD450
6
A
I
2 Safety instructions
!WARNING!
• This device can be used by childrenaged 8 years or over, as well as by
persons with diminished physical, sensory or mental capacities or a
lack of experience and knowledge, providing they are supervised, or
have been taught how to use the device safely and are aware of the
resulting risks.
• Only use the product as intended.
• Do not make any modifications or alterations to the product.
ANOTICE!
• No unauthorized persons should have access to the master key and
the master code. Store the master key very carefully in a safe location.
3Scopeofdelivery
• Electronic safe
• Installation and operating manual (on request)
I
4Accessories
Available as accessories (not included in the scope of delivery):
NOTICE!
Indicates a situation that, if not avoided, can result in property damage.
NOTE
Supplementary information for operating the product.
NOTE
The master key is not part of the standard scope of delivery of the safe.
To request the master key, contact your local Dometic sales partner.
The master key is always shipped separately.
Description Ref. no.
Fixing kit 9106600005

EN
MD310, MD390, MD450 Intended use
7
5 Intended use
Dometic MD310/MD390/MD450 are hotel safes in which guests can securely lock
away their valuables.
This product is only suitable for the intended purpose and application in accordance
with these instructions.
This manual provides information that is necessary for proper installation and/or
operation of the product. Poor installation and/or improper operating or mainte-
nance will result in unsatisfactory performance and a possible failure.
The manufacturer accepts no liability for any injury or damage to the product
resulting from:
• Incorrect installation, assembly or connection, including excess voltage
• Incorrect maintenance or use of spare parts other than original spare parts
provided by the manufacturer
• Alterations to the product without express permission from the manufacturer
• Use for purposes other than those described in this manual
Dometic reserves the right to change product appearance and product
specifications.
6 Technical description
The control panel has a displayand a key pad for entering the code. A master key and
a master code are available for opening in an emergency.
The model can be identified from the type plate.

EN
Installing safe MD310, MD390, MD450
8
6.1 Control elements
7 Installing safe
7.1 Notes on installation
A
Observe the following instructions when installing:
• Carefully check the safe for damage once you have removed it from the
packaging. If there is visible damage, contact the manufacturer (see rear of safe
for addresses).
• Install the safe on a flat and even surface.
• Select a location for installation which is a sufficient distance from heat sources
(e.g. radiators). Avoid installing in locations with temperatures of under 0 °C and
over 45 °C.
• Avoid damp ambient conditions (e.g in the bathroom and swimming pool) in
order to avoid condensation forming in the device.
• Select a fastening material (screws with plugs, if necessary) which is appropriate
for the base.
No. in fig. 1,
page 3 Description
1 Display
2 Number keys
3CLOSE button Closes the safe lock after code is entered
4CLEAR button Cancels the code entered
5 Lock for master key (behind cover)
6 Locking mechanism cover
NOTICE!
The safe must only be installed by qualified specialists.

EN
MD310, MD390, MD450 Installing safe
9
7.2 Attaching the safe
1. Select a suitable installation location.
2. Select an appropriate method for installation (attachment on the rear or on the
underside).
3. Mark the drill holes according to the table below
Drilling on the rear (fig. 2, page 3)
Drilling on the underside (fig. 3, page 3)
1. Pre-drill the hole in the mounting location (e.g. in the wall or cupboard).
2. Attach the safe with a suitable fastening material.
Model MD450 MD390 MD310
H 100 mm 100 mm 82.5 mm
L1 120 mm 90 mm 50 mm
L2 210 mm 210 mm 210 mm
Model MD450 MD390 MD310
L1 120 mm 90 mm 50 mm
L2 210 mm 210 mm 210 mm
P 200 mm 235 mm 120 mm

EN
Using the safe MD310, MD390, MD450
10
8 Using the safe
8.1 Operating functions for guests
Closing the safe
1. Enter a four digit code.
2. Press the CLOSE button.
✔The display shows the message CLOSED.
Opening the safe
➤Enter the correct four digit code.
✔The code entered is shown in the display.
✔The safe will open.
✔The display shows the message OPEN.
I
8.2 Emergency opening using master code
The master code is necessary if guests have left the safe locked or have forgotten
their code.
NOTE
If an incorrect code is entered, the message E-CODE appears on the
display.
After 3 incorrect attempts, the safe lock will remain blocked for
15 minutes and no further entries are possible. As soon as a button is
pressed, the message HOLD15 appears on the display.
PIN 4X CLOSE
PIN 4X

EN
MD310, MD390, MD450 Using the safe
11
Opening the safe with the master code
➤Enter the correct six digit master code.
✔The display shows the message OPEN.
✔The door opens.
Changing the master code
A
You can change the factory setting code (888888). The safe must be opened for
this.
1. Enter the correct six digit master code.
2. Press the CLEAR button.
✔The display shows the message NEW.
3. Enter a new six digit master code.
4. Press the CLOSE button.
✔The display shows the message AGAIN.
NOTICE!
• If you forget your master code, nobody can access the safe any more
(not even the manufacturer). No resetting, or similar action, is
possible.
• Therefore note down the master code and store it very carefully in a
safe location.
• The safe has a factory setting code. We strongly recommend that you
change this code for security reasons.
PIN 6X
PIN 6X
PIN 6X CLEAR
NEW
PIN 6X
AGAIN
CLOSE
CLOSE

EN
Using the safe MD310, MD390, MD450
12
5. Repeat the entry of the new six digit master code.
6. Press the CLOSE button again.
✔The safe confirms the change of the master code with the message DONE.
8.3 Emergency opening with the master key
A
The safe lock can be opened in all eventualities with the master key, even in the event
of an electronic fault.
Opening the safe with the master key
1. Slide the plastic cover which covers the key hole (fig. 15, page 3).
2. Put the master key into the key hole.
3. Open the safe lock by turning the master key 90° to the left (fig. 4, page 4) until
the bolts slide completely home.
✔The bolts extend mechanically.
Emergency opening with the master key giving a new user code
1. Slide the plastic cover which covers the key hole (fig. 15, page 3).
2. Put the master key into the key hole.
3. Open the safe lock by turning the master key 90° to the left (fig. 4, page 4) until
the bolts slide completely home.
4. Keep the master key in this position and open the door.
5. Enter a new four digit code.
6. Press the CLOSE button.
✔The display shows the message CLOSED.
✔The display shows the message E-RUN.
7. Close the safe door.
8. Remove the master key.
NOTICE!
No unauthorised persons should have access to the master key.
Store the master key very carefully in a safe location.

EN
MD310, MD390, MD450 Replacing the batteries
13
9Replacingthebatteries
The batteries must be replaced after no later than one year. The batteries must also
be replaced immediately if “LO-BAT”is shown on the display.
I
1. Take off the cover (fig. 51, page 4).
2. Remove the four used batteries from the battery compartment (fig. 52,
page 4).
3. Insert four new AA batteries into the battery compartment.
4. Replace the cover over the interior section.
10 Display messages
NOTE
• Use four high-quality alkaline AA/LR6 batteries (1.5 V).
• Pay attention to the polarity.
• Always change all batteries at the same time.
Display Sound
Press CLEAR 1 beep
Press CLOSE 1 beep
Key in guest code to open the safe OPEN + OPENED 2 beeps
Key in guest code to close the safe CLOSE + CLOSED 1 beep
Incorrect sequence or error entering
code
E-CODE 3 beeps
Enter new master code NEW
Repeat master code AGAIN
After changing the master code DONE 1 beep
Low battery detected LO-BAT
3 x error entering code HOLD15 3 beeps
Error in locking mechanism while
opening
E-RUN 2 beeps
Error in locking mechanism while
closing
E-RUN 2 beeps

EN
Troubleshooting MD310, MD390, MD450
14
11 Troubleshooting
If you are unable to rectify the fault, get in touch with a specialist workshop.
12 Maintaining and cleaning the safe
A
➤Occasionally clean the product with a damp cloth.
13 Warranty
The statutory warranty period applies. If the product is defective, please contact your
retailer or the manufacturer's branch in your country (see dometic.com/dealer).
For repair and warranty processing, please include the following documents when
you send in the product:
• A copy of the receipt with purchasing date
Display Fault Possible cause Suggested remedy
LO-BAT The safe lock doesn't
close.
The battery is low. ➤Replace the batteries.
E-CODE Three short audible
signals sound.
False code ➤Enter the correct code.
– False master code ➤Enter the correct master
code.
HOLD15 Two short audible
signals sound
whenever any button is
pressed.
The safe lock is
disabled after the
wrong code has been
entered three times.
➤Wait for 15 minutes
without pressing any
buttons. The safe lock is
no longer disabled
following this 15 minute
waiting period.
➤Following this, enter the
correct code.
➤Open the door
mechanically with the
master key.
NOTICE! Damage hazard
Do not use sharp or hard objects or cleaning agents for cleaning as these
may damage the product.

EN
MD310, MD390, MD450 Disposal
15
• A reason for the claim or description of the fault
Note that self-repair or non-professional repair can have safety consequences and
might void the warranty.
14 Disposal
Recycling packaging material
Recycling products with batteries, rechargeable batteries, and light
sources
15 Technical data
➤Place the packaging material in the appropriate recycling waste bins wher-
ever possible.
➤Remove any batteries, rechargeable batteries, and light sources before recy-
cling the product.
➤Return defective or used batteries to your retailer or dispose of them at col-
lection points.
➤Do not dispose of any batteries, rechargeable batteries, and light sources
with general household waste.
➤If you wish to finally dispose of the product, ask your local recycling center or
specialist dealer for details about how to do this in accordance with the appli-
cable disposal regulations.
➤The product can be disposed free of charge.
MD450 MD390 MD310
Capacity 30.4 l 31.5 l 9 l
Dimensions
H x W x D 200 x 450 x 410 mm 200 x 390 x 480 mm 165 x 310 x 245 mm
Gross weight 15.1 kg 14.9 kg 8 kg
Net weight 14.5 kg 14.3 kg 7.1 kg

DE
Erläuterung der Symbole MD310, MD390, MD450
16
Lesen und befolgen Sie bitte alle Anweisungen, Richtlinien und Warnhinweise in diesem Produkthandbuch sorgfältig, um sicherzustellen,
dass Sie das Produkt ordnungsgemäß installieren und stets ordnungsgemäß betreiben und warten. Diese Anleitung MUSS bei dem Produkt
verbleiben.
Durch die Verwendung des Produktes bestätigen Sie hiermit, dass Sie alle Anweisungen, Richtlinien und Warnhinweise sorgfältig gelesen
haben und dass Sie die hierin dargelegten Bestimmungen verstanden haben und ihnen zustimmen. Sie erklären sich damit einverstanden,
dieses Produkt nur für den angegebenen Verwendungszweck und gemäß den Anweisungen, Richtlinien und Warnhinweisen dieses Pro-
dukthandbuchs sowie gemäß allen geltenden Gesetzen und Vorschriften zu verwenden. Eine Nichtbeachtung der hierin enthaltenen Anwei-
sungen und Warnhinweise kann zu einer Verletzung Ihrer selbst und anderer Personen, zu Schäden an Ihrem Produkt oder zu Schäden an
anderem Eigentum in der Umgebung führen. Dieses Produkthandbuch, einschließlich der Anweisungen, Richtlinien und Warnhinweise,
sowie die zugehörige Dokumentation können Änderungen und Aktualisierungen unterliegen. Aktuelle Produktinformationen finden Sie
unter documents.dometic.com.
Inhaltsverzeichnis
1 Erläuterung der Symbole . . . . . . . . . . . . . . . . . . . . . . . . . . . . . . . . . . . . . . . .16
2 Sicherheitshinweise . . . . . . . . . . . . . . . . . . . . . . . . . . . . . . . . . . . . . . . . . . . .17
3 Lieferumfang . . . . . . . . . . . . . . . . . . . . . . . . . . . . . . . . . . . . . . . . . . . . . . . . . .17
4 Zubehör. . . . . . . . . . . . . . . . . . . . . . . . . . . . . . . . . . . . . . . . . . . . . . . . . . . . . .18
5 Bestimmungsgemäßer Gebrauch . . . . . . . . . . . . . . . . . . . . . . . . . . . . . . . . .18
6 Technische Beschreibung . . . . . . . . . . . . . . . . . . . . . . . . . . . . . . . . . . . . . . .18
7 Safe montieren . . . . . . . . . . . . . . . . . . . . . . . . . . . . . . . . . . . . . . . . . . . . . . . .19
8 Safe benutzen . . . . . . . . . . . . . . . . . . . . . . . . . . . . . . . . . . . . . . . . . . . . . . . . .21
9 Batterien wechseln . . . . . . . . . . . . . . . . . . . . . . . . . . . . . . . . . . . . . . . . . . . . 24
10 Displaymeldungen . . . . . . . . . . . . . . . . . . . . . . . . . . . . . . . . . . . . . . . . . . . . 24
11 Störungsbeseitigung . . . . . . . . . . . . . . . . . . . . . . . . . . . . . . . . . . . . . . . . . . 25
12 Safe pflegen und reinigen . . . . . . . . . . . . . . . . . . . . . . . . . . . . . . . . . . . . . . 25
13 Garantie. . . . . . . . . . . . . . . . . . . . . . . . . . . . . . . . . . . . . . . . . . . . . . . . . . . . . 25
14 Entsorgung . . . . . . . . . . . . . . . . . . . . . . . . . . . . . . . . . . . . . . . . . . . . . . . . . . 26
15 Technische Daten . . . . . . . . . . . . . . . . . . . . . . . . . . . . . . . . . . . . . . . . . . . . . 26
1 Erläuterung der Symbole
!WARNUNG!
Sicherheitshinweis: Kennzeichnet eine Gefahrensituation, die zum
Tod oder schwerer Verletzung führen könnte, wenn die jeweiligen
Anweisungen nicht befolgt werden.

DE
MD310, MD390, MD450 Sicherheitshinweise
17
A
I
2 Sicherheitshinweise
!WARNUNG!
• Dieses Gerät kann von Kindern ab 8 Jahren und darüber sowie von
Personen mit verringerten physischen, sensorischen oder mentalen
Fähigkeiten oder Mangel an Erfahrung und Wissen benutzt werden,
wenn sie beaufsichtigt oder bezüglich des sicheren Gebrauchs des
Gerätes unterwiesen wurden und die daraus resultierenden Gefahren
verstehen.
• Benutzen Sie das Produkt nur zu seinem bestimmungsgemäßen
Gebrauch.
• Führen Sie keine Änderungen oder Umbauten am Produkt durch!
AACHTUNG!
• Nur autorisierte Personen dürfen Zugriff zu Masterschlüssel und
Mastercode erhalten. Verwahren Sie den Masterschlüssel sehr
sorgfältig an einem sicheren Ort.
3 Lieferumfang
• Elektronischer Hotelsafe
• Montage- und Bedienungsanleitung (auf Anfrage)
I
ACHTUNG!
Kennzeichnet eine Situation, die zu Sachschäden führen kann, wenn die
jeweiligen Anweisungen nicht befolgt werden.
HINWEIS
Ergänzende Informationen zur Bedienung des Produktes.
HINWEIS
Der Masterschlüssel gehört nicht zum Standard-Lieferumfang des Tre-
sors. Um den Masterschlüssel anzufordern, wenden Sie sich bitte an
Ihrenlokalen Dometic Vertriebspartner.DerMasterschlüssel wirdimmer
separat geliefert.

DE
Zubehör MD310, MD390, MD450
18
4Zubehör
Als Zubehör erhältlich (nicht im Lieferumfang enthalten):
5 Bestimmungsgemäßer Gebrauch
Dometic MD310/MD390/MD450 sind Hotelsafes, in die Gäste ihre
Wertgegenstände sicher einschließen können.
Dieses Produkt ist nur für den angegebenen Verwendungszweck und die Anwen-
dung gemäß dieser Anleitung geeignet.
Dieses Handbuch enthält Informationen, die für die ordnungsgemäße Installation
und/oder den ordnungsgemäßen Betrieb des Produkts erforderlich sind. Installati-
onsfehler und/oder ein nicht ordnungsgemäßer Betrieb oder eine nicht ordnungs-
gemäße Wartung haben eine unzureichende Leistung und u. U. einen Ausfall des
Geräts zur Folge.
Der Hersteller übernimmt keine Haftung für Verletzungen oder Schäden am Pro-
dukt, die durch Folgendes entstehen:
• unsachgemäße Montage oder falscher Anschluss, einschließlich Überspannung
• unsachgemäße Wartung oder Verwendung von anderen als den vom Hersteller
gelieferten Original-Ersatzteilen
• Veränderungen am Produkt ohne ausdrückliche Genehmigung des Herstellers
• Verwendung für andere als die in der Anleitung beschriebenen Zwecke
Dometic behält sich das Recht vor, das Erscheinungsbild des Produkts und dessen
technische Daten zu ändern.
6 Technische Beschreibung
Das Bedienpanel hat ein Display und ein Tastenfeld zur Codeeingabe. Zur
Notöffnung sind ein Masterschlüssel und ein Mastercode verfügbar.
Über das Typenschild können Sie das Modell identifizieren.
Beschreibung Art.-Nr.
Befestigungskit 910660005

DE
MD310, MD390, MD450 Safe montieren
19
6.1 Bedienelemente
7Safemontieren
7.1 Hinweise zur Montage
A
Befolgen Sie die Hinweise bei der Montage:
• Kontrollieren Sie den Safe sorgfältig auf Beschädigungen, nachdem Sie ihn der
Verpackung entnommen haben. Falls Schäden sichtbar sind, kontaktieren Sie
den Hersteller (Adressen siehe Rückseite).
• Installieren Sie den Safe auf einer geraden, ebenen Oberfläche.
• Wählen Sie einen Montageort, der sich in ausreichender Entfernung zu
Wärmequellen (z. B. Radiatoren) befindet. Vermeiden Sie Montageorte mit
Temperaturen von unter 0 °C und über 45 °C.
• Vermeiden Sie feuchte Umgebungsbedingungen (z. B. im Badezimmer, in
Schwimmbädern), um die Bildung von Kondenswasser im Gerät zu vermeiden.
• Wählen Sie Befestigungsmaterial (Schrauben und ggf. Dübel), das für den
Untergrund geeignet ist.
Pos. in
Abb. 1,
Seite 3
Beschreibung
1Display
2 Zifferntasten
3 Taste CLOSE Safeschloss nach Codeeingabe schließen
4 Taste CLEAR Codeeingabe abbrechen
5 Schloss für Masterschlüssel (hinter der Abdeckung)
6 Abdeckung des Schließmechanismus
ACHTUNG!
Die Montage des Safes darf nur durch qualifiziertes Fachpersonal
erfolgen.

DE
Safe montieren MD310, MD390, MD450
20
7.2 Safe befestigen
1. Wählen Sie einen geeigneten Montageort.
2. Wählen Sie eine geeignete Montageart (Befestigung an der Rückseite oder an
der Unterseite).
3. Zeichnen Sie die Bohrlöcher gemäß der Tabellen unter an:
Bohrungen an der Rückseite (Abb. 2, Seite 3)
Bohrungen an der Unterseite (Abb. 3, Seite 3)
1. Bohren Sie die Bohrlöcher am Montageort (z. B. in der Wand oder im Schrank)
vor.
2. Befestigen Sie den Safe mit geeignetem Befestigungsmaterial.
Modell MD450 MD390 MD310
H 100 mm 100 mm 82,5 mm
L1 120 mm 90 mm 50 mm
L2 210 mm 210 mm 210 mm
Modell MD450 MD390 MD310
L1 120 mm 90 mm 50 mm
L2 210 mm 210 mm 210 mm
P 200 mm 235 mm 120 mm
Other manuals for MD310
2
This manual suits for next models
2
Table of contents
Languages:
Other Dometic Safe manuals