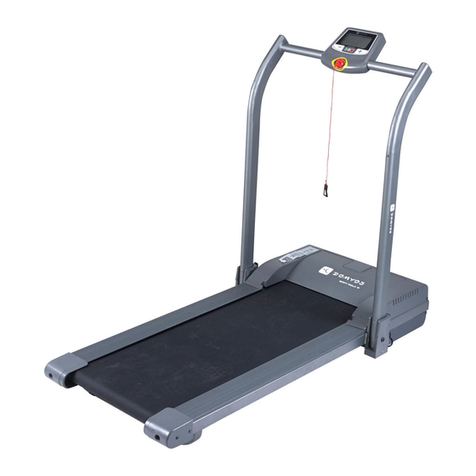
Domyos RUN PRO User manual

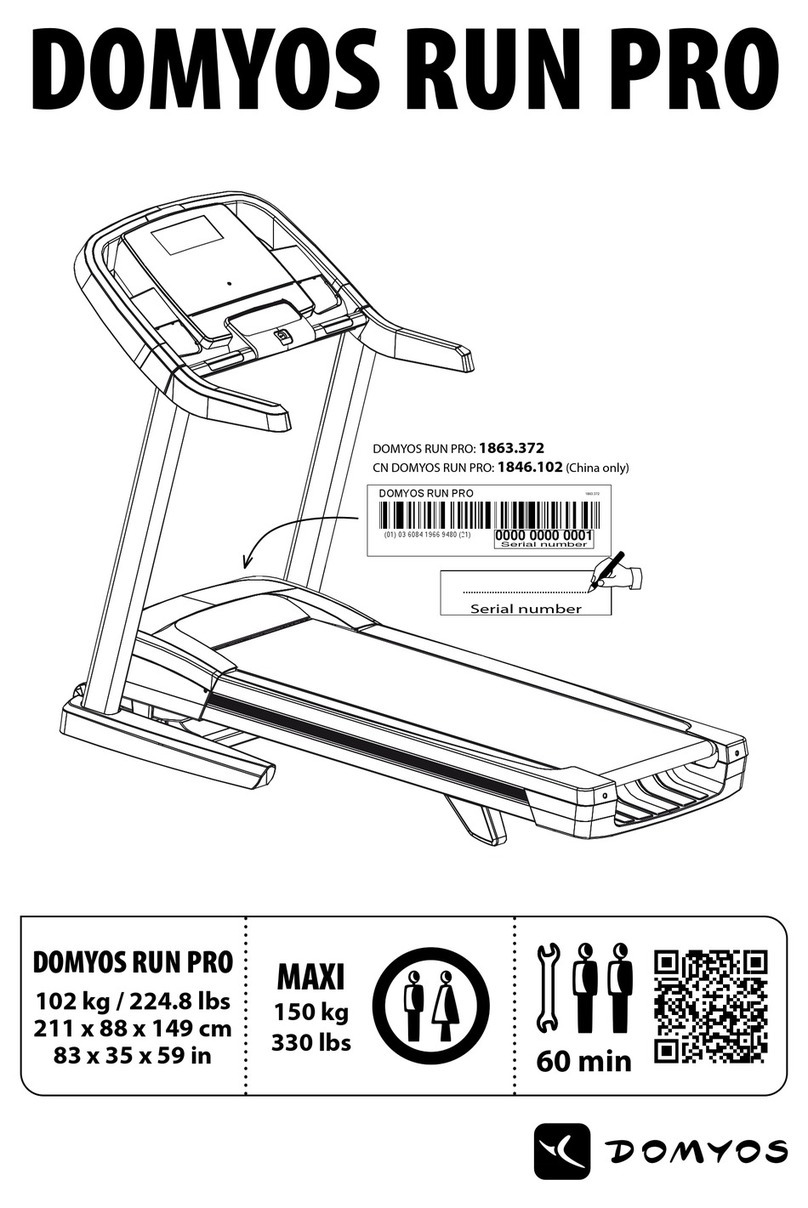
DOMYOS RUN PRO 1863.372
0000 0000 0001
Serial number
(01) 03 6084 1966 9480 (21)
DOMYOS RUN PRO
DOMYOS RUN PRO
102 kg / 224.8 lbs
211 x 88 x 149 cm
83 x 35 x 59 in 60 min
MAXI
150 kg
330 lbs
................................................
Serial number
DOMYOS RUN PRO: 1863.372
CN DOMYOS RUN PRO: 1846.102 (China only)

3
1
76
5
4
8
2
9
Belt heart rate monitor
Ceinture cardiofréquencemètre
Cinturón cardiofrecuenciómetro
Herzfrequenzmessgurt
Cintura cardiofrequenzimetro
Band voor hartslagmeting
Cinto cardiofrequencímetro
Pas do pomiaru częstotliwości tętna
Szívritmusmérő öv
Пояс-пульсометр
Centură cardio-frecvențmetru
Pás merača srdečnej frekvencie
Pás měřiče tepové frekvence
Hjärtfrekvensbälte
Колан за измерване на пулса
Kardiyofrekansmetre kemeri
Traka za mjerenje srčane frekvencije
Pas merilca za srčni utrip
10
9
1
Console
Console
Consola
Konsole
Console
Console
Consola
Konsola
Konzol
Консоль
Consolă
Konzola
Konzole
Konsol
Конзола
Konsol
Konzola
Nadzorna plošča
ﻢﻜﺤﺘﻟا ﺔﺣﻮﻟ
2
Safety key
Clé de sécurité
Llave de seguridad
Sicherheitsschlüssel
Chiave di sicurezza
Veiligheidssleutel
Chave de segurança
Klucz zabezpieczający
Biztonsági kulcs
Ключ безопасности
Cheie de siguranță
Bezpečnostný kľúč
Bezpečnostní klíč
Säkerhetsnyckel
Ключ за безопасност
Güvenlik anahtarı
Sigurnosni ključ
Varnostni ključ
نﺎﻣأ حﺎﺘﻔﻣ
3
Handrail
Barre de maintien
Barra de sujeción
Haltestange
Barra di tenuta
Steunstang
Barra de suporte
Uchwyt
Tartórúd
Поручень
Bară de susținere
Operná tyč
Madlo
Stödstång
Дръжка
Tutunma barı
Ručka za držanje
Balanca
ﺖﻴﺒﺜﺗ ﺐﻴﻀﻗ
4
Master switch
Interrupteur principal
Interruptor principal
Hauptschalter
Interruttore principale
Hoofdschakelaar
Interruptor principal
Wyłącznik główny
Főkapcsoló
Основной выключатель
Întrerupător principal
Hlavný vypínač
Hlavní vypínač
Huvudbrytare
Основен бутон
Ana kumanda anahtarı
Glavni prekidač
Glavno stikalo
ﻲﺴﻴﺋر ﻊﻃﺎﻗ
5
Treadmill belt
Bande de course
Cinta de correr
Lauäche
Nastro di corsa
Loopband
Passadeira de corrida
Pas bieżny
Futófelület
Беговое полотно
Bandă de alergare
Bežecký pás
Běžící pás
Löpband
Бягаща лента
Koşu bandı
Traka za trčanje
Tekalno stezo
ﻲﺸﻣ ﺮﻴﺳ
6
Footrest
Repose-pieds
Reposapiés
Fußraste
Poggiapiedi
Voetensteun
Descanso para pés
Oparcia stóp
Lábtartó
Подножки
Suport pentru picioare
Stúpačka
Stupačky
Fotstöd
Стъпенка
Ayak dayama yeri
Odmorište za noge
Podstavek za noge
ﻦﻴﻣﺪﻘﻟا ﺪﻨﺴﻣ
7
Castors
Roulettes de déplacement
Ruedas de desplazamiento
Transportrollen
Rotelle di spostamento
Transportwieltjes
Rodinhas de deslocação
Kółka do przemieszczania
Görgők a mozgatáshoz
Транспортировочные ролики
Rotiţe de deplasare
Premiestňovacie kolieska
Přemísťovací kolečka
Transporthjul
Колелца за преместване
Hareket makaraları
Kotači premještanje
Kolesca za premike naprave
ﻞﻘﻨﻟا تاﺮﻜﺑ
8
Adjusting nut to centre and set the tension of the treadmill belt
Vis de réglage pour le centrage et la tension de la bande de course
Tornillo de ajuste para el centrado y la tensión de la cinta de correr
Einstellschraube für das Zentrieren und die Spannung der Lauäche.
Vite di regolazione per la centratura e la tensione del nastro di corsa
Regelschroef voor het centreren en het spannen van de loopband
Parafuso de ajuste para centragem e tensão da passadeira de corrida
Śruba regulacji wyśrodkowania i naprężenia pasa bieżnego
A futófelület központosítására és a szalag feszességének beállítására szolgáló csavar
Регулировочный болт для центрирования и натяжения бегового полотна
Șuruburi de reglare pentru centrarea şi tensionarea benzii de alergare
Nastavovacia skrutka pre centrovanie anapínanie bežeckého pásu
Šroub pro nastavení centrování a napětí běžícího pásu
Justerskruv för centrering och spänning av löpbandet
Регулиращ винт за центриране и регулиране степента на обтягане на бягащата лента
Koşu bandı için ortalama ve gerginlik ayarı vidası
Regulator za centriranje i podešavanje napetosti trake za trčanje
Nastavitveni vijak za centriranje in nastavitev napetosti tekalne steze
ﻲﺸﻤﻟا ﺮﻴﺳ ﺪﺷو ﺔﻳﺎﺸﻤﻟا ﺰﻛﺮﻤﺗ ﻂﺒﻀﻟ ﺔﺒﻟﻮﻠﻣ ﺮﻴﻣﺎﺴﻣ
10
Power cord
Cordon d’alimentation
Cable de alimentación
Stromkabel
Cavo d’alimentazione
Elektriciteitssnoer
Cabo de alimentação
Kabel zasilający
Tápkábel
Сетевой кабель
Cablu de alimentare
Napájací kábel
Napájecí kabel
Elsladd
Захранващ кабел
Güç kablosu
Kabel za napajanje
Napajalni kabel
ءﺎﺑﺮﻬﻜﻟا ﻞﺒﻛ

SECURITY • SÉCURITÉ • SEGURIDAD • SICHERHEIT • SICUREZZA • VEILIGHEID •
SEGURANÇA • BEZPIECZEŃSTWO • BIZTONSÁG • БЕЗОПАСНОСТЬ • SIGURANŢĂ •
BEZPEČNOSŤ • BEZPEČNOST • SÄKERHET • БЕЛОПАСНОСТ • EMNİYET •
SIGURNOST • VARNOST • 安全 • 安全 • 安全 •
نﺎﻣﻷا

60 min
ASSEMBLY • MONTAGE • MONTAJE • MONTAGE • MONTAGGIO •
AFWERKING • MONTAGEM • MONTAŻ • SZERELÉS • СБОРКА •
MONTARE • MONTÁŽ • MONTÁŽ • MONTERING • МОНТИРАНЕ •
MONTAJ • MONTAŽA • MONTAŽA • • 組み立て• •


MOVING • DÉPLACEMENT • DESPLAZAMIENTO • TRANSPORT • SPOSTAMENTO •
VERPLAATSEN • DESLOCAÇÃO • TRANSPORT • MOZGATÁS • ПЕРЕМЕЩЕНИЕ •
DEPLASARE • PREMIESTNENIE • PŘEMÍSTĚNÍ • TRANSPORT • ПРЕМЕСТВАНЕ •
HAREKET ETME • PREMJEŠTANJE • PREMIK • • • •

Our operating tips are all on the product record on our website.
Retrouvez tous nos conseils d’utilisation sur la che produit présente sur notre site internet.
Todos nuestros consejos de uso en la cha de producto de nuestra página de Internet.
Sie nden alle unsere Verwendungsratschläge auf dem Produktmerkblatt in unserer Internetsite.
Ritrovate i nostri consigli per l’uso nella scheda prodotto reperibile sul nostro sito internet.
U vindt onze adviezen omtrent het gebruik terug bij de productgegevens op onze website.
Consulte todos os nossos conselhos de utilização na cha do produto presente no nosso site da Internet.
Wszystkie wskazówki dotyczące użycia znajdują się w zakładce produktu na naszej stronie internetowej.
A használatra vonatkozó minden tanácsunkat megtalálja az internetes honlapunkon lévő termékleírásban.
Все рекомендации по использованию этого продукта можно найти на нашем веб-сайте.
Regăsiţi toate recomandările noastre de utilizare în şa tehnică a produsului care gurează pe site-ul nostru de internet.
Všetky naše rady týkajúce sa použitia nájdete v karte výrobku na našej webovej stránke.
Veškeré naše návody k použití najdete u popisu výrobku, který je dostupný na naší internetové stránce.
Alla våra bruksanvisningar nns på produktens informationssida på vår webbplats.
На нашия сайт можете да намерите описание на продукта, включващо съвети за употреба.
Bütün kullanım önerilerimizi, internet sitemizde bulunan ürün şinde bulabilirsiniz.
Savjete za korištenje možete pronaći u opisu proizvoda kojeg možete naći na našoj internetskoj stranici.
Vse nasvete za uporabo lahko najdete pri informacijah o proizvodu na naši spletni strani.
请登陆我们的官方网站以查看产品说明书中的全部使用建议.
当社サイトの製品概要で、使用上のアドバイスをご覧いただけます.
請登錄我們的官方網站以查看產品說明書中的全部使用建議.
.
www.domyos.com
USE • UTILISATION • UTILIZACIÓN • VERWENDUNG • UTILIZZO • GEBRUIK • UTILIZAÇÃO •
WYKORZYSTANIE • HASZNÁLAT • ИСПОЛЬЗОВАНИЕ • UTILIZARE • POUŽITIE • POUŽITÍ •
ANVÄNDNING • НАЧИН НА УПОТРЕБА • KULLANIM • KORIŠTENJE • UPORABA •
使用方法 • 使用 • 使用方法 •
لﺎﻤﻌﺘﺳﻻا

BELT HEART RATE MONITOR INSTALLATION • INSTALLATION DE LA CEINTURE
CARDIOFRÉQUENCEMÈTRE • INSTALACIÓN DEL CINTURÓN CARDIOFRECUENCIÓMETRO •
ANLEGEN DES HERZFREQUENZMESSGURTS • INSTALLAZIONE DELLA CINTURA CARDIOFREQUENZIMETRO •
PLAATSING VAN DE HARTFREQUENTIEMETERBAND • INSTALAÇÃO DO CINTO CARDIOFREQUENCIMETRO •
ZAKŁADANIE PASA DO POMIARU CZĘSTOTLIWOŚCI TĘTNA • A SZÍVRITMUSMÉRŐ ÖV ELHELYEZÉSE •
НАДЕВАНИЕ ПОЯСА-ПУЛЬСОМЕТРА • INSTALAREA CENTURII CARDIO-FRECVENŢMETRU •
UMIESTNENIE PÁSU MERAČA TEPOVEJ FREKVENCIE • INSTALACE PÁSU MĚŘIČE TEPOVÉ FREKVENCE •
INSTALLATION AV BÄLTET MED HJÄRTFREKVENSMÄTARE • ПОСТАВЯНЕ НА КОЛАНА ЗА ИЗМЕРВАНЕ
НА ПУЛСА • KARDİYOFREKANSMETRE KEMERİNİN YERLEŞTİRİLMESİ • POSTAVLJANJE POJASA •
NAMESTITEV PASU ZA MERJENJE SRČNEGA UTRIPA• •
心拍数測定ベルトの設置 • •cvcvcvcvcvcvcvcvcvcvcvcv
CHANGING THE BATTERY • CHANGEMENT DE LA PILE • SUSTITUCIÓN DE LA PILA • AUSWECHSELN
DER BATTERIE • SOSTITUZIONE DELLA PILA • BATTERIJEN VERVANGEN • SUBSTITUIÇÃO DA PILHA •
WYMIANA BATERII • AZ ELEM CSERÉJE • ЗАМЕНА ЭЛЕМЕНТА ПИТАНИЯ • SCHIMBAREA BATERIEI •
VÝMENA BATÉRIE • VÝMĚNA BATERIE • BYTE AV BATTERI • СМЯНА НА БАТЕРИЯТА • PİLİN
DEĞİŞTİRİLMESİ • MIJENJANJE BATERIJA • ZAMENJAVA BATERIJE • 电池的更换 •
バッテリーの交換 • 電池的更換 •
تﺎﻳرﺎﻄﺒﻟا ﺮﻴﻴﻐﺗ
1 32 4
close
3
CR2032
21
open
RECYCLING
The "crossed-out bin" symbol means that
this product and the batteries it contains
must not be thrown away with general
household waste. They are subject to a
specic type of sorting. Please take the
batteries and your unusable electronic
product to an authorised collection point for
recycling. This treatment of your electronic
waste will protect the environment and your
health.
RECYCLAGE
Le symbole "poubelle barrée" signie que le
produit et les piles qu’il contient ne peuvent
être jetés avec les déchets domestiques. Ils
font l’objet d’un tri sélectif spécique.
Déposez les batteries ainsi que le produit
électronique en n de vie dans un espace de
collecte autorisé an de les recycler. Cette
valorisation de vos déchets électroniques
permettre la protection de l’environnement
et de votre santé.
RECICLAJE
El símbolo "papelera tachada" signica que
este producto y las pilas que contiene, no
podrán tirarse con los residuos domésticos.
Son objeto de una selección especíca.
Deposite las baterías, así como su producto
electrónico al nal de su vida en un espacio
de recogida autorizado para su reciclaje.
Esta evaluación de los residuos electrónicos
permitirá la protección del medio ambiente
y de su salud.
ENTSORGUNG
Das Symbol "durchgestrichene Mülltonne"
bedeutet, dass dieses Produkt sowie die
darin enthaltenen Batterien nicht mit dem
Hausmüll zu entsorgen sind. Sie werden mit
dem Spezialmüll entsorgt. Entsorgen Sie
Batterien sowie Ihr Elektrogerät am
Lebensende zum Recycling bei einer
genehmigten Sammelstelle. Die
Wiederverwertung elektronischer Abfälle
ermöglicht den Schutz der Umwelt und Ihrer
Gesundheit.
RICICLAGGIO
Il simbolo del "cestino barrato" signica che
questo prodotto e le pile che esso contiene
non possono essere smaltiti con i riuti
domestici. Sono l'oggetto di una specica
raccolta dierenziata. Consegnare le batterie
insieme al prodotto elettronico a ne ciclo di
vita in uno spazio di raccolta autorizzato per
riciclarli. Questa valorizzazione dei riuti
elettronici permetterà la protezione
dell’ambiente e della salute.
RECYCLING
Het symbool "doorkruiste vuilnisbak"
betekent dat dit product en de batterijen
erin niet weggegooid mogen worden met
het huisafval. Ze maken deel uit van een
speciek sorteerproces. Werp de batterijen
evenals uw elektronisch product aan het
einde van de levensduur in een daarvoor
bestemde container teneinde deze te
recyclen. Deze recycling van uw elektronisch
afval zal het milieu en uw gezondheid
beschermen.
RECICLAGEM
O símbolo "caixote do lixo com traço por
cima" signica que este produto e as pilhas
que contém não podem ser deitados fora
com o lixo doméstico. Estão sujeitos a uma
triagem selectiva especíca. Coloque as
pilhas bem como o seu produto electrónico
em m de vida num espaço de recolha
autorizado de forma a proceder à sua
reciclagem. Esta reciclagem dos seus
resíduos electrónicos permitirá a protecção
do ambiente e da saúde.
RECYKLINGU
Symbol "przekreślonego kosza" oznacza, że
ani produkt ani baterie nie mogą być
wyrzucane do odpadów komunalnych.
Podlegają one zbiórce selektywnej. Zużyte
baterie i urządzenie elektroniczne powinny
być pozostawione w autoryzowanym
punkcie zbiórki w celu poddania ich
recyklingowi. Zapewnia to ochronę
środowiska naturalnego oraz zdrowia
użytkownika.
ÚJRAHASZNOSÍTÁSA
Az "áthúzott szemetesedény" szimbólum azt
jelzi, hogy sem ezt a terméket, sem a benne
levő elemeket nem szabad a háztartási
szemétbe dobni. Ezeket speciális
válogatásnak vetik alá. A használt elemeket
és a tovább már nem használható
elektronikus terméket újra hasznosítás
céljából adja le egy engedélyezett
gyűjtőhelyen. Az elektronikai hulladék
újrahasznosítása védi a környezetet és az ön
egészségét.
ПЕРЕРАБОТКА
Знак перечеркнутой мусорной корзины
означает, что настоящее изделие, а также
батарейки, входящие в его состав, нельзя
выбрасывать вместе с бытовыми
отходами. Они подлежат отдельной
утилизации. По окончании срока
эксплуатации батареек и электронного
изделия отнесите их в специально
отведенное для этого место для
последующей утилизации. Дальнейшее
повторное использование электронных
изделий направлено на защиту
окружающей среды и Вашего здоровья.
RECICLARE
Simbolul "coş de gunoi barat" semnică
faptul că acest produs şi bateriile pe care le
conţine nu pot aruncate împreună cu
deşeurile menajere. Acestea fac obiectul
unei trieri selective specice. Depozitaţi
bateriile, dar şi produsul electronic uzat,
într-un spaţiu de colectare autorizat pentru
a reciclate. Această valoricare a deşeurilor
electronice va contribui la protecţia
mediului şi a sănătăţii dumneavoastră.
RECYKLÁCIA
Symbol preškrtnutá nádoba na odpadky
znamená, že tento produkt a batérie, ktoré
obsahuje, sa nesmú vyhadzovať do bežného
domáceho odpadu. Je nutné ich triediť ako
separovaný odpad. Batérie ako aj ostatné
elektronické komponenty po skončení ich
životnosti odovzdajte v autorizovanej
zberni, ktorá zabezpečí recykláciu. Táto
valorizácia vášho elektronického odpadu
prispieva k ochrane životného prostredia a
vášho zdravia.
RECYKLACE
Symbol přeškrtnuté popelnice znamená, že
tento výrobek a baterie v něm obsažené není
možné vyhodit do běžného domácího odpadu.
Patří do speciálního tříděného odpadu. Po
skončení životnosti odložte váš elektronický
výrobek do specializované sběrny, kde bude
zrecyklován. Tímto znovuzpracováním
elektronického odpadu napomáháte chránit
životní prostředí a své zdraví.
ÅTERVINNING
Den överkorsade soptunnan innebär att
produkten och dess batterier inte kan
slängas bland hushållssoporna. De måste
sopsorteras. Lämna in batterierna och den
kasserade elektroniska apparaten till en
auktoriserad återvinningscentral. Om du gör
dig av med ditt elektriska avfall på detta vis
skonar du miljön och din egen hälsa.
РЕЦИКЛИРАНЕ
Знак "задраскано кошче за боклук"
означава, че този продукт и съдържащите
се в него батерии не могат да се изхвърлят
заедно с домакински отпадъци. Те трябва
да се събират разделно. Изхвърлете
батериите и стария електронен уред на
разрешеното за целта място за
рециклиране. Това преработване на Вашите
електронни уреди ще позволи да се защити
околната среда и Вашето здраве.
GERI DÖNÜŞÜM
"Üzeri çizgili çöp tenekesi" sembolü, bu ürün
ve içerdiği pillerin normal ev atıklarıyla
birlikte atılamayacağı anlamına gelmektedir.
Bunların özel olarak ayrılıp atılmaları
gerekmektedir. Bataryaları ve kullanım ömrü
sona eren elektronik ürününüzü, geri
dönüşümleri sağlanmak üzere bir toplama
alanına bırakınız. Elektronik atıklarınızın bu
şekilde değerlendirilmesi çevrenin ve
sağlığınızın korunmasını sağlayacaktır.
RECIKLAŽA
Simbol "prekrižene kante za otpatke"
označava da se proizvod i baterije koje se u
njemu nalaze ne smiju odložiti zajedno s
kućanskim otpadom. Oni podliježu
posebnom načinu razvrstavanja otpada.
Baterije i elekronički proizvod koji se više ne
može koristiti predajte ovlaštenom
prikupljalištu za reciklažu. Ovakvim načinom
zbrinjavanja električnog i elektroničkog
otpada štitite okoliš i svoje zdravlje.
RECIKLIRANJE
Simbol koš za smeti označuje, da izdelka
in baterij ni dovoljeno zavreči med običajne
hišne. Ločevanje je obvezno. Odpadne
baterije in elektronske dele odnesite v center
za ločeno zbiranje odpadkov, kjer jih bodo
reciklirali. S takšnim ravnanjem in odlaganjem
elektronskih odpadkov varujete okolje
in zdravje ljudi.
回收
“划杠垃圾箱”标志表明该产品及其电池
不可作为生活垃圾丢弃。必须进行专门的
筛选。将电池和电子产品一起放在专门的
回收中心。这种对电子产品的处理措施有
利于保护环境和您的身体健康。
「斜め線の入ったごみ箱」マークは、製品
および電池が、家庭ごみとして処理でき
ないことを示します。指定の選別ゴミと
して処理してください。寿命に達したバ
ッテリーや電化製品は、リサイクルごみ
として回収されます。電化製品を正しく
処理することは、あなたの健康と環境の
保護につながります。
回收
“打交叉的垃圾箱”標誌表明該產品及其
電池不可作為生活垃圾丟棄。必須進行專
門的篩選。將電池和電子產品一起放在專
門的回收中心。這種對電子產品的處理措
施有利於保護環境和您的身體健康。
ﺭﻳﻭﺩﺗﻟﺍ ﺓﺩﺎﻋﺇ
ﻡﺩﻋ ﺏﺟﻳ ﻪﻧﺇ "× ﺔﻣﻼﻋ ﺕﺍﺫ ﺕﻼﻣﻬﻣﻟﺍ ﺔﻠﺳ" ﺯﻣﺭﺑ ﺩﺻﻘﻳ
ﺕﺎﻔﻠﺧﻣ ﻊﻣ ﺕﺎﻳﺭﺎﻁﺑ ﻥﻣ ﻪﻳﻭﺣﻳ ﺎﻣﻭ ﺞﺗﻧﻣﻟﺍ ﺍﺫﻫ ﻁﻠﺧ
ﺫﺧﺃ ءﺎﺟﺭﺑ .ﺩﺩﺣﻣ ﻑﻳﻧﺻﺗﻟ ﻥﺎﻌﺿﺧﻳ ﺎﻣﻬﻓ .ﺔﻳﺩﺎﻌﻟﺍ ﻝﺯﻧﻣﻟﺍ
ﻡﺍﺩﺧﺗﺳﻼﻟ ﺢﻟﺎﺻﻟﺍ ﺭﻳﻏ ﻲﻧﻭﺭﺗﻛﻳﻟﻹﺍ ﻙﺯﺎﻬﺟﻭ ﺕﺎﻳﺭﺎﻁﺑﻟﺍ
ﻙﻠﻣﺎﻌﺗ ﻥﺇ .ﺎﻬﺑ ﺡﺭﺻﻣ ﺕﺎﻔﻠﺧﻣﻟﺍ ﺭﻳﻭﺩﺗﻟ ﻊﻳﻣﺟﺗ ﺔﻁﻘﻧ ﻰﻟﺇ
ﺔﺋﻳﺑﻟﺍ ﻲﻣﺣﻳ ﺎﻣﻧﺇ ﻭﺣﻧﻟﺍ ﺍﺫﻫ ﻰﻠﻋ ﺔﻳﻧﻭﺭﺗﻛﻳﻟﻹﺍ ﻙﺗﺎﻳﺎﻔﻧ ﻊﻣ
.ﻙﺗﺣﺻ ﻲﻣﺣﻳﻭ
ﺐﻠﻘﻟا تﺎﻀﺒﻧ سﺎﻴﻗ ماﺰﺣ ﺖﻴﺒﺜﺗ

EN
Thank you for choosing a DOMYOS product and for the trust this demonstrates.
Whether you are a beginner or a high level athlete, DOMYOS is there to help you stay t or increase your tness. Our teams are always pushing themselves
to create the best possible products for you to use. However if you have any comments, suggestions or questions, you can voice them on our website:
DOMYOS.COM. On the website you will also nd training advice and support.
We wish you all the best for your training and hope that this DOMYOS product will meet all your needs.
PRESENTATION
The DOMYOS RUN PRO is designed for walking at a speed of 1 km/h upwards, for power walking and
running at a speed of up to 22 km/h.
The incline system allows you to increase your eort and burn more calories.
RECOMMENDATIONS FOR USE
Read instructions carefully and keep for future reference.
START-UP
1. Plug in the power cable.
2. Switch the circuit breaker, located near the power cable, to the RESET position.
3. Position yourself on the treadmill, with your feet on the foot rails.
4. Attach the safety key clip to your clothing.
5. Insert safety key into designated slot on the console.
6. Your screen will light up and the treadmill is ready to use.
14. Wear sports shoes which are in good condition. To avoid
damaging your apparatus, ensure that your shoes are free of any
debris such as gravel or small stones.
15. Tie up your hair. Do not wear baggy clothing likely to get in your
way when exercising. Take o all jewellery.
16. After exercising, wait for the treadmill to stop completely before
getting o.
17. After use, remove the safety key from the console and store it in a
place which is inaccessible to children.
18. Always stop the machine using the master switch.
19. Always position and store the power cable away from heavy
trac areas.
20. If you want to get o urgently, grab the support rails and place
your feet on the foot rails.
21. To perform an emergency stop, remove the safety key.
22. Level of acoustic pressure measured 1 m from the surface of
the machine and at a height of 1.6 m above the ground: 71 dBA
(maximum speed). Noise emission under load is higher than
without load.
23. The underside of the belt will have been lubricated during
manufacturing. During transportation, some lubricant may have
been transferred onto the top of the belt and the cardboard. If
there is any lubricant on top of the belt, clean the belt using a
cloth and non-abrasive cleaning product.
24. This machine is intended for professional and/or commercial use
(class S) and should not be used in excess of 30 hours per week.
Therefore it is not intended for tness clubs where use will exceed
the maximum recommended limit.
25. If you experience dizziness, nausea, chest pain, or any other
abnormal symptom, stop exercising immediately and consult a
doctor.
26. The machine must be placed on a stable, at, horizontal surface.
27. WARNING! The heart-rate monitoring systems may not always be
precise. Over-exertion may lead to serious injuries or death. If you
feel unwell, stop your workout immediately.
1. Check your tness level with your medical practitioner. This is
especially important for persons over the age of 35 or persons
with pre-existing health problems.
2. This equipment should not be used by persons (including
children) with reduced physical, sensory or mental abilities or
persons lacking the necessary experience or knowledge, unless
they have received prior instruction on how to use the equipment
or are under the supervision of a person responsible for their
safety.
3. Domyos cannot be held liable for claims of injury or damage
sustained by any person or property resulting from the use or
misuse of this product by the purchaser or by any other person.
4. Your home’s electrical supply must be in a good state of repair
and comply with current standards. This machine should be used
with a 220 volt/16 amp circuit (minimum). Ensure that no other
piece of equipment shares the same circuit.
5. For your safety, your treadmill must be connected to a properly
tted plug with an earth connection that complies with currently
applicable regulations. If in doubt, get a qualied electrician to
check that the treadmill is properly installed. Do not modify the
plug supplied with your treadmill in any way.
6. If you need an extension cable, use one tted with an earth
connection and which is at least 1.5 m long.
7. Never use this machine with a damaged electrical cable or plug or
if it has been in contact with water.
8. Immediately after each use and prior to any cleaning, assembly
or maintenance operation, turn o the master switch and
disconnect the treadmill from the mains.
9. Never leave the treadmill plugged in without supervision.
10. Never remove motor hood. Adjustments and modications
other than those described in this manual must only be carried
out by an authorised technician. Failure to follow these safety
instructions may result in serious injuries, even death.
11. Keeps hands well away from all moving parts. Never place your
hands or feet under the walking belt.
12. Replace any worn or faulty parts immediately.
13. Ensure that there is adequate air ow during your exercise session.

EN
USING THE CONSOLE
Display:
• Running time
• Calories expended
• Distance covered
• Speed
• Heart rate
• Prole of selected programme or display of a 400 m running track (as you progress, the track
is gradually revealed)
• The VM indicator shows the change in incline (in metres). The mechanism starts once the
treadmill is used on an incline (from 0.5%). When used on the at (0%) the treadmill shows
no change in incline.
Functions:
Allows you to start the treadmill, if it has stopped, or pause the
treadmill.
Your treadmill will automatically start at 2 km/h. To reduce the speed
to 1 km/h, use the speed control button.
Allows you to stop exercising at any time.
Allows you to adjust the incline from 0% to 12% in increments of
0.5%, at any time.
Allows you to adjust your speed from 1 km/h to 22 km/h in
increments of 0.1 km/h (0.1 mph) at any time.
Hold down the button to scroll through the speed settings in
increments of 0.5 km/h (0.5 mph).
Allows you to select CALORIE programmes.
Allows you to select PERFORMANCE programmes.
Allows you to select DISTANCE programmes.
Allows you to select TIME programmes.
Allows you to modify the main display to show your
preferred data: time, distance, speed, calories, heart rate.
Audio jack socket for mp3 player
Allows you to adjust the fan intensity
Allows you to adjust volume
Direct access to 12 pre-dened incline levels:
Press relevant number to go directly to
preferred incline level.
Direct access to 12 pre-dened speeds:
Press relevant number to go directly to preferred speed.
Heart rate sensors
Speaker
Cable to link your mp3 player to the
treadmill speakers
Direct access to 7 pre-dened programmes:
Press your programme of choice to start.
PROGRAMS
The DOMYOS RUN PRO oers 20 pre-set programmes which vary both the speed and incline. The programmes are divided into several segments.
Each segment corresponds to a speed or incline setting. Note: two consecutive segments may have the same setting.
The ashing segment represents the current segment of your exercise programme The height of the segment represents the speed.
The rst 10 programmes are specically designed for weight loss. Working on an incline allows you to burn more calories.
The following 10 programmes are designed for resistance training, improving endurance and cardio performance, and building muscle.
You can adjust the speed/and or incline at any time during the programme, depending on your level. However, the treadmill will return to the
default setting at the beginning of the next new training segment.

EN
PROGRAMME TIME DISTANCE MAX. SPEED MAX. INCLINE
1200 kcal 20 min 2.2 km 8 km/h -
2250 kcal 20 min 2.6 km 9.5 km/h 4%
3300 kcal 30 min 3.0 km 6.5 km/h 5%
4350 kcal 30 min 3.1 km 7 km/h 10%
5400 kcal 40 min 3.9 km 7 km/h 8%
6450 kcal 40 min 3.9 km 7 km/h 10%
7500 kcal 40 min 4.5 km 7.5 km/h 8%
8600 kcal 30 min 5.9 km 13.5 km/h 5%
9600 kcal 40 min 6.3 km 11 km/h 2.5%
10 700 kcal 40 min 6.4 km 11 km/h 8.5%
11 performance 1 20 min 2.7 km 11 km/h 4%
12 performance 2 30 min 3.8 km 9.5 km/h 4%
13 performance 3 45 min 6.3 km 10.5 km/h 12%
14 performance 4 60 min 9.0 km 9.5 km/h 7%
15 performance 5 60 min 8.4 km 12 km/h 5%
16 5 km distance 33 min 5 km 10 km/h 3%
17 10 km distance 55 min 10 km 11 km/h 1.5%
18 15 km distance 88 min 15 km 13 km/h 2%
19 30 min run 30 min 6.3 km 13.5 km/h 6.5%
20 40 min run 40 min 6.1 km 10.5 km/h 10%
Pausing the treadmill during a programme:
• Pausing for 5 minutes or less:
The programme will restart and gradually resume at the pre-set speed the treadmill was moving before pausing.
When the next segment begins to ash, pre-set programme settings will be resumed.
• Pausing for 5 minutes or more:
The programme segment will restart at 2 km/h. You can then adjust your speed manually.
When the next segment begins to ash, pre-set programme settings will be resumed.
Programme selection:
• CALORIE programmes (1-10): Press the button until you reach desired programme.
• PERFORMANCE programmes (11-15): Press the button until you reach desired programme.
• DISTANCE programmes (16-18): Press the button until you reach desired programme.
• TIME programmes (19-20): Press the button until you reach desired programme.
• Press the button to start selected programme.
• Press the button to pause programme at any time.
• Press the button to stop programme at any time.
HEART RATE
You can measure your heart rate at the start and end of the exercise by placing your palms on the pulse sensors. For more accurate information, you
can also measure your heart rate throughout your training session using the heart rate monitor belt provided.
WARNING! Heart rate monitoring systems may be inaccurate. Over-training can lead to serious injury or even death. If you start to feel ill, stop
training immediately.
INFORMATION MODE
The information mode allows you adjust some of the settings and displays a summary of performance.
1. Hold down the button and then insert the safety key into console.
2. Release the button .
3. Press the button to scroll through the settings.
Units of measurement: Press the button to display desired unit of measurement (METRIC = kilometres/ENGLISH = miles).
Screen contrast: Press the incline adjusting buttons to change the contrast.
Demo mode: Demo mode is designed to be used if the treadmill is on display in store. It allows the screen to work when the safety key has
been removed from the console (gives an automatic demonstration of the dierent programmes).
Press the button to activate or disable the demo mode.
Performance summary: Display of cumulative time elapsed (in hours) and distance covered (kilometres or miles depending on unit of
measurement selected) from the rst time used.
4. Remove safety key from console to exit information mode.

EN
MAINTENANCE
Regular maintenance is necessary to maintain the performance of the machine and to extend the life of the product. Refer to the maintenance
table at the end of the instructions.
Failure to comply with maintenance recommendations may result in premature wear, permanent damage and voiding of the guarantee.
If you have any questions, please contact your local DECATHLON store or visit our website, www.domyos.com.
WEEKLY MAINTENANCE
Inspect and, if necessary, tighten all external parts of the treadmill.
Cleaning:
• Switch o and then unplug the treadmill.
• Apply a small amount of mild, multi-purpose cleaner, using a 100% cotton cloth. Do not spray directly onto the walking belt and
do not use acid or ammonia-based cleaning products.
• Wipe the console and screens.
• Remove any dust and grime from the hand rails, uprights, foot rails, frame and motor hood. In addition, wipe the deck along the
sides of the walking belt. Do not wipe under the walking belt.
Adjusting the position of the walking belt (centring):
The space G between the walking belt and the foot rails must be visible at all times on both sides of the belt.This prevents damage to
the walking belt and untimely stopping.
G G
• Run your treadmill at 4 km/h (2.5 mph) and stand behind
the machine.
• The belt is skewed to the left:
Turn the left adjusting screw clockwise half a turn.
• The belt is skewed to the right:
Turn the right adjusting screw clockwise half a turn.
• Let the treadmill run long enough for the belt to reposition
itself (1-2 minutes) and repeat the procedure if necessary.
However, make sure that the belt is not too tight.
Adjusting the tension of the walking belt:
The walking belt is susceptible to wear and tear and can stretch over time. Re-tighten it as soon as it begins to slip (skidding feeling
with sudden changes in speed).
• Turn both adjusting screws by half a turn clockwise.
• Repeat procedure if necessary but make sure that the belt is not too tight. The belt is correctly tightened if you can lift the edges
by 2 to 3 centimetres on each side.
MONTHLY MAINTENANCE
Lubricating the walking belt:
It is important to lubricate your treadmill in order to reduce friction between the walking belt and the deck. If you note traces of
silicone on the inner surface of the walking belt (damp, wet and slightly greasy surface), there is no need to lubricate.
If the belt and deck are dry:
• Switch o treadmill and unplug.
• Lift the edges of the walking belt and coat the inner surface with silicone.*
• Plug in treadmill.
• Before using, run the walking belt at 4km/h (2.5 mph) for 10-20 seconds.
• Your treadmill is now ready to use!
* One lube application usually requires between 5 and 10 ml of silicone. Warning: a surfeit of
silicone can adversely aect the functioning of your treadmill (risk of slipping).
To purchase belt lube, please contact your local DECATHLON store.

EN
PREVENTATIVE MAINTENANCE
Check motor and motor belt after every 1,500 hours of use*
Change walking belt after every 3,500 hours of use*
Change deck after every 5,000 hours of use*
* To nd out the treadmill's total cumulative usage, refer to the INFORMATION MODE paragraph.
DIAGNOSING ERRORS
The treadmill doesn't switch on:
1. Check that the power cable is plugged into a functioning wall socket (to check if the wall socket is working, plug in a lamp or other electrical
device).
2. Check that the power cable is plugged into a correctly earthed wall socket. If you need an extension cable, use one tted with an earth
connection which is no longer than 1.5 m in length.
3. Once you've plugged in the power cable, check that the key is properly inserted into the console.
4. Check the circuit breaker, located on the treadmill frame, near the power cable. If it is protruding, as shown, the circuit breaker has tripped.To
reset, wait for 5 minutes and then push the switch back in.
The treadmill switches o when in use:.
• Check the circuit breaker, located near the power cable. If it is in the OFF position,
wait 5 minutes, then switch to the RESET position.
• Check that the power cable is plugged in.
• Remove key from console. Reinsert key into console.
If the problem persists, contact the after-sales service team (see last page of instructions).
The console screen remains on when you remove key from console:
The console has a demo mode which is designed to be used when the treadmill is
displayed in store. If the screen remains lit when you remove the key from the console,
the demo mode is probably turned on. To disable the demo mode, refer to paragraph
entitled INFORMATION MODE.
The belt slows down when you walk on it:
• If you need to use an extension cable, you must only use a cord with 3 x 1 mm² conductors (size 14), which is no longer than 1.5 m (5 ft) in
length.
• If the walking belt is over-tightened, your treadmill performance may be adversely aected and the walking belt may become damaged
To adjust the tension of the belt, refer to the paragraph entitled MAINTENANCE.
If the problem persists, contact the after-sales service team (see last page of instructions).
The incline system does not function property:
Recalibrate incline system:
1. Change the incline by pressing one of the incline adjusting buttons.
2. During the recalibration process, remove the safety key from console then unplug treadmill.
3. Wait a few seconds then plug in treadmill once again and insert safety key into console.
The treadmill will automatically rise to the maximum incline level then return to the minimum level.
Noise from motor when treadmill switched on:
If the treadmill was switched o during the incline phase, it will automatically recalibrate when
the treadmill is switched on. When this happens, there is a noise from the motor although no belt
movement. The treadmill will automatically rise to the maximum incline level then return to the
minimum level. Wait until the treadmill has nished recalibrating and then continue as usual.
Structure-borne noise (grinding):
Check and, if necessary, tighten all external parts of the treadmill.

EN
USE
If you are a beginner, start by training for several days at a gentle pace; don't push yourself and rest if necessary. Gradually increase the frequency and
duration of sessions. Ensure the room in which you are exercising is well ventilated.
Stretching/warming up: Gentle eort for a minimum of 10 minutes
To maintain tness or for rehabilitation, train every day for at least 10 minutes. This type of exercise provides a good,
gentle work-out for muscles and joints and can be used as a warm-up activity before more intense physical exercise.
To develop muscle tone in the legs, choose a steeper incline and increase the duration of the exercise.
Aerobic exercise for weight loss: Moderate eort for 35 to 60 minutes
This type of training is an eective way of burning calories. There is no point in pushing yourself unduly; for the best
results the most important thing is frequency of exercise (at least 3 times a week) and the duration of the session (35 to
60 minutes). Exercise at average intensity (moderate eort so you are not out of breath).
In order to lose weight, as well as taking regular physical exercise, it's essential to follow a balanced diet.
Aerobic training for endurance: Sustained eort for 20 to 40 minutes
This type of exercise helps strengthen the heart muscle and improves your respiratory health. Exercise at least 3 times a
week at a steady pace (rapid breathing). As your training progresses, you will be able to maintain this eort for longer,
and at an improved pace.
Training at a faster pace (anaerobic and in the red zone) is reserved for athletes and requires special preparation.
Cool down
After each training session, walk slowly for a few minutes to bring your body gradually to rest. This cool down phase helps your cardiovascular and
respiratory systems, blood circulation and muscles return to normal. It also helps to eliminate side eects such as the accumulation of lactic acid
which is one of the major causes of muscle pain (cramps and stiness).
Stretching
Stretching after exercise reduces muscle stiness caused by lactic acid accumulation and stimulates blood circulation.
COMMERCIAL GUARANTEE
DOMYOS guarantees this product in normal conditions of use, 5 years for the structure and 2 years for other parts and labour, from the date of
purchase, the date on the receipt is binding.
DOMYOS'S obligation with regards to this guarantee is limited to the replacement or repair of the product, at the discretion of DOMYOS.
This guarantee doesn't apply in cases of:
• Damage caused during transportation
• Use and/or storage outside in a damp environment (excluding trampolines)
• Poor assembly
• Misuse or abnormal use
• Poor maintenance
• Repairs made by technicians not approved by DOMYOS
• Use in excess of 30 hours per week
This guarantee does not cancel the legal guarantee applicable in the country of purchase.
To take advantage of your product's guarantee, consult the last page of the user's guide.
DECLARATION OF CONFORMITY
Product name: DOMYOS RUN PRO
Product function: Treadmill
Model: 8350242
Type: 1863.372
This product conforms with all the relevant EC directives
and standards listed below:
2006/42/CE
2006/95/CE
2004/108/CE
EN 60335-1
EN 55014-1 & EN 55014-2
EN 61000-3-2 & EN 61000-3-3
EN 20957-1 & EN 957-6
Made in (place): MARCQ-EN-BARŒUL
Date (day/month/year): 01/12/2015
DOMYOS brand manager: Philippe BERNADAT
DECATHLON, 4 boulevard de Mons, BP 299
59650 VILLENEUVE D’ASCQ CEDEX, FRANCE
Other manuals for RUN PRO
2
Table of contents
Other Domyos Treadmill manuals

Domyos
Domyos TC 270 User manual

Domyos
Domyos TC290 User manual

Domyos
Domyos ESSENTIAL RUN User manual

Domyos
Domyos ESSENTIAL RUN User manual

Domyos
Domyos COMFORT RUN User manual

Domyos
Domyos ESSENTIAL RUN User manual

Domyos
Domyos TC 5 User manual

Domyos
Domyos RUN PRO User manual

Domyos
Domyos T520A User manual

Domyos
Domyos TC 5 User manual

Domyos
Domyos TC 140 User manual

Domyos
Domyos TC 450 User manual

Domyos
Domyos TC 4 User manual

Domyos
Domyos TC 760 User manual

Domyos
Domyos TC490 User manual

Domyos
Domyos RUN PRO User manual

Domyos
Domyos TC 5 User manual

Domyos
Domyos TC 790 User manual

Domyos
Domyos TC 5 User manual

Domyos
Domyos TC7 User manual