Dimensions and technical information are subject to change without notice
102
Rotary Actuators | Maintenance and Assembly Procedure
RR-36, 46 options Series
16
13
30
1
31
9
32
15
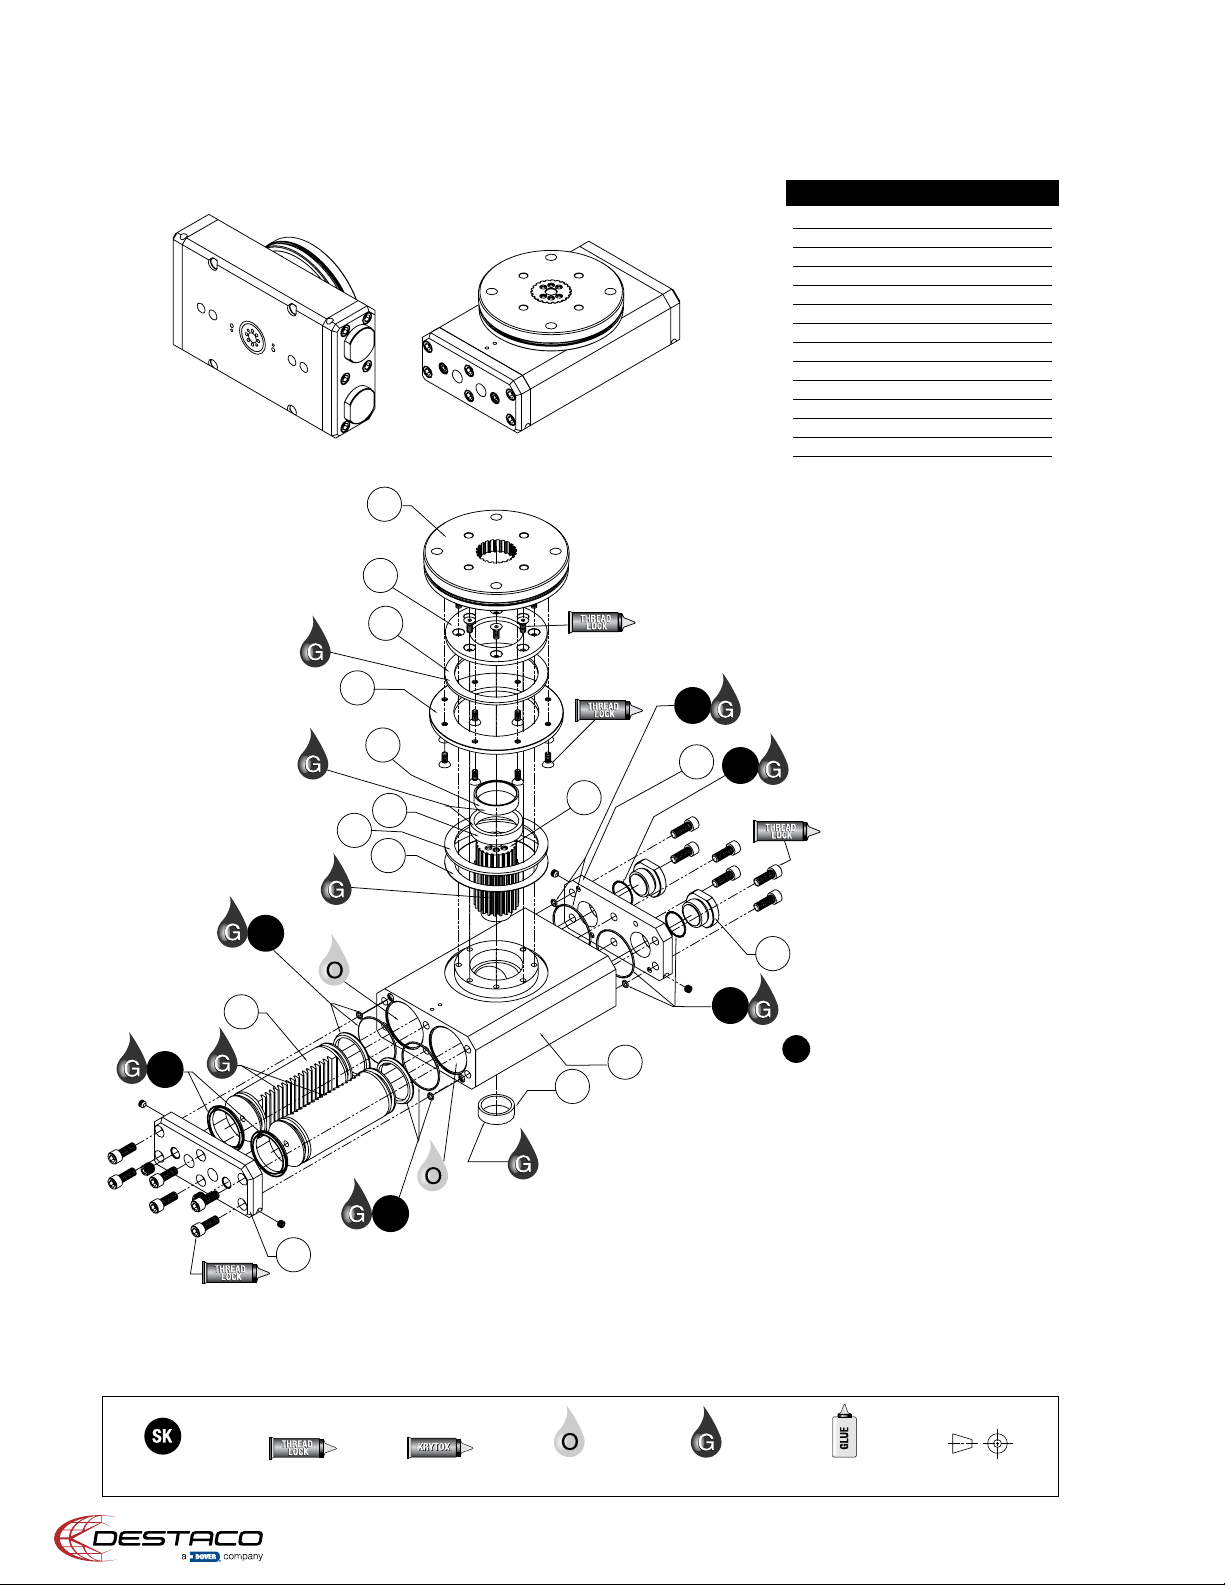
(4 O-RINGS)
(4 O-RINGS)
(6 SCREWS)
(2 SCREWS)
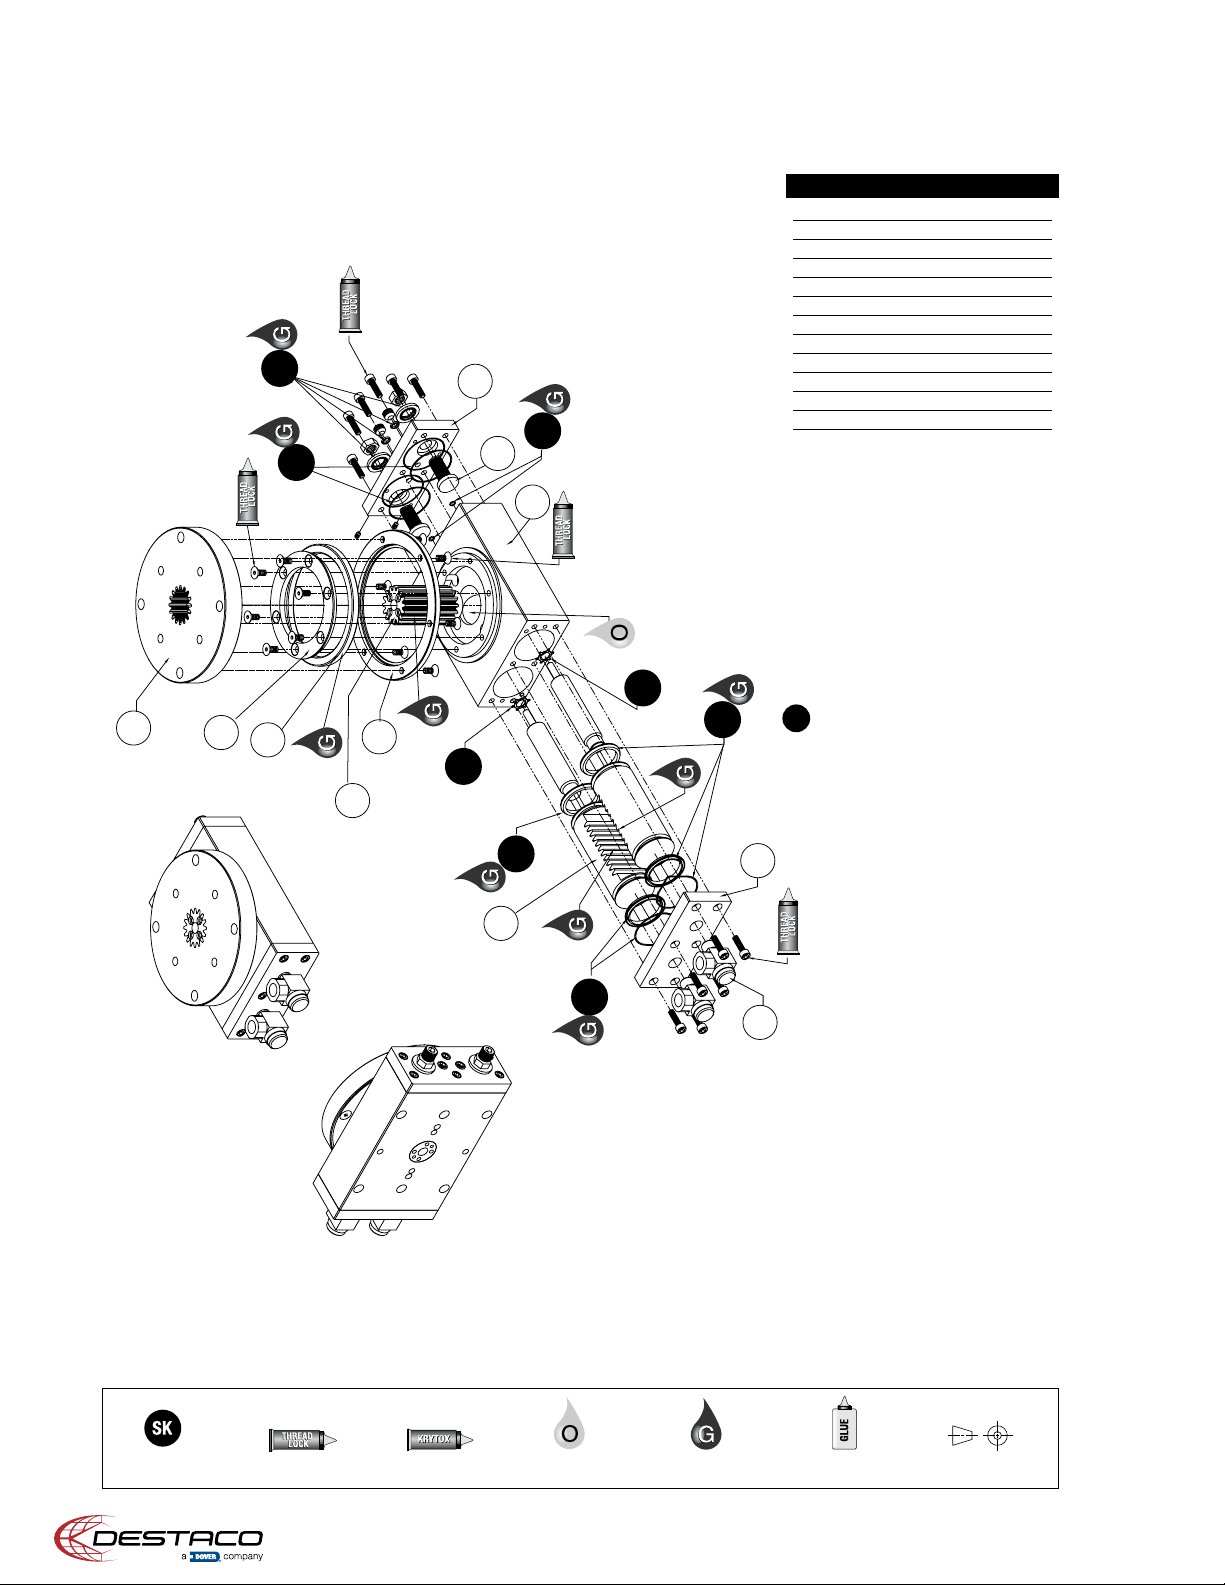
SK
SK
SK
SK
SK
SK
For more information call us at: 1-800-ROBOHAND or 203-261-5558 Fax: 203-452-7418 Visit us on the Internet at: www.destaco.com
3.16
RR-36 & 46
OPTIONS
MAINTENANCE
Third Angle
Projection
Seal Kit
Items
Thread
Locker
Krytox™
Lubricant
Teflon®Based
Grease
Lightweight
Machine Oil
Super
Bonder
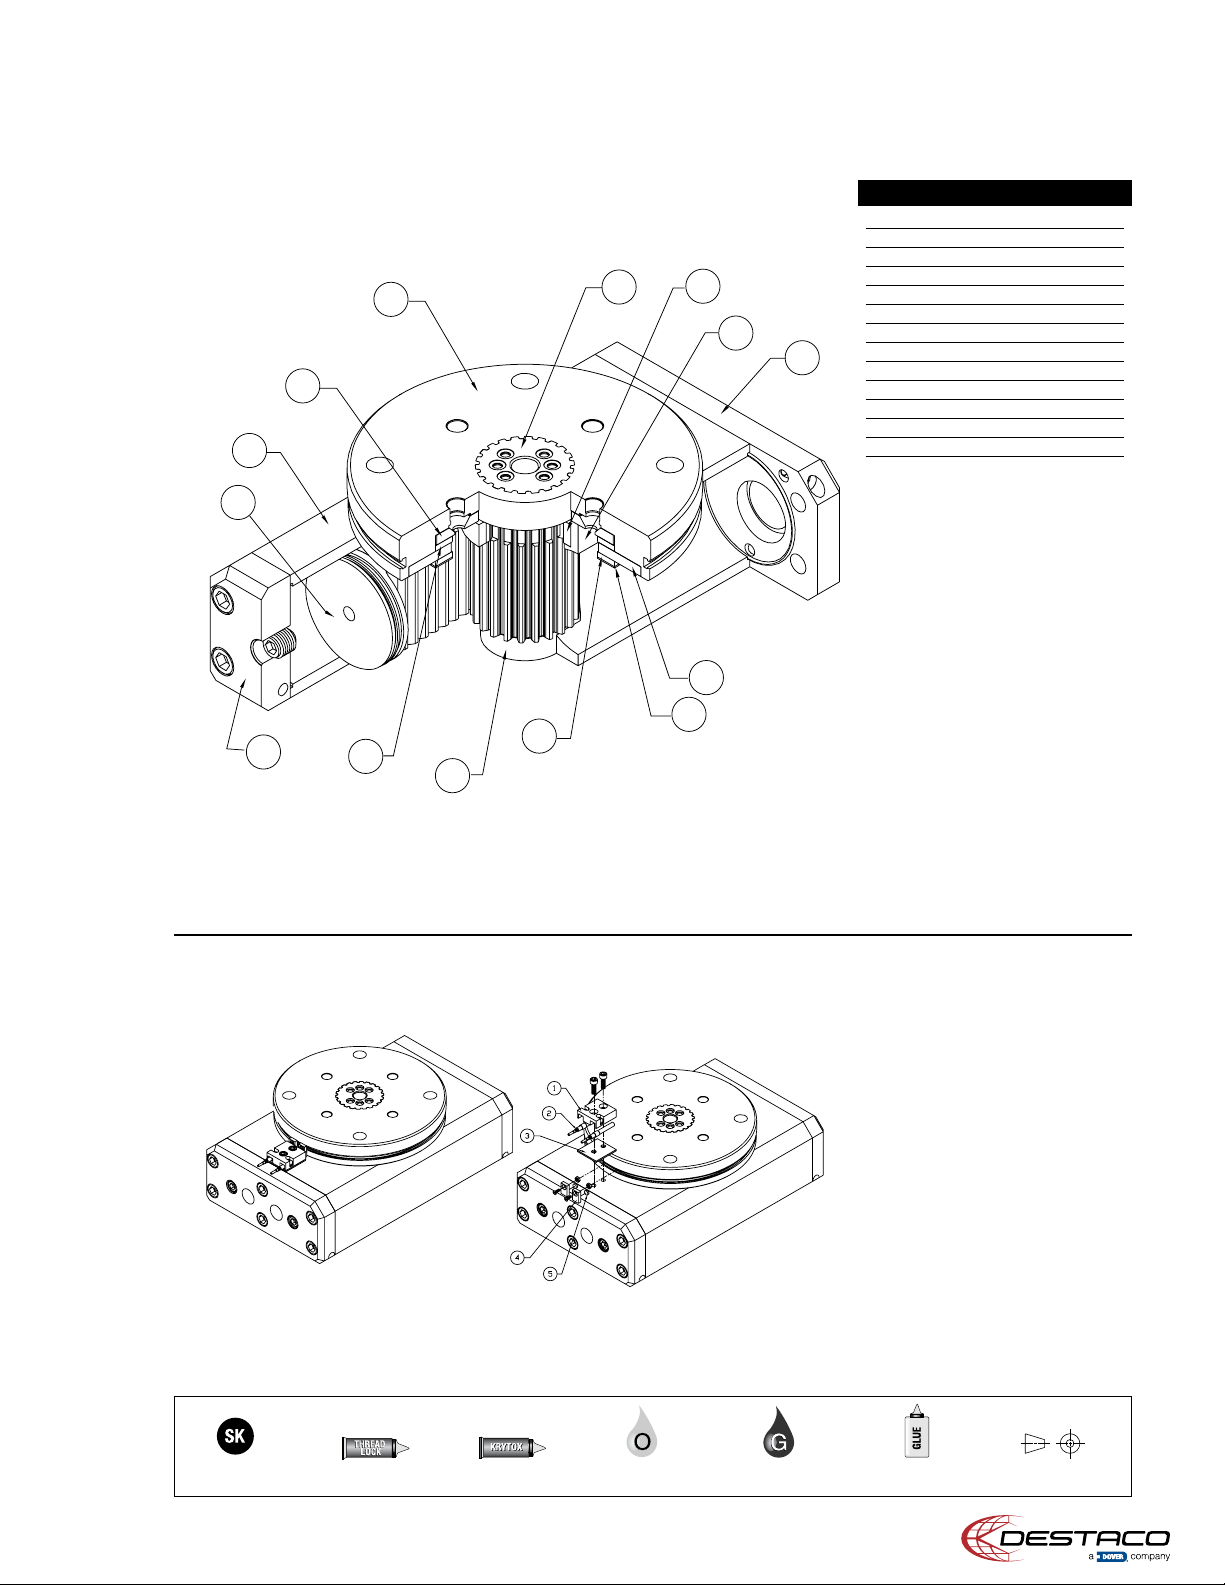
RR-36 & 46 Options Exploded View
Item Qty Name
RR-36&46-S
(Mid Position Stop Option)
13 2 Piston, Midstop
16 1 Body, Midstop
30 2 Mid-Stop Adjustment Screws
RR-36&46-M
(Rotary Manifold Option)
09 1 Manifold,Rotary
15 1 Manifold
31 2 Dowel Pin
32 2 Dowel Pin
NOTE: Contact the Robohand Sales
Department for a complete spare parts
list with order numbers and prices.
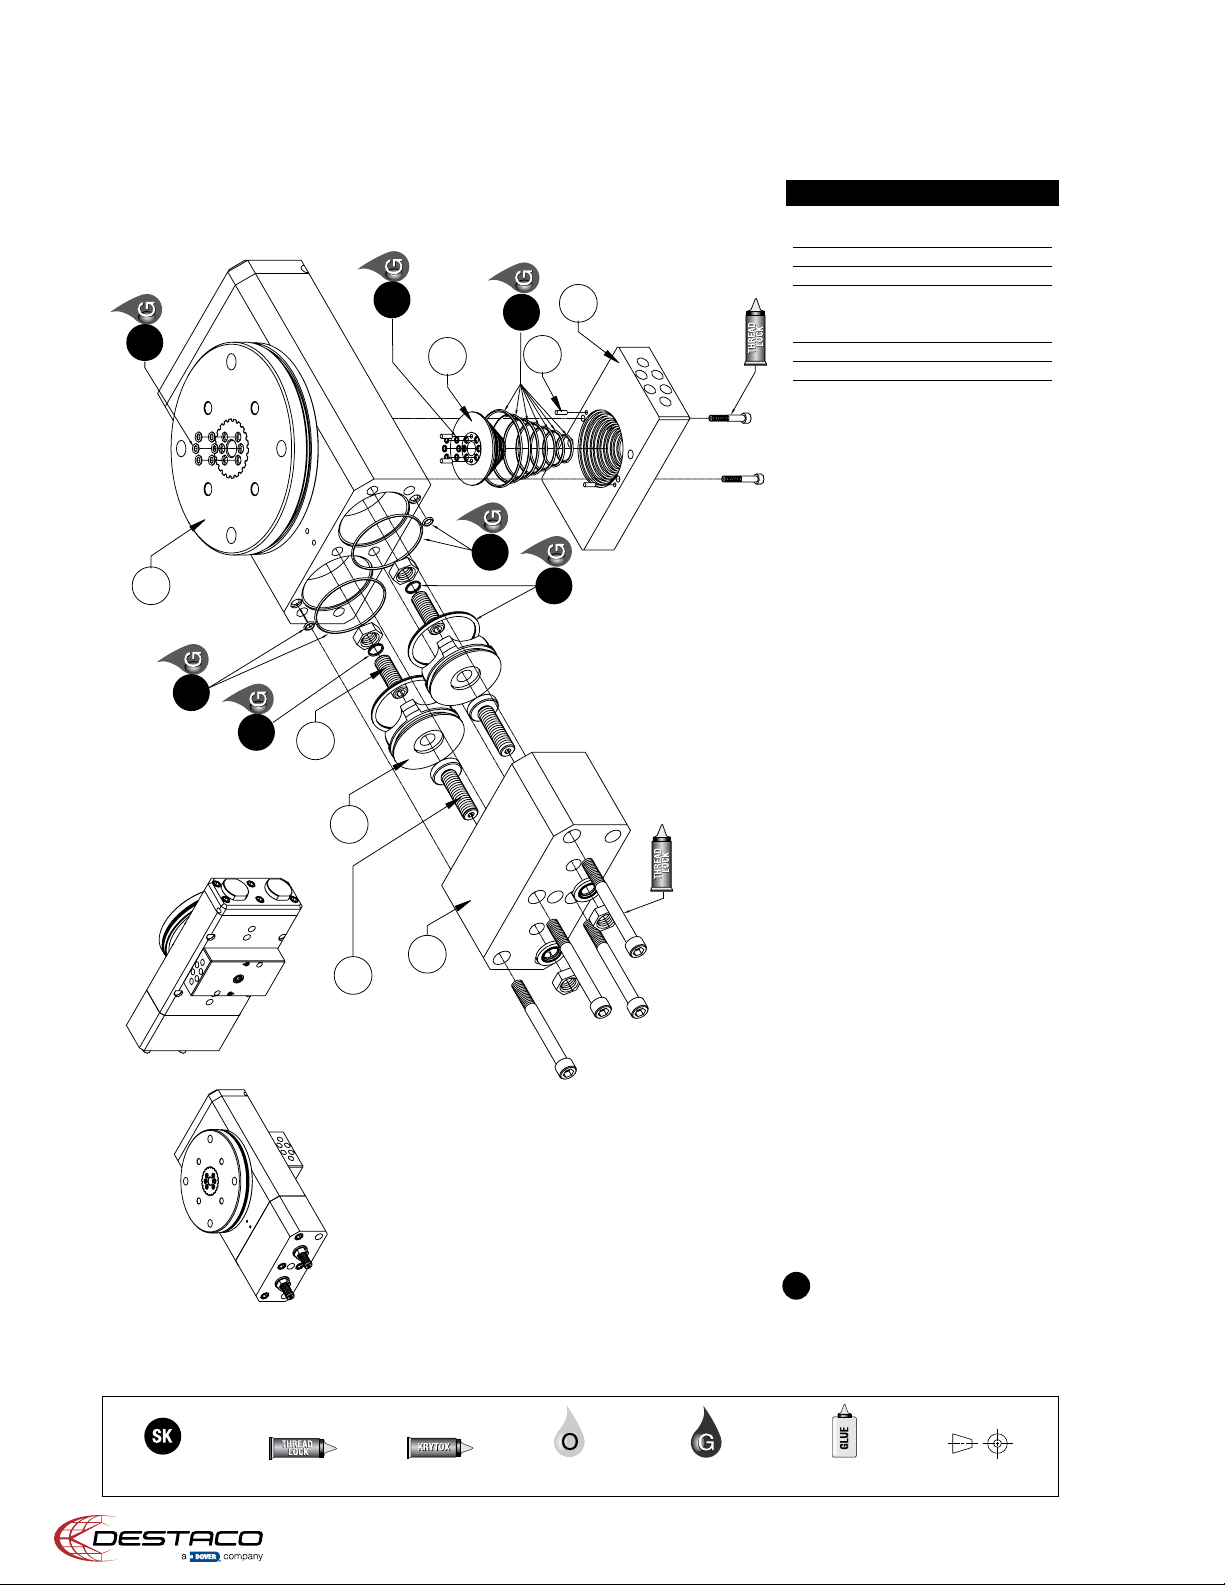
Manifold Option
Assembly Procedure
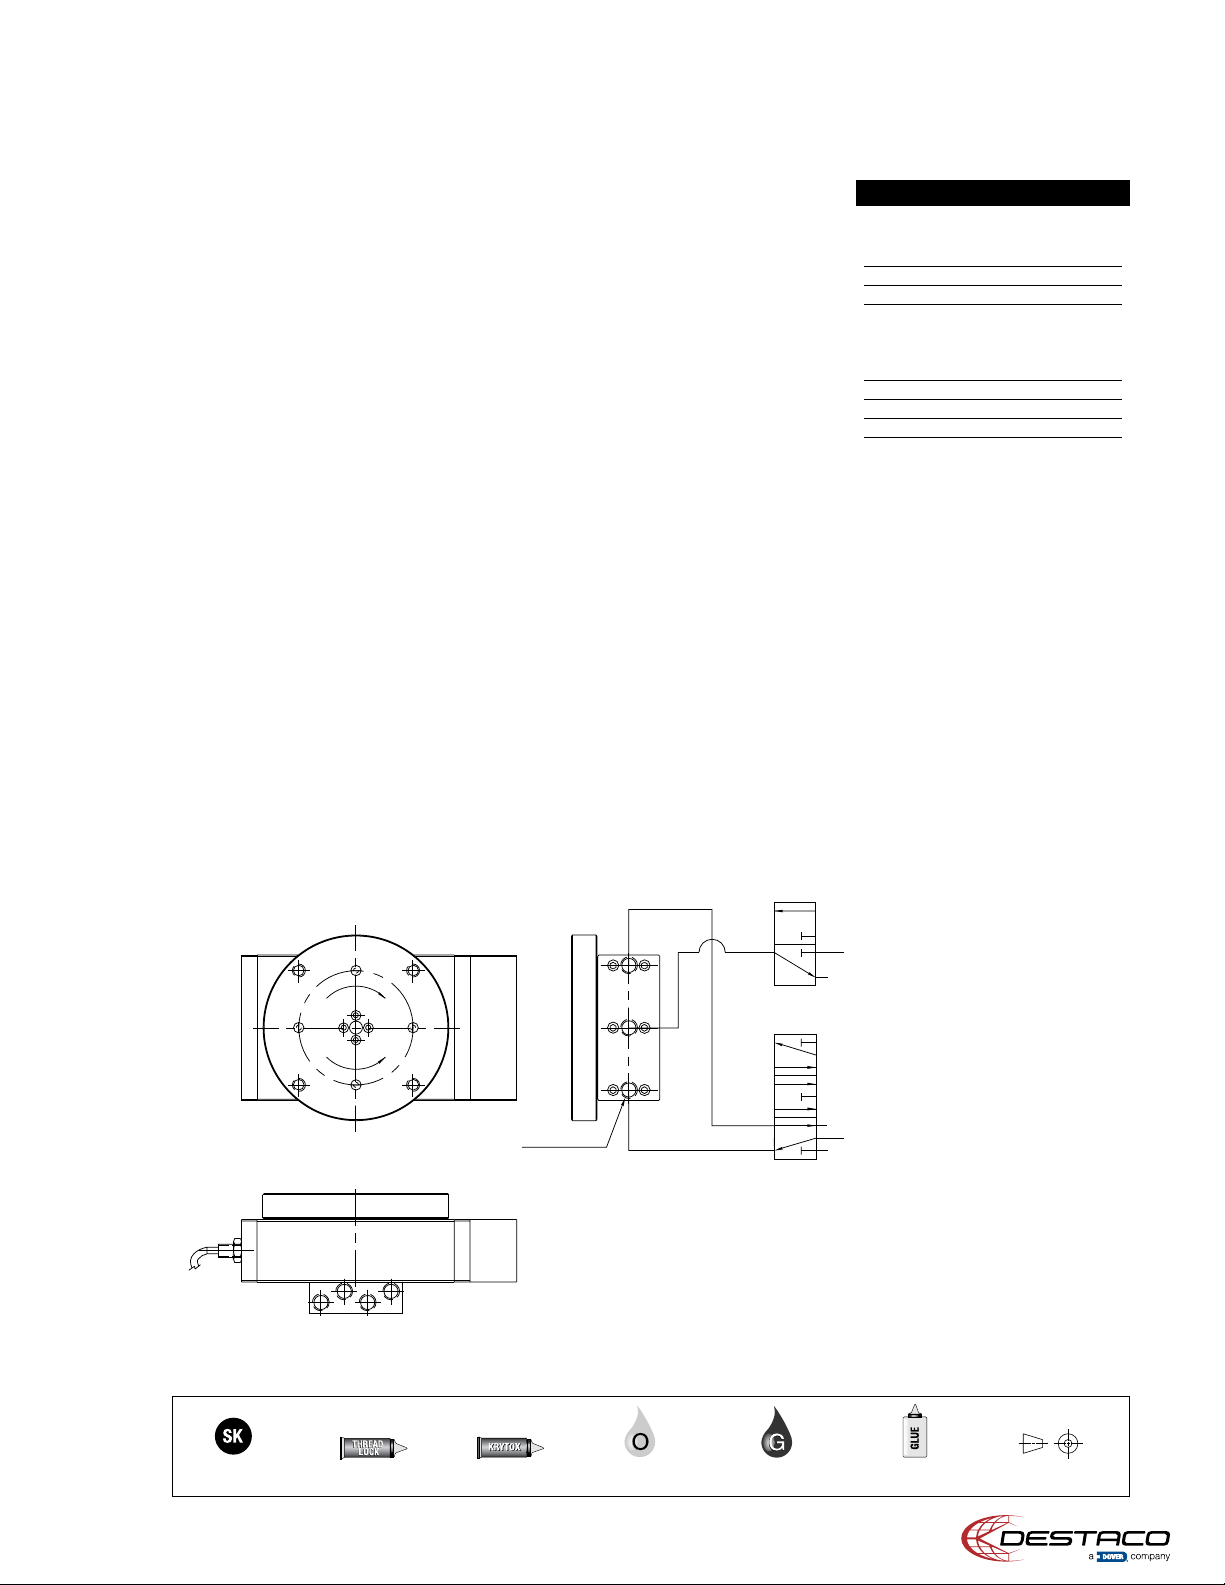
1) Lubricate and install 8 small o-rings.
(4 in the pinion, 4 in the rotary mani-
fold body).
2) Install 5 large O-rings on the rotary
manifold.
3) Press dowel pin into rotary manifold
4) Install rotary manifold in manifold
body.
5) Attach manifold assembly to rotary
actuator body.
Mid-Stop Option
Assembly Procedure
1) Lubricate and install o-rings.
2) Install mid-stop pistons, adjustment
screws, seal washers, and hex nuts
in rotary actuator body.
3) Attach mid-stop body to rotary actua-
tor body.
4) Install flow controls.
Mid-Stop Adjustment Procedure
1) Remove mid-stop body from actuator
base.
2) Remove the two mid-stop pistons
from the mid-stop body and insert
them into their respective cylinder
bores in the actuator base.
3) Back off both mid-stop adjustment
screws (#30) while pushing the mid-
stop pistons firmly into the cylinder
bores. The face of the pistons should
seat against the actuator base. If not,
then continue to back out the stop
screws.
4) Turn the turntable to the desired posi-
tion and advance the mid-stop
adjustment screws until both screws
touch the main piston faces
5) Re-attach the two mid-stop pistons to
the mid-stop body and fasten mid-
stop body back onto actuator base.
Seal Repair Kit Order #’s
See Product Data Sheets
SK
3.1-3.45 (RR_DRM) RED.qxd 2/7/06 1:12 PM Page 16