manuals.online logo
Brands
  1. Home
  2. •
  3. Brands
  4. •
  5. Draper
  6. •
  7. Projection Screen
  8. •
  9. Draper Cinefold User manual

Draper Cinefold User manual

Copyright © 2002 Draper, Inc. Form Cinefold_Inst02 Printed in U.S.A.
Assembly Instructions
Cinefold Portable Projection Screen by Draper
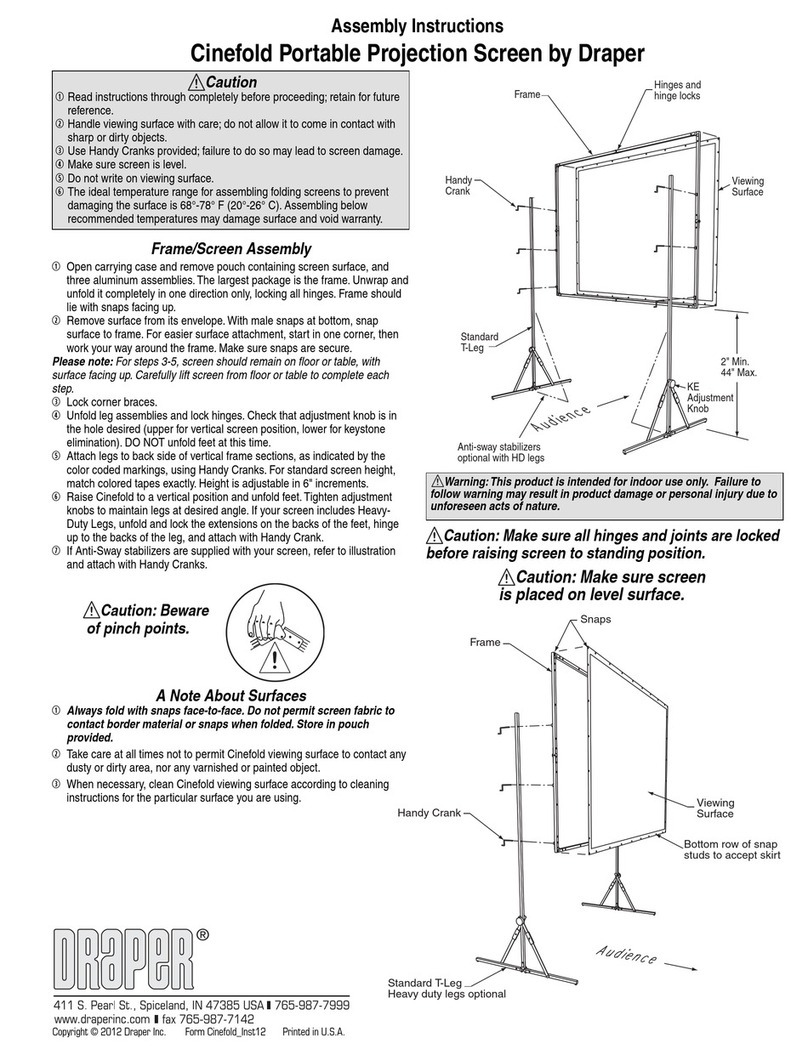
Frame Hinges and
hinge locks
Handy Crank Viewing
Surface
KE Adjustment
Knob
2" Min.
44" Max.
Anti-sway stabilizers
optional with HD legs
Standard T-Leg
Frame
Snaps
Handy Crank Viewing
Surface
Bottom row of snap
studs to accept skirt.
Standard T-Leg
Heavy duty legs optional
Frame/Screen Assembly
➀Open carrying case and remove pouch containing screen
surface, divider, and three aluminum assemblies.The
largest package is the frame. Unwrap and unfold it
completely in one direction only, locking all hinges. Frame
should lie with snaps facing up.
➁Remove surface from its envelope.With male snaps at
bottom, snap surface to frame.Begin at the 4 corners, and
work across the bottom, up the sides, and across the top.
Make sure snaps are secure.
Please note: For steps 3-5, screen should remain on floor or
table, with surface facing up. Carefully lift screen from floor or
table to complete each step.
➂Lock corner braces.
➃Unfold leg assemblies and lock hinges.Check that
adjustment knob is in the hole desired (upper for vertical
screen position, lower for keystone elimination). DO NOT
unfold feet at this time.
➄Attach legs to back side of vertical frame sections, as
indicated by the color coded markings, using Handy
Cranks.For standard screen height, match colored tapes
exactly. Height is adjustable in 6" increments.
➅Raise Cinefold to a vertical position and unfold feet.Tighten
adjustment knobs to maintain legs at desired angle. If your
screen includes Heavy-Duty Legs, unfold and lock the
extensions on the backs of the feet, hinge up to the backs of
the leg, and attach with Handy Crank.
➆If Anti-Sway stabilizers are supplied with your screen, refer to
illustration and attach with Handy Cranks.
A Note About Surfaces
➀Always fold with snaps face-to-face. Do not permit screen
fabric to contact border material or snaps when folded. Store in
pouch provided, and retain case divider to separate pouch
from aluminum parts when in case.
➁Take care at all times not to permit Cinefold viewing surface to
contact any dusty or dirty area, nor any varnished or painted
object.
➂When necessary, clean Cinefold viewing surface with mild
soap and water. USE NO SOLVENTS! Surface must be
completely dry before folding.
Caution
➀Read instructions through completely before proceeding; retain for
future reference.
➁Handle viewing surface with care; do not allow it to come in contact
with sharp or dirty objects.
➂Use Handy Cranks provided;failure to do so may lead to screen
damage.
➃Make sure screen is level.
➄Do not write on viewing surface.
411 S. Pearl St., Spiceland, IN 47385 USA
❚
765-987-7999
❚
fax 765-987-7142
e-mail [email protected] ❚www.draperinc.com
Assembly Instructions
Truss-Style Cinefold Portable Projection Screen by Draper
Truss Assembly
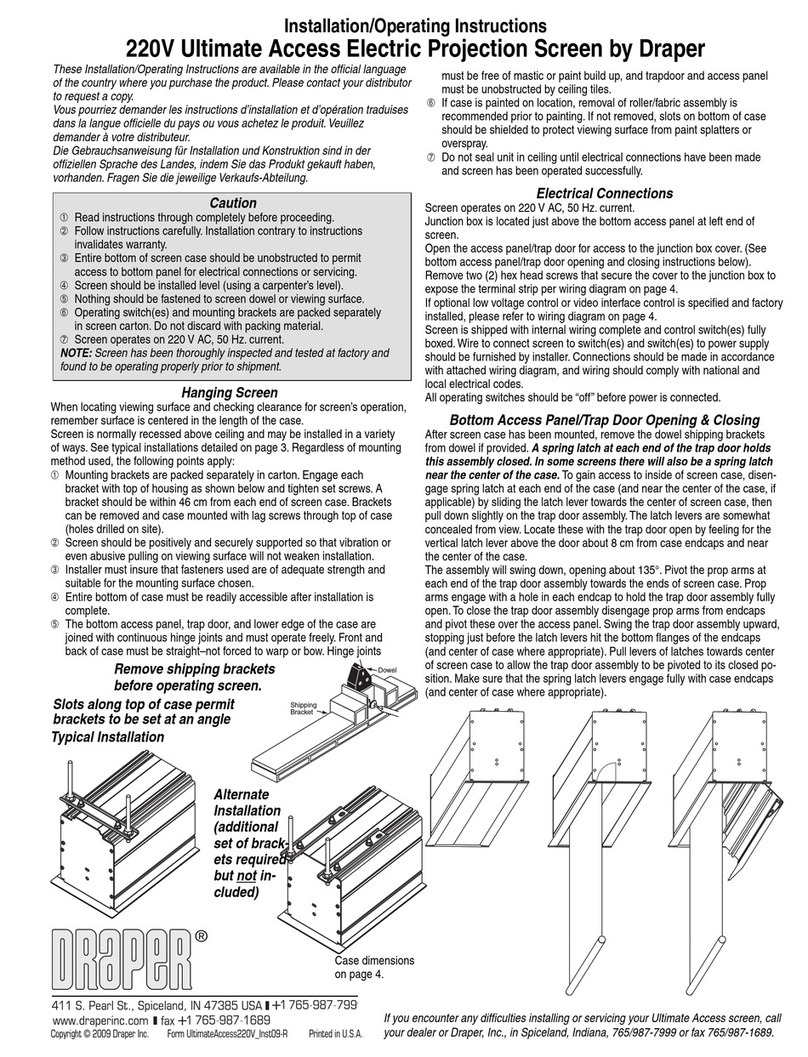
➀Remove pouch containing viewing surface from case and set aside.
Remove and retain case divider, and take out all aluminum assemblies.
➁Unfold all folded aluminum assemblies completely, noting labels and color-
coded marks.Lock all hinges.Position Stage Right and Stage Left
sections in appropriate positions with snaps facing
up
.Top and Bottom
sections should be set with snaps facing
down
.
➂To increase frame rigidity, hinges on top and bottom frame sections have
rivnuts marked with red and green. Insert a Handy Crank through the
threadless rivnut (red) and tighten into the threaded rivnut (green).
➃Apply small sections marked “Stiffener Bars” to back of Bottom frame
section, using 8 Handy Cranks each.Failure to use all Handy Cranks may
result in damage to screen frame.Turn Bottom frame section over so
snaps face up.
➄If your screen frame is less than 25' wide, repeat step 4 forTop frame
section. Frames 25' wide and over are equipped with a special full-width
Stiffener for the top frame section.To attach it, place Stiffener flat with
green rivnuts face down. Place top frame section on top of and at right
angles to Stiffener, over the green rivnuts.Insert and tighten standard
Handy Cranks. Install 45° angle braces to the Top frame section and
Stiffener with short Handy Cranks.Turn Top frame so snaps face up.
Dress-Up Kit Assembly
PLEASE NOTE: All components are labeled and color coded to
facilitate assembly.
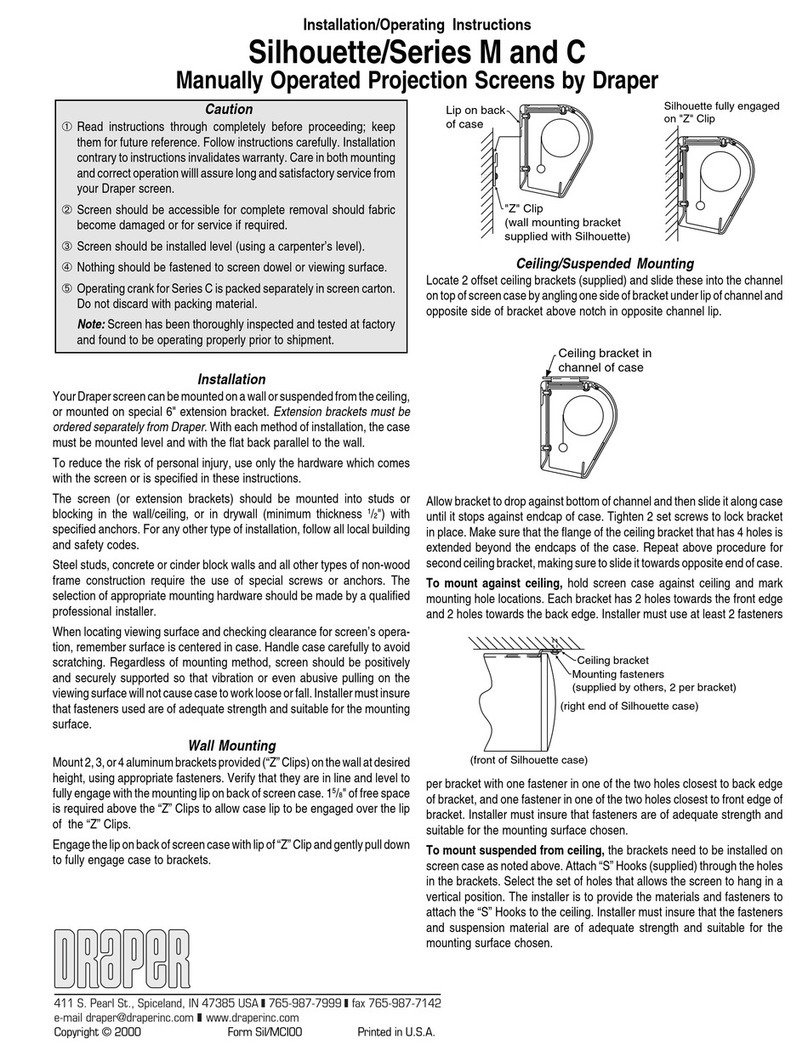
A. Valance Bar attaches to frame with simple bayonet-style mounting.
B. Draper Bars mount to Valance Bar, bayonet-style.
C. Optional adjustable Skirt Bar is secured to frame at desired level with
positive-locking plunger mechanism. If Skirt Bar is not used, Skirt may
be snapped to bottom of viewing surface.
D.Valance, Drapes, and Skirt snap onto Mounting Bars.
Drapery
Bar
Valance Bar
Drapery
Bar
Adjustable Skirt Bar
Rigid
Truss
Frame
Anti-Sway
Stabilizers
Heavy-Duty
Legs
Frame & Legs
Assemble with
Handy Cranks
Handy Crank
Caution
➀Read instructions through completely before proceeding; retain for
future reference.
➁Handle viewing surface with care; do not allow it to come in contact
with sharp or dirty objects.
➂Use Handy Cranks provided; failure to do so may lead to screen
damage.
➃Make sure screen is level.
➄Do not write on viewing surface.
411 S. Pearl St., Spiceland, IN 47385 USA
❚
765-987-7999
❚
fax 765-987-7142
e-mail [email protected] ❚www.draperinc.com
➅Join Top and Bottom to Stage Right and Stage Left, using 2 Handy Cranks
on each of the 4 corners.Match numbers on white labels, and keep in
mind that no Handy Crank should protrude outside screen frame.
➆Remove surface from pouch.With the row of male snaps at bottom,
position screen surface over frame. Snap each of the 4 corners, then snap
across bottom, up sides, and across top.
➇Attach feet to inner side of legs with Handy Cranks, matching color-coded
markings. Attach legs to Stage Right and Stage Left with Handy Cranks,
matching colored tapes.
➈Raise screen to a vertical position. Add Heavy-Duty Legs and Anti-Sway
Stabilizers with Handy Cranks in the positions indicated below.
Copyright © 2002 Draper, Inc. Form Cinefold_Inst02 Printed in U.S.A.
Other Draper Projection Screen manuals

Draper Foundation User manual

Draper

Draper Foundation User manual

Draper Premier XL Programming manual

Draper

Draper Premier XL Programming manual

Draper Premier Manual

Draper

Draper Premier Manual

Draper Signature Series E User manual

Draper

Draper Signature Series E User manual

Draper Access/Series M Manual

Draper

Draper Access/Series M Manual

Draper Nocturne+E Programming manual

Draper

Draper Nocturne+E Programming manual

Draper Lace & Grommet Installation instructions

Draper

Draper Lace & Grommet Installation instructions

Draper Ultimate Access E Programming manual

Draper

Draper Ultimate Access E Programming manual

Draper Tabletop Projection Screen MicroScreen User manual

Draper

Draper Tabletop Projection Screen MicroScreen User manual

Draper Targa Manual

Draper

Draper Targa Manual

Draper AKT 315 IX Manual

Draper

Draper AKT 315 IX Manual

Draper Profile+ User manual

Draper

Draper Profile+ User manual

Draper RoadWarrior User manual

Draper

Draper RoadWarrior User manual

Draper Premier PRE-28 User manual

Draper

Draper Premier PRE-28 User manual

Draper Series E Manual

Draper

Draper Series E Manual

Draper Ultimate Access XL V User manual

Draper

Draper Ultimate Access XL V User manual

Draper Rolleramic Electric Projection Screen Manual

Draper

Draper Rolleramic Electric Projection Screen Manual

Draper Loke User manual

Draper

Draper Loke User manual

Draper Rolleramic Manual

Draper

Draper Rolleramic Manual

Draper Signature V Series Manual

Draper

Draper Signature V Series Manual

Draper Envoy Manual

Draper

Draper Envoy Manual

Draper Access MultiView Manual

Draper

Draper Access MultiView Manual

Draper Premier Programming manual

Draper

Draper Premier Programming manual

Draper Ambassador Manual

Draper

Draper Ambassador Manual

Popular Projection Screen manuals by other brands

Elite Screens Kestrel Series How to replace

Elite Screens

Elite Screens Kestrel Series How to replace

Da-Lite Cosmopolitan Electrol Instruction book

Da-Lite

Da-Lite Cosmopolitan Electrol Instruction book

Elite Screens YARD MASTER MANUAL SERIES Product White Paper

Elite Screens

Elite Screens YARD MASTER MANUAL SERIES Product White Paper

3M Digiral Walldisplay 9200PD Quick reference guide

3M

3M Digiral Walldisplay 9200PD Quick reference guide

Kohler Aerie K-12345M Installation and care guide

Kohler

Kohler Aerie K-12345M Installation and care guide

Projecta Elpro electrol RF Mounting instruction

Projecta

Projecta Elpro electrol RF Mounting instruction

Kauber BLUE LABEL installation guide

Kauber

Kauber BLUE LABEL installation guide

Kimex SLIM Series user manual

Kimex

Kimex SLIM Series user manual

Screen Research TheaterCurved Reference X-Mask T-XLR3 installation manual

Screen Research

Screen Research TheaterCurved Reference X-Mask T-XLR3 installation manual

Champion 3130 Owner's operating and maintenance manual

Champion

Champion 3130 Owner's operating and maintenance manual

SI Short Throw Lift Motorized Screen installation instructions

SI

SI Short Throw Lift Motorized Screen installation instructions

CINEMOOD CNMD0020 quick start guide

CINEMOOD

CINEMOOD CNMD0020 quick start guide

Sony SCN-61X2 instructions

Sony

Sony SCN-61X2 instructions

HIVILUX TNZ series installation manual

HIVILUX

HIVILUX TNZ series installation manual

Panoview DS-9092PM installation guide

Panoview

Panoview DS-9092PM installation guide

SnapAV Dragonfly installation manual

SnapAV

SnapAV Dragonfly installation manual

Elite Screens Kestrel Tab-Tension 3 CineWhite X user guide

Elite Screens

Elite Screens Kestrel Tab-Tension 3 CineWhite X user guide

Elite Screens Electric100H Specifications

Elite Screens

Elite Screens Electric100H Specifications

manuals.online logo
manuals.online logoBrands
  • About & Mission
  • Contact us
  • Privacy Policy
  • Terms and Conditions

Copyright 2025 Manuals.Online. All Rights Reserved.