manuals.online logo
Brands
  1. Home
  2. •
  3. Brands
  4. •
  5. DSC
  6. •
  7. Control Unit
  8. •
  9. DSC PC6216 User manual

DSC PC6216 User manual

PC6216
Output Module Installation Instructions
Please refer to the System Installation Manual for information on limitations regarding product
use and function and information on the limitations as to liability of the manufacturer.
1. Introduction
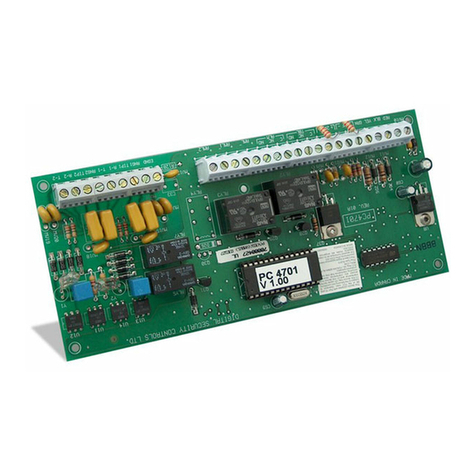
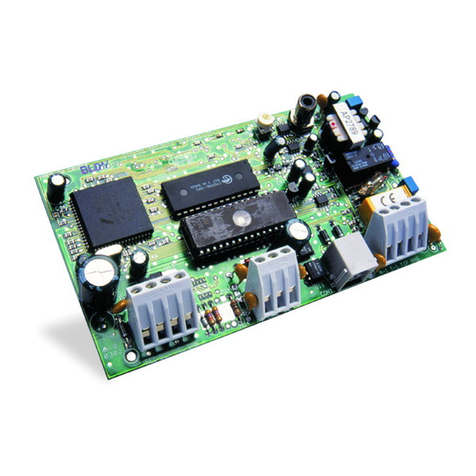
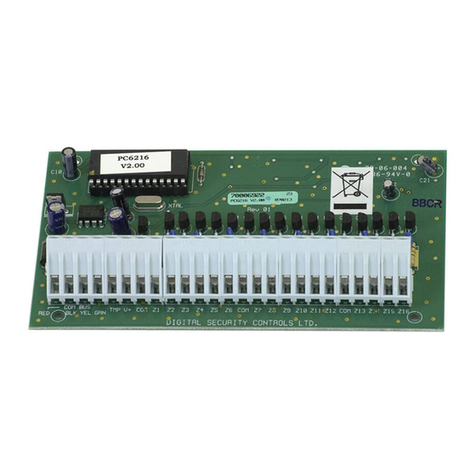
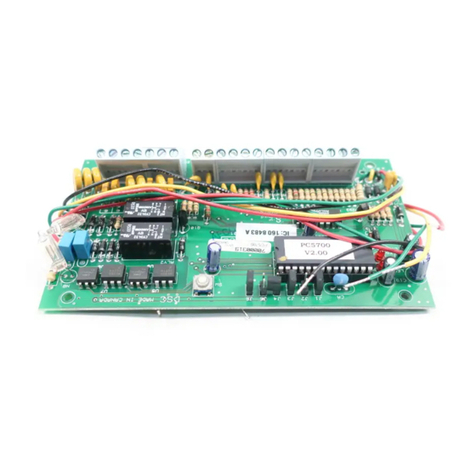
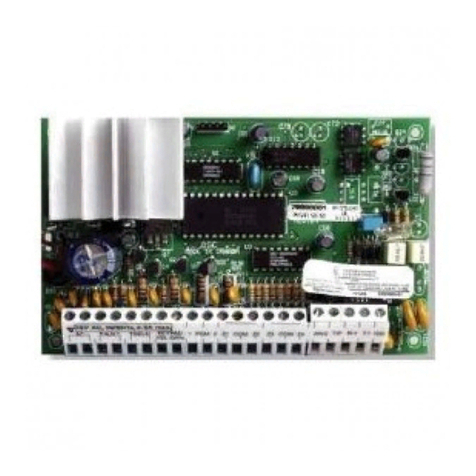
The PC6216 is an output module with 16 programmable outputs.
2. Specifications
• 16 output low current module, 12V, 50mA max. each,
power drawn from Ebus
• Up to 9 modules per system
• 9 modules programmable as alarm or zone annunciators
• Each of the 9 modules programmable for all 16 outputs;
available output options determined by the control panel
software version
• Connects to control panel via 4-wire Ebus
• Nominal current draw of 30mA
• Tamper contact input
Compatible Cabinets
• PC4003C
• PC4006C
• PC4001C/4002C
3. Installing the PC6216
3.1 Unpacking
The PC6216 package should include the following parts:
• One PC6216 circuit board
• 4 plastic stand-offs
3.2 Mounting
The PC6216 should be located inside a compatible cabinet,
mounted in a dry, secure location. Preferably, it should be
placed at a convenient distance from the connected devices.
Perform the following steps to mount the unit:
1. Press the four plastic stand-offs through the mounting
holes at back of the cabinet.
2. Secure the cabinet to the wall in the desired location. Use
appropriate wall anchors when securing the cabinet to
drywall, plaster, concrete, brick or other surfaces.
3. Press the circuit board into the plastic stand-offs to secure
the module to the cabinet.
Once the unit is mounted, wiring may be completed.
3.3 Installation and Wiring
Before beginning to wire the unit, ensure that all power (AC
transformer and battery) is disconnected from the control panel.
Perform the following steps to complete wiring:
1. Connect the four Ebus wires to the PC6216. Connect the
red, black, yellow and green Ebus wires to the RED, BLK,
YEL and GRN terminals, respectively.
2. Complete all output wiring as illustrated below:
The latching output will cause the status of all 16
programmable outputs to latch during a Ebus reset. To do
this, connect as shown above.
*NOTE:When using the PC6216 with the Relay Output, Indicator
and/or Voltage Output connection, you must short Ebus Red to V+
(see Standard connection diagram above) to ensure proper operation.
If you are using an external power supply (Latching Output),
shorting Ebus Red to V+ is NOT required.
3. Connect the external tamper switch, if used.
Consult the wiring diagrams for further information.
Ebus
STANDARD*
firealarmresources.com
3.4 Applying Power
After all wiring is completed, apply power to the control panel.
Connect the battery leads to the battery, then connect the AC
transformer. For more information on control panel power
specifications, see the control panel System Manual.
NOTE: Do not connect the power until all wiring is complete.
4. Enrolling and Programming the PC6216
Follow the instructions below for enrolling and programming
your PC6216 module. Refer to your System or Programming
manual for more information on programming.
4.1 Enrolling
You must enroll the PC6216 module with the panel before you
can program it. After you enroll the module, the system will
ask if you want to enable lamp testing on the module. See
section 4.3 for a description of the lamp test feature.
Follow these steps to enroll the module(s):
1 At a PC6010 system LCD keypad, enter Installer’s
Programming ([*][8][Installer’s code]).
2 Scroll to Module Hardware, press [*], then, scroll to
Enroll Module, press [*].
3 Scroll to PC6216 16 O/P, press [*].
4 The LCD keypad displays Create Tamper on Desired Unit.
Tamper and then restore the PC6216 module:
a) open and close the tamper switch, if one is installed on
the module OR
b) momentarily disconnect the jumper wire between the
TMP and COM terminals.
The LCD keypad displays PC6216 (nn) Enrolled where (nn)
is the number of the PC6216 module.
5 Record the number of the PC6216 module in the
programming worksheet, opposite.
6 Press any key. The keypad displays Lamp Test Y/N. Press
[*] to toggle between yes and no. To exit, press [#].
7 To exit module enrollment, press [#].
NOTE: If you need to change the Lamp Test option on a PC6216
module after it has been enrolled, you must delete and then re-enroll
the module.
4.2 Programming
Program the PC6216 module to follow one of 9 custom
groups.
A custom group is a set of 16 programming choices that
correspond to the 16 programmable outputs on each PC6216
module. Example: a PC6216 is assigned to custom group (01),
in which output (05) is programmed as output option (18),
zone follow, for zone (020), which is a fire zone. LED 5 turns
on when zone (020) is in alarm and turns off when zone (020)
is restored and a fire reset is performed. If you assign a PC6216
module to a custom group, you must also assign an output
option to each programmable output in the group. More than
one module may follow the same custom group.
Assign a Custom Group
1. Scroll to System Area, press [*], PGM Outputs, press [*],
then 4216 Options, press [*].
2. Scroll through the list of PC6216 modules to choose the
one you want to program (01-09). Press [*].
3. Scroll through the available options to choose a custom
group. Press [*] to select.
4. To exit, press [#].
Program a Custom Group
If you have assigned a PC6216 module to a custom group, you
need to program the 16 outputs in the group.
1. Scroll to System Area, press [*], PGM Outputs, press [*],
then 4216 Custom, press [*].
2. Scroll to the custom group you want to program (01-09).
Press [*].
3. Enter the number of the output to be programmed (01-16).
4. Enter the number of the output option to be used for that
output. Refer to your system’s Programming manual for
descriptions of the available programmable output options.
5. To exit, press [#].
4.3 Testing the PC6216
If you have enabled the lamp test option on the PC6216
module, master users will be able to conduct a lamp test.
• The LEDs on the PC6216 modules with the lamp test
option enabled turn on for 2 seconds.
Refer to the Maintenance Manual for instructions.
firealarmresources.com
PC6216 Options 0-06-3-01 ➔09
Enroll Module
Record the module number of the PC6216 module here:
Module Number: I______I______I
PC6216 Options (see section 4.2)
Record your programming choice for each PC6216 module here. See module options below.
Module Option Module Option Module Option
Number Number Number
01 I______I______I 04 I______I______I 07 I______I______I
02 I______I______I 05 I______I______I 08 I______I______I
03 I______I______I 06 I______I______I 09 I______I______I
PC6216 Module Options
[01] Custom Group 1 [02] Custom Group 2 [03] Custom Group 3 [04] Custom Group 4
[05] Custom Group 5 [06] Custom Group 6 [07] Custom Group 7 [08] Custom Group 8
[09] Custom Group 9
PC6216 Custom
If you will use a Custom Group to program the PC6216 module, you need to program the Custom Group that will
be used. Record your programming choices for the relevant group below. See your System or Programming Manual
for a list of valid output options.
Custom Group l
____l
____lArea Date Pulse Alarm Seismic
No. Output*
1 2 3 4 5 6 7 8 9 10 11 12 13 14 15 16 17 18 19 20 21 22 23 24 25 26 27 28 29 30 31 32
Zone Schedule Timer Group Group
1I
_____I
_____II
____I
____I
____I
____I
____I
____I
____I
____I
____I
____I
____I
____I
____I
____I
____I
____I
____I
____I
____I
____I
____I
____I
____I
____I
____I
____I
_____I
____I
____I
____I
____I
____II
_____I
_____I
_____II
_____I
_____II
_____I
_____II
_____I
_____II
_____I
_____I
2I
_____I
_____II
____I
____I
____I
____I
____I
____I
____I
____I
____I
____I
____I
____I
____I
____I
____I
____I
____I
____I
____I
____I
____I
____I
____I
____I
____I
____I
_____I
____I
____I
____I
____I
____II
_____I
_____I
_____II
_____I
_____II
_____I
_____II
_____I
_____II
_____I
_____I
3I
_____I
_____II
____I
____I
____I
____I
____I
____I
____I
____I
____I
____I
____I
____I
____I
____I
____I
____I
____I
____I
____I
____I
____I
____I
____I
____I
____I
____I
_____I
____I
____I
____I
____I
____II
_____I
_____I
_____II
_____I
_____II
_____I
_____II
_____I
_____II
_____I
_____I
4I
_____I
_____II
____I
____I
____I
____I
____I
____I
____I
____I
____I
____I
____I
____I
____I
____I
____I
____I
____I
____I
____I
____I
____I
____I
____I
____I
____I
____I
_____I
____I
____I
____I
____I
____II
_____I
_____I
_____II
_____I
_____II
_____I
_____II
_____I
_____II
_____I
_____I
5I
_____I
_____II
____I
____I
____I
____I
____I
____I
____I
____I
____I
____I
____I
____I
____I
____I
____I
____I
____I
____I
____I
____I
____I
____I
____I
____I
____I
____I
_____I
____I
____I
____I
____I
____II
_____I
_____I
_____II
_____I
_____II
_____I
_____II
_____I
_____II
_____I
_____I
6I
_____I
_____II
____I
____I
____I
____I
____I
____I
____I
____I
____I
____I
____I
____I
____I
____I
____I
____I
____I
____I
____I
____I
____I
____I
____I
____I
____I
____I
_____I
____I
____I
____I
____I
____II
_____I
_____I
_____II
_____I
_____II
_____I
_____II
_____I
_____II
_____I
_____I
7I
_____I
_____II
____I
____I
____I
____I
____I
____I
____I
____I
____I
____I
____I
____I
____I
____I
____I
____I
____I
____I
____I
____I
____I
____I
____I
____I
____I
____I
_____I
____I
____I
____I
____I
____II
_____I
_____I
_____II
_____I
_____II
_____I
_____II
_____I
_____II
_____I
_____I
8I
_____I
_____II
____I
____I
____I
____I
____I
____I
____I
____I
____I
____I
____I
____I
____I
____I
____I
____I
____I
____I
____I
____I
____I
____I
____I
____I
____I
____I
_____I
____I
____I
____I
____I
____II
_____I
_____I
_____II
_____I
_____II
_____I
_____II
_____I
_____II
_____I
_____I
9I
_____I
_____II
____I
____I
____I
____I
____I
____I
____I
____I
____I
____I
____I
____I
____I
____I
____I
____I
____I
____I
____I
____I
____I
____I
____I
____I
____I
____I
_____I
____I
____I
____I
____I
____II
_____I
_____I
_____II
_____I
_____II
_____I
_____II
_____I
_____II
_____I
_____I
10 I
_____I
_____II
____I
____I
____I
____I
____I
____I
____I
____I
____I
____I
____I
____I
____I
____I
____I
____I
____I
____I
____I
____I
____I
____I
____I
____I
____I
____I
_____I
____I
____I
____I
____I
____II
_____I
_____I
_____II
_____I
_____II
_____I
_____II
_____I
_____II
_____I
_____I
11 I
_____I
_____II
____I
____I
____I
____I
____I
____I
____I
____I
____I
____I
____I
____I
____I
____I
____I
____I
____I
____I
____I
____I
____I
____I
____I
____I
____I
____I
_____I
____I
____I
____I
____I
____II
_____I
_____I
_____II
_____I
_____II
_____I
_____II
_____I
_____II
_____I
_____I
12 I
_____I
_____II
____I
____I
____I
____I
____I
____I
____I
____I
____I
____I
____I
____I
____I
____I
____I
____I
____I
____I
____I
____I
____I
____I
____I
____I
____I
____I
_____I
____I
____I
____I
____I
____II
_____I
_____I
_____II
_____I
_____II
_____I
_____II
_____I
_____II
_____I
_____I
13 I
_____I
_____II
____I
____I
____I
____I
____I
____I
____I
____I
____I
____I
____I
____I
____I
____I
____I
____I
____I
____I
____I
____I
____I
____I
____I
____I
____I
____I
_____I
____I
____I
____I
____I
____II
_____I
_____I
_____II
_____I
_____II
_____I
_____II
_____I
_____II
_____I
_____I
14 I
_____I
_____II
____I
____I
____I
____I
____I
____I
____I
____I
____I
____I
____I
____I
____I
____I
____I
____I
____I
____I
____I
____I
____I
____I
____I
____I
____I
____I
_____I
____I
____I
____I
____I
____II
_____I
_____I
_____II
_____I
_____II
_____I
_____II
_____I
_____II
_____I
_____I
15 I
_____I
_____II
____I
____I
____I
____I
____I
____I
____I
____I
____I
____I
____I
____I
____I
____I
____I
____I
____I
____I
____I
____I
____I
____I
____I
____I
____I
____I
_____I
____I
____I
____I
____I
____II
_____I
_____I
_____II
_____I
_____II
_____I
_____II
_____I
_____II
_____I
_____I
16 I
_____I
_____II
____I
____I
____I
____I
____I
____I
____I
____I
____I
____I
____I
____I
____I
____I
____I
____I
____I
____I
____I
____I
____I
____I
____I
____I
____I
____I
_____I
____I
____I
____I
____I
____II
_____I
_____I
_____II
_____I
_____II
_____I
_____II
_____I
_____II
_____I
_____I
**
**
*List of Output Options:List of Output Options:
List of Output Options:List of Output Options:
List of Output Options:
[00] Fire and Burg [11] Courtesy Pulse [22] Exit Follow [33] Battery Test [44] Inv Date Sched
[01] Inv Fire /Burg [12] Chime Follower [23] Entry Follow [34] Auxiliary Alrm [45] Inv Hold Up
[02] Burg Only [13] TLM Only [24] Date Schedule [35] Medical alarm [46] Inv Set
[03] Inv Burg Only [14] Failure to Comm [25] Hold Up [36] Seismic Pulse [47] Inv Tbl Group
[04] Fire Only [15] Ebus Power [26] Set [37] Alarm Group [48] Inv Tamper
[05] Inv Fire Only [16] Ready Status [27] Trouble Group [38] Inv Area Status [49] Inv Cond. Al.
[06] Utility Output [17] Zone Alarm [28] Tamper [39] Inv Latch Strobe [50] Inv Police Code
[07] Sensor Reset [18] Zone Follow [29] Condition. Al. [40] Inv Trouble O/P [51] Inv Aux Alm
[08] Area Status [19] Duress Output [30] Police code [41] Inv Zn Alarm [52] Inv Medical Alm
[09] Latched Strobe [20] Buzzer Follow [31] Momentary O/P [42] Inv Zn Follow [53] Inv Seismic O/P
[10] Trouble Output [21] Remote Operation [32] Maintained O/P [43] Inv Duress O/P [54] Inv Alarm Group
[55] APS Controlled
Programming Worksheet
firealarmresources.com
©2002 Digital Security Controls Ltd.
Toronto, Canada • www• www
• www• www
• www.dsc.com.dsc.com
.dsc.com.dsc.com
.dsc.com Printed in Canada 29004920 R002
firealarmresources.com

Other DSC Control Unit manuals

DSC PC5400 User manual

DSC

DSC PC5400 User manual

DSC PC5720 User manual

DSC

DSC PC5720 User manual

DSC PCL422 User manual

DSC

DSC PCL422 User manual

DSC Maxsys PC4937 User manual

DSC

DSC Maxsys PC4937 User manual

DSC PC6216 User manual

DSC

DSC PC6216 User manual

DSC Power 832 User manual

DSC

DSC Power 832 User manual

DSC PC5928 User manual

DSC

DSC PC5928 User manual

DSC MAXSYS PC4851 User manual

DSC

DSC MAXSYS PC4851 User manual

DSC Maxsys PC4116 User manual

DSC

DSC Maxsys PC4116 User manual

DSC IT-100 User manual

DSC

DSC IT-100 User manual

DSC Downlook DLM-7 User manual

DSC

DSC Downlook DLM-7 User manual

DSC Misterhouse PC5401 User manual

DSC

DSC Misterhouse PC5401 User manual

DSC PC5108 User manual

DSC

DSC PC5108 User manual

DSC PowerSeries User manual

DSC

DSC PowerSeries User manual

DSC PC5700 User manual

DSC

DSC PC5700 User manual

DSC ESCORT558OTC User manual

DSC

DSC ESCORT558OTC User manual

DSC PowerSeries PC585 User manual

DSC

DSC PowerSeries PC585 User manual

DSC PowerSeries Neo V1.2 User manual

DSC

DSC PowerSeries Neo V1.2 User manual

DSC MAXSYS  PC4850 User manual

DSC

DSC MAXSYS PC4850 User manual

DSC RXL2-433 User manual

DSC

DSC RXL2-433 User manual

DSC Power Series PC5904 User manual

DSC

DSC Power Series PC5904 User manual

DSC PC5200 User manual

DSC

DSC PC5200 User manual

DSC Sur-Gard DVACS PC54OO User manual

DSC

DSC Sur-Gard DVACS PC54OO User manual

DSC PowerSeries User manual

DSC

DSC PowerSeries User manual

Popular Control Unit manuals by other brands

Danfoss SCA-X installation guide

Danfoss

Danfoss SCA-X installation guide

Runxin 63504 user manual

Runxin

Runxin 63504 user manual

GRAUPNER S8446 manual

GRAUPNER

GRAUPNER S8446 manual

Isenberg TVH.4201 installation manual

Isenberg

Isenberg TVH.4201 installation manual

Biamp Vocia ANC-1 Operation manual

Biamp

Biamp Vocia ANC-1 Operation manual

AB Quality 1769-IQ16F installation instructions

AB Quality

AB Quality 1769-IQ16F installation instructions

ThermOmegaTech CSUA Installation instructions manual

ThermOmegaTech

ThermOmegaTech CSUA Installation instructions manual

Automated Logic U253 Technical instructions

Automated Logic

Automated Logic U253 Technical instructions

Hioki 2304-20 instruction manual

Hioki

Hioki 2304-20 instruction manual

Lenze L-force Communication LECOM-B Mounting instructions

Lenze

Lenze L-force Communication LECOM-B Mounting instructions

Chuango H4 user manual

Chuango

Chuango H4 user manual

Honeywell D16 installation instructions

Honeywell

Honeywell D16 installation instructions

Heritage Bathrooms SHP02 Installation instructions and user guide

Heritage Bathrooms

Heritage Bathrooms SHP02 Installation instructions and user guide

Watts LFM110-18 Installation, operation and maintenance manual

Watts

Watts LFM110-18 Installation, operation and maintenance manual

AAON HP2C2 Technical guide

AAON

AAON HP2C2 Technical guide

Parallax 29115 manual

Parallax

Parallax 29115 manual

FARMSCAN AG Jackal quick start guide

FARMSCAN AG

FARMSCAN AG Jackal quick start guide

Bartec PBTC-300 Operation and installation manual

Bartec

Bartec PBTC-300 Operation and installation manual

manuals.online logo
manuals.online logoBrands
  • About & Mission
  • Contact us
  • Privacy Policy
  • Terms and Conditions

Copyright 2025 Manuals.Online. All Rights Reserved.