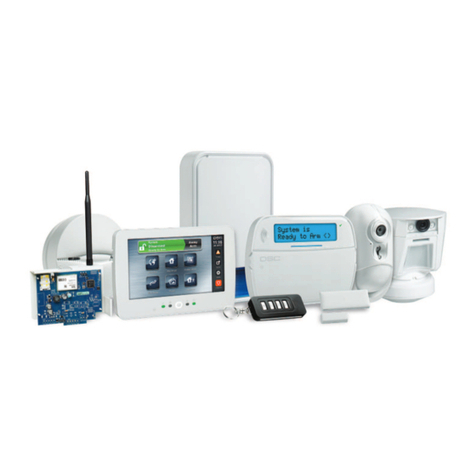
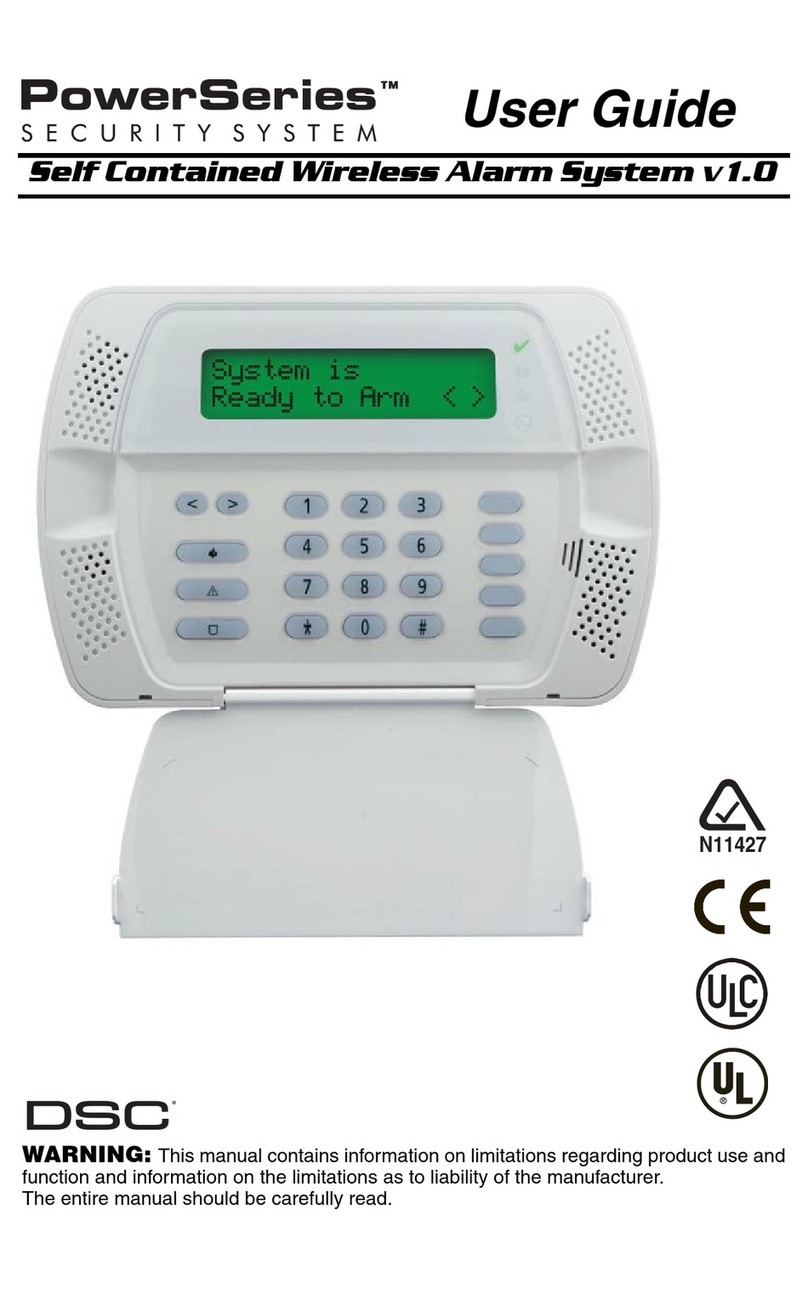
DSC PowerSeries PC1404 Operating and installation instructions

PC1404 v1.1
Programming Descriptions

PC1404 Programming Descriptions
1
PC1404 Programming Descriptions
The following is a description of the programming features and options available in the PC1404 control panel.
Note: This manual shall be used in conjunction with the PC1404 Installation Guide (part number 29008503).
[000] Keypad Function Programming
Function Key Description
[00] Null The key is not used and will perform no function when pressed.
[01]-[02] Not Used
[03] Stay Arm Arms the partition to which the keypad is assigned. All stay/away and night type zones will be
automatically bypassed. Delay type zones will provide entry and exit delay. The quick arm
feature controls whether an access code must be entered after pressing this function key. The
exit delay will be silent if the panel is armed using this function key.
[04] Away Arm Arms the partition to which the keypad is assigned. All stay/away and night type zones will be
active at the end of the exit delay. Delay type zones will provide entry and exit delay. The
quick arm feature controls whether an access code must be entered after pressing this function
key. The exit delay will be audible if the panel is armed using this function key.
[05] [*][9] No Entry Arming After this function key is pressed, the user must enter a valid access code. The partition will
arm and remove entry delay from the partition when the exit delay expires. The key can be
pressed again to enable the entry delay. This function key always requires an access code entry
after it has been pressed.
[06] [*][4] Door Chime On/Off Pressing the key will toggle the door chime feature on or off. One solid beep means the feature
has been disabled, three short beeps means it has been enabled.
[07] Not Used
[08] Zone Bypassing When this function key is pressed, the system enters the [*][1] Zone Bypassing menu. If
desired, the panel can be configured to require an additional access code entry before the sys-
tem enters zone bypassing
[09] Trouble Display When this function key is pressed, the system enters the [*][2] Trouble Display menu.
[10] Not Used
[11] User Code Programming When this function key is pressed, the keypad prompts for an access code entry. If the master
code or an access code with similar permissions is entered, the system enters the [*][5] User
Code Programming menu.
[12] User Functions When this function key is pressed, the keypad prompts for an access code entry. If the master
code or an access code with similar permissions is entered, the system enters the [*][6] User
Functions menu.
[13] [*][7][1] Command Output This function key provides the user with a simple method of activating a PGM output pro-
grammed as Command Output 1. By default, an access code must be entered after the key is
pressed before the output will activate, but this can be changed by disabling PGM attribute 5.
[14] [*][7][2] Smoke Detector Reset Pressing this key will cause the panel to deactivate any output programmed as Sensor Reset.
[15] Not Used
[16] [*][0] Quick Exit Pressing this key will cause the panel to activate the Quick Exit feature.
[17] [*][1] Reactivate Stay/Away
Zones
This function key provides the user with a simple method of adding stay/away zones into the
system, and it changes the stay armed mode to away armed mode.
[18] Not Used
[19] [*][7][3] Command Output 3 This function key provides the user with a simple method of activating PGMs programmed as
Command Output #3. An access code may be required after pressing this key if PGM attribute
5 is enabled.
[20] Night Arming The system arms with all Night Zones bypassed, even if the delay zones are violated during
exit delay. This key only works while the system is disarmed, or armed in the stay mode. The
panel logs Armed in Night Mode for this closing type. If no night zone types are programmed
on the system, the panel will arm in away mode with an audible exit delay. Normally, no
acknowledgement beeps are sounded and the exit delay is silent if this function key is used to
arm.The quick arming toggle option controls whether an access code must be entered after the
function key is pressed.
[21] [*][7][4] Command Output 4 This function key provides the user with a simple method of activating a PGM output pro-
grammed as Command Output 4.
[22]-[24] Not Used

PC1404
2
Zone Programming
Zones 1-8 are enabled by default. Disable unused zones or enable additional zones in Section [001] Zone 1–8 Definitions. The zone
definitions describe how each of the zones you use will operate. Program a two-digit code describing the zone definition. Select a defi-
nition from the list below.
In addition, each zone has 16 different attributes which may be programmed in Sections [101]-[108] Zone Attributes. (See also pro-
gramming descriptions Section [101]-[108] Zone Attributes)
[001] Zone Definitions
[00] Null Zone
This zone type should be programmed if an input is not going to be used. Programming this zone type should clear any trouble condi-
tions present on the zone input. An EOL resistor is not required for this zone definition.
[01] Delay 1
This zone type, normally used for entry/exit doors, can be violated and restored during the exit delay time without causing an alarm.
After the exit delay has expired and the system is armed, violating this zone shall start the entry delay 1 timer. During the entry delay
time, the keypad buzzer will sound steadily to advise the user that the system should be disarmed. If the panel is disarmed before the
entry time expires, no alarm will be generated.
[02] Delay 2 Zone
This zone type operates the similar to the delay 1 zone; however, it follows a different entry delay timer, defined as Entry Delay 2 in
Section [005] System Times. Typically this zone type is used for garage doors or for entry/exit points that require a different delay time
than what is being used for the main entry/exit point. The Delay 2 entry delay time can be set independently of Delay 1 in programming
Section [005] (System Times).
[03] Instant Zone
This zone type causes an instant alarm if it is violated when the panel is armed; it does not provide an entry delay when violated while
armed. This zone type does not generate an alarm when disarmed. Typically, this zone is used for windows, patio doors or other perim-
eter zones, and glass break detectors.
[04] Interior Zone
Interior zones have an exit delay and an entry delay if a delay zone has been violated first. The zone goes into alarm when the entry
delay of the delay type zone has expired if the system has not been disarmed. If the zone is violated without an entry or exit delay being
active on the system, an immediate alarm is generated. This zone will not cause an alarm if violated during the entry delay. If the zone
is violated before the entry delay has begun, it will cause an instant alarm. Typically, this zone is used for interior protection devices,
such as motion detectors.
[05] Interior Stay/Away Zone
If the system is stay armed, this zone is bypassed. If the system is armed in away or night mode, the zone acts like an Interior Zone type [04].
[06] Delay Stay/Away Zone
If the system is stay armed, this zone is bypassed. If the system is armed in away or night mode, this zone acts like a Delay 1 type [01].
[07] Delayed 24-hr Fire Zone
Note: Do not wire Fire zones on keypad zone terminals if the DEOL supervision option is enabled for the panel (Section [013], Option [2]).
This zone type requires a SEOL resistor, and it cannot be reconfigured using the NC, EOL or DEOL options in the panel. The alarm
state is short, the restored state is 5k6, and an open condition will generate a zone tamper and fire trouble. When this zone is violated,
the alarm output will be immediately activated (pre-alert) but the communicator will be delayed for 30 seconds. If the alarm is acknowl-
edged by pressing any key during this delay or by tripping a keyswitch zone, the alarm output and the communicator will be delayed an
additional 90 seconds, giving the user time to correct the problem. If the zone is still violated after the 90 second delay, the sequence
will repeat.
If the user does not press a key during the 30 second pre-alert, the alarm output will latch and the panel will communicate the alarm to
the central station. The alarm will sound until the Bell Cutoff time expires ([005] System Times) or until a code is entered.
Note: If a second Fire type zone is violated or if the Fire keys are pressed during the delay period, the panel will latch the alarm output
and will immediately communicate the alarm.
A violated Fire zone will be displayed on all keypads and can be delayed at any keypad. Typically this zone is used for latching smoke
detectors.
[25] Instant Stay Arming This feature operates similarly to the stay arming function key except for the following:
When this function key is pressed, no acknowledgement beeps are sounded, there is no exit
delay; and the system arms immediately. The panel logs "Armed in Stay Mode" for this clos-
ing type. If no stay/away zone types are programmed, the system arms in Away mode with no
exit delay.
Note: This function key must not be used in CP-01 listed systems.
[26]-[33] Not Used Not Used.

PC1404 Programming Descriptions
3
[08] Standard 24-hr Fire Zone (hardwired)
Note: Do not wire Fire zones on keypad zone terminals if the DEOL supervision option is enabled for the panel (Section [013], Option [2]).
This zone type requires a SEOL resistor, and it cannot be reconfigured using the NC, EOL or DEOL options in the panel. The alarm
state is short, the restored state is 5k6, and an open condition will generate a zone tamper and fire trouble. When violated, the bell output
will sound a pulsing alarm tone to indicate that the fire loop has been activated. If enabled, the communicator will immediately send an
alarm to the central station.The alarm will sound until the Bell Cutoff time expires (Section [005] “System Times”), or until a code is
entered. A violated Fire zone will be displayed on all keypads. Typically this zone is used for pull stations.
[09] 24-hr Supervisory Zone
This zone type requires a SEOL resistor, and it cannot be reconfigured using the NC, EOL or DEOL options in the panel. The restored
state of this zone is 5.6k, the alarm state is short and the tamper state is open. This zone does not cause the bell to activate, but will be
displayed in alarm memory regardless of the armed state of the panel. If this zone is violated when the system is either armed or dis-
armed, the panel will report to the central station, and will log the zone alarm to the event buffer. This zone gives a silent alarm by
default.
Note: Do not wire 24-hr Supervisory zones on keypad zone terminals.
[10] 24-hr Supervisory Buzzer Zone
If this zone is violated when the system is either armed or disarmed, the panel will immediately latch the keypad buzzer until a valid
access code is entered and will immediately communicate to the central station.
[11] 24-hr Burglary Zone
If this zone is violated when the system is either armed or disarmed, the panel will immediately latch the alarm output and communicate
to the central station. The alarm will sound until the Bell Cutoff time expires (Section [005] “System Times”), or until a code is entered.
[12] Not Used
[13] 24 Hr. Gas
This zone type is active at all times, regardless of the armed state, and when tripped will generate an audible, pulsing alarm. This zone
type is typically used with CO detectors or for monitoring gas lines.
[14] 24 Hr. Heat
This zone type is active at all times, regardless of the armed state, and when tripped will generate an audible, steady alarm. This zone
type is typically used with heat detectors.
[15] 24 Hr. Medical
This zone type is active at all times, regardless of the armed state, and when tripped will generate an audible, steady alarm. This zone
type is typically used for medical emergency pull stations.
[16] 24 Hr. Panic
This zone type is active at all times, regardless of the armed state, and when tripped will generate an audible, steady alarm. This zone
type is typically used with panic pendants.
[17] 24 Hr. Emergency
This zone type is active at all times, regardless of the armed state, and when tripped will generate an audible, steady alarm. This zone
type is typically used for non-medical emergency situations.
[18] Not Used
[19] 24 Hr. Water
This zone type is active at all times, regardless of the armed state, and when tripped will generate an audible, steady alarm. This zone
type is typically used for monitoring flood conditions.
[20] 24 Hr. Freeze
This zone type is active at all times, regardless of the armed state, and when tripped will generate an audible, steady alarm. This zone
type is typically used in applications that monitor low temperatures.
[21] 24-hr Latching Tamper
This zone type, when violated, will cause arming of the system to be inhibited until the installer accesses Installer Programming or the
condition has been reset using DLS. This zone type is normally used for monitoring the panel's cabinet. If the cabinet has been opened,
someone may have tampered with the system's wiring, so this zone type is used to generate an installer service call. This zone type gen-
erates an audible, steady alarm in both armed and disarmed states.
[22] Momentary Keyswitch Arm Zone
A keyswitch device (mechanical switch controlled by a key) may be connected to the zone input programmed as momentary keyswitch.
Momentary activation (open and close) of the zone alternately arms/disarms the system and silences alarms. Tampers and faults will
only initiate their respective trouble sequence. The keypad will not display an indication when this type of zone is activated. When an
audible alarm is active, using the keyswitch when disarmed is the same as entering an access code at the keypad. The system will log
special closing or special opening if the keyswitch is used for arming/disarming. If a keyswitch device is bypassed, the bypass must be
manually removed.
[23] Maintained Keyswitch Arm Zone (Hardwired)
A keyswitch device (mechanical switch controlled by a key) may be connected to the zone input programmed as maintained keyswitch.
In the restored state, the system is disarmed. In the violated state, the panel will arm. Tampers and faults will only initiate their respec-
tive trouble sequence. The keypad will not display an indication when this type of zone is activated. If the system is armed using this
zone (violated), but the system is disarmed using a different method, the keyswitch must be restored and violated again to start a new
arming sequence. The same is true for disarming.
A bypass of this zone type must be manually removed.
PC1404
4
With an audible alarm active, using the keyswitch when disarmed is the same as entering an access code at the keypad. Activating this
zone type during the first 30 seconds of a delayed fire alarm is the same as entering an access code at the keypad (the 90 second delay
will start). If left in the violated state, the system will not arm until the zone is restored and violated again.
[24] Not Used
[25] Interior Delay Zone
This zone type is normally used with interior motion detectors and has a standard exit delay time. If the panel is armed in away or night
mode, the interior delay zone will be active at the end of exit delay. The zone then acts like an Interior zone [04]. If the system is armed
in stay mode, the zone behaves like a delay 1 zone. Violating this zone during exit delay will not cause the system to arm in away mode
like regular delay 1 zones do.
[26] 24 Hour Non-Alarm (or local alarm) Zone
Zones programmed as this type are active at all times but do not cause an alarm, and are not saved in alarm memory. Zone attributes
such as Zone Bypassing and Door Chime affect the functionality of this zone. Typically, this zone type is used in conjunction with a
zone follower PGM to trigger an output when violated but not cause alarm conditions.
Note: This zone type sounds the bell but does not communicate during a walk test. Tampers and faults on zones programmed as 24-
Hour non-alarm type do not cause alarms.
[27]-[28] Not Used
[29] Auto-Verified Fire
This zone type is used with hardwired smoke detectors. This zone definition will ensure that an alarm condition persists by removing
power to a smoke detector in the alarm state. When the power is restored after 20 seconds, the system will check the state of the zone
again. If the zone is still violated, the system will sound a pulsing alarm using the system siren and will communicate the alarm to the
monitoring station.
Auto-verify Alarm Sequence:
Step 1 - Perform a 20 second sensor reset (remove power to smoke detector).
Step 2 - Allow 10 seconds for devices to settle.
Step 3 - Check for verified alarm for 60 seconds.
This zone is used for CP-01 and UL/ULC Fire Monitoring applications.
If a secondary fire alarm is detected at any time during the above delay sequence, the auto-verify sequence is immediately terminated
and alarms are generated for all pending fire alarms.
[30] Not Used
[31] Day Zone
Violating this zone when disarmed sounds the keypad buzzer but does not log or report the events. Violating this zone when armed
sounds the bell and communicates the event.
[32] Instant, Stay-Away Zone
This zone is bypassed when the system is Stay armed or disarmed, but it functions similarly to an Instant Zone [03] when Away or
Night armed. This zone type is useful for motion detectors that must NOT follow the entry delay after a delay zone is violated, but must
still retain the Stay/Away functionality.
[33]-[34] Not Used
[35] 24-Hr. Bell/Buzzer
This zone type will behave like a 24 hour burglary zone when armed and a 24 hour buzzer zone while disarmed. When the panel is
armed, the siren will activate for the duration of bell time out when this zone is violated. When the panel is disarmed, the keypad buzz-
ers will latch until a valid disarming procedure is used.
[36] 24-Hr. Non-Latching Tamper
This zone type is always active and will report a tamper condition if the panel is armed or disarmed. The communications generated for
this zone type do not follow transmission delay. In DEOL configuration, a tamper or open condition will generate a tamper event. A
short condition will generate a fault event.
[37] Night Zone
This zone type is bypassed if the panel is disarmed, armed in stay mode or armed in night mode. It is active in the armed state and
behaves like an Interior zone. If entry delay is active, the zone type will not create an alarm until the entry delay expires. If violated
while away armed, but entry delay isn't active, the zone will generate an instant alarm.
[41] 24-Hr. CO Zone (hardwired)
This zone definition is only to be used with hardwired carbon monoxide detectors. The zone is active in all armed states. This zone defi-
nition has its own bell cadence. The siren shall sound 4 cycles of 100mS On/Off pulses, followed by a 5 second pause and then the
sequence repeats. After four minutes, the 5 second pause will be extended to a 60 second pause. The bell will be silenced upon bell time
out or when a code has been entered at the keypad. No bell delay or transmission delay will affect this operation. Tampers and faults
from a CO zone type will not impede arming.
If a CO zone is in Device Fault, the control panel will sound CO cadence. This is different when compared to a low sensitivity fault in a
smoke detector, which will not generate an alarm.
A tamper restore must be created on the device to remove any device faults, which will prevent run-away transmission from a device
going in and out of fault.
[81]-[88] Not Used

PC1404 Programming Descriptions
5
[005] System Times
Enter Section [005] then Subsection [01] to program the Entry Delay 1, Entry Delay 2 and Exit Delay for the system. Entries are in
seconds. A value of 000 in the entry or exit delay sections causes a 255 second delay; however, the time is displayed as 000. Enter Sec-
tion [005] then Subsection [09] to program the Bell Cut-Off Time. Valid entries are in minutes. A value of 000 in the BTO section pro-
duces a 1 minute bell cut-off time. However, this time is displayed as 000.
[006] Installer Code
The default Installer Code is [5555] or [555555] if 6-digit access codes is enabled.
[007] Master Code
The default Master Code is [1234] or [123456] if 6-digit access codes is enabled.
[008] Maintenance Code
The Maintenance Code is a system user code that can only arm and disarm. Any other system function that requires an access code is
not accessible by this code. The default Maintenance code is [AAAA] or [AAAAAA] if 6-digit access codes are programmed. See
[701] First International Options Opt. 5.
[009]–[011] PGM Programming (Zones/PGMs)
Program the programmable outputs PGM 1 and PGM 2 on the main board and on PC5208 and PC5204 by selecting one of the output
options listed below (exceptions noted)].
PGM Output Options
01 Burglary and Fire Bell Output. This output will activate when the siren output is active and will turn off when the alarm
output deactivates. If the siren is sounding a pulsing alarm, the PGM output will pulse as well. This PGM will follow:
• Fire alarm pre-alert
• Temporal three fire signal (if enabled)
• All burglary and fire alarms
• Bell cut-off time
This output does will NOT activate for siren squawk events of any type.
iFire alarms take precedence over burglary. Therefore, if the PGM is indicating a steady burglary alarm, and a fire alarm occurs,
the PGM will follow a pulsing cadence. If the PGM is already on when a silent alarm occurs, the output will remain on.
02 Not Used
03 Sensor Reset. This output is normally active (switched to ground). This option is used to remove and restore power for latch-
ing smoke detectors. The output will deactivate for 5 seconds when the [*][7][2] command is entered (refer to [*][7] com-
mand outputs). When this PGM is programmed, the PGM output is normally low, which is the opposite of how most PGMs
operate at default. This is because the PGM is used as the negative return for power to 4-wire smoke detectors (positive comes
from the Aux + terminal). To activate this output and reset smoke detectors, [*][7][2] must be entered at the keypad or an
equivalent function key must be used. The PGM terminal will go high (open circuit) and thus remove power from the devices
connected.
04 2-Wire Smoke. When this PGM is programmed, the onboard PGM 2 functions as an input instead of an output. It behaves
much like the sensor reset PGM in that it is normally low supplying the negative return. Two-wire smoke devices can be con-
nected to this input. The PGM is also supervised, and a trouble condition is generated if a 2.2K resistor is not present between
the PGM terminal and AUX+. The two-wire smoke detector input creates an instant and latching alarm.
05 System Armed Status. This output will activate (switch to ground) when the system is armed and will deactivate when dis-
armed. Depending on the market, the panel may turn off this PGM when keypad blanking is active.
06 Ready to Arm. The PGM switches to ground when the system is ready to arm (all non-force armable zones on the system are
restored). When an access code is entered to arm the system and the exit delay begins, the PGM output is de-activated. This
PGM operates as described during walk test mode (if all zones are restored).
07 Keypad Buzzer Follow. The PGM output switches to ground when the keypad buzzer is activated by the events described
below:
• 24-hour supervisory buzzer zone alarm • Auto-Arm or No activity arm pre-alert
• Entry delay • Audible exit delay
• Door chime
The PGM output remains switched to ground while the keypad buzzer is active. This PGM type does not activate for local key
presses or trouble beeps.
08 Courtesy Pulse. This PGM output switches to ground for 2 minutes past the end of entry or exit times to allow enough time
for complete entry to or exit from the premises. This option can also be used to turn on a light along the entry/exit route during
the entry or exit delay times. If the system is armed through the No Activity Arming method this output will NOT activate.

PC1404
6
09 System Trouble. This PGM output switches to ground when any of the selected Troubles are detected. The output de-acti-
vates when all of the selected Troubles are restored. The PGM attributes for this output are unique for this PGM type and the
standard attributes do not apply. The PGM attributes for this output are as follows:
1Service Required*5Fire Trouble/Zone Fault
2A.C. Failure 6Zone Tamper
3Telephone Line Fault 7Future Use
4Communications (Failure to Communicate) 8 Loss of Clock
Note: * = Battery, Bell circuit, General System Trouble, General System Tamper, General System Supervisory Troubles,
PC5204 Low Battery and PC5204 AC Fail
10 System Event Output. This PGM output switches to ground when any of the selected system events (alarms) occur on the sys-
tem. In the armed state, the output will deactivate only once the system is disarmed.
If an alarm causes this output to activate in the disarmed state, the output will deactivate if a user enters a valid access code while
the bell is still active. If BTO has occurred, the PGM will deactivate if someone arms the system after the bell cut-off has expired.
This output can be used to indicate that an alarm has occurred before entering the premises. The PGM attributes for this output
are unique and the standard attributes do not apply. Program the events that will activate the output by selecting some or all of the
following PGM attributes:
iNote: This PGM output activates for alarm conditions only. Pre-alerts or delays do NOT activate the output. When this output
follows the output timer, events that have been disabled from activating the output do not restart the timer.
11 System Tamper. This PGM output switches to ground when any Tamper condition occurs on the system and deactivates when all
Tamper conditions on the system are cleared. These tampers include zone tampers (DEOL), 24 Hr Latching or Non-latching Tamper
Zones, module tampers and keypad tampers. This output will also activate for the following events): Bell Circuit Trouble, TLM
Trouble, Keybus Fault, Zone Expander Supervisory, General System Supervisory, and General System Tamper.
12 TLM and Alarm. The output activates when a Telephone Line Trouble (TLM) condition is present followed by an alarm
condition. The output will remain active until an access code is entered to disarm the partition. The output will activate for all
audible and silent alarms except for duress if a TLM trouble is present at the time of the alarm. If an alarm activates this out-
put in the disarmed state, it will deactivate when the system is armed or the telephone line trouble is restored.
13 Kiss-off. This output will activate (switch to ground) for two seconds after the panel receives the kiss-off signal from the cen-
tral station receiver.
14 Ground Start. This PGM output is used for old telephone systems where Tip and Ring need to be shorted together briefly to
get dial tone. The output will activate for two seconds before the panel attempts dialing to obtain a dial tone on Ground Start
telephone equipment. Two 2-second pauses (hex E) must be inserted at the beginning of the telephone number when using
this option.
15 Remote Operation. This output can be activated or deactivated remotely by using DSC's Downloading Software.
16 Not Used
17 Away Armed Status. This output will activate at the beginning of exit delay when the system is armed using away mode.
18 Stay Armed Status. This output will activate when the system is armed with the stay/away zones bypassed.
PGM output types [17] and [18] are designed to follow the status of the stay/away zones. If the system is armed with stay/
away zones bypassed, the stay output should be active. If the system is armed with the stay/away zones active, the AWAY
armed status PGM will turn on. The following indicates how these arming techniques work:
STAY key Stay
[*][9] + Code Stay
AWAY key Away
Keyswitch Arm Depends on delay type zone during exit delay
[*][0] Quick Arm Depends on delay type zone during exit delay
Access Code Arm Depends on delay type zone during exit delay
DLS Arm Away
Auto Arm Away
Stay Armed, then [*][1] Away
PGM Output Options
1Burglary
2Fire
3Panic
4Medical
5Supervisory
6Priority
7Not Used
8Latched
Delay, Instant, Interior, Stay/Away and 24-Hour Burg. zones
Key, Fire zone
Key and Panic zone
Auxiliary Key, Medical and Emergency zones
Supervisory, Freezer and Water zones
Gas, Heat, Sprinkler and 24-Hour Latching zones
Output Follows Pulse timer/Output Latching

PC1404 Programming Descriptions
7
[012] Keypad Lockout Options
This section determines how the keypad function operates. The panel can be configured to "lockout" keypads if a series of incorrect
access code entries are made.
19 Command Output #1. This output is activated by entering the [*][7][1] command. The configuration of the corresponding
attributes determines how this PGM will activate. Command outputs 1-4 are user initiated by entering [*][7][1-4] at any key-
pad. When any output is activated, three ack beeps will be sounded by the keypad. This feature is User controlled. This func-
tion can be performed when a Programmable Output is programmed as Type [19].
This output can be used for operating devices such as garage door opener, special lighting or door strikes.
Note: If there are multiple outputs programmed with the same PGM type, the PGM attributes must be the same for each of them.
20 Command Output #2. This output is activated by entering the [*][7][2] command. The configuration of the corresponding
attributes determines how this PGM will activate. Only one sensor reset or command output #2 PGM can be programmed on
the system. This feature is User controlled. This function can be performed when a Programmable Output is programmed as
Type [03] or Type [20], but not both.
This output can be used to reset all smoke detectors on the system (2-Wire and 4-Wire).
21 Command Output #3. This output is activated by entering the [*][7][3] command. The configuration of the corresponding
attributes determines how this PGM will activate. This feature is User controlled. This function can be performed when a Pro-
grammable Output is programmed as Type [21].
This output can be used for operating devices such as garage door opener, special lighting or door strikes.
22 Command Output #4. This output is activated by entering the [*][7][4] command. The configuration of the corresponding
attributes determines how this PGM will activate. This feature is User controlled. This function can be performed when a Pro-
grammable Output is programmed as Type [22].
This output can be used for operating devices such as garage door opener, special lighting or door strikes.
23-24 Not Used
25 Delayed Fire and Burg Output. This programmable output type operates the same as the fire and burglary output (PGM type
01), except that it follows the transmission delay timer programmed in Section [377]. If a zone is violated that has the trans-
mission delay attribute enabled (bit 7), the Bell and Regular Fire and Burg PGMs will activate. At the end of the transmission
delay, the delayed fire and burg output will activate. This PGM is usually used to control outdoor sirens: if a "false" alarm
occurs on the panel, the user has the duration of transmission delay to disarm the system before the external sirens activate.
Note: If a zone is violated that causes an alarm, but does not follow transmission delay, this PGM will activate immediately,
even if transmission delay is active for a different zone alarm.
Note: This output activates for audible exit fault.
26 Not Used
27 Police Code Output. When the police code event occurs, this output will activate until the panel is either armed or disarmed.
If police code is not configured to communicate, the PGM will still activate for the event.
29 Zone Follower 1-8. This output type is normally active and allows an output to deactivate for the duration that a zone is violated.
The PGM attributes are programmed through an 8 bit toggle mask that selects which zones the output will follow. The toggle mask
is programmable in Sections [551-564]. Example: If PGM is programmed as Type 29 with extended attributes 1, 6 and 8 ON, the
output will turn off when any of the three zones are violated, and will restore when all three zones are restored.
30 Status Alarm Memory Output. This feature is intended to be used on a keyswitch plate, with a light controlled by this PGM
to indicate system status. The status alarm memory output will activate (steady) at the beginning of exit delay, when the parti-
tion is armed. If an alarm occurs on the armed partition, the output will flash (1 sec ON/1 sec OFF) for the remainder of the
armed period. If an alarm occurs on a disarmed partition (24 Hr Zone), the output will flash (1 sec ON/1 sec OFF) until the
alarm is acknowledged (bells are silenced during BTO, or the partition is armed after BTO). This output will not activate in
walk test.
Number of Invalid Codes Before Lockout
Program a number from 001 to 255 to determine the number of invalid master, user or installer access code entries to reach
keypad lockout. When keypad lockout occurs, the system is rendered inoperative via the keypad for the programmed duration
only (keyswitch zones still function). When any keys are pressed, an error tone sounds. Entering 000 disables keypad lockout.
Lockout Duration
Program a time from 001 to 255 minutes to determine the length of time before lockout resets and the keypad can once again be
used.
• If lockout is not reached within the hour roll-over (01:59 to 02:00 for example), the number of invalid attempts is reset to 0.
• After a valid access code is entered, the number of invalid attempts is reset to 0.
• Fire, Auxiliary and Panic keys are still active during keypad lockout.
• Key presses do not reset the timer.
• If the lockout timer was active before powering down, the system lockout is active for the programmed duration on power up.
PGM Output Options

PC1404
8
[013] First System Options
[014] Second System Options
Option Description
[1]
Zone
Loop
Type
ON: Normally Closed Loops. All zones are wired as normally closed circuits with returns connected to a COM terminal.
The end-of-line resistor is not required. An alarm will be generated when the circuit is opened.
OFF: End-of-Line Resistors. All zones must be wired with an end-of-line resistor configuration, determined by Option 2
in Section [013].
[2]
End-of-
Line
Option
ON: Double End-of-Line Resistors. All zones will use Double End-of-Line resistors, except Standard Fire, Delayed Fire
and 24 Hr Supervisory. These zones must be connected using the EOL resistor. Double EOL resistors enable the detection
of zone faults and tampers. The tamper resistor (5k6) is placed across the alarm activating device, and the single EOL resis-
tor (5k6) is placed between the alarm and tamper contacts. This configuration will allow the panel to detect zone faults
(zone shorted), zone tampers (open zone), zone alarms (11.2k) and restored zones (5k6).
If the zone/system is disarmed and placed in the tamper or fault state, trouble beeps will be generated on all system keypads
until a key is pressed. If the zone is armed and a tamper is activated, the tamper alarm and zone alarm will be logged and
transmitted. The zone will begin the normal alarm sequence (bells, alarms in memory, etc.).
OFF: Single End-of-Line Resistors. All zones must have a 5k6 resistor across the terminals. If the zone is shorted or
opened, it will be treated as a violated state. If the zone is open and programmed as a fire zone, it will be in the trouble state.
[3]
Trouble
Display
ON: Panel Shows All Troubles While Armed. The panel will activate the trouble LED in both the armed and disarmed
state when any trouble is present on the system.
OFF: Panel Shows Fire Troubles While Armed. The panel will activate the trouble LED for all troubles while disarmed,
but the LED will only activate for Fire Troubles while the system is armed.
[4]
Tamper/
Fault
Display
ON: Tampers and Faults Do Not Show As Open. The panel will not activate the respective Zone LED if the zone is in the
tamper or fault states, only the Trouble LED will be on.
OFF: Tampers and Faults Show as Open. The panel will illuminate the respective Zone LED (LED Keypads) if the zone
is in the tamper or fault state.
[5]
Auto-
Arm
Schedule
ON: Auto-Arm Schedule in [*][6]. The auto-arm schedules (Section [181]) are accessible via [*][6] as well as Installer
Programming.
OFF: Auto-Arm Schedule in Installer Programming Only. The auto-arm schedules (Section [181]) are only accessible
via Installer Programming.
[6]
Audible
Exit
Fault
ON: Audible Exit Fault is Enabled. If a delay type zone is violated or is still violated within 4 seconds after the exit delay
has expired, the panel will sound the entry delay warning through the keypad and siren alerting the customer that an
improper exit was made. If the panel is disarmed within the entry delay, no signal is sent. If not, the panel will continue to
sound the alarm and send a signal to central station. Audible Exit Fault Pre-Alert will be logged when the entry delay
begins, and audible exit fault will be logged and communicated when the exit delay expires.
OFF: Audible Exit Fault is Disabled. The siren will not activate during the entry delay created by leaving a delay zone
violated when exit delay expires.
[7]
Zone
Doubling
ON: Zone Doubling Enabled. When the Zone Doubler option is enabled on a PC1404, Zone 1 will become Zones 1 and 5,
Zone 2 will become Zones 2 and 6, and so on, up to 8 hardwired zones. The 4 zones on the main board now act as 8 zone
inputs. When enabled, Options 1 and 2 in Section 013 are ignored. Keypad Zones should not be used on zones designated
for Zone Doubling (PC1404: Zones 1-8). Fast Loop Response Feature (Section 030) will not work when Zone Doubling is
enabled.
Note: Only normally closed devices may be used with zone doubling.
Note: A fault condition from either zone will create a zone fault trouble for both zones.
OFF: Zone Doubling is Disabled.
The 4 zones on the main board act as 4 zone inputs.
[8]
Fire
Signaling
ON: Temporal 3 Fire Signal. To comply with NFPA 72, all Fire Bells will sound the temporal 3 fire cadence as described in the
NFPA standard if this option is enabled. The cadence is 500ms ON, 500ms OFF, 500ms ON, 500ms OFF, 1.5 sec OFF.
OFF: Standard Pulsing Fire Signal. All fire bells will sound with the standard 1 second ON/1 second OFF fire bell
cadence.
Option Description
[1]
Bell
Squawk
ON: Arm/Disarm Bell Squawk Enabled. The system squawks the bell output once when armed (including auto-arming)
and twice when disarmed. If there are alarms in memory, 3 distinct squawk pairs will sound (6 squawks in total).
OFF: Arm/Disarm Bell Squawk Disabled. Bell output does not activate when the system is armed or disarmed in any manner.
[2]
Bell
Squawk
for Auto-
Arming
ON: Bell Squawk For Auto-Arming Enabled. The bell output will sound a single squawk every 10 seconds during the
auto-arm pre-alert time. This also applies to no activity arming pre-alerts.
OFF: Bell Squawk For Auto-Arming Disabled. The bell output will not be activated during auto arming or no activity
arming pre-alerts.
[3]-[6] Future Use

PC1404 Programming Descriptions
9
[015] Third System Options
[016] Fourth System Options
[7]
Exit
Delay
Termina-
tion
Exit Delay Termination Enabled. The exit delay will be reduced to 5 seconds when the system detects that a delay 1 zone
has been restored during exit delay. All audible indications associated with the exit delay (keypad tones, bell squawks) will
be silenced when the exit delay is reduced and terminates. Force armable delay 1 zones will still cause the exit delay to be
reduced if they restore during the exit period.
Exit Delay Termination Disabled. The exit delay timer will continue to count down even after the delay zone for the entry/
exit door or area is restored.
[8]
Fire Bell
Timeout
ON: Fire Bell is Continuous. The bell output will sound for all fire type alarms until a valid disarming procedure is entered
to silence the alarm or disarm the system, regardless of the time programmed for bell timeout in Section [005].
OFF: Fire Bell Follows Timeout. The bell output will sound for all fire type alarms for the duration of bell timeout or until
an access code is entered.
Option Description
[1]
[F] Key
Annunciation
ON: Fire Key Enabled. Pressing and holding the fire key for 2 seconds generates a fire alarm. The keypad sounds a set of
3 beeps to acknowledge the valid alarm and the bell activates and sounds the fire cadence. Communication of the alarm to the
central station is immediate. The bell sounds for the length of the bell time-out unless Fire Bell is Continuous is enabled.
OFF: Fire Key Disabled. The Fire key does not sound or report an alarm when pressed.
Note: When enabled, this key generates alarms at all times, regardless of what is happening on the system, unless the
panel is in Installer Programming.
[2]
[P] Key
Annunciation
ON: Panic Key Audible. When a valid Panic key alarm is generated, the keypad buzzer sounds a series of 3 beeps to
acknowledge the alarm. The bell or siren will also sound for the duration of BTO.
OFF: Panic Key Silent. When a valid Panic key alarm is generated, the keypad buzzer and the bell output remain
silent, but the alarm reporting code is still transmitted to the central station (if programmed).
[3]
Quick Exit
ON: Quick Exit Enabled. When the system is armed, users may enter the [,][0] command to allow a single delay 1 or
delay 2 zone to be activated and restored so they can leave the premises without disarming the system. Only one delay
zone may be activated; a second zone trip will initiate its respective alarm sequence. If the delay zone is still open two
minutes after the [,][0] command is entered, the entry delay will begin. If armed in stay mode, the automatic bypass of
the stay/away zones will not be removed.
OFF: Quick Exit Disabled. When the system is armed, users cannot perform a quick exit by pressing [,][0].
[4]
Quick
Arming
ON: Quick Arming Enabled/Function Keys Do Not Require Code. [,][0] arming and Stay/Away function keys may
be used to arm the system without the entry of a valid access code. All other function keys may also be used without the
entry of an access code.
OFF: Quick Arming Disabled/Function Keys Require Code. [,][0] arming is not permitted, and all function keys
(including Stay/Away) require the entry of an access code to arm the system.
[5]
Bypass
Access
Code
ON: Code Required for Bypassing. After entering the [,][1] Bypass Zones command, an access code must be entered
before zones may be bypassed.
OFF: No Code Required. The user can enter [,][1] and gain access to zone bypassing without the use of an access code.
[6]
Master
Code
ON: Master Code Not Changeable. The Master Code (access code 40) may not be changed by the user with [,][5] access
code programming. The Master Code can only be programmed in Installer Programming, Section [007].
OFF: Master Code Changeable. The Master Code (access code 40) may only be programmed by the user in Installer Pro-
gramming.
[7]
Telephone
Line
Monitoring
ON: TLM Enabled. The Telephone Line Monitor function is active and the system indicates if a Telephone Line Trouble
condition exists when using the [,][2] View Trouble Conditions command.
OFF: TLM disabled. The Telephone Line Monitor function is shut off and telephone line troubles are NOT indicated by
the system.
[8] For Future Use
Option Description
[1]
AC
Trouble
Display
ON: AC Trouble Displayed. If AC power fails, the condition will be reported to the monitoring station and will be indi-
cated as a trouble condition on the system's keypads.
OFF: AC Trouble Not Displayed. If AC power fails, the condition will be reported, but the trouble LED will not be acti-
vated on the system's keypads. If [*][2] is entered to view the system troubles, Trouble #2 will still be displayed.
[2]
AC
Trouble
Flash
ON: Trouble Light Flashes if AC Fails. When AC power is lost from the system, the Trouble LED will flash in the base
Ready and Armed modes within 30 seconds of the AC loss. When AC restores, the Trouble LED will stop flashing within
30 seconds.
OFF: Trouble Light Does Not Flash if AC Fails. When AC power is lost, the trouble LED will not flash but instead will
turn on steady, depending on the programming of [016] Option 1.

PC1404
10
[017] Fifth System Options
[018] Sixth System Options
[3]
Keypad
Blanking
ON: Blank Keypad When Not Used. If no keys are pressed for 30 seconds, the display and all keypad lights except
backlighting (if enabled) turn OFF until the next keypress, entry delay, audible alarm, or keypad buzzer condition. Key-
pad function and FAP keys still operate during keypad blanking.
OFF: Keypad Always Active. The keypad lights remain ON at all times.
[4]
Keypad
Blanking
Restore
Options
ON: Access Code required to remove Keypad Blanking. A valid access code must be entered before blanking can be
removed.
OFF: Access Code Not Required. Pressing any key on a blanked keypad removes the blanking.
[5]
Keypad
Backlight-
ing
ON: Keypad Backlighting Enabled. All keypads on the system have backlighting on at all times.
OFF: Keypad Backlighting Disabled. Keypad backlighting is always off.
[6]
Power save
mode
ON: Power Save Mode Enabled. If AC Power fails, all keypad lights, including backlighting, will be shut off. The key-
pad lights will come back ON after a keypress, entry delay, audible alarm or keypad buzzer condition (except door
chime). The keypad lights will return to the off state after 30 seconds of no activity. If the AC Fail condition restores, the
keypad lights will be reactivated.
OFF: Power Save Mode Disabled. If AC Power fails, the keypads will not go into power save mode.
[7]
Bypass
Status
Display
ON: Bypass Status Displayed While Armed. The bypass light will be ON if there are zones bypassed when the system
is armed.
OFF: Bypass Status Not Displayed While Armed. The bypass light will be ON only while the system is disarmed to
indicate that there are bypassed zones on the system. When the system is armed, the bypass light will be OFF.
Note: The bypass status LED will be ON if there are Stay/Away zones auto-bypassed at the time of arming, regardless of
whether or not this option is enabled. This option only enables and disables manual bypass display.
[8]
Keypad
Tampers
ON: Keypad Tampers are Enabled. All keypads containing Tamper switches will generate tamper alarms and Restores.
OFF: Keypad Tampers are Disabled. The tamper switches on all keypads will not generate tamper alarms.
Note: If this option is used, all keypads should be properly installed and secured (tamper restored) before enabling the
option. Alternatively, the panel can be powered down/up after enabling this option to ensure all the tampers are detected.
Option Description
[1]-[3] Future Use
[4]
Double Hit
ON: Double Hit Enabled. Two alarms from the same zone within the Cross Zone Timer Duration will cause the Police
Code or Cross Zoning events to be logged and transmitted.
OFF: Double Hit Disabled. Two alarms from the same zone will not cause the Police Code or Cross Zoning events to be
logged and transmitted. Two different zones must be in alarm to transmit the Police Code or verify the Cross Zone.
iThis feature only applies to zones defined as Interior, Interior Delay, Interior Stay/Away, Instant Stay/Away, Delay Stay/
Away, or Night Zones (PIR Zones).
[5]
Late to
Close
ON: Late to Close Enabled. The panel will log and communicate a late-to-close event at the time programmed for auto-
arm. This system toggle controls whether the late-to-close reporting code is sent at the end of the auto-arming pre-alert.
This feature is used in installations that require an audible warning that the panel should be armed at a specific time of
day, but are not required to auto-arm.
OFF: Late to Close Disabled. The panel will not communicate or log late to close for any reason.
Note: If the auto-arm toggle option is disabled, the auto-arm pre-alert will still occur if there is a time programmed for
that day and this option is ON. This option does not directly affect the operation of auto-arm. If late to close is enabled,
and auto-arming is not, LCD keypads will still display “System arming in progress” during the late to close pre-alert.
[6]
Daylight
Savings
Time
ON: Daylight Savings Time Enabled. The panel will adjust between daylight and standard times according to the pro-
grammed month, day, year, week and hours in Sections [168] and [169].
OFF: Daylight Savings Time Disabled. The panel will make no automatic time adjustments for daylight savings time.
[7]-[8]
Future Use
Option Description
[1]-[4] Future Use
[5]
Keypad
Buzzer
Alarm
ON: Keypad Buzzer Follows Bell Enabled. The keypad buzzers will follow the partition's bell activity. The buzzer will
turn on when the siren activates and the buzzer will turn off when the siren deactivates.
OFF: Keypad Buzzer Follows Bell Disabled. The keypad buzzer will not follow bell activity. Only alarms designated to
activate the keypad buzzer will do so.

PC1404 Programming Descriptions
[020] Keypad Zone Assignment
Enter the two-digit zone number to be assigned to each keypad assigned to a specific slot. Only one keypad can be assigned to a specific slot.
See also Section [020] Keypad Zone Assignments. Valid entries are from [00] to [08].
[022] Ninth System Options
[023] Tenth System Options
[6]
Cross
Zoning/
Police
Code
ON: Cross Zoning is Enabled. The panel will use the Cross Zone attribute for Burglary Verification. This feature
requires two or more trips from a zone that has the Cross Zone attribute enabled within a specified time before starting an
alarm sequence.
When a zone with cross zoning enabled is violated, no alarm occurs on the system; however, entry delay may start or the
system event PGM may activate. The cross zoning timer will be started. If another zone with the cross zone attribute is
violated before the timer expires, the panel will transmit the first alarm signal—a Cross Zone event, followed by the sec-
ond zone alarm, and begins the appropriate local alarm sequence. If no other zones are violated before the timer expires,
no alarm sequence occurs and a Burglary Not Verified event is logged in the buffer. If the double hit feature is enabled,
the panel will react to two violations of the same zone during the cross zoning timer and start the alarm sequence. This
option will not function for zones that don't create alarm conditions (day zone while disarmed, instant zone while dis-
armed, etc.)
Note: The cross zoning timer counts in seconds when this feature is enabled. Police code timer counts in minutes when
this feature is disabled.
Note: Fire Zones should never have cross zoning enabled.
OFF: Police Code is Enabled. The panel will use the police code feature for burglary verification.
[7]
Exit Delay
Restart
ON: Exit Delay Restart Enabled. This CP-01 feature is used to prevent a false alarm caused by the user exiting and then
immediately re-entering the protected area. If a delay zone is violated and restored during the exit delay, it is considered
an exit. If a delay zone is then violated again, it is considered a re-entry. With this option enabled, the panel will restart the
exit delay ONCE. Further violations of the same zone or other delay zones shall not restart the exit delay.
OFF: Exit Delay Restart Disabled. Delay zone violations and restores will not restart the exit delay.
[8]
AC
Trouble
Beeps
ON: AC Trouble Beeps Enabled. When an AC trouble occurs on the panel, all keypads will sound an audible trouble
indication (2 beeps every 10 seconds).
OFF: AC Trouble Beeps Disabled. AC troubles will remain silent.
Option Description
[1]-[2] Future Use
[3]
Auto-
Arming
and Force
Arming
CP-01 operation
ON: Auto-Arming Force-Arms Open Zones. All zones that are open at the end of the auto-arming exit delay will be
force-armed, even if force-arming is disabled in Sections [101]-[108].
OFF: Auto-Arming Follows Force-Arming Attribute. Only zones with the force-arm attribute enabled will be force-
armed; if the force-arming attribute is disabled for the zone, the zone will go into alarm if violated when exit delay
expires.
Non-CP-01 operation
ON: Auto-Arming Force-Arms Open Zones. All zones that are open at the end of the auto-arming pre-alert will be
force-armed.
OFF: Auto-Arming Follows Force-Arming Attribute. Only zones with the force-arming attribute enabled will be
force- armed when the pre-alert expires. Non-force armable zones will go into alarm.
[4]-[7] Future Use
[8]
Audible
Stay
Arming
ON: Audible Exit Delay for Stay Arming. When the system is armed in stay mode, the exit delay will be sounded by 1
beep every 3 seconds.
OFF: Stay Arming is Silent. When the system is armed in stay mode, the exit delay will be silent.
Option Description
[1]-[4] Future Use
[5]
Stay/Away
ON: Switching from Away to Stay Disabled. The system cannot be switched from Away to Stay mode by pressing the
[Stay] Function key.
OFF: Away to Stay Toggling Enabled. The system can be switched from Away to Stay mode by pressing the [Stay]
function key, but only if entry delay is not active and the system is not in alarm.
[6] Future Use
[7]
Silent
Trouble
Beeps
ON: Trouble Beeps are Silent. When a trouble is detected on the system, trouble beeps will not be sounded at the system keypads.
OFF: Trouble Beeps are Audible. When a trouble is detected on the system, trouble beeps will be sounded at the system
keypads.

PC1404
12
[030] Zone Loop Response Options
Fast loop response for the onboard zones is programmable using Installer Programming Section [030]. Section [030] is an 8 bit toggle
option that controls which main board zones will use fast loop response (~40mS) or normal loop response (~250mS).
Note: Fast loop response should not be enabled for zones that are "doubled" by using the zone doubler feature.
[101]-[108] Zone Attributes
The following options can be enabled or disabled for each zone. Pressing [9] in one of these sections brings the installer to the upper
bank (attributes 9 to 16). From the upper bank, press [9] to return to the lower bank (attributes 1 to 8).
Daylight Savings Time
These sections are used to program the date, time and increment that the clock moves ahead for Daylight Saving Time each year. Day-
light savings time can be programmed to adjust the time by 1 or 2 hours (backward or forward) at an exact date and time, or on a spe-
cific weekday of a specific month. To enable daylight saving's time, the installer must enable Option 6 in Section [017] and program
[8]
Keyswitch
Arming
Option
ON: Keyswitch Arms in Away Mode. When a keyswitch zone is used to arm the system, the panel will always arm in
away mode, regardless of whether a delay zone was violated and restored during exit delay.
OFF: Keyswitch Arms in Stay or Away Mode. When a keyswitch is used to arm the system, the panel will arm in away
mode if a delay zone is violated and restored during the exit delay, or if there are no stay/away zones on the system. If nei-
ther of these conditions is met, the panel will arm in stay mode.
Option Description
[1] ON: Zone 1 is Fast Loop Response OFF: Zone 1 is Normal Loop Response
[2] ON: Zone 2 is Fast Loop Response OFF: Zone 2 is Normal Loop Response
[3] ON: Zone 3 is Fast Loop Response OFF: Zone 3 is Normal Loop Response
[4] ON: Zone 4 is Fast Loop Response OFF: Zone 4 is Normal Loop Response
iThese attributes override default settings. Do NOT change fire zone attributes from their default settings.
Option Description
[1] Bell options ON: An alarm activates the Siren.
OFF: Silent alarm.
[2] Steady or Pulsed-
Bell Type
ON: The bell output is steady when the zone is in alarm.
OFF: The bell output pulses (1 sec on/off) when the zone is in alarm.
[3] Chime ON: The keypad chimes when the zone is opened/closed.
OFF: The zone does not chime the keypad when the zone is opened/closed.
[4] Bypass ON: The zone may be manually bypassed in [,][1].
OFF: The zone cannot be manually bypassed in [,][1].
[5] Force Arming ON: The zone can be violated and system arming will not be impeded.
OFF: The system cannot be armed if the zone is open.
[6] Swinger
Shutdown
ON: When the zone goes into alarm for the number of times programmed in the Swinger Shutdown
Counter (see Section [377]), it shuts down with no further transmissions sent to the monitoring station.
OFF: Swinger Shutdown is disabled. All alarms are transmitted and do not follow the Swinger Shutdown
Counter.
[7] Transmission
Delay
ON: Reporting of zone alarms (and police code) are delayed for the time programmed in Section [377].
OFF: When an alarm occurs, the reporting code is transmitted immediately.
[8] Not Used
[9] Cross Zoning ON: The zone can start or complete the cross zoning sequence. It can generate a confirmed burglary
alarm.
OFF: This zone type will not start or complete the cross zoning sequence. It cannot generate a con-
firmed burglary alarm.
[10]-[13] Not Used
[14] Normally Closed
Loops*
ON: If the zone type is assigned to an onboard zone, it will not require an end of line resistor if this
option is enabled (Normally Closed Loops). This overrides the EOL configuration programmed in Sec-
tion [013].
OFF: The zone type will follow the end of line configuration programmed in Section [013]
[15] Single End of
Line (SEOL)
Resistors*
ON: If the zone type is assigned to an onboard zone, it will require a single end of line resistor (SEOL).
This overrides the EOL configuration programmed in Section [013].
OFF: The zone type will follow the end of line configuration programmed in Section [013]
[16] Double End of
Line (DEOL)
Resistors*
ON: If the zone type is assigned to an onboard zone, it will require double end of line resistors (DEOL).
This overrides the EOL configuration programmed in Section [013]
OFF: The zone type will follow the end of line configuration programmed in Section [013]
* Some zone types only support single end-of-line configuration, regardless of how the panel is configured, such as Fire Zones which are always single end-of-line.

PC1404 Programming Descriptions
13
Sections [168] and [169] to configure the system to change the time automatically for daylight savings. Enter [168] when setting the
clock forward and enter [169] when setting the clock backward.
[168] Daylight Savings Time Begins
Example:
E.g., Set the clock 1 hour ahead at March 5th, 2006 at 2:00am.
1. Enter Section [168].
2. Program the first entry (Month) with 003 for March.
3. Program the second entry (Week) with 000 since the week doesn't matter in this example.
4. Program the third entry (Day) with 005 for the 5th.
5. Program the fourth entry (Hour) with 002 for 2 am.
6. Program the fifth entry (Interval) with 001, which correlates to a 1 hour change to the time of day.
[169] Daylight Savings Time Ends
These sections are used to program the date, time and increment that the clock moves back for Standard Time each year. The following
attributes can be programmed:
[170] PGM Output Timer
This value, programmable in seconds, is accessible by using Installer Programming Section [170]. This value represents the period of
time that a PGM will activate if programmed to follow the PGM Timer. The default value is 005 seconds. Valid entries are 001-255 sec-
onds, although some PGM types can be configured to latch. This timer does not affect PGM type 03, Sensor Reset.
Note: If a system event PGM is programmed to follow the Command Output Timer, all PGM attributes must be enabled.
[175] Auto-Arm Postpone Timer
In this section, program the time (in minutes) for which the system will postpone automatic arming if the auto-arming process is inter-
rupted. After the programmed time, the system will attempt to auto-arm again. If [000] is entered in this section, the system will abort
the auto-arm sequence instead of postponing it.
[176] Cross Zone/Police Code Timer
Program the time, in seconds (Cross Zone) or minutes (Police Code), that the panel uses to determine if a Cross Zone or Police Code
event has occurred. If [000] is programmed when using the Police Code feature, the panel generates a Police Code event (if any two
zones go into alarm during an armed-to-armed period). Valid entries are [000] to [255].
[181] Auto-Arm Time of Day
Program the desired auto-arming time of day in military time format, HH:MM. The PC1404 will attempt to auto-arm at this time every
day unless the feature is disabled in [*][6] User Functions. Valid entries are 00:00 to 23:59, 99:99 to disable.
[190] No Activity Arming Pre-Alert
Program the time, in minutes, for the No Activity Arming Pre-Alert Duration. The keypad provides a steady tone warning the user that
the system is arming. The user can either violate a zone or press any key to abort the arming sequence. Valid entries are [000] to [255].
[191] No Activity Arming Timer
Program the time, in minutes, for the No Activity Arm Timer. If any delay 1 zone is restored and no zone activity is detected on the sys-
tem for the programmed duration, the system will start the automatic arming sequence. Valid entries are [000] to [255]. An entry of 000
disables this feature.
Month [001] to [012] represents January to December.
Week [000] indicates that the day of the month is programmed in the Day section below. [001] to [005] represents weeks
1 to 5 of the month. Week 5 always represents the last week in the month, regardless of whether the number of
weeks in the month is 4 or 5.
Day [001] to [031] represents the day of the month if [000] was programmed in the Week section above. If [001] to
[005] was programmed in the Week section above, then [000] to [006] represents Sunday to Saturday.
Hour [000] to [022] represents the hour that Daylight Saving Time takes effect.
Increment [001] to [002] represents the number of hours to advance the clock for Daylight Savings Time.
iDo not program the Hour outside of the valid range or the time will not change.
Do not program the value of the Increment to be greater than the number of hours remaining in the current day.
Month [001] to [012] represents January to December.
Week [000] indicates that the day of the month is programmed in the Day section below. [001] to [005] represents weeks
1 to 5 of the month. Week 5 always represents the last week in the month, regardless of whether the number of
weeks in the month is 4 or 5.
Day [001] to [031] represents day of the month if [000] was programmed in the Week section above. If [001] to [005]
was programmed in the Week section above, then [000] to [006] represents Sunday to Saturday.
Hour [000] or [023] represents the hour that Standard Time takes effect.
Increment [001] or [002] represents the number of hours to roll back the clock for Daylight Saving Time.
iIf Daylight Saving Time occurs at Midnight program the time 2:00AM.

PC1404
14
[199] Auto-Arming Pre-Alert Timer
In this section, program the time (in minutes) for the Auto-Arming Pre-Alert time. This timer is used for all programmed auto-arming
features (it is not used for no-activity arming). The keypads will provide a steady tone, warning the user that the system is preparing to
arm. The user can enter a valid access code, or valid disarming procedure, to abort the arming sequence. Valid entries are 001 to 255.
[301]-[303], [305] Communication Telephone Numbers
[304] Call Waiting Cancel String
[310] System Account Number
Program the System Account Number, which will be used by the panel when communicating. Only the SIA format supports 6-digit
account numbers. If a 4-digit account number is required, program the last two digits as data [FF]. If the account code needs to have a 0
in it, and the format is programmed as CID or BPS, a HEX digit A must be used to send a 0.
[320]-[324] Alarm Reporting Codes
These reporting codes are used by the communicator to transmit zone alarms and restores for Zones 1 to 8. These reporting codes are
sent to the Alarm & Restore call direction group.
[328] Miscellaneous Alarm Reporting Codes
Duress Alarm
This reporting code is transmitted whenever a Duress code is used to perform any function on the system. The reporting code is sent to
the Alarm & Restore call direction group.
Opening After Alarm
This reporting code is transmitted when the system is disarmed after an alarm; if an alarm occurred during the previous armed period.
The reporting code is sent to the Alarm & Restore call direction group.
Recent Closing
This reporting code is transmitted when an alarm occurs within two minutes of system arming.
Zone Expander Supervisory Alarm/Restore
This reporting code is generated when a keypad with a keypad zone enrolled is no longer responding to the panel on keybus. The report-
ing code is sent to the Alarm & Restore call direction group.
Police Code Alarm
Two zones on the same partition go into alarm during any given armed-to-armed period (including 24-Hr. zones).
[329] Priority Alarm and Restore Reporting Codes (Fire, Auxiliary, and Panic Alarms/Restores)
If enabled and used to generate manual alarms, these reporting codes are sent to the Alarm & Restore Call Direction group.
Note: Auxiliary alarms can be any non-medical alarm.
The information in this section applies to Sections [301], [302], [303] and [305].
These sections determine which type of communicator is activated in the event of an alarm condition or other communicated event.
The PC1404 only supports one method of communications, PSTN. GPRS and Ethernet communicators are not supported.
• Entry of [D] followed by a [Telephone Number] terminated with “F” configures the section for telephone dialing.
E.g.: [D12223334444F]
Telephone Communications
All telephone number sections are 32 digits in length. Hexadecimal digits may be programmed in the telephone number to perform
additional functions as follows:
Enter [,][2][,] – HEX B to dial “,”
Enter [,][3][,] – HEX C to dial “#”
Enter [,][4][,] – HEX D for an additional dial tone search, as is required for PBX telephone systems
Enter [,][5][,] – HEX E to insert a 2-second pause in the telephone number
iThere is an automatic 2-second pause before additional dial tone searches are initiated.
HEX A is not used.
HEX F represents the end of the phone number (everything after F is ignored).
Pressing [#] in these sections exits and saves the entire phone number.
The panel does not attempt to communicate if no phone number is programmed. This applies to phone numbers 1 to 4.
This is a 6-digit HEX entry that is used to disable the call waiting on a call waiting equipped phone line. This is typically ,70 and is
programmable using Installer Section [304]. Dialing this string before a phone number will disable call waiting for the duration of the
call. If this section is programmed (not FFFFFF), and Section [382] Option 4 is ON, the panel dials this string in place of the first digit
of the phone number. This only applies to the first attempt that is made to each phone number. If 6 digits are not required, terminate
the string with hex Fs to create a 6 digit string.
iZone alarms transmit to the System Test Transmission Call Direction when they are being transmitted as part of the walk
test (enabled if Section [382] Option [2] is ON).

PC1404 Programming Descriptions
15
[330]-[334] Tamper/Restore Reporting Codes, Zones 01-8
These reporting codes are used by the communicator to transmit zone tampers and restores for Zones 1 to 8. These reporting codes are
sent to the Tamper Alarm & Tamper Restore call direction group of the system.
[338] Miscellaneous Tamper Reporting Codes
General System Tamper & Restore
These reporting codes are sent to the system Tamper Alarm & Tamper Restore call direction group when a panel tamper occurs.
Keypad Lockout
Whenever the system enters keypad lockout, this reporting code is sent to the system Tamper Alarm & Tamper Restore call direction
group.
[339]-[340] Closing (Arming) Reporting Codes (Access Codes 1-32)
When the system is armed, a closing reporting code is transmitted after the exit delay expires for the user code that armed the system.
These reporting codes are sent to the Opening & Closing call direction group of the system. In addition, "Armed in Stay Mode,"
"Armed in Away Mode" or "Armed in Night Mode" is logged to the event buffer.
[341] Miscellaneous Closing (Arming) Reporting Codes
Automatic Zone Bypassing
This stops transmission of zone bypass information for systems set up for an automatic communication format (SIA and Contact ID).
Enter [00] to disable the automatic zone bypassing communications. If the zones are to be identified, they are transmitted with the Par-
tial Closing to the Opening & Closing call direction group. (24 Hour zone types transmit that they have been bypassed when the user
exits the bypassing menu).
Partial Closing
If zones were manually bypassed at the time of arming, this reporting code is transmitted to the central station with the Closing code to
warn of a security compromise. Automatic bypasses caused by Stay arming do not cause this code to be transmitted. Zones force armed
by automatic arming transmit in the manner described above. If SIA is used, each zone is identified using the UB-XX (un-typed bypass)
identifier. The identified zones follow the partial closing code and precede the closing transmission. This reporting code is sent to the
Opening & Closing call direction group.
Special Closing
This reporting code is transmitted if the system is armed without an access code using Keyswitch Zone, Downloading, Quick Arm
[,][0], or Stay or Away function keys. In addition, either “Armed in Stay Mode,” “Armed in Away Mode,” or “Armed in Night Mode”
is logged to the event buffer for all closing types. This reporting code is sent to the Opening & Closing call direction group.
Late to Close
This reporting code is transmitted whenever the auto-arm pre-alert sounds (if the Late to Close option is enabled).
Exit Fault
If an Exit Error occurs and entry delay expires before the system is disarmed, this reporting code is sent. This reporting code is sent to
the Openings & Closings call direction group.
[342]-[343] Opening (Disarming) Reporting Codes (Access Codes 1-32)
When the system is disarmed, an opening Reporting code for the corresponding user is transmitted.
These reporting codes are sent to the Opening & Closing call direction group.
[344] Miscellaneous Opening (Disarming) Reporting Codes
Auto-Arm Cancellation
This reporting code is transmitted if Auto-Arming is Cancelled or Postponed.
Special Opening
If the system is disarmed (opened) by using keyswitch zone or downloading, this reporting code is transmitted to the Opening & Clos-
ing call direction group.
[345]-[346] Maintenance Alarm and Restore Reporting Codes
Battery Trouble & Restore
This trouble is reported if the standby battery is low or disconnected. These reporting codes are sent to the System Maintenance call
direction group.
AC Failure Trouble & Restore
If the AC supply has failed or has been restored, these reporting codes are sent. A programmable delay (001-255 minutes, Section
[377]) applies to both the trouble and the restore. These reporting codes are sent to the System Maintenance call direction group.
Bell Circuit Trouble
An open or short circuit detected across bell terminals causes this trouble to be reported.
iIf the delay zone that caused the exit error has cross zoning enabled, the exit fault and zone alarm still transmit if a second
zone is not violated. This is to inform the central station that the premise is not secure. The local alarm sequence follows
the cross zoning rules. The exit error is transmitted with the zone alarm that caused the fault, even if that zone has a trans-
mission delay enabled.

PC1404
16
Fire Trouble & Restore
An open circuit or any Low Sensitivity, Tamper or Fault report from a smoke detector causes this trouble to be reported. These reporting
codes are sent to the System Maintenance call direction group.
Auxiliary Power Supply Trouble & Restore
If an auxiliary voltage supply trouble occurs (the Aux PTC has caused the auxiliary supply to stop outputting power), this trouble is
reported. These reporting codes are sent to the System Maintenance call direction group.
TLM Alarm
The TLM Restore code is sent when the telephone trouble condition is restored. This reporting code is sent to the System Maintenance
call direction group.
General System Trouble & Restore
These reporting codes are transmitted via System Maintenance call direction group to report hardware fault troubles that occur on the
system.
General System Supervisory Trouble & Restore
These reporting codes are transmitted via the System Maintenance call direction group when an enrolled TLXXX module has been
detected as absent or restored.
System Reset (Cold Start)
In the event of a total power failure, the Cold Start reporting code is transmitted to the central station when power is restored to the
panel. The reporting code is sent after 2 minutes to allow the panel to stabilize, although the event is logged in the buffer at 00:00. An
entry of 00 in this section disables the reporting code.
[347] Miscellaneous Maintenance Reporting Codes
Failure to Communicate (Phone Numbers 1, 2, 3 & 4)
When events fail to communicate to either telephone number, this reporting code is transmitted the next time a communication is suc-
cessful. The information is transmitted in the following order:
•OldEvent(s)
• Failure To Communicate (Phone #1)
•NewEvent(s)
The FTC reporting code does not follow any call direction “group.” It is sent to every group’s call directions upon transmission of
“failed to communicate” events. When event(s) fail to communicate to a telephone number, no attempt to communicate is made again
until another event is sent to that phone number.
Event Buffer 75% Full
This reporting code is generated after 96 events have been logged to the system event buffer since the panel was last uploaded with
DLS. This reporting code is sent to the system maintenance call direction group.
DLS Lead In and Lead Out
When call-back is enabled, the control panel transmits the DLS Lead In reporting code before calling back the downloading computer.
The DLS Lead Out reporting code is transmitted by the panel every time DLS has completed a successful DLS session with the control
panel. The DLS Lead In reporting code is transmitted in two ways: after the panel has been successfully called by DLS, but before the
panel calls DLS back via the downloading telephone number when call-back is enabled, or upon a user-initiated call-up. These report-
ing codes are sent to the System Maintenance call direction group.
General Zone Fault & Restore
This reporting code is sent whenever a zone has entered the fault state. This occurs when there is a short on DEOL hardwired zones.
These reporting codes are sent to the System Maintenance call direction group.
Delinquency Reporting Code
The Delinquency Reporting code is transmitted in one of two ways. If Section [380] Option [8] is OFF, it is transmitted when the sys-
tem has not been armed for the number of days programmed in Section [377]. If Section [380] Option [8] is ON, it is transmitted when
no zone activity has been detected on the system for the number of hours programmed in Section [377]. This reporting code is sent to
the System Maintenance call direction group.
Installer Lead In and Lead Out
The Installer Lead In and Lead Out reporting codes are sent when the panel enters and exits Installer Programming respectively.
iWhen the Aux Positive Temperature Co-efficient (electronic fuse) enters the open state due to a short or high current draw,
if the short is removed and a load is still applied, the Aux+ output will not recover. It must be powered down and back up
again to restore this condition.
iIf DLS is terminated by an alarm, the alarm system will not communicate the DLS lead out event.
iThe Activity Delinquency timer is active when the system is armed in Stay mode, and not active in Away mode or Night
mode arming.

PC1404 Programming Descriptions
17
[348] Test Transmission Reporting Codes
Walk Test Begin/End
These reporting codes are sent when the walk test is initiated and terminated. These codes precede and terminate the alarm reporting
codes for the zones that are activated during the walk test period, if the alarms are to be transmitted (Section [382] Option [2]). The
walk test reporting codes are sent to the System Test Transmission call direction group.
Periodic Test Transmission
When the programmed interval and time of day have elapsed, this reporting code is transmitted. This reporting code is sent to the Sys-
tem Test Transmission call direction group.
System Test
When the [,][6][Master Code][4] command is used to perform a manual system test, this reporting code is sent to test the communica-
tor. This reporting code is sent to the System Test Transmission call direction group.
[350] Communications Format Options
This section requires four 2-digit entries (1 per phone number). See Appendix B: Communicator Format Options.
[351]-[376] Communicator Call Direction Options
Communicator call directions can be configured for 4 different phone numbers. Each reporting code falls under one of the following 5
groups:
• Alarms & Restores
• Openings & Closings
• Tampers & Restores (including System Tampers)
• System Maintenance Alarms & Restores
• System Test Transmissions
Each group can be assigned to the following call directions:
Option 1: 1st Telephone Number
Option 2: 2nd Telephone Number
Option 3: 3rd Telephone Number
Option 4: 4th Telephone Number
[377] Communicator Variables
Program a 3-digit number for each program entry:
Option Description
[1] Swinger Shutdown (Alarms): Maximum number of alarm/restore transmissions per zone. Valid entries: [000] to [014]. Pro-
gram data [000] to disable shutdown.
For CP-01, valid entries are 001-006 and 000 is an invalid entry.
[2] Swinger Shutdown (Tamper): Maximum number of tamper alarm/restore transmissions per zone. Valid entries: [000] to
[014]. Program data [000] to disable shutdown.
[3] Swinger Shutdown (Maintenance): Maximum number of trouble alarm/restore transmissions per trouble condition. Valid
entries: [000] to [014]. Program data [000] to disable shutdown.
[4] Communicator (Transmission) Delay: Time, in seconds, panel delays reporting an alarm event. Valid entries: [000] to
[255]. For CP-01, valid entries are 015-045.
[5] AC Failure Communication Delay: Time in minutes or hours that panel delays reporting an AC trouble event or restore.
Valid entries [000] to [255]
Note: AC Restore communications follow the same delay.
[6] TLM Trouble Delay: Time, in 3 second checks, before the system considers the phone line disconnected. Valid entries:
[003] to [255]
(e.g., 3 x 3 seconds = 9 seconds).
Note: TLM Restore follows the same delay.
[7] Test Transmission Cycle (Land Line): Number of days between test transmission reporting events. Valid entries: [001] to
[255]. [000] disables the Test Transmission.
[8] For Future Use

PC1404
18
[378] Test Transmission Time of Day
The panel can be configured to communicate a test transmission signal to the monitoring station. Program 4 digits – [HHMM] using
military standard. For a test transmission at 11:00 pm, program data [2300]. Valid entries are [0000] to [2359], [9999] to disable.
[380] First Communicator Options
[9] Delinquency Transmission Delay: Number of hours (Activity Delinquency) or days (Arming Delinquency) the panel delays
before transmitting the event to the central station. Whether this value is in hours or days is determined if Delinquency is for
Activity (Hours) or Closing (Days) as specified in Section [380] Option 8. The timer starts under the following conditions:
1. When the system is armed in Stay Mode;
2. When the system is disarmed;
3. When a zone is violated and restored while system is disarmed or stay armed (Interior, Interior Delay, Interior Stay/
Away, Delay Stay/Away, Interior Delay or Night zones only.
The activity delinquency timer will be ignored when the system is armed in away mode. Zones that are bypassed in [*][1]
will not reset the timer. Automatic restore conditions or activity from fire or CO zones should not reset this counter. If the sys-
tem is programmed to monitor Closing Delinquency, the timer will be programmed in days. The timer will restart every time
the system is disarmed. Valid entries: [001] to [255].
[10] Communication Cancel Window: Time, in minutes, after an alarm has occurred that the system will report a Communica-
tion Cancel reporting event if the system is disarmed. The keypad will beep rapidly to indicate that the Communication Can-
cel reporting event has been communicated successfully. Valid entries: [001] to [255]. Entering [000] will disable this
window.
Option Description
[1]
Communications
ON: Communications Enabled. The system communicator is enabled and all events with reporting codes will
be reported to the monitoring station.
OFF: Communications Disabled. The communicator is disabled and events will not be transmitted to the moni-
toring station. Downloading may still be performed if enabled.
[2
]
Restore
Transmission
ON: Restores Transmissions on Bell Time-out. Zone restore reporting codes will not be transmitted until the zone
has been restored, the bell cut-off time has expired, and the zone is not in swinger shutdown. If the zone is not
restored when the bell cut-off time expires, the restore will be transmitted when the zone physically restores or when
the system is disarmed.
Note: 24 Hr Zones will not restore until physically restored.
OFF: Restore Transmissions Follow Zones. Zone restore reporting codes will be transmitted when the zone is
physically restored and the zone is not in swinger shutdown. If the zones are still violated when the system is dis-
armed, the restore codes will be transmitted when the system is disarmed.
[3]
Dialing Method
ON: Pulse Dialing Enabled. The panel uses rotary (pulse) dialing.
OFF: DTMF Dialing. The panel uses touchtone (DTMF) dialing.
[4]
Pulse Dialing
Options
ON: Switch to Pulse Dialing after 4 DTMF Attempts. If DTMF dialing is enabled, the control panel dials tele-
phone numbers using DTMF dialing for the first 4 attempts. If unsuccessful, the control panel switches to pulse
(rotary) dialing for the remaining attempts.
OFF: DTMF Dial for all Attempts. If DTMF dialing is enabled, the control panel dials telephone numbers using
DTMF dialing for all dialing attempts.
[5] Future Use
[6] ON: Alternate Dialing Enabled. The communicator switches to the next backup phone number in the sequence
after each failed dialling attempt. This continues until communications are successful, or the sequence has been
repeated 5 times.
OFF: Call Primary Number, Backup to Secondary. If 5 attempts to communicate to the primary telephone number
fail, the communicator switches to the next backup and makes up to 5 more attempts. If the communication failure con-
dition persists, the communicator will attempt the second and third backup phone numbers if programmed.
[7] Future Use
[8]
Delinquency
ON: Delinquency Follows Zone Activity (Hours). The Delinquency feature follows zone activity—if there is no zone
activity on the system, the delinquency transmission delay counter in Section [377] begins counting in hours. When the
counter reaches the programmed value, the panel communicates the delinquency code to the central station.
Note: This code will not be transmitted for partitions that are “Away” armed. Activity on bypassed zones does not
affect this timer. The timer is reset on arming.
OFF: Delinquency Follows Arming (Days). The Delinquency feature follows arming—if a partition has not
been armed for a programmed number of days, the panel communicates the delinquency code. This feature may
be disabled by entering 000 in Section [377].

PC1404 Programming Descriptions
19
[381] Second Communicator Options
[382] Third Communicator Options
Option Description
[1]
Ringback
ON: Opening After Alarm Keypad Ringback Enabled. When the Opening After Alarm reporting code is successfully
transmitted to the monitoring station, the keypad sounds a series of 8 beeps to confirm to the end user that the Opening After
Alarm Code was sent and received. This Ringback occurs for each Opening After Alarm code successfully reported.
OFF: Opening After Alarm Ringback Disabled. When the opening after alarm reporting code is successfully trans-
mitted to the monitoring station, no keypad indications will be provided.
[2] Future Use
[3]
SIA
Reporting
Codes
ON: SIA Uses Programmed Reporting Codes. This option is for use with the SIA communication format. If 00 is
programmed in the reporting code section, the event will not be communicated. When this option is ON and there is a
valid reporting code programmed in the reporting code section, the programmed reporting code will be transmitted. If
FF is programmed as a reporting code, the event will not be communicated.
Reporting Code Entry Option ON Option OFF
00 No Transmission No Transmission
FF No Transmission Auto Rep Code Sent
01-FE 01-FE Sent Auto Rep Code Sent
OFF: SIA Uses Automatic Reporting Codes. When this option is OFF and there is a valid reporting code (01-FE) or
FF programmed in the reporting code section, the panel transmits an automatic reporting code for SIA only. This
would be used when automatic reporting codes are required but there is a requirement for a different reporting code
(like a pulse format).
[4]
Closing
Confirmation
ON: Closing Confirmation Enabled. The system beeps the keypad 8 times after successfully transmitting a Closing
reporting event.
OFF: Closing Confirmation Disabled. The keypad does not beep.
[5]-[6] Future Use
[7]
CID
Reporting
Codes
ON: Contact ID Uses Programmed Reporting Codes. The Contact ID communications format uses programmed
reporting codes when transmitting to a central station.
OFF: Contact ID Uses Automatic Reporting Codes. The Contact ID communications format uses automatic report-
ing codes as shown in Appendix A when transmitting to central station.
[8] Future Use
Option Description
[1] Future Use
[2]
Walk Test
Communications
ON: Alarm Communications Enabled During Walk Test. The system transmits all alarms during Walk Test.
OFF: Alarm Communications Disabled During Walk Test. The system does not report alarm events during
Walk Test, even if alarms are programmed.
[3]
Communications
Cancelled Message
ON: Communications Cancelled Message Enabled. The Communications Cancelled (LCD) or CC (Icon) mes-
sage will be displayed if alarms are acknowledged during the transmission delay time + arming cancellation win-
dow. This message will be displayed for 5 seconds on all keypads. The acknowledgement can be made with an
access code, disarming function key or a Keyswitch zone.
OFF: Communications Cancelled Message Disabled. The Communications Cancelled LCD message and CC
Icon keypad message will not be created by any method.
[4]
Call Waiting
Cancel
ON: Call Waiting Cancel Enabled. The call waiting dialing string programmed in Section [304] will be dialed
before the first attempt of each phone number. All subsequent dialing attempts to the same phone number will not
use the call waiting cancel string.
OFF: Call Waiting Cancel Disabled. The system does not dial the Call Waiting Cancel string.
Note: A call waiting cancel on a non-call waiting line will prevent successful connection to the central station.
[5] Future Use
[6]
AC Fail
Communications
Timing
ON: System AC Failure Transmission Delay in Hours. The System AC Failure Transmission Delay in Section
[377], Option 5 is programmed in hours.
OFF: System AC Failure Transmission Delay in Minutes. The System AC Failure Transmission Delay in Sec-
tion [377], Option 5 is programmed in minutes.
Other manuals for PowerSeries PC1404
5
Table of contents
Other DSC Security System manuals

DSC
DSC PC1616; PC1832; PC1864 User manual

DSC
DSC PowerSeries TR5164 User manual

DSC
DSC New Classic PC585 User manual

DSC
DSC Neo User manual

DSC
DSC ALEXOR Instruction manual

DSC
DSC PC2525 User manual

DSC
DSC Power832 User manual

DSC
DSC neo HS128 E User manual

DSC
DSC neo HS2016 User manual

DSC
DSC Envoy NT9005 V1.0 Operating instructions