Installing the Printer Driver for:
Windows 2000/Windows XP/Windows NT
IIMMPPOORRTTAANNTT::You must have administrative rights in order to perform this installation.
To begin, click Install at the bottom right corner of your DuraLabel 4TTP Installation
CD screen. This will bring up a License Agreement window. On the next window,
accept the terms of the license agreement and click Next.
Verify the installation directory chosen. The default is “C:\Seagull”
3
GETTING STARTED
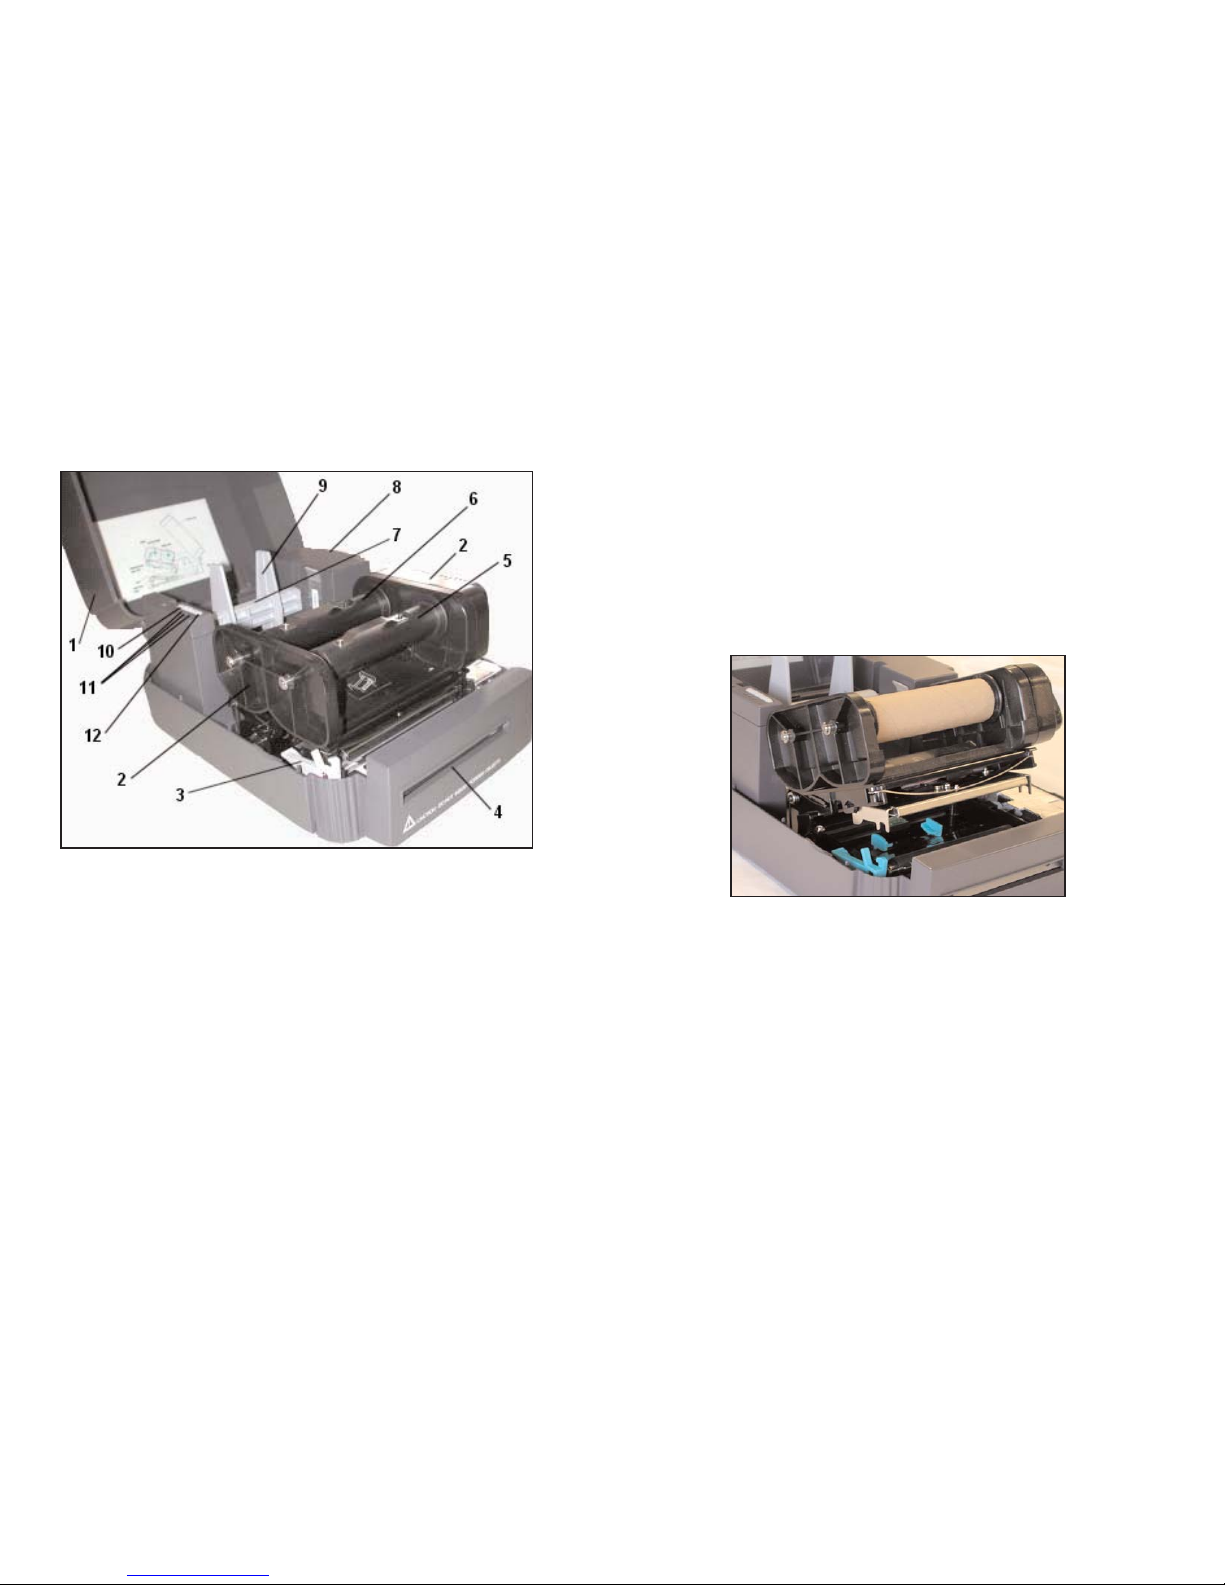
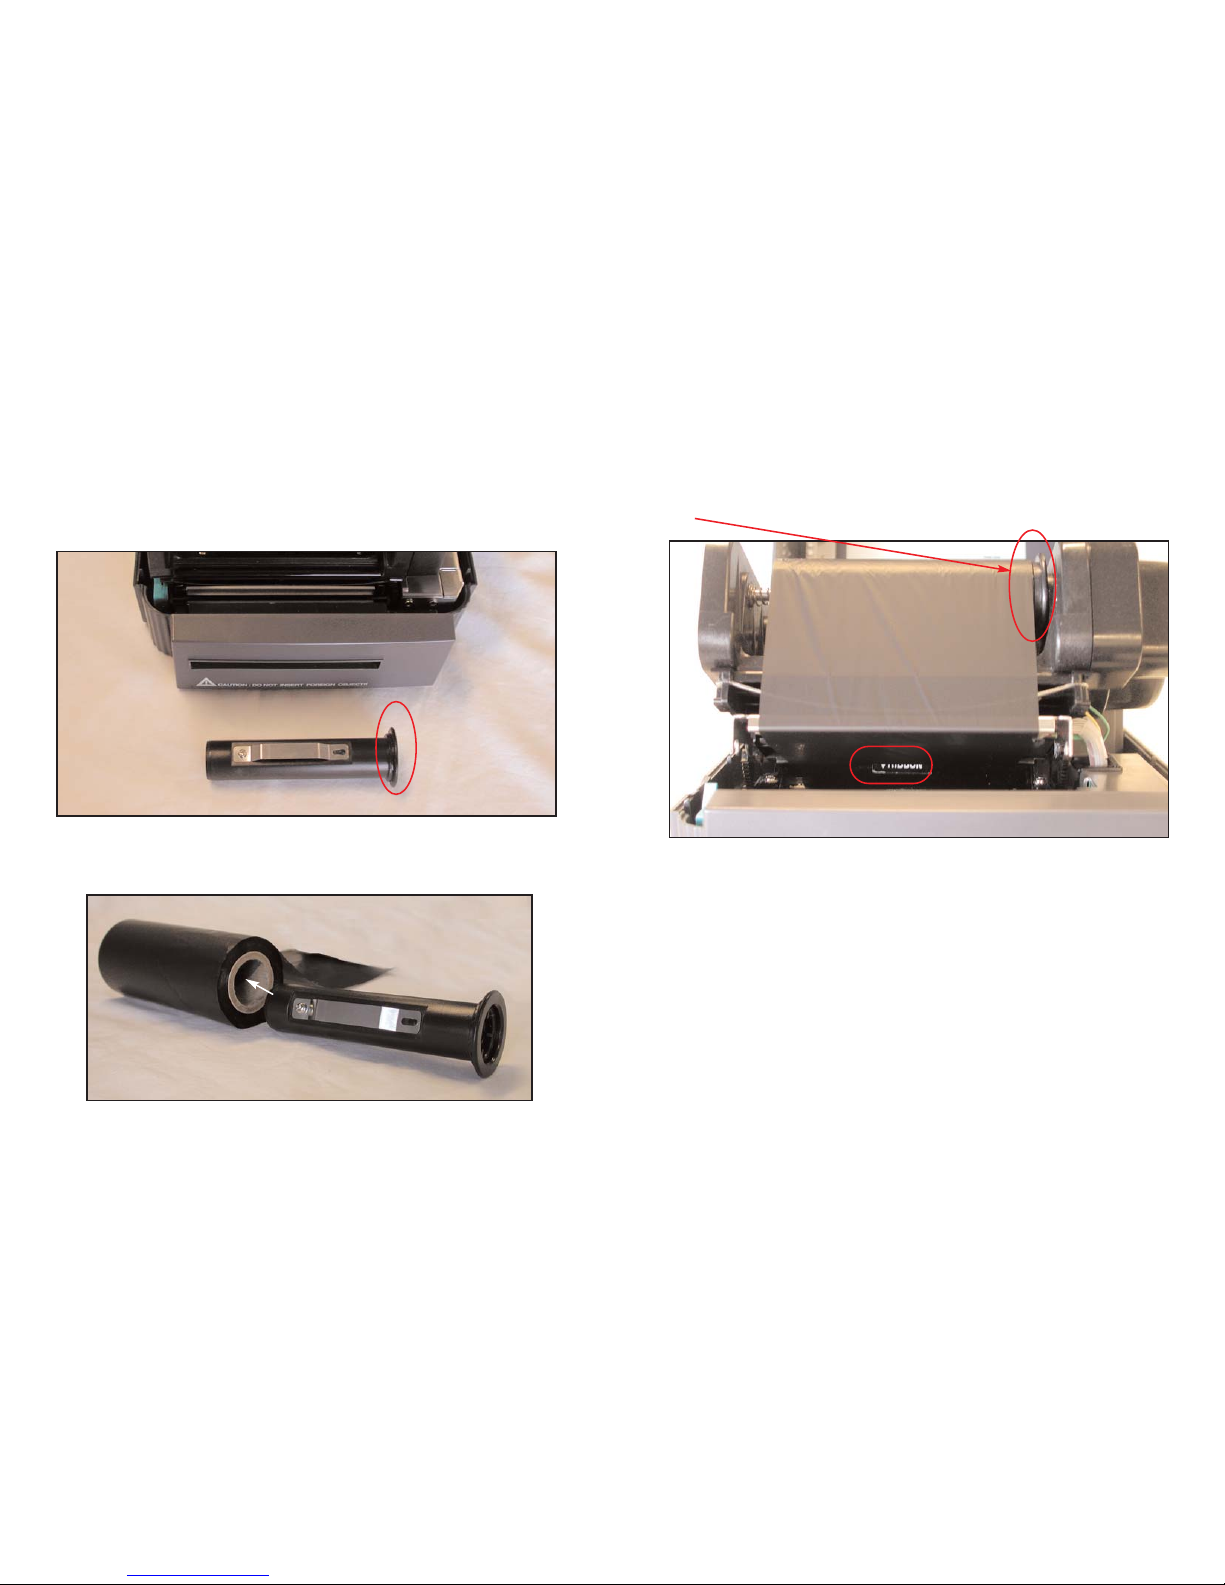
Prepare the printer
Instructions for unpacking, loading supplies and connecting your printer are located
in the User’s Manual (in printed or electronic form). There is also an instructional
video included on he CD which shows you how to load supplies. Please read and
follow those instructions carefully before continuing.
Note: To view the electronic version of the manual you will need a corresponding document viewer (PDF or
DOC). Two suitable viewers are included on the installation CD - Adobe Acrobat Reader and Microsoft Word
Viewer.
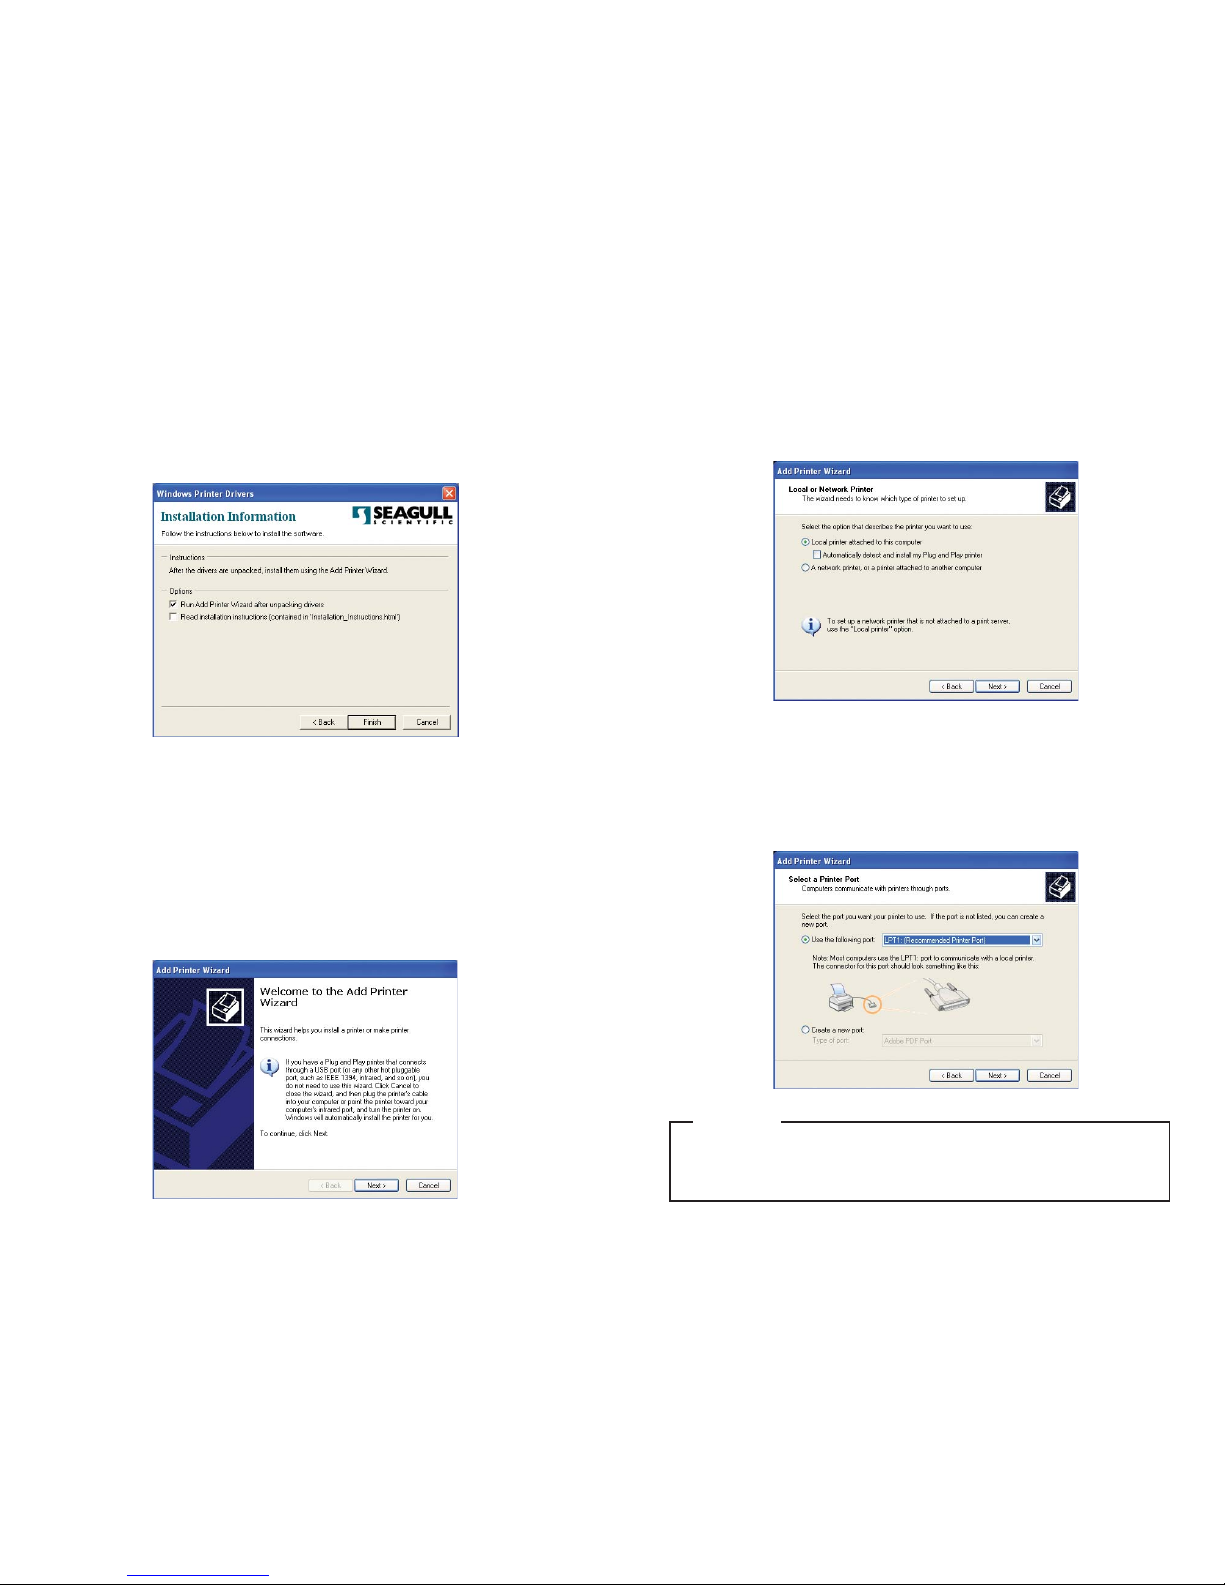
Install the printer drivers
With the DuraLabel 4 connected and powered on you are ready to install the printer
drivers and software. When you place the CD in the drive, it should autorun within a
few seconds.* When the autorun begins, the DuraLabel 4 menu will appear on your
screen. Click on the button Install Driver.
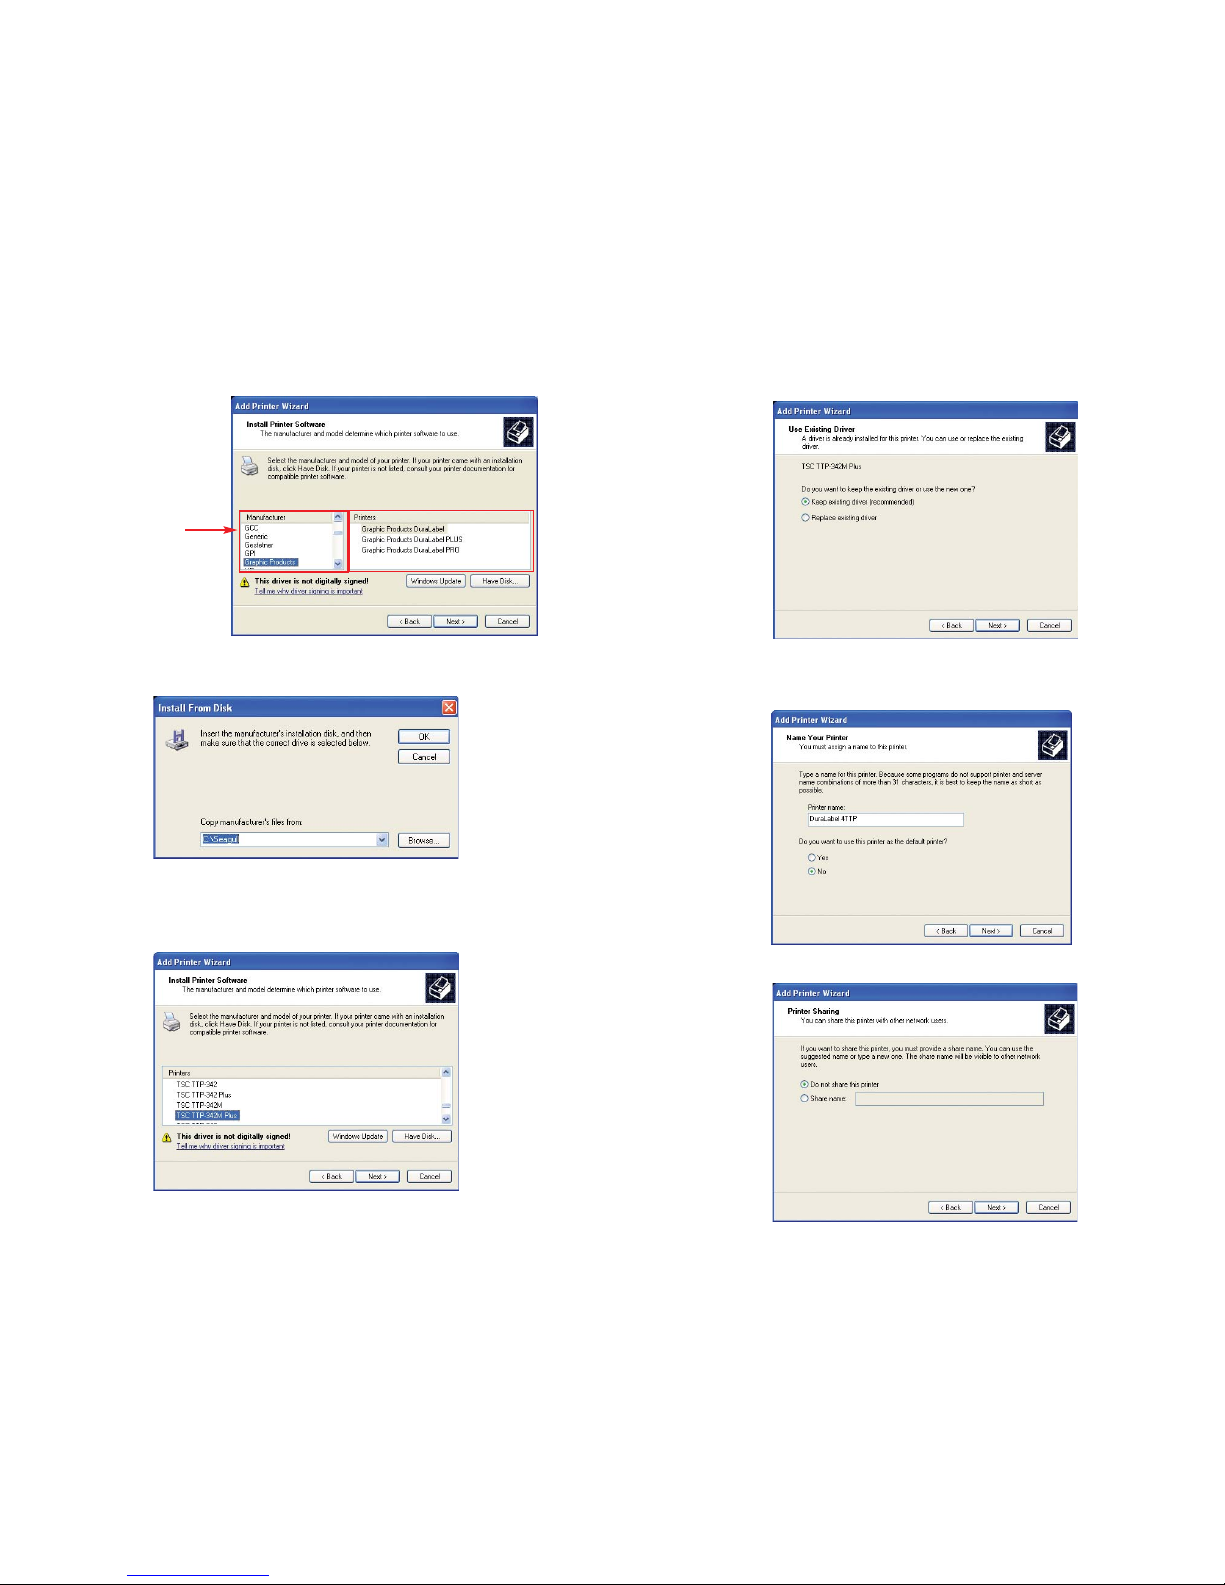
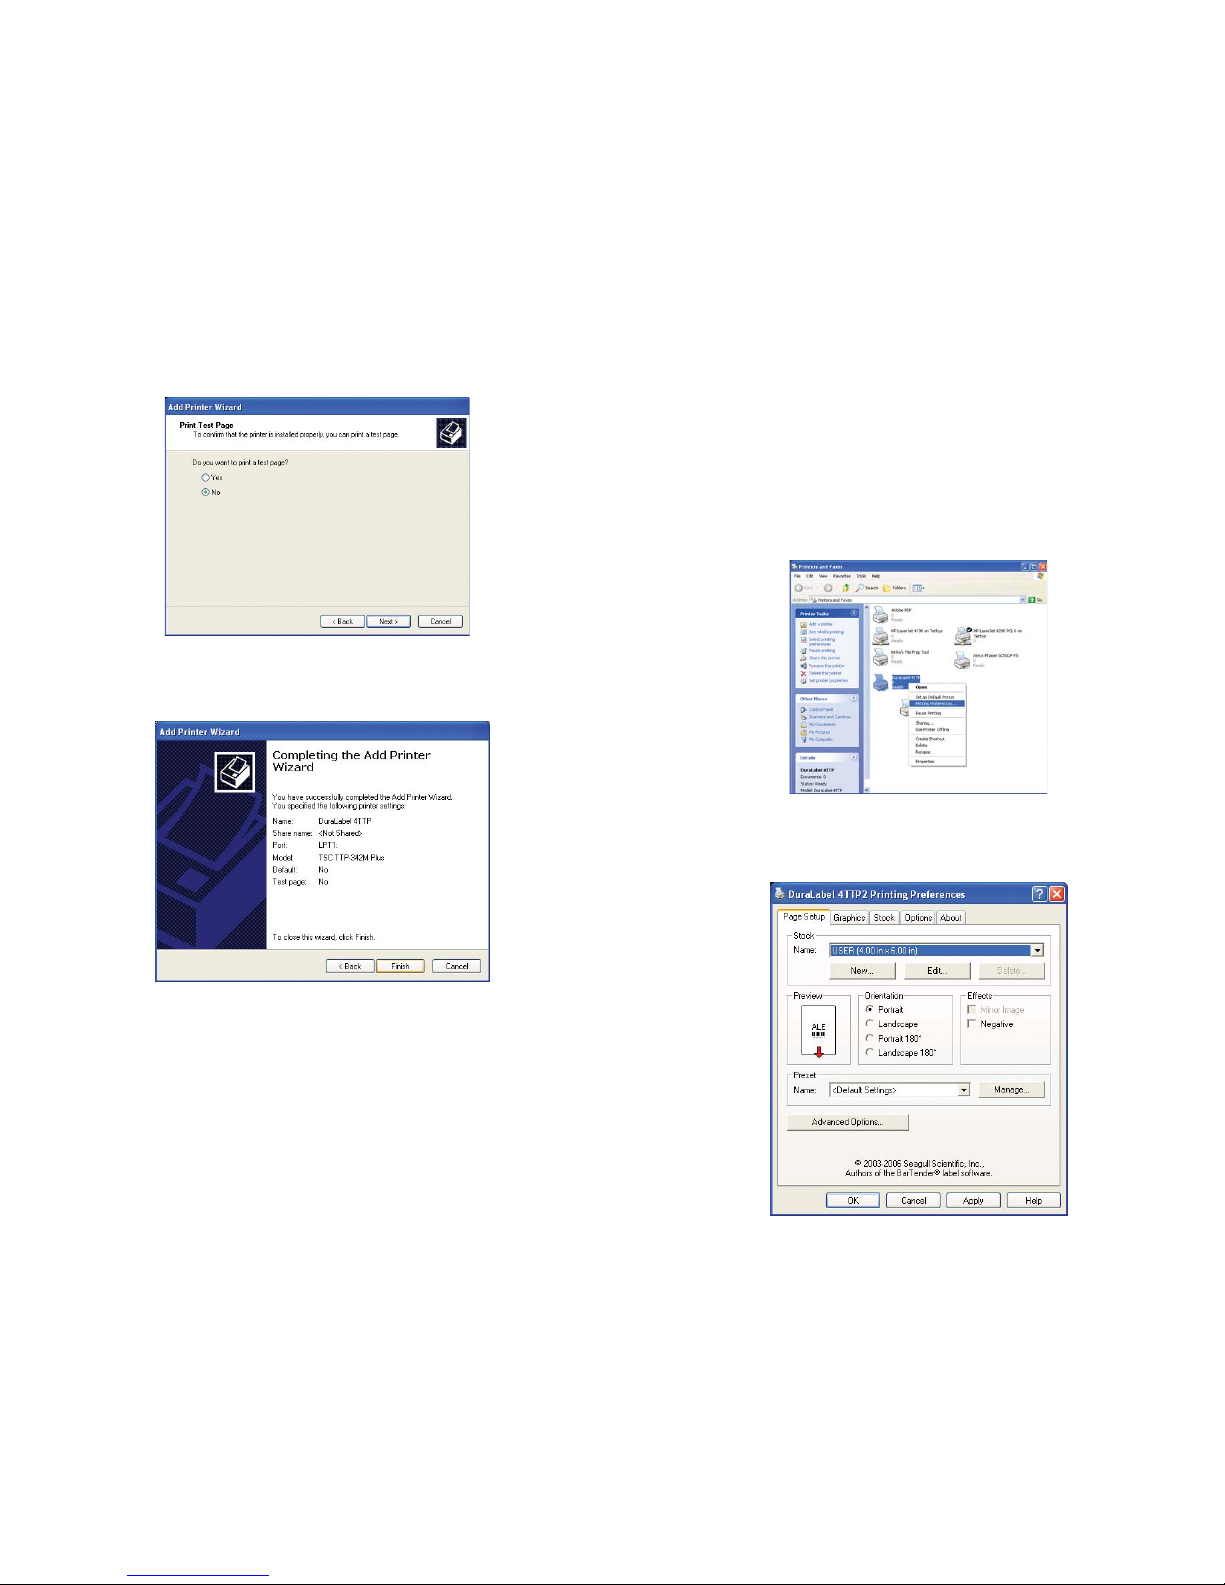
The program will now guide you through the installation of your printer driver.
Note: Find out your Windows version by right-clicking on the My Computer icon (located on your
desktop). Select the Properties option. Your Windows version is located under the System heading.
*If the CD does not autorun you may need to manually install your printer drivers. To manually install, dou-
ble-click on the CD.
2
After you’ve installed the drivers, click the Install RTK Software button on the
DuraLabel 4 startup screen, and the RTK Software will be installed on your
computer. When the installation screen opens, you can click More Information
to see more info on the installation process or simply click Automatic Install to
begin.
To use the RTK Software, the print driver and the DuraLabel 4 itself must be set
up. See the introduction section of the help page in the software and follow
the directions there. To align the printing and cutting of the labels, see the
problem solving section of the help page for clear instructions.
If you plan to print RTK labels: