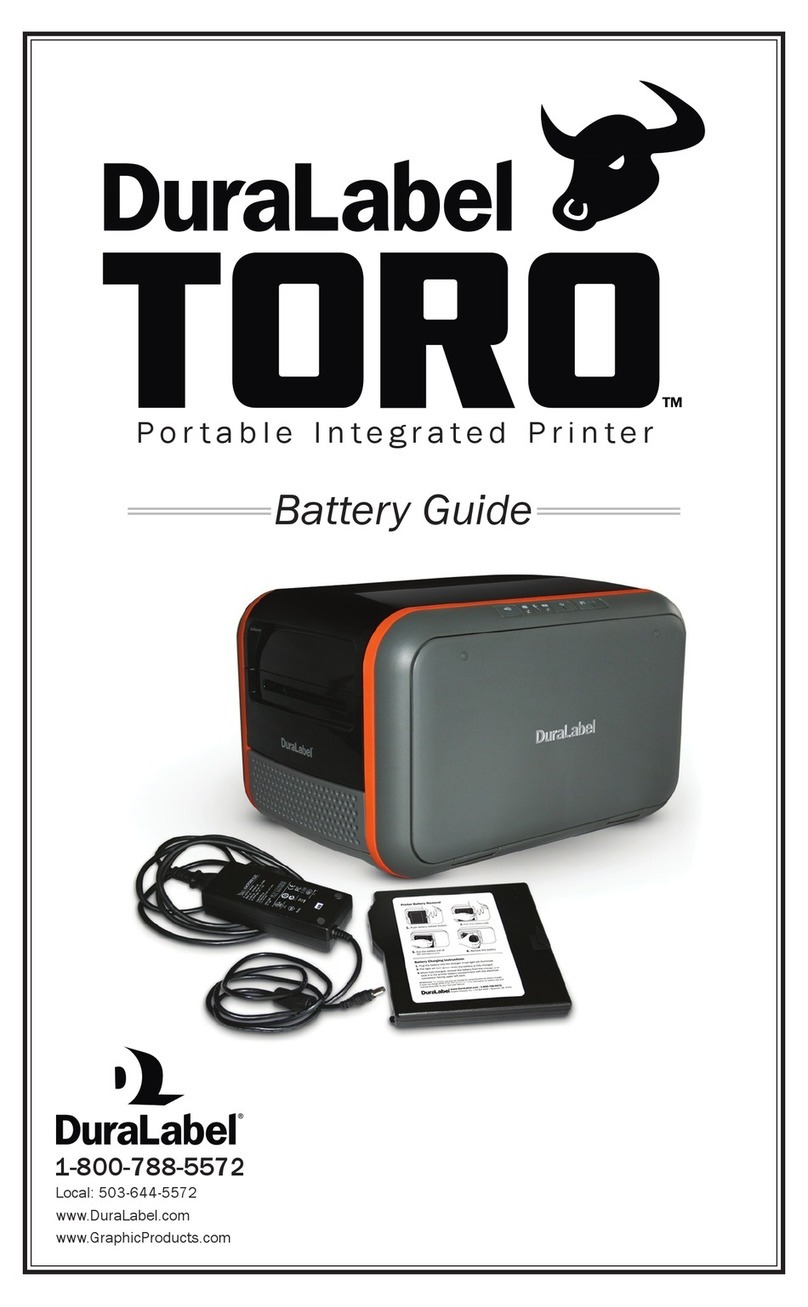
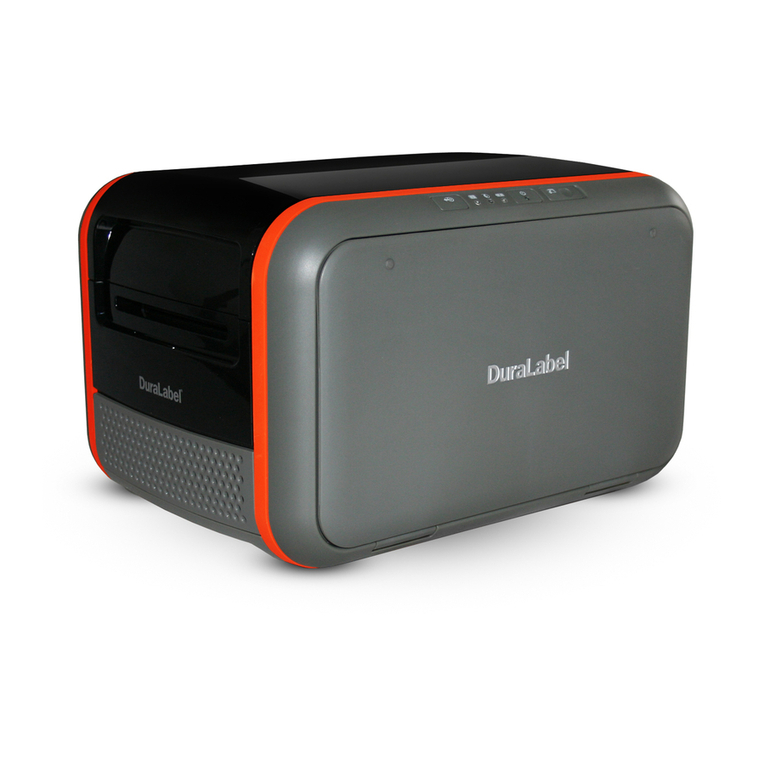
DuraLabel Toro User manual

USER GUIDE
PORTABLE STANDALONE PRINTER
800.788.5572
DuraLabel.com

Copyright Information
No part of this manual, including the products and software described in it, may be reproduced,
transmitted, transcribed, stored in a retrieval system, or translated into any language in any form
or by any means, except documentation kept by the purchaser for backup purposes, without the
express written permission of Graphic Products, Inc.
Products and corporate names appearing in this manual may or may not be registered trademarks
or copyrights of their respective companies, and are used only for identification or explanation and
to the owners’ benefit, without intent to infringe.
Specifications and information contained in this manual are furnished for informational use
only, and are subject to change at any time without notice, and should not be construed as a
commitment by Graphic Products. Graphic Products assumes no responsibility or liability for any
errors or inaccuracies that may appear in this manual.
Graphic Products®
, DuraLabel®
, PathFinder®
, Toro®and Lobo®are Registered Trademarks of Graphic Products, Inc.
© 2011, 2014 Graphic Products, Inc.

DuraLabel.com | 800.788.5572 Contents | 1
Contents
1. Introduction
3
2. Warranties
4
2.1 5-Year DuraLabel Printer Warranty 4
2.1.1 Repairs 4
2.1.2 Batteries 4
2.1.3 Warranty Details 4
2.2 5-Year DuraLabel Premium Vinyl Warranty 5
3. Safety Instructions 6
4. Getting to Know Your Toro 7
4.1 Operating System 7
4.2 Control Panel 7
4.3 Connection Panel 8
4.4 Keyboard 8
4.4.1 Keyboard Release 8
4.4.2 Keyboard Positions and Toro Modes 8
4.5 Screen 9
5. Loading Ribbon and Label Stock 10
5.1 Loading Ribbon 10
5.2 Loading Label Stock 11
6. Toro Main Screen 12
6.1 Toolbar 12
7. Advanced Functions 14
7.1 Using the USB Drive 14
7.1.1 Windows Systems 14
7.1.2 Linux Systems 14
7.2 Touchscreen Calibration 14
7.3 Installing Programs 15
7.4 Password Protection 15
7.5 Installing an External Pointing Device 15
7.6 Recovering Templates 15
7.6.1 Windows Systems 16
7.6.2 Linux Systems 16
7.7 Sleep Mode 16
7.7.1 Windows Systems 16
7.7.2 Linux Systems 16
8. Battery (Optional) 17
8.1 Battery Loading 17
8.2 Charging the Battery 17
8.3 Battery Maintenance 17

2| Contents DuraLabel.com | 800.788.5572
CONTENTS
9. Cleaning Your Toro 18
10. Troubleshooting 19
11. Specifications 21
11.1 Printer 21
11.2 Indicators & Buttons 21
11.3 Communication Interface 21
11.4 Power Requirements 21
11.5 Capabilities 21
11.6 Environment 22
11.7 Label Stock 22
11.8 Ribbon Supply 22
11.9 Printer Body 22
12. End User License Agreement 23
13. Certifications 27

DuraLabel.com | 800.788.5572 1. Introduction | 3
1. Introduction
With your DuraLabel Toro, producing custom labels and signs is fast and easy. Its
powerful software expands your creative capabilities and simplifies safety compliance.
This versatile, go-anywhere printer comes with a built-in keyboard, mouse and
touchscreen for your convenience.
Because your Toro is a standalone system, you can take it to a remote site, or place it on
a cart and use it anywhere in your facility.
An optional battery provides three hours of continuous printing capability even when
there is no power outlet nearby.
For larger sign projects, Toro can connect to the DuraLabel 9000 sign and label printer.

4| 2.1 5-Year DuraLabel Printer Warranty DuraLabel.com | 800.788.5572
2. Warranties
2.1 5-Year DuraLabel Printer Warranty
Graphic Products’ DuraLabel printers are warrantied to be
free from defects in materials and workmanship for a period
of five (5) years from the date of purchase. Within this period,
Graphic Products, Inc. will, at its sole option, repair or replace
any components which fail in normal use. Such repairs or
replacement will be made at no charge to the purchaser for parts or labor, provided that
the purchaser shall be responsible for any transportation cost. This warranty does not
cover loss, damages from accident, or equipment or parts which have been misused,
altered, neglected, carelessly handled, used for purpose other than those for which the
printer was manufactured, or damages resulting from unauthorized service.
2.1.1 REPAIRS
Repairs are warrantied for 90 days. If the original warranty is still in effect, repaired
units will remain under their original warranty or for 90 days from the date of service,
whichever is longer.
2.1.2 BATTERIES
The optional battery packs for the DuraLabel Toro and Lobo portable systems are
warrantied for three years from the date of purchase.
The battery for the DuraLabel 2000 PLUS system is warrantied for one year from the
date of purchase.
2.1.3 WARRANTY DETAILS
The warranties and remedies contained herein are exclusive and in lieu of all other
warranties whether express, implied, or statutory, including any liability arising under any
warranty of merchantability or fitness for a particular purpose, statutory or otherwise.
This warranty gives the purchaser specific legal rights, which may vary from state to
state.
In no event shall Graphic Products be liable for any incidental, special, indirect, or
consequential damages, whether resulting from the use, misuse, or inability to use
the product for any reason including defect. Some states do not allow the exclusion of
incidental or consequential damages, so the above limitation may not apply in all areas.
Graphic Products retains the exclusive right within all warranty periods to repair, replace,
or offer a full refund of the purchase price at its sole discretion. Such remedy shall be
the purchaser’s sole and exclusive remedy for any breach of warranty.
DuraLabel.com | 800.788.5572 2.2 5-Year DuraLabel Premium Vinyl Warranty | 5
WARRANTIES
General maintenance and cleaning of the DuraLabel printer is the purchaser’s
responsibility and is not covered by the warranty. Expendable items or parts such as
label supply and ribbon are not covered by this warranty.
NOTE: Specic preparation may be required before shipping. Please contact your
Graphic Products representative to ensure correct return procedure: please call
800.788.5572 for details. Graphic Products, Inc. shall not be responsible for any loss
or damages incurred during shipping.
2.2 5-Year DuraLabel Premium Vinyl Warranty
DuraLabel supplies are tested for durability under various conditions, including UV
exposure, moisture, heating and cooling cycles, abrasion, and chemical exposures.
Graphic Products warranties labels made from its Premium vinyl supplies for a period of
five (5) years.
Within five years of purchase and after proper application, Graphic Products will replace
labels made with DuraLabel Premium Vinyl which become unreadable or fail to maintain
adhesion with the labeled surface. In such instance, Graphic Products, Inc. will provide
a one-time replacement roll of the same supply.

6| 3. Safety Instructions DuraLabel.com | 800.788.55726
3. Safety Instructions
Please review the following safety instructions before using the printer:
• Keep printer away from humidity and ultraviolet radiation. Toro is intended for
indoor use only.
• Check power source voltage before connecting printer to power outlet.
• Disconnect printer from power source when not in use.
• DO NOT pour liquid onto the printer or printer parts.
• ONLY qualified service personnel should attempt to repair printer.
• DO NOT repair or adjust energized equipment without supervision. A person
capable of providing first aid must always be present.
• Toro supply may build a small static charge in static-sensitive environments.
DO NOT operate Toro near flammable materials.
• Power outlet should be near printer and easily accessible for quick power
disconnect.
• Use only with power supply model WDS120240.
• Remove Toro’s battery and unplug unit from wall socket to completely disconnect
power.
NOTE: Changes or modications not expressly approved by the party responsible for
compliance could void the user’s authority to operate the equipment.

DuraLabel.com | 800.788.5572 4.2 Control Panel | 7
4. Getting to Know Your Toro
4.1 Operating System
Due to different licensing agreements, some Toro systems use Microsoft Windows XP
Embedded™ software, while others use Ubuntu Linux™ software. The functions of the
two system types are only slightly different, and are described in this User Guide.
To identify the operating system in use on your DuraLabel Toro, press the system
information icon on your toolbar. In the lower right part of this window, you will see
the name of the operating system in place on your Toro. If your DuraLabel Toro uses
Ubuntu Linux the system also includes a list of preferred fonts, which can be found by
pressing the help icon on the toolbar and then pressing the View button for Preferred
Fonts. This list shows which fonts we recommend for use, and similar fonts available on
Windows-based systems.
4.2 Control Panel
Toro’s control panel is centered at the top of the printer.
Supply Feed Power Button
Printer Status Light
Supply Status Light
Battery Status Light
Keyboard Release
Slider
Supply Feed Button: Press this button to pause or resume a print job. If there is no
current print job, you can hold this button to feed blank supply through the printer.
Printer Status Light: This light glows green to indicate normal operation, and changes
color or blinks to show errors. See the Troubleshooting section for help.
Supply Status Light: If this light is red, supply is low. A blinking red light indicates supply
has almost run out or no supply is loaded.
Battery Status Light: When this light is red, the battery is down to 10% of its charge.
Remaining battery power will last for only a short time. (The Toro battery is an optional
accessory, and is not required when using a standard power outlet.)
Power Button: Press this button to turn your Toro on or off. The indicator light will blink
while Toro is starting up, shutting down, or in sleep mode; it will glow green when Toro is
ready.
Keyboard Release Slider: Slide this to the right to release the keyboard from its locked,
upright position.

8| 4.3 Connection Panel DuraLabel.com | 800.788.5572
GETTING TO KNOW YOUR TORO
4.3 Connection Panel
Contains Toro’s power and data transfer ports.
Ethernet Port USB-A Ports USB-B Port 24-VDC Port
USB-A ports: Connect the mouse here, or plug in your USB flash drive to transfer files.
USB-B port: Use this port to connect Toro to a computer and use the system as a
normal desktop printer.
24-VDC port: Connect the Toro power supply here.
Ethernet Print Server Port (optional): If present, this port allows you to connect Toro to
a network as a shared printer.
4.4 Keyboard
4.4.1 KEYBOARD RELEASE
The Toro keyboard is permanently mounted
to the printer housing. Open the keyboard
by moving the release slider on the control
panel to the right, and pulling the keyboard
down until it rests on your work surface. When
finished with the system, you can raise the
keyboard back into its locked, upright position.
4.4.2 KEYBOARD POSITIONS AND TORO MODES
Your DuraLabel Toro has two different modes:
Standalone Mode: In this mode, Toro’s touchscreen and keyboard can be used to create
label designs.
Desktop Mode: In this mode, Toro will wait for print commands from a connected
computer.

DuraLabel.com | 800.788.5572 4.5 Screen | 9
GETTING TO KNOW YOUR TORO
When the keyboard is open (showing Toro’s screen) the system is in its Standalone
mode. To use Desktop mode and design labels on your computer, close the keyboard
(hiding Toro’s screen). While in Desktop mode, Toro’s internal software will be
deactivated to save power. You can turn your Toro on or off while it is in either mode,
and you can switch it between the two modes whenever it is not busy.
4.5 Screen
Toro includes a 9" (diagonal) screen with touch capability. You can use a fingertip or the
Toro stylus (seated in the bottom-right edge of the keyboard) to design your labels.
To unlock the screen and adjust its angle, push the release button to the right of the
screen. Then, lift the screen to the desired angle. The screen features four tilt positions
to optimize viewing and touch accessibility. Each position is held firmly in place for finger
touch and pointer use.
In addition to the touchscreen, Toro includes a wireless optical mouse. Seated in the
base of the mouse is a small USB receiver; plug this small receiver into one of the
USB-A ports on the Connection Panel of your Toro. The mouse uses a single AA battery
and includes its own power switch; if the Toro does not respond when you use the
mouse, make sure that the USB receiver is still firmly connected, that the mouse power
switch is set to ON, and that the battery is still fresh.

10 | 5.1 Loading Ribbon DuraLabel.com | 800.788.5572
5. Loading Ribbon and Label Stock
To load your Toro with supplies, you will need to raise the hinged cover. The cover will
hold itself at the fully-opened position, which will require about 21 inches of vertical
clearance.
5.1 Loading Ribbon
The printing ribbon provides the “ink” for the printing process. As labels are printed,
colored resin will be transferred from the fresh ribbon onto the label stock, and the used
ribbon will be collected on a take-up roller for later disposal.
1. Start with a fresh, empty ribbon take-up core. Fit one end of the core onto the gray
spring-loaded holder on the top of the print head carriage. Then, fit the other end of
the ribbon core onto the wheeled holder (Fig. A). Turn the take-up core or holder by
hand, until the tab on the holder locks into the notch in the core.
2. Then, push the gray print head release tabs (Fig. B), to release the print head
carriage. It will spring upward. Hold the new roll of ribbon so the loose end falls to
the rear of the printer. Fit one end of the ribbon core onto the gray spring-loaded
holder (Fig. B) on the underside of the print head carriage.
3. Then, fit the other end of the ribbon core onto the geared holder. Turn the ribbon
core by hand until the tab on the holder locks into the notch in the core.
4. Pull the loose end of the ribbon up and around the print carriage and use a small
piece of label stock or tape to secure the end of the ribbon to the top of the empty
rewind core.
5. Pull the ribbon snug by turning the gray take-up wheel (Fig. A).
Ribbon Take-up Core Holders
Print head release Tabs
Ribbon Supply Core Holders
Take-Up Wheel
FIG. A FIG. B

DuraLabel.com | 800.788.5572 5.2 Loading Label Stock | 11
LOADING RIBBON AND LABEL STOCK
5.2 Loading Label Stock
Your label stock is the base material for your labels, or the “paper” in the printing
process. For each roll of ribbon you use in the Toro, you will probably use three or four
rolls of label stock.
Cutter Module
Print
Carriage
Fixing Tabs
Adjustable
Label Guides
FIG. C
1. If you haven’t already done so, raise
the print head carriage by pressing
the two gray Print Head Release
Tabs (Fig. B).
2. Place label supply onto the supply
spindle and slide the fixing tabs onto
either side (Fig. C) to hold the roll in
the center of the spindle.
3. With the label supply unrolling
from the top of the roll and feeding
toward the print head carriage, rest
the supply spindle into its slots in
your Toro.
4. Feed the end of the label supply
under the print carriage, threading
it between and beneath the gray
adjustable label guides, and over
the top of the rubber roller near the
cutter module.
5. Slide the gray adjustable label
guides together to keep the label
stock centered, but not so tight as to
bend or wrinkle the label stock.
6. Close the print head carriage by
pressing it down into place, and then
close the Toro cover.
When loading supplies, you can also flip the cutter module down to provide more room.
Simply pull the top edge of the cutter module away from the rest of the Toro; it will rest
in its lowered position. If you lower the cutter module while changing supplies, be sure
to raise it back into place before closing the Toro lid.

12 | 6.1 Toolbar DuraLabel.com | 800.788.5572
6. Toro Main Screen
The Toro main screen appears when you
turn the system on. Most of the common
functions of your Toro can be reached
through the toolbar along the top of this
screen.
6.1 Toolbar Toro main screen
Templates
drop-down menu
Programs
drop-down menu
Toro D drive window
1. SOFTWARE SHORTCUT ICONS: At the left side of the toolbar, you will see icons for
your label design software. For users in the United States, Toro comes loaded with
DuraSuite for creating labels in a variety of standardized formats, such as GHS
labels, NFPA Diamond labels, Arc Flash labels, or Pipe Markers. Toro also includes
LabelForge for creating completely customized label designs from scratch, using
a simple interface. Each of these programs is covered in more detail in its own User
Guide.
2. TEMPLATES: The Templates menu allows you to easily browse pre-made templates
that are provided with your Toro. The templates are organized into categories.
3. PROGRAMS: The Programs menu provides access to the different software and
system controls on your Toro.
4. D DRIVE: On a Windows system, this button allows you to browse the backup and
data folders on your Toro system. On a Linux system, this button will be replaced by
a “DATA” icon on the desktop.
5. MY DOCUMENTS: Use this to browse your commonly-used templates, label designs,
or images. Most of your created files will be saved here.
1 2 3 4 5 6 7 8 9 10 11 12

DuraLabel.com | 800.788.5572 6.1 Toolbar | 13
TORO MAIN SCREEN
6. PRINTER SETTINGS: This button opens
the Printer Settings window, where you can
adjust common Toro system settings or
access more advanced ones.
If you change ribbon types, you will need to select
the current ribbon under “Ribbon Type” in this
window. Different ribbon types will have a color-
coded marking on the end of the ribbon core:
Black Core - premium black ribbon
Blue Core - petroleum-resistant ribbon
Red Core - extreme chemical-resistant ribbon
Green Core - custom ribbon
Orange Core - black shrink tube ribbon
Plain Core - white, red, green, orange, yellow, dark blue
If you change from one type of label stock to another, you may need to select the current
supply type in the “Supply Calibration” section.
Continuous: an uninterrupted, continuous roll of label stock (the most common
supply type)
Black Mark: a roll of partially pre-printed labels, with black marks on the backing to
distinguish one label from the next
Die-Cut: a roll of pre-cut labels, usually pre-printed with some elements, with small
gaps between labels
7. SUPPLY INFORMATION: This icon fills with green to show approximately how much
of your label stock is left. Clicking on the icon will open a window with more details
about the supply.
8. BATTERY STATUS: If Toro is using a battery, the approximate level of charge
remaining will be shown here.
9. HELP: This icon gives you access to training materials, including instructional
videos, manuals, how-to demonstrations and label examples.
10. SYSTEM INFORMATION: Click on this icon to view the contact information for
customer support, supply ordering, or product updates, as well as details on your
Toro system and its software.
11. POWER BUTTON: Use this button to power down your Toro system. The physical
button on the Control Panel will have the same effect.
12. DATE AND TIME: If the displayed time is incorrect, click on the time to open the
time settings window.
Printer Settings window

14 | 7.1 Using the USB Drive DuraLabel.com | 800.788.5572
7. Advanced Functions
7.1 Using the USB Drive
To copy files such as images or templates onto your Toro system, load the files onto a
USB flash drive or similar storage device, and connect it to an unused USB-A port on
your Toro.
7.1.1 WINDOWS SYSTEMS
A button labeled E: will appear on the Toro toolbar. Click this button to view the contents
of the USB drive. You can drag and drop files to the desired location using the folder
tree to the left of the window.
7.1.2 LINUX SYSTEMS
A new desktop icon will appear on the Toro desktop. Double click this icon to view
contents of the USB drive. Drag and drop files to the desired location using the file
browser or to the desktop.
NOTE: Any les that you want to keep on your Toro system should be saved to the
My Documents folder (on Windows systems) or the /home/dltoro folder (on Linux
systems). This is the default location for all user-created les, including saving new
or modied templates, images, and other documents. Files changed, deleted, moved
or modied in other parts of the Toro system will automatically revert to their original
state the next time Toro is powered on.
7.2 Touchscreen Calibration
Your Toro touchscreen may need to be calibrated occasionally to improve touch
performance. To calibrate the Toro touchscreen, select Control Panel from the Programs
menu on the toolbar, then select Touch Calibration. Press the x that appears in a corner
of your screen. When you hear a beep and the x stops blinking, a new x will appear in
a different corner. When four x’s have been pressed, your screen will be calibrated for
optimum touch accuracy.

DuraLabel.com | 800.788.5572 7.6 Recovering Templates | 15
ADVANCED FUNCTIONS
7.3 Installing Programs
The Toro cannot install or run user programs. Only manufacturer-supplied upgrades can
be installed. If you would like to use other software, you can use Toro as a desktop label
printer by connecting it to your computer. Plug a USB cable into the USB-B port on your
Toro and connect the other end to an available USB-A port on your computer. If your
Toro is equipped with the optional Ethernet port, you can also set up Toro as a network
printer.
Once you have installed the Toro printer driver on your computer, you will be able to use
many different programs to print labels.
7.4 Password Protection
To enable Toro’s password protection option, select the Programs menu from the
toolbar, highlight Password Control, and choose Add User. Complete the information in
the Add User window that appears, then click Enable Lock. The next time Toro is started
up (or wakes from its Sleep mode) a log-in prompt will be displayed.
The following are shown under Password Control:
• Add User
• Delete User
• Change Password
• Disable Station Lock (toggle – disable/enable)
To disable the station lock, choose Disable Station Lock. To immediately lock the station,
select Programs, then Lock Station Now. If a password is forgotten, contact Graphic
Products at 800.788.5572.
7.5 Installing an External Pointing Device
Toro supports most USB-compatible pointing devices, such as ordinary computer mice
and trackballs. To install a pointing device, plug it into an available USB-A port on your
Toro. The system will automatically recognize the new device.
7.6 Recovering Templates
Toro retains a backup copy of all original manufacturer-supplied label templates. If
changes were made to an original template but the unchanged one is needed, follow
these steps to replace the edited template with the original:

16 | 7.7 Sleep Mode DuraLabel.com | 800.788.5572
ADVANCED FUNCTIONS
7.6.1 WINDOWS SYSTEMS
• Click the hard drive icon on the Toro toolbar.
• Browse to the folder C:\GraphicProducts\BackUp\DLP Templates and Symbols.
• Drag and drop the template file to the same folder as the modified copy in
C:\Documents and Settings\Default User\My Documents\DLP Templates and
Symbols.
• Click OK at the prompt to overwrite the edited template with the original.
7.6.2 LINUX SYSTEMS
• Double-click on the DATA icon on the desktop.
• Navigate to /home/dltoro/Desktop/DATA/Backup/DLP Templates and Symbols.
• Drag and drop the template file to the same folder as the modified copy in /home/
dltoro/Documents/DuraLabel Templates/DLP Templates and Symbols.
• Click Replace at the prompt to overwrite the edited template with the original.
An entire template folder may be recovered using the same procedure.
7.7 Sleep Mode
In sleep mode, user data is saved to memory and the Toro appears to be off. The power
indicator light will slowly blink green. To leave sleep mode, press any key, such as the
spacebar.
7.7.1 WINDOWS SYSTEMS
To enable sleep mode, select the Programs menu from the taskbar, highlight Control
Panel, highlight All Settings, and choose Power Options. Select the Power Schemes tab
from the Power Options window that appears, and select the desired time in the System
standby box. Your selection will be implemented the next time Toro starts up.
7.7.2 LINUX SYSTEMS
To enable sleep mode, select the Programs menu from the taskbar, highlight Control
panel, highlight All Settings, and choose Power Options. Select the On AC Power tab
from the Power Options window that appears, and choose “Put computer to sleep when
inactive...”; then, choose the desired wait time.

DuraLabel.com | 800.788.5572 8.3 Battery Maintenance | 17
8. Battery (Optional)
Toro’s battery is an optional accessory. The Lithium-Ion (Li-ion) battery lets you design
and print labels on the go, even without an AC power supply. Typically, a fully-charged
battery will allow for about three hours of continuous printing, or 30 hours of sleep
mode.
A Toro battery can usually be fully recharged in about three hours. During charging,
make sure to put the battery on a clean, dry surface, away from heat or direct sunlight.
Because Lithium batteries self-discharge over time, it is recommended that you fully
recharge the battery at least once every three months.
8.1 Battery Loading
The battery mounts into the back of the Toro. Remove the battery cover door by pushing
the slider downward and pulling the door away. Position the battery so the cut-outs are
aligned and the contacts are in position with the contact interface. Push the battery in
until it locks into place.
8.2 Charging the Battery
The Toro battery should be charged only with the charging unit provided. Plug the
charging unit into the Toro battery and place the battery on a clean and dry surface.
Then, plug the charger into an AC outlet. The light on top of the charger will glow red.
When the charger light turns green, the charge is complete. A typical charging time is
three hours; do not leave the battery connected to the charger for more than 24 hours
at a time.
8.3 Battery Maintenance
When the battery is not in use, keep it in a cool, dry place, away from heat or direct
sunlight. Do not disassemble your Toro battery. Do not let the metal battery pins come
into contact with another metal surface. If you notice any unusual odor, leakage, or
swelling in the Toro battery, discontinue use and contact your DuraLabel representative.

18 | 9. Cleaning Your Toro DuraLabel.com | 800.788.5572
9. Cleaning Your Toro
IMPORTANT! Always turn the power OFF and remove the battery before cleaning or
performing maintenance. Wait at least 5 seconds before turning ON the power. Basic
cleaning of the print head, cutter and platen roller will extend the life of the printer and
allow crisp, clear labels and signs with every printing.
Dust, residue, or adhesive on the print head can result in an unclear printout. Keep the
top cover closed when printing.
1. Turn the printer power OFF. Remove the battery, if one is being used.
2. Open the printer cover, raise the print head mechanism, and remove the ribbon and
label supply from the printer.
3. To open a cleaning swab, place the swab between your index finger and thumb.
Squeeze the swab until it snaps. Alcohol will be distributed to the cotton side of the
swab.
4. Run the swab back and forth several times across the front and underside of the
print head to remove any built-up adhesive, residue, or dust particles.
5. Run the wet swab between and around the gray adjustable label guides to clear any
dust or adhesive build-up.
6. Finally, run the wet swab across both sides of the cutter blade by gently inserting it
into the slot in the cutter module. Clean the blade from both sides. It may be easer
to reach if you flip the cutter module forward for this process.
Other manuals for Toro
5
Table of contents
Other DuraLabel Printer manuals

DuraLabel
DuraLabel 9000 User manual

DuraLabel
DuraLabel 9000 User manual

DuraLabel
DuraLabel 4 TTP User manual

DuraLabel
DuraLabel Toro User manual

DuraLabel
DuraLabel 9000 User manual

DuraLabel
DuraLabel 9000 User manual

DuraLabel
DuraLabel Bronco User manual

DuraLabel
DuraLabel PRO 300 User manual

DuraLabel
DuraLabel PRO User manual

DuraLabel
DuraLabel 900 User manual