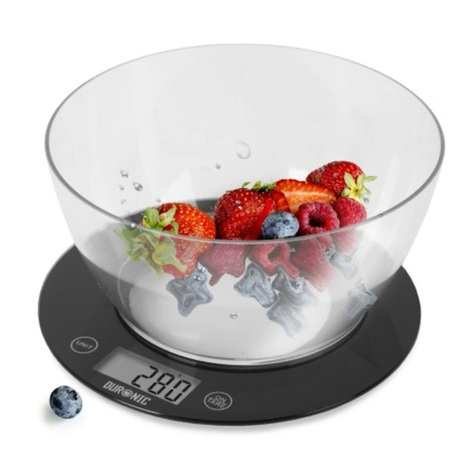
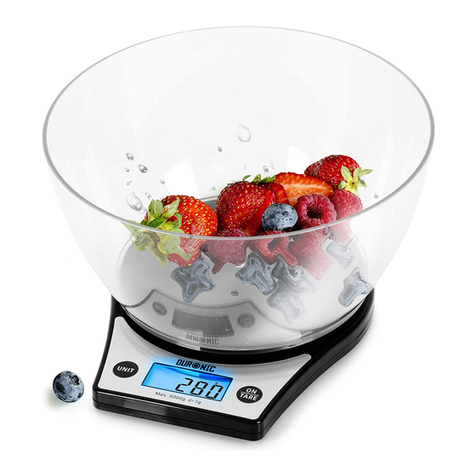
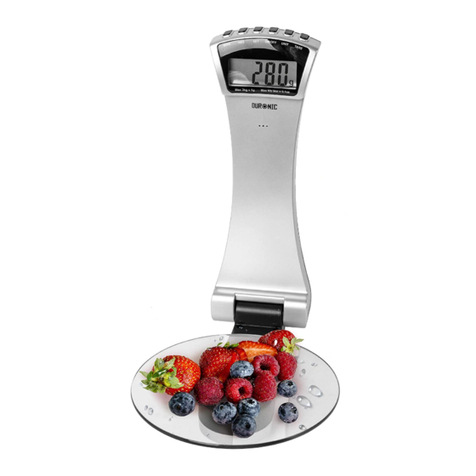
Duronic KS1055 User manual

Creative
Consumer
Products

2

3
f

4

5

6
1. Power: 1 x 3V CR2032 Lithium battery
2. Power On/Tare button:
3. Auto power off time: 60 seconds
4. Manual power off time: Press and hold the ‘ON’ button for 2 seconds.
5. Minimum weight: 5g
6. Maximum weight: 5000g (5kg) / 11lb
7. Overload value: 5300g
8. Graduation: 1g, 0.1oz, 0.05oz, 1ml
9. Unit conversion: press button for unit conversion to g, lb, oz, ml
10. Power on display: turn to zero, 0g. The default unit is g
11. No weight display: 0g-0:0.0lb:oz-0.00oz-0ml
12. Indication Symbol:
Overload indicated by
Lower than 2.6V indicated by
Lower than 2.5V indicated by
Weight unstable indication:
13. Negative weight indication: indicate actual negative weight.
14. Tare function enables weight measurements with the bowl.

7
This appliance works with1 Lithium battery (3V, type CR2032). Remove the
insulating strip for yourst use.
To install a new battery, remove the cover of the battery housing on the
bottom of the scale. Place the battery by pushing one side of the battery in
under positive pole facing outwards and then pressing down on the other side,
Observe the polarity and then place the cover back into place. The scale will
then be ready for use.
Choose the measuring option at any time by pressing the button
(g, lb, oz), depending on which option you wish to use. The scale uses the
following sequence: g=>lb:oz=>oz=>ml

8
1) Place the scale on an even and hard surface, for instance a table or
counter-top. Avoid soft surfaces as this will not enable the user to get accurate
results.
2) Switch the scale on by pressing the “ON” button and the LCD screen
will initialize.
3) The scale will turn on and the LCD display will show “0g”. Change the
weight unit as needed, by pressing the unit touch button
4) Place the ingredients you want to weigh on the glass plate and the weight
will be displayed.
5) Remove the ingredients oncnished.
6) The scale will turn off automatically after 60 seconds. You can also switch
the scale off anytime by holding on to for 2 seconds.
7) If the scale goes off automatically, press the “ON” button to switch on
again.
The zero/tare function is extremely useful to calculate the weight of ingredients
that cannot be put directly on to the platform. For examplour or liquids,
which require a container before weighing.
In order to use this function, place the empty container or object on to the
scale, and then press the ‘ON’ button . The scale will switch on and
indicate 0 g

9
Add the ingredients to weigh. The measurement indicated on the display will
be the weight of the ingredient added inside the container.
Note: When you remove the container from the platform, the LCD display will
show the weight as negative ( “¬¬-” will appear on the left-hand side). To reset,
simply press again.
In case that the scale was already switched on, simply press with the
object or empty container on it, so that the display will show ”0”. The “TARE”
symbol will be displayed, on the bottom left-hand side.

10
If the “LO” symbol is displayed on the LCD screen, it means that the battery
of your scale is low in voltage (less than 2.5V), and should be replaced
soon. Please dispose of the old batteries in an environmentally friendly way.
An advanced warning indicator is also supplied, when the symbol is
displayed, it means the battery voltage is lower than 2.6V.
If the “unSt” symbol is displayed on the LCD screen, it means that the weight
on the scale is not stabilized, or that the scale is not placed oat and
stable surface. Place the scale oat, stable surface and try again.

11
If the “EEEE” symbol appears on the LCD screen, it means that the maximum
weight has been exceeded. Please remove the ingredients/object to ensure no
damage is caused.
REMINDER
1) Please ensure before use that the scale is oat, even and stable
surface.
2) This scale is not waterproof, therefore should not be exposed to moisture or
submerged under water.
3) Clean the scale with a slightly damp cloth. Do not use any chemical/
abrasive cleaning agents to clean the scale.
4) Please remove the battery if the scale is not to being used for along time.

12
1 Year Guarantee from Shine-Mart Ltd, Trademark owners of Duronic Products.
NOTE: THESE STATEMENTS DO NOT AFFECT YOUR STATUTORY RIGHTS AS A
CONSUMER
This product has been manufactured under the strictest or quality control procedures, and
using the highest quality of materials, to ensure excellent performance and reliability. It will
give very good and long lasting service, provided it is properly used and maintained. The
product is guaranteed for 1 years from the date of original purchase. If any defect arises due
to a faulty materials or poor workmanship, the faulty product must be returned to the original
place of purchase. Refund or replacement is at the discretion of that company.
Duronic Products are offered with a 1 year guarantee under the following conditions:
1. The product must be returned to the retailer with original proof of purchase.
2. The product must be installed and used in accordance with the instructions contained in
this operating manual.
3. It must be used only for domestic purposes.
4. It does not cover wear and tear, malicious damage, misuse, neglect, inexpert repairs or
consumable parts.
5. Shine-Mart Ltd has no responsibilities for accidental or consequential loss or damage.
6. Shine-Mart Ltd are not liable to carry out any type of servicing work, under the guarantee
7. Valid in the UK only
This product itted with BS:1363 plug and fuse
Imported by Shine-Mart Ltd, RM3 8SB
Information on waste Disposal for Consumers of
Electrical & Electronic Equipment.
This mark on a product and/or accompanying documents indicates that when it
is to be disposed of, it must be treated as Waste
Electrical & Electronic Equipment, (WEEE).
Any WEEE marked products must not be mixed with general household waste,
but kept separate for the treatment, recovery and recycling of the materials used.
For proper treatment, recovery and recycling; please take all WEEE marked
waste to your Local Authority Civic waste site,
where it will be accepted free of charge.
If customers dispose of Waste Electrical & Electronic Equipment correctly, they
will be helping to save valuable resources and preventing any potential negative
effects upon human health and the environment, of any hazardous materials that
the waste may contain.

13

14

15
f

16
é
1. Alimenté par 1 pile lithium 3V CR2032
2. Touch On/Tare
3. Touch On/Tare
4. Extinction manuelle : pressez maintenanez la touche pendant deux secondes.
5. Poids minimum: 5 g
6. Poids maximum: 5000 g (5 kg) / 11 lb
7. Valeur maximale: 5300g
8. Graduation: 1 g, 0.1 oz, 0.05 oz, 1 ml
9. Unité de mesure : pressez la touche pour changer en g, lb, oz, ml.
10. Mesure automatique: allumez la balance et l'affichage indiquera 0 g. L'unité de
mesure par défaut est le gramme.
11. Indication minimale: 0 g - 0:0.0 lb:oz - 0.00 oz - 0 ml
12. Message d'erreurs:
Indicateur de surcharge
Pile à moitié vide
Pile vide
Indicateur de poids instable:
13. Indicateur de poids négatif : symbole -
14. Fonction tare pour mesurer des ingrédients dans un récipient

17
Changement des piles
Unités de mesure
Ce produit fonctionne avec une pile lithium (3V CR2032). Retirez la
languette placée sous la pile lors de votre première utilisation.
Pour installer une nouvelle pile, retirez le couvercle de la pile, placez la
nouvelle pile avec la borne + vers l'extérieur. Replacez le couvercle, votre
balance est prête à l'utilisation.
Vous pouvez modifier l'unité de mesure souhaitée à tout moment en
pressant la touche (g, lb, oz). La balance suit cette fréquence: gramme >
livre liquide > once liquide > millilitre.

18
Utilisation de la balance
Fonction Tare (remise à zéro)
1) Placez la balance sur une surface plate et dure (une table ou un plan de travail
par exemple). Evitez les surfaces douces car la précision ne sera autrement plus
garantie.
2) Allumez la balance en pressant la touche « ON », l’affichage LCD s’initialisera.
3) La balance s’allumera et l’affichage LCD indiquera « 0 g ». Modifiez l’unité de
mesure souhaitée en pressant la touche « unit ».
4) Placez les ingrédients sur la balance, le poids s’affichera automatiquement.
5) Retirez les ingrédients une fois la mesure achevée.
6) La balance s’éteint automatiquement après une période de 60 secondes. Vous
pouvez éteindre la balance à n’importe quel moment en pressant la touche
pendant deux secondes.
7) Si la balance s’éteint automatiquement, pressez la touche « ON » pour
rallumer la balance.
La touche Tare est une fonction pratique qui permet de remettre à zéro la mesure
du poids. Ceci permet donc d’ajouter de nouveaux ingrédients et de recommencer
la pesée à 0. Cette fonction permet également de placer un récipient, de remettre la
pesée à zéro puis de commencer la pesée des ingrédients.
Afin d’utiliser cette fonction, placez un récipient vide sur la balance puis
pressez la touche « ON ». La balance s’allumera et indiquera 0 g.

19
Ajoutez les ingrédients à peser. La mesure affichée représente le poids des
ingrédients placés dans le récipient.
Note : lorsque vous enlevez le récipient de la balance, l’affichage LCD
indiquera un poids négatif (le symbole – s’affichera sur la gauche de l’écran).
Pour réinitialiser la balance, pressez simplement la touche
Si la balance est déjà allumée, pressez la touche … afin que l’affichage se
remette à zéro. L’affichage indiquera « TARE » sur la gauche de l’écran.

20
Indicateur de batterie faible
Indicateur de poids instable
Si le symbole « LO » s’affichage sur l’écran, la pile de la balance est vide et
doit être remplacée rapidement. Veuillez disposer des piles usagées en
suivant les règles environnementales qui s’appliquent dans votre localité.
Un indicateur avancé de faible avancé s’affiche lorsque la pile est à moitié
vide.
Si le symbole « unSt » s’affichage sur l’écran, le poids des ingrédients n’est
pas stabilisé or la balance n’est pas placée sur une surface plate et stable.
Placez la balance sur une surface plate et stable puis essayez de nouveau.
Other manuals for KS1055
1
Table of contents
Languages:
Other Duronic Scale manuals

Duronic
Duronic KS3000 User manual

Duronic
Duronic KS350 User manual

Duronic
Duronic KS1009 User manual

Duronic
Duronic KS350 User manual

Duronic
Duronic LS1008/B User manual

Duronic
Duronic BS901 User manual

Duronic
Duronic KS1080 User manual

Duronic
Duronic KS1009 User manual

Duronic
Duronic BS504 User manual

Duronic
Duronic KS6000 User manual

Duronic
Duronic BS603 User manual

Duronic
Duronic BS801 User manual

Duronic
Duronic BS601 User manual

Duronic
Duronic KS7000 User manual

Duronic
Duronic KS4000 User manual

Duronic
Duronic BS701 User manual

Duronic
Duronic BS301 User manual

Duronic
Duronic KS100 BK User manual

Duronic
Duronic BS503 User manual

Duronic
Duronic KS4000 User manual