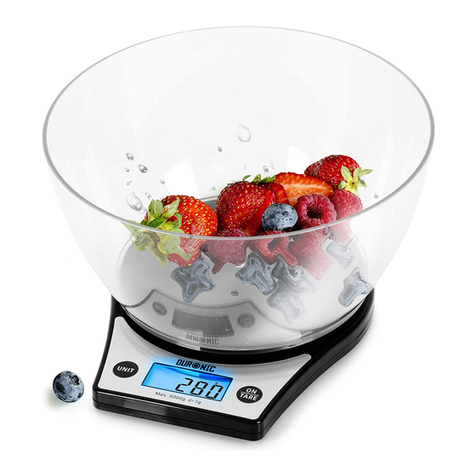
Duronic KS4000 User manual

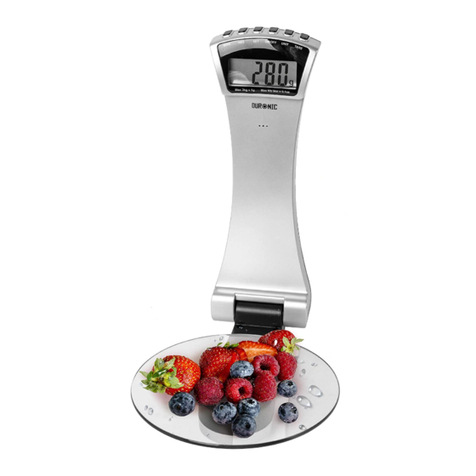
KS4000 - Kitchen Scale
PLEASE READ ALL THE INSTRUCTIONS BEFORE USE

2

3
English Manual
Manuel d’utilisation en Français
Gebrauchsanleitung auf Deutsch
Manual de Instrucciones en Español
Manuale D’istruzioni In Italiano
Instrukcja obsługi. Polski
Gebruikershandleiding in Nederlands
4
9
14
19
24
29
34
Contents

4
English Manual

5
Features and Specications
Model Batteries Minimum
Weight
Maximum
Weight
Units Graduation
KS4000 2 x AAA 5g 3kg / 6.6lb g / lb / oz 1g / 0.1oz
Installation
1. Make two holes in the wall, ensuring that they are the same distance to each other
as the mounting holes on the back of the mounting bar.
2. Insert 2 raw plugs into the wall
3. Place the mounting bar onto the wall over ensuring the holes align with each other.
4. Carefully x the bar to the wall using 2 screws.
5. Then x the scale onto the top of the mounting bar.
• ON/TARE button
• UNIT button
• TARE button
• SET button
• HRS button
• MINS button
• Weighing platform
• Clock and Timer

6
Batteries
Replacing the batteries
Remove the cover of the battery compartment on the back of the scale.
Take out the old batteries and and replace with 2 new ones, ensuring that they are
positioned according to the correct polarities +/-.
Fix the back cover back on top of the battery compartment.
When discarding of old unwanted batteries, it is important to follow local recycling
guidelines to ensure they are disposed of safely and responsibly.
Setting the Clock
When the batteries are inserted, the time will need to be reset. On the digital display it
will ash “TM” to show it is in Time Setting Mode.
To set the time:
1. Press the “HRS” button to select the hour gure.
2. Press the “MIN” button to select the minute gure.
3. Press the “SET” button once to conrm the time you have selected, and the “TM” will
stop ashing.
4. The display will only show in the Time Setting Mode for 20 seconds if there is no
operation.
Note: 24hr clock display format will be shown only when the grams (g) unit is selected.
12hr clock display format will be shown only when the pounds (lb) unit is selected.
Setting the Timer
1. Press the “SET” button to enter the Timer Mode, the display will then show “0:00”
and “TMR”.
2. Press and hold the “SET” button for 2 seconds to enter the Timer Set Mode and
‘TMR’ will ash.
3. Press the “HRS” button to adjust the hour gure.
4. Press the “MIN” button to adjust the minute gure.
5. Press the “SET” button once to conrm and ‘TMR’ will stop ashing. The time will
now begin counting down.
6. When the time counting has fnished, you will hear a beeping for 20
seconds. 7. Press “HRS” or “MIN” or “SET” to stop the alarm.
8. The scale will return to Clock Mode 40 seconds after the
alarm.
Using the Scale
To Weigh
1. Place your scale in an upright position.
2. Press the ON/OFF button to switch on the scale.
3. Wait until the screen display shows
“0.0”
4. Press UNIT button to select the desired unit.

7
5. Place the item you wish to weigh on the round glass platform.
6. The weight will be displayed.
7. The scales will return to Clock Mode automatically after 60 seconds of inactivity.
To Add and Weigh
To weight several different ingredients in the same bowl as each other, press the
TARE button between each ingredient to reset the scale.
Automatic Switch Off
The scale will automatically switch off after 60 seconds of no use.
Manual Switch Off
You can manually switch the scale off at any time by pressing the ON/OFF button.
Warning Indicators
Cleaning and Care
The scale is not waterproof, therefore should not be exposed to moisture or submerged
under water.
To clean the scale, use a slightly damp cloth to wipe over it. Do not use any chemical or
abrasive cleaning products to clean the scale.
If you plan to not use the scale for a long time, remove the batteries before storing
away.
Low battery
This symbol gives advance warning
that the battery will run out soon. It’s
time to change the batteries.
Error
This means the weight is not stabi-
lised.
Check that the scale is level, press
TARE and start to weigh again.
Overload
This means that the maximum weight
limit has been exceeded. Remove
some ingredients to prevent damag-
ing the scale.

8
Warranty
1 Year Guarantee from Shine-Mart Ltd, Trademark owners of Duronic Products.
NOTE: THESE STATEMENTS DO NOT AFFECT YOUR STATUTORY RIGHTS AS A
CONSUMER
This product has been manufactured under the strictest or quality control procedures, and
using the highest quality of materials, to ensure excellent performance and reliability. It will
give very good and long lasting service, provided it is properly used and maintained. The
product is guaranteed for 1 years from the date of original purchase. If any defect arises due
to a faulty materials or poor workmanship, the faulty product must be returned to the original
place of purchase. Refund or replacement is at the discretion of that company.
Duronic Products are offered with a 1 year guarantee under the following conditions:
1. The product must be returned to the retailer with original proof of purchase.
2. The product must be installed and used in accordance with the instructions
contained in this operating manual.
3. It must be used only for domestic purposes.
4. It does not cover wear and tear, malicious damage, misuse, neglect,
inexpert repairs or consumable parts.
5. Shine-Mart Ltd has no responsibilities for accidental or consequential loss or damage.
6. Shine-Mart Ltd are not liable to carry out any type of servicing work,
under the guarantee
7. Valid in the UK only
This product is tted with CE:1363 plug and fuse
Imported by Shine-Mart Ltd, RM3 8SB
Information on waste Disposal for Consumers of
Electrical & Electronic Equipment.
This mark on a product and/or accompanying documents indicates that when it
is to be disposed of, it must be treated as Waste
Electrical & Electronic Equipment, (WEEE).
Any WEEE marked products must not be mixed with general household waste,
but kept separate for the treatment, recovery and recycling of the materials used.
For proper treatment, recovery and recycling; please take all WEEE marked
waste to your Local Authority Civic waste site,
where it will be accepted free of charge.
If customers dispose of Waste Electrical & Electronic Equipment correctly, they
will be helping to save valuable resources and preventing any potential negative
effects upon human health and the environment, of any hazardous materials that
the waste may contain.

9
Manuel d’utilisation en Français

10
Caractéristiques
Modèle Batteries Poids
minimum
Poids
maximum
Unités
de poids
Graduation
KS4000 2 x AAA 5 g 3 kg / 6.6 lb g / lb / oz 1g / 0.1oz
Installation
1. Percez deux trous dans le mur en vous assurant qu’ils soient à la même distance
l’un de l’autre que les trous à l’arrière de la barre de montage.
2. Insérez deux chevilles dans le mur.
3. Placez la barre de montage sur le mur en vous assurant à nouveau que les trous
soient alignés les uns avec les autres.
4. Fixez la barre au mur à l’aide de deux vis.
5. Fixez la balance sur le dessus de la barre de montage.
• Bouton ON/OFF
• Bouton UNIT
• Bouton TARE
• Bouton SET
• Bouton HRS
• Bouton MINS
• Plateforme de pesée
• Horloge et minuteur

11
Batteries
REMPLACER LES PILES
Retirez le couvercle du compartiment à pile à l’arrière de la balance. Enlevez les
anciennes piles et remplacez-les avec deux nouvelles en vous assurant que les
pôles +/- soient correctement placés. Remettez le couvercle du compartiment à
pile en place.
Lorsque vous jetez de vieilles piles et batteries, il est important de suivre les règles
de recyclage locales afin qu’elles soient disposées en tout sécurité et
responsablement.
Programmer l’horloge
Lorsque les piles sont insérées, l’heure doit être reprogrammée. Sur l’écran digital,
l’indication « TM » clignotera pour signifier que le mode de programmation de
l’heure est activé.
Pour régler l’horloge :
1. Appuyez sur le bouton « HRS » pour sélectionner le chiffre de l’heure.
2. Appuyez sur le bouton « MIN » pour sélectionner le nombre des minutes.
3. Appuyez sur le bouton « SET » pour confirmer l’heure sélectionnée et l’indication
« TM » arrêtera de clignoter.
4. L’écran n’affichera le mode de programmation de l’heure que pendant 20
secondes si aucune opération n’est réalisée.
À noter : Le format 24H n’est affiché que lorsque l’unité de poids « grammes (g) »
est sélectionnée. Le format 12H n’est affiché que lorsque l’unité de poids « livres
(lb) » est sélectionnée.
Programmer le minuteur
1. Appuyez sur le bouton « SET » pour entrer le mode de minuterie, l’écran affichera
alors « 0:00 » et « TMR ».
2. Maintenez enfoncé le bouton « SET » pendant 2 secondes pour entrer le mode de
programmation de la minuterie et l’indication « TMR » commencera à clignoter.
3. Appuyez sur le bouton « HRS » pour sélectionner le chiffre de l’heure.
4. Appuyez sur le bouton « MIN » pour sélectionner le nombre des minutes.
5. Appuyez une fois sur le bouton « SET » pour confirmer et l’indication « TMR »
arrêtera de clignoter. Le minuteur comment alors à décompter le temps.
6. Une fois le compteur terminé, un signal sonore se fait entendre pendant 20
secondes.
7. Appuyez sur « HRS », « MIN » ou « SET » pour éteindre l’alarme.
8. La balance retombera sur le mode horloge 40 secondes après l’alarme.
Utiliser la balance
POUR PESER
1. Placez la balance en position verticale.
2. Appuyez sur le bouton « ON/OFF » pour allumer la balance.
3. Attendez que l’écran affiche « 0.0 ».
4. Appuyez sur le bouton « UNIT » pour sélectionner l’unité de poids désirée.

12
5. Placez l’élément que vous souhaitez peser sur la plateforme ronde en verre.
6. Le poids sera affiché.
7. La balance retournera sur le mode horloge automatiquement après 60 secondes
d’inactivité.
POUR AJOUTER DU POIDS ET LE PESER
Pour peser différents ingrédients dans le même contenant, appuyez sur le bouton
« TARE » entre chaque ingrédient pour remettre la balance à 0.
ARRÊT AUTOMATIQUE
La balance s’éteint automatiquement après 60 secondes sans être utilisée.
ARRÊT MANUEL
Vous pouvez éteindre manuellement la balance quand vous le souhaitez en appuyant
sur le bouton « ON/OFF ».
Indicateurs d’avertissement
Nettoyage et maintenance
La balance n’est pas résistante à l’eau et ne devrait donc pas être exposée à
l’humidité ou submergée sous l’eau.
Pour nettoyer la balance, utilisez un tissu légèrement humide. N’utilisez pas de
produits chimiques ou abrasifs pour la nettoyer.
Si vous n’avez pas l’intention d’utiliser la balance pendant un moment, retirez
les piles avant de la ranger.
Batterie faible
Ce symbole vous avertit que les
batteries seront bientôt faibles. Il est
temps de les changer.
Erreur
Cela signifie que le poids n’est pas
stabilisé.Vérifiez que la balance est
à niveau, appuyez sur « TARE » et
pesez à nouveau.
Surcharge
Cela signifie que la capacité
maximale a été dépassée. Retirez
quelques ingrédients pour ne pas
endommager la balance.

13
Garantie et service après-vente
1 an de garantie de la part de Shine-Mart Ltd, propriétaire de la marque Duronic.
NOTE : CES DÉCLARATIONS N’AFFECTENT EN RIEN VOTRE DROIT STATUTAIRE EN
TANT QUE CONSOMMATEUR
Ce produit a été produit en suivant les procédures de contrôle de qualité les plus strictes en
utilisant des matériaux de qualité pour assurer une excellente durabilité et performance.
Cette centrifugeuse vous offrira de longues années de service tant que vous utilisez
correctement cette machine et suivez les instructions de maintenance contenues dans ce
manuel. Ce produit est garanti pour 1 an à partir de la date originelle d’achat. Si ce produit
était endommagée en raison d’un problème électrique ou d’une fabrication imparfaite,
le produit défectueux peut être remplacé au vendeur à la discrétion de la marque sous
conditions:
1. Le produit doit être retourné avec la preuve originale d’achat.
2. Le produit doit être installé et utilisé en accord avec les instructions contenues
dans ce manuel d’utilisation.
3. Le produit doit être réservé à un usage privé.
4. La garantie ne protège pas contre les dommages dus à l’usure normale,
l’utilisation malveillante, la mauvaise utilisation, la négligence, les réparations
conduites par des non-experts ainsi que les pièces consommables.
5. Shine-Mart Ltd ne porte pas de responsabilité pour tout dommage ou perte
accidentel ou conséquent causé par ce produit.
6. Shine-Mart Ltd se dégage de toute responsabilité en matière de réparation
durant la période de garantie.
7. Valide dans toute l’Union Européenne.
Ce produit est fourni avec une prise européenne
et un fusible de 3 ampères.
Importé par Shine-Mart Ltd, RM3 8SB.
Ce symbole apparaît sur le produit et/ou les documents accompagnant ce
produit pour indiquer que pour procéder à la destruction de ce produit, celui-ci
doit être traité comme un déchet électrique et électronique (WEEE).
Les produits marqués WEEE ne doivent être mélangés avec les déchets
ménagers et doivent être séparés pour traitement et recyclage des composants.
An de traiter et recycler ce produit, veuillez déposer tous les composants
marqués WEEE au site de recyclage le plus proche où ce produit sera repris
gratuitement. Si les clients jettent les déchets électriques et électroniques
WEEE correctement, ce geste aidera la préservation de ressources précieuses
et prévient les potentiels effets négatifs que ces composants ou tout autre
composant dangereux ont sur la santé humaine et l’environnement.
Garantie
suivez nous
www.duronic.com @Duronic_FranceDuronic France@duronic_france

14
Gebrauchsanleitung auf Deutsch

15
Merkmale und Spezifikationen
Modell Batterien Mindest-
gewicht
Maximales-
gewicht
Maßeinheit Einheit
KS4000 2 x AAA 5g 3kg / 6.6lb g / lb / oz 1g / 0.1oz
Installation
1. Boren Sie zwei Löcher in die Wand und achten Sie darauf, dass sie den
gleichen Abstand zueinander haben wie die Befestigungslöcher auf der Rückseite
der Montagestange.
2. Stecken Sie 2 Dübel in die Wand
3. Platzieren Sie die Montagestange an der Wand und achten Sie darauf, dass die
Löcher miteinander einstimmen.
4. Befestigen Sie die Stange vorsichtig mit 2 Schrauben an der Wand.
5. Befestigen Sie dann die Waage auf der Montagestange.
• EIN/TARE Taste
• UNIT Taste
• TARE Taste
• SET Taste
• HRS Taste
• MINS Taste
• Wiegeplatte
• Zeit und Timer

16
Batterien
Ersetzen der Batterien
Entfernen Sie die Abdeckung des Batteriefachs an der Unterseite der Waage.
Nehmen Sie die alten Batterien heraus und ersetzen Sie sie durch 2 neue.
Achten Sie dabei darauf, dass sie den richtigen Polaritäten +/- entsprechen.
Setzen Sie die hintere Abdeckung wieder auf am Batteriefach.
Beim Entsorgen alter Batterien ist es wichtig, die Recyclingrichtlinien zu
befolgen, um sicherzustellen, dass diese sicher und verantwortungsbewusst
entsorgt werden.
Uhr einstellen
Wenn die Batterien eingesetzt werden, muss die Zeit eingestellt werden. Auf der
Digitalanzeige wird „TM“ angezeigt, um anzuzeigen, dass die Waage sich im
Zeiteinstellungsmodus befindet.
So stellen Sie die Uhrzeit ein:
1. Drücken Sie die Taste „HRS“, um die Stunden auszuwählen.
2. Drücken Sie die Taste „MIN“, um die Minuten auszuwählen.
3. Drücken Sie einmal die Taste „SET“, um die von Ihnen gewählte Zeit zu
bestätigen.
4. Das Display wird im Zeiteinstellungsmodus nur 20 Sekunden lang angezeigt,
wenn keine Operation ausgeführt wird.
Hinweis: Das 24-Stunden Format wird nur angezeigt, wenn die Gramm (g) Einheit
ausgewählt ist. Das 12-Stunden Format wird nur angezeigt, wenn die Einheit Pfund
(lb) ausgewählt ist.
Timer einstellen
1. Drücken Sie die Taste „SET“. Auf dem Display wird „0:00“ und „TMR“
angezeigt.
2. Halten Sie die SET Taste 2 Sekunden lang gedrückt, um den Timer-Einstellmodus
aufzurufen, und TMR wird aktiviert.
3. Drücken Sie die Taste „HRS“, um die Stundenzahl auszuwählen.
4. Drücken Sie die Taste „MIN“, um die Minutenzahl auszuwählen.
5. Drücken Sie einmal die Taste "SET", um zu bestätigen.
6. Nach Ablauf der Zeitzählung hören Sie 20 Sekunden lang einen Piepton.
7. Drücken Sie „HRS“ oder „MIN“ oder „SET“, um den Alarm zu stoppen.
8. Die Waage kehrt 40 Sekunden nach dem Alarm in den Uhrmodus zurück.
Verwendung
Wiegen
1. Stellen Sie Ihre Waage aufrecht auf.
2. Drücken Sie die EIN / AUS-Taste, um die Waage einzuschalten.
3. Warten Sie, bis auf dem Bildschirm „0.0“ angezeigt wird.
4. Drücken Sie die UNIT-Taste, um die gewünschte Einheit auszuwählen

17
Tara-Funktion
Die Tara-Funktion erlaubt, in jedem Moment das Display der Waage auf Null
zurückzustellen und die Tara eines eventuellen Tellers oder mehr Wiegevorgänge,
ohne die bereits gewogenen Zutaten zu entfernen, auszuführen.
Automatische Abschaltfunktion
Die Waage schaltet sich nach 60 Sekunden automatisch aus.
Manuelles Ausschalten
Sie können die Waage jederzeit manuell ausschalten, indem Sie die Taste "ON /
OFF" drücken.
PROBLEME UND LÖSUNGEN
Reinigung und Pflege
Stellen Sie bitte sicher, dass sie auf einer trockenen, ebenen Oberfläche verwendet
wird.
Die Waage ist nicht wasserdicht und sollte daher keiner Feuchtigkeit ausgesetzt oder
unter Wasser getaucht werden.
Wenn Sie die Waage längere Zeit nicht benutzen, entfernen Sie die Batterien,
bevor Sie sie aufbewahren.
Niedriger Batteriestatus
Dieses Symbol warnt vorab, dass
die Batterie bald leer sein wird.
Error
Dies bedeutet, dass das Gewicht
nicht stabilisiert ist.
Überlast
Dies bedeutet, dass die maximale
Gewichtsgrenze überschritten
wurde.
5. Legen Sie den Gegenstand, den Sie wiegen möchten, auf die runde Glasplattform.
6. Das Gewicht wird angezeigt.
7. Die Waage kehrt nach 60 Sekunden Inaktivität automatisch in den Uhrmodus zurück.

18
Shine-Mart Ltd, der Markeninhaber von Duronic Produkten, bietet 1 Jahr Gewährleistung.
HINWEIS: DIESE BEDINGUNGEN BEEINFLUSSEN IHRE GESETZLICHE RECHTE ALS
VERBRAUCHER NICHT
Dieses Produkt wurde unter strengen Qualitätskontrollen produziert und aus hochwertigen
Materialien hergestellt, um ausgezeichnete Leistung und Zuverlässigkeit zu gewährleisten.
Sofern das Produkt korrekt benutzt und gewartet wird, kann eine langlebige Lebensdauer
erwartet werden.
Das Produkt hat eine Gewährleistung von einem Jahr ab Kaufdatum. Beim Auftreten eines
Schadens, der von fehlerhalten Materialien oder Verarbeitung verursacht wurde, sollte das
defekte Produkt an den ursprünglichen Verkäufer zurückgegeben werden. Die Erstattung
oder Umtausch erfolgt nach Vorschriften des Unternehmens.
Duronic Produkte haben 1 Jahr Gewährleistung unter folgenden Bedingungen:
1. Das Produkt muss mit dem Kaufnachweis zurückgegeben werden.
2. Das Produkt muss unter den Anweisungen und Anleitungen installiert und benutzt
worden sein.
3. Es muss ausschließlich für den Hausgebrauch genutzt worden sein.
4. Natürliche Abnutzung oder Verschleiß, böswillige Beschädigung, Missbrauch,
Vernachlässigung und unsachgemäße Reparaturen sind von der Gewährleistung
ausgeschlossen.
5. Shine-Mart Ltd übernimmt keine Verantwortung für zufällige oder Folgeschäden.
6. Shine-Mart Ltd ist nicht für Wartungsarbeiten zuständig. Diese fallen nicht unter die
Gewährleistung.
7. Gültig in der EU
Dieses Produkt ist mit tted CE geprüfte Typ-F
Euro Stecker/BS Stecker ausgestattet
Von Shine-Mart Ltd, RM3 8SB importiert
Information über Abfalllagerung für Verbraucher von elektronischen Geräten.
Dieses Zeichen auf dem Produkt und/oder auf mitgelieferte Dokumenten
zeigt, dass, wenn eine Entsorgung erfolgt, das Gerät an einer Elektro- und
Elektronikgeräte-Abfall-Sammelstelle (WEEE) abgegeben werden muss.
Um eine weitere Behandlung und Weiterverarbeitung der Materialien zu
gewährleisten dürfen diese WEEE-markierten Produkte nicht mit dem Hausmüll
vermischt werden.
Für die korrekte Behandlung, Aufbereitung und Wiederverwendung geben Sie
alle WEEE-markierten Produkte zur kommunalen Abfallbeseitigungsanlage.
Dort können Sie diese kostenlos abgeben.
Wenn die Beseitigung von Elektro-und Elektronik-Altgeräten korrekt
durchgeführt wird, tragen Sie zur Gewinnung von wertvollen Ressourcen
bei, sowie einer möglichen Vermeidung von negativen Auswirkungen auf
Gesundheit und Umwelt.
Gewährleistung
Folgen Sie Uns

19
Manual De Instrucciones En Español

20
Características y especificaciones
ModeloPilas Peso
mínimo
Peso
máximo
Unidad
de
medición
Graduación
KS4000 2 x AAA 5g 3kg / 6.6lb g / lb / oz 1g / 0.1oz
Instalación
1. Haga dos agujeros en la pared que estén a la misma distancia que los agujeros
de la parte posterior de la barra de montaje.
2. Inserte 2 tacos de plástico en la pared.
3. Instale la barra de montaje en la pared de manera que los agujeros coincidan.
4. Fije la barra en la pared con 2 tornillos.
5. A continuación, fije la balanza en la parte superior de la barra de montaje.
• Botón ON/TARA (encendido/tara)
• Botón UNIT (unidad)
• Botón TARE (tara)
• Botón SET (ajustes)
• Botón HRS (horas)
• Botón MINS (minutos)
• Plato de medición
• Reloj y tiempo
Other manuals for KS4000
1
Table of contents
Languages:
Other Duronic Scale manuals

Duronic
Duronic BS503 User manual

Duronic
Duronic KS6000 User manual

Duronic
Duronic KS1055 User manual

Duronic
Duronic KS1055 User manual

Duronic
Duronic BS901 User manual

Duronic
Duronic KS1009 User manual

Duronic
Duronic BS201 User manual

Duronic
Duronic KS1009 User manual

Duronic
Duronic BS504 User manual

Duronic
Duronic BS603 User manual

Duronic
Duronic BS301 User manual

Duronic
Duronic KS100 User manual

Duronic
Duronic BS401 User manual

Duronic
Duronic BS801 User manual

Duronic
Duronic BS601 User manual

Duronic
Duronic KS350 User manual

Duronic
Duronic KS100 BK User manual

Duronic
Duronic LS1008/B User manual

Duronic
Duronic KS7000 User manual

Duronic
Duronic KS3000 User manual