manuals.online logo
Brands
  1. Home
  2. •
  3. Brands
  4. •
  5. DXV
  6. •
  7. Plumbing Product
  8. •
  9. DXV Victorian D35402150 User manual

DXV Victorian D35402150 User manual

- 1 -
INSTALLATION INSTRUCTIONS
SAVE FOR FUTURE USE
Product names listed herein are trademarks of AS America, Inc.
© AS America, Inc. 2017
In the United States:
DXV
One Centennial Avenue
Piscataway, New Jersey 08855
Attention: Director of Customer Care
For residents of the United States, warranty
information may also be obtained by calling
the following toll free number: (800) 227-2734
www.DXV.com
In Canada:
DXV
5900 Avebury Road
Mississauga, Ontario
L5R 3M3
Canada
Toll Free: 1-800-387-0369
Local: 905-306-1093
Fax: 1-800-395-1498
www.DXV.ca
In Mexico:
DXV
Via Morelos 330
Col. Santa Clara Coatitla
Ecatepec, Estado de México 55540
Toll Free: 01-800-8391200
www.DXV.mx
Thank you for selecting DXV. To ensure that your installation
proceeds smoothly, please read these instructions carefully
before you begin.
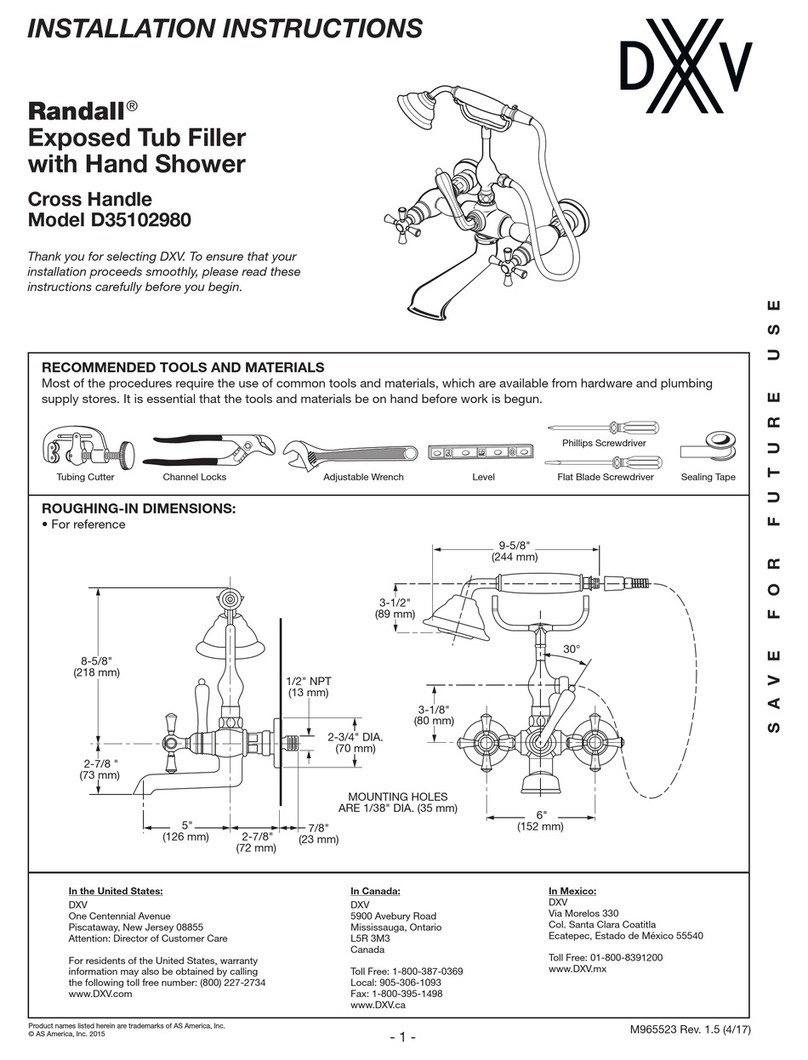
RECOMMENDED TOOLS AND MATERIALS
Most of the procedures require the use of common tools and materials, which are available from hardware and plumbing
supply stores. It is essential that the tools and materials be on hand before work has begun.
M965536 Rev. 1.7 (4/17)
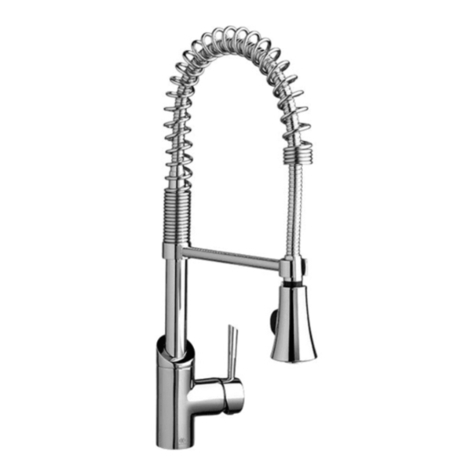
Single Control Faucet
Model D35402150
Victorian
Single Control Kitchen Faucet
with Pull-Out Spray
ROUGHING-IN DIMENSIONS:
• For reference
Plumbers' Putty or CaulkingAdjustable Wrench
Phillips Screwdriver
Channel Locks Flat Blade Screwdriver
NOTE: Bore hole size is 1-3/8"
SPRAY HOSE
WEIGHT
9-1/8"
(232mm)
4-1/8"
(105mm)
1-1/8"
(29mm)
11-3/8"
(289mm)
3/8"
COMPRESSION
2-1/4" D.
(57mm)
2-3/16"
(53.8mm)
- 2 - M965536 Rev. 1.7 (4/17)
1INSTALL FITTING
• Make certain the O-RING (2) is properly seated in recess of FAUCET BASE (3).
• Insert HOSES (4) and SHANK (9) through center hole of sink or mounting surface.
• Assemble three BRASS SCREW (8) into the FIXATION RING (7).
• Assemble SUPPORT PLATE (5) METAL WASHER (6), and
FIXATION RING (7) onto SHANK (10) from underside of sink.
Hand tighten the FIXATION RING (7) and check that
FAUCET (1) is centered.
• Use a screwdriver to tighten SCREWS (8) on FIXATION RING (7).
Work your way around FIXATION RING (7), tightening the SCREWS (8)
slightly each time until all are snug to ensure even pressure.
CAUTION Turn off hot and cold wate
supplies before beginning.
5
86
7
4
9
2
3
1
- 3 -
1
4
5
HOT
COLD
2
3
SUPPLY STOPS
6
7
M965536 Rev. 1.7 (4/17)
4
3
TEST INSTALLED FAUCET
MAKE WATER SUPPLY CONNECTIONS
• Move HANDLE (1) into “off” position.
• Turn on water supplies and check all connections for leaks.
• Pull HAND SPRAY (2) from HOLDER (3) and disconnect HAND SPRAY (2).
Pull HOSE (4) (HOSE should pull approximately 2 feet)and direct open HOSE END (4) into sink.
• Operate handle, in COLD and HOT positions, to ush water lines thoroughly.
• Connect HAND SPRAY (2) to HOSE END (4).
Place HAND SPRAY (2) back into faucet, operate
HANDLE (1) and check all connections for leaks.
• Check HAND SPRAY (2) operation with
faucet on, push front of LEVER (5) for
a broad cleansing spray.
TROUBLE SHOOTING
Low water flow from faucet:
• Remove check valve assembly and check
fordebris. Clean if necessary.
• Remove back ow preventer from spray head
and clean if necessary.
• Remove AERATOR (6) and clean if necessary.
Pull-Out Spray will not remove from faucet freely:
• Check that pull-out spray hose is not obstructed with
plumbingconnections or ttings under faucet.
• Make sure hose is not twisted or bound in faucet body.
• Turn off hot and cold water supplies before beginning.
• Connect FLEXIBLE SUPPLIES (6, 7) directly to wall supplies.
Connection on tting supplies are 3/8" compression. Connect
left supply (Marked Red) to Hot and right supply (Marked Blue)
to Cold wall supply. Use adjustable wrench to tighten connections.
Do not over tighten.
• Faucet supplies are 21" long from faucet base.
Note: If additional supply length is required, installer must
purchaseadditional parts separately.
Important: If SUPPLY HOSES (6, 7) are too long,
loop asillustrated to avoid kinking.
2CONNECT SPRAY HOSE
• Slide COUPLING NUT (1) of SPRAY HOSE (2) onto end of OUTLET (3).
Tighten with wrenchesto make a water tight connection.
• With HAND SPRAY seated in faucet body,install WEIGHT (4) onto HOSE (2)
using two SCREWS (5). Locate the WEIGHT (4) two feet (2') from the underside
of the sink deck.Tighten SCREWS (5) rmly.
CHECK
CONNECTIONS
FOR LEAKS
2
1
3
4
6
5
- 4 - M965536 Rev. 1.7 (4/17)
Replace the “YYY” with
appropriate finish code
POLISHED CHROME 100
CARBON BRONZE 110
ULTRA STEEL 355
Victorian
Single Control
Kitchen Faucet
with Pull-Out Spray
MODEL NUMBER
D35402150
M964666-YYY0A
SPOUT SUB-ASSEMBY
H962078.191
CARTRIDGE NUT
M964669-YYY0A
ESCUTCHEON KIT
H961342.XXX
HANDLE KIT
H962019.XXX
HANDLE FIXATION
M964406-0070A
CARTRIDGE
H961125.XXX
PULL-OUT SPRAY
M964395-0070A
WEIGHTS
M964954-1000A
NYLON SPRAY HOSE
WITH SEALS
M964667-0070A
MOUNTING KIT
M964668-YYY0A
DECORATIVE RING KIT
M921935-0070A
ADAPTOR

Other DXV Plumbing Product manuals

DXV Percy D35105104 User manual

DXV

DXV Percy D35105104 User manual

DXV Landfair D35107.840 User manual

DXV

DXV Landfair D35107.840 User manual

DXV Rem D35100330 User manual

DXV

DXV Rem D35100330 User manual

DXV Rem D3510045C User manual

DXV

DXV Rem D3510045C User manual

DXV Percy D3510584C User manual

DXV

DXV Percy D3510584C User manual

DXV AT100 Instruction Manual

DXV

DXV AT100 Instruction Manual

DXV 5004A User manual

DXV

DXV 5004A User manual

DXV Keefe D35104500 User manual

DXV

DXV Keefe D35104500 User manual

DXV Randall D35102.500 User manual

DXV

DXV Randall D35102.500 User manual

DXV Keefe D35104900 User manual

DXV

DXV Keefe D35104900 User manual

DXV Rem D35100510 User manual

DXV

DXV Rem D35100510 User manual

DXV D35403.410 User manual

DXV

DXV D35403.410 User manual

DXV Keefe D35104.430 User manual

DXV

DXV Keefe D35104.430 User manual

DXV Equility D35109500 User manual

DXV

DXV Equility D35109500 User manual

DXV Percy D35105870 User manual

DXV

DXV Percy D35105870 User manual

DXV Modulus D35120802 User manual

DXV

DXV Modulus D35120802 User manual

DXV Fitzgerald D35160760 User manual

DXV

DXV Fitzgerald D35160760 User manual

DXV Fitzgerald D35160802 User manual

DXV

DXV Fitzgerald D35160802 User manual

DXV Rem D35100900 User manual

DXV

DXV Rem D35100900 User manual

DXV Randall D35102.940 User manual

DXV

DXV Randall D35102.940 User manual

DXV Percy D35105840 User manual

DXV

DXV Percy D35105840 User manual

DXV EQUILITY D12536-004 User manual

DXV

DXV EQUILITY D12536-004 User manual

DXV Equility D2210AA109 User manual

DXV

DXV Equility D2210AA109 User manual
DXV OAK HILL D12025004.415 User manual
DXV

DXV OAK HILL D12025004.415 User manual

Popular Plumbing Product manuals by other brands

American Standard MONTERREY 7500 Series installation instructions

American Standard

American Standard MONTERREY 7500 Series installation instructions

Bristan W BTH12 C Fitting instructions

Bristan

Bristan W BTH12 C Fitting instructions

JADO IQ 823 303 Series installation instructions

JADO

JADO IQ 823 303 Series installation instructions

Billi Quadra user guide

Billi

Billi Quadra user guide

Moen 62320 installation guide

Moen

Moen 62320 installation guide

Moen 84576 Series manual

Moen

Moen 84576 Series manual

Grohe GROHTHERM 3000 COSMOPOLITAN 19 568 manual

Grohe

Grohe GROHTHERM 3000 COSMOPOLITAN 19 568 manual

Sunlighten mPulse Aspire Assembly instructions

Sunlighten

Sunlighten mPulse Aspire Assembly instructions

Lefroy Brooks CW-2153 Installation, operating,  & maintenance instructions

Lefroy Brooks

Lefroy Brooks CW-2153 Installation, operating, & maintenance instructions

Gessi OVALE 23099 manual

Gessi

Gessi OVALE 23099 manual

Hans Grohe 26272 Series Instructions for use/assembly instructions

Hans Grohe

Hans Grohe 26272 Series Instructions for use/assembly instructions

Toto NEOREST instruction manual

Toto

Toto NEOREST instruction manual

BELLOSTA UNO 2208/E Installation instruction

BELLOSTA

BELLOSTA UNO 2208/E Installation instruction

Symmons Allura Trim Series Installation & operation instructions

Symmons

Symmons Allura Trim Series Installation & operation instructions

VIGO VGR3620C manual

VIGO

VIGO VGR3620C manual

Brizo VETTIS T60 Series manual

Brizo

Brizo VETTIS T60 Series manual

Hansgrohe Axor Starck Series Instructions for use/assembly instructions

Hansgrohe Axor

Hansgrohe Axor Starck Series Instructions for use/assembly instructions

Sterling McAllister 11444-NA Specifications

Sterling

Sterling McAllister 11444-NA Specifications

manuals.online logo
manuals.online logoBrands
  • About & Mission
  • Contact us
  • Privacy Policy
  • Terms and Conditions

Copyright 2025 Manuals.Online. All Rights Reserved.