TEMPERATUREADJUSTMENT
YOUWILL NEED THEMS412 TEMPERATURE CALIBRATION
SYSTEMTO MONITORTEMPERATURE.
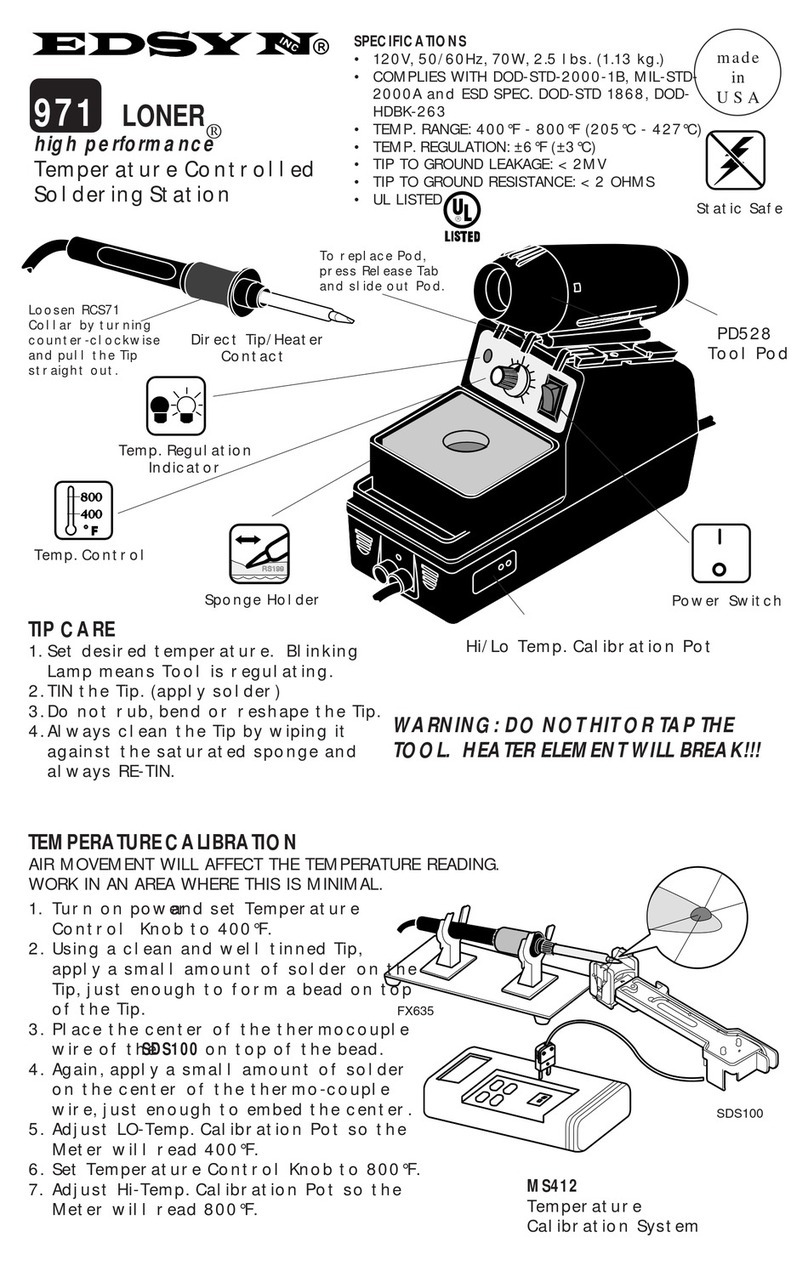
1. Loosen RC334 to expose Temp. Control Screw.
2. Using a clean and well-tinned tip do set up according to
illustration so that the thermocouple wire is hanging on
the tip.
3. Apply a small amount of solder on the Tip, just enough to
form a solder bead on top of the Tip. Place the center of
the thermocouple wire of the on top of the solder bead.
4. Again, apply a small amount of solder on the center of
the cross wire, just enough to embed the center.
5. Turn Temp. Control Screw clockwise to increase
temperature or counter-clockwise to decrease
temperature.
6. Tighten RC334.
Temp. Control (A) Calibration Pot (B)
SRF20
original handle
Tools Needed
•SRW01
•SRF20
•MS412
•Pot Adjustment Tool
Pot Adjustment Tool
SRF20
FX635
TI680 Meter
MS412 Temperature
Calibration System
TEMPERATURECALIBRATION
AIRMOVEMENT WILLAFFECT THE TEMPERATUREREADING.
WORK IN AN AREA WHERE THIS IS MINIMUM.
1. Use the SRW01 to pull out heater assembly, PCB & power cord from handle. Leave enough power cord slack
to install SRF20.
2. Place heater assembly, PCB & power cord inside SRF20. Install tip that is clean and well tinned.
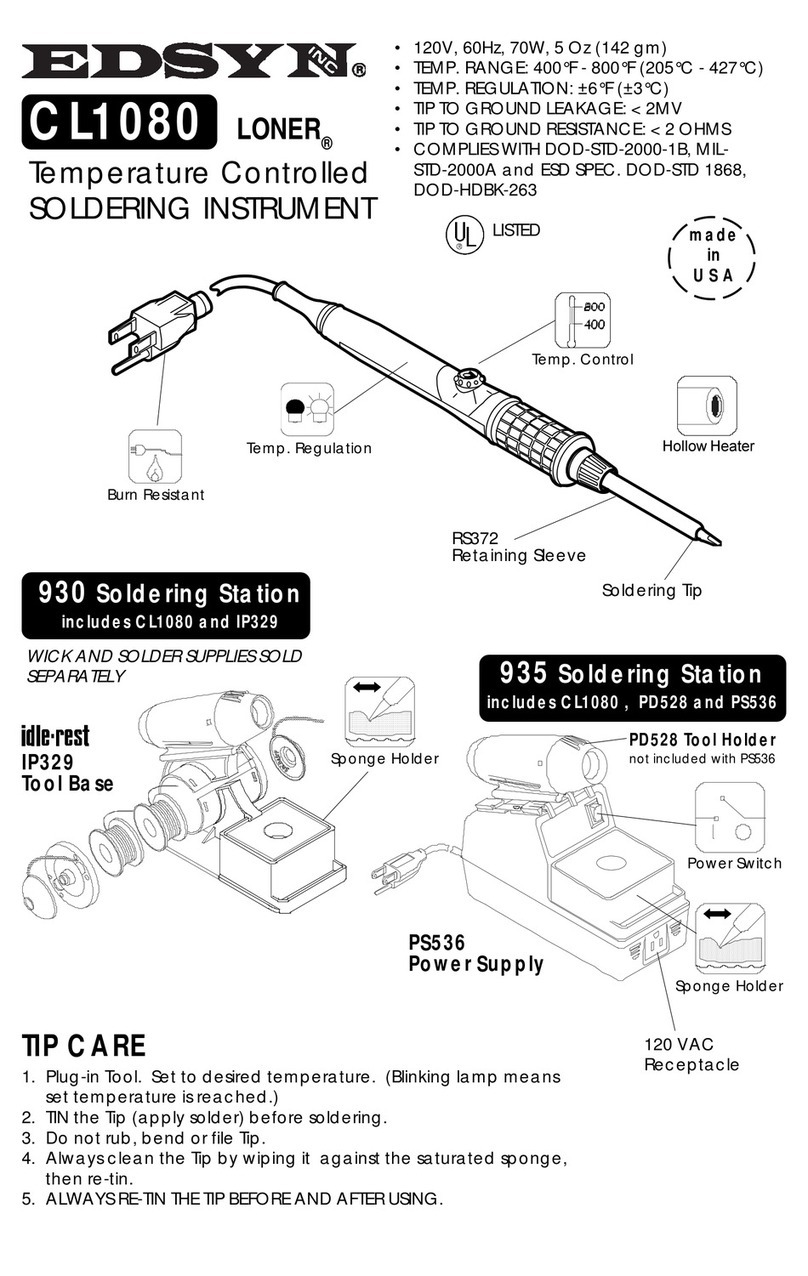
3. With the use of the MS412 Temperature Calibration System. Follow set-up shown below.
4. Plug in tool and by using the Pot Adjustment Tool supplied, turn Temp. Control (A) to "solder-melt" tempera-
ture.
5. Apply a small amount of solder on the Tip, just enough to form a solder bead on top of the Tip. Place the
center of the thermocouple wire of the on top of the solder bead.
6. Again, apply a small amount of solder on the center of the cross wire, just enough to embed the center.
7. Turn Temp. Control (A) fully clockwise. Adjust Calibration Pot (B) until reading stabilizes at 800°F.
8. Assemble unit in original handle.
ELECTRICALHAZARD
This should only be done by
qualified personnel.
SDS100
SRW01
SOLDERINGTIPS
Iron Plated for long life•Nickel and
Chrome Plated for optimum heat transfer
CONTACT EDSYN FOR MORE SELECTIONS ab
Large and heavy tip for
heavy duty soldering.
Fine point tip for SMD
soldering.
.03 (0.8 mm) .48 (12.2 mm)
.06 (1.5 mm) .48 (12.2 mm)
.02 (0.5 mm) 1.13 (28.8 mm)
.07 (2.0 mm) .93 (23.6 mm)
.03 (0.8 mm) .48 (12.2 mm)
.10 (2.5 mm) .74 (18.8 mm)
.06 (1.5 mm) 1.21 (30.7 mm)
.04 (1.0 mm) 1.21 (30.7 mm)
.20 (4.9 mm) .93 (23.6 mm)
.32 (8.3 mm) .97 (21.1 mm)
LT374 Standard Probe
LT375 Standard Spade
LT392 Extra-Long Needle Point
LT394 Extra-Long Spade
LT446 SMD Probe
LT337BC Heavy Duty Terminal Spade
LT223BC Heavy Duty Fine Spade
LT222BC Extra long Needle Point
LT153BH Jumbo Spade
LT155BH Jumbo Angle Spade
SET-UP & REQUIRED ACCESSORIES FOR HEAVY DUTY AND JUMBO TIPS
Apply AN112 or
AN122* Anti-Seize
Compound to
Heater and area of
Tip contact.
*AN122 Anti-Seize Compound comes in
syringe dispenser.
MAINTENANCE
• Replace RS199 Cleaning Sponge
1. Fill water only up to the top of the RS243 Leveling Pad.
2. Depress RS199 to moisten it completely.
• Replace SC581 Solder Collector
1. Hold the Housing firm and turn Cap counter-clockwise
and pull it away from the Housing.
2. Remove used SC581 and replace with a new one.
3. Reassemble Pod with TOP of the Cap in proper position.
LN230
SH230-1
RS243
RS199
CAUTION:
Over-filling can cause thermal shock to the tip or
heating element during tip cleaning.
SC581 SR043
Front Housing
SR042
Thermal Housing
TIP CLEANING To maintain proper Tip to Ground resistance.
1. Remove Tip from Heater Assembly.
2. Using a ST707 Soldering Tool Maintenance Brush, clean Tip and
Heater Barrel at surfaces shown.
If there is no gap, try replacing the RS372 Retaining
Sleeve.
3. Install the tip and tighten RS372 Retaining Sleeve.
Take note of the gap to ensure proper fitting.
gap
clean these areas
"BC"HEAVY DUTY TIP
AC735 TA350 JUMBOTIP RS351
RS271
