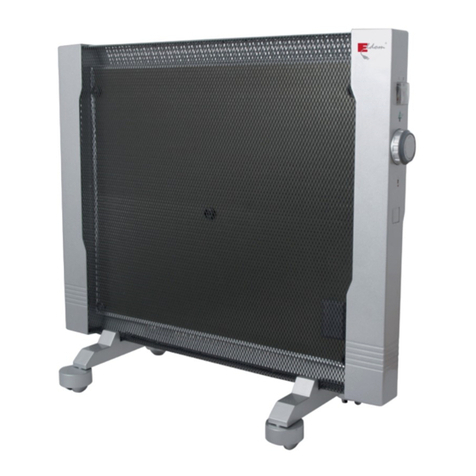
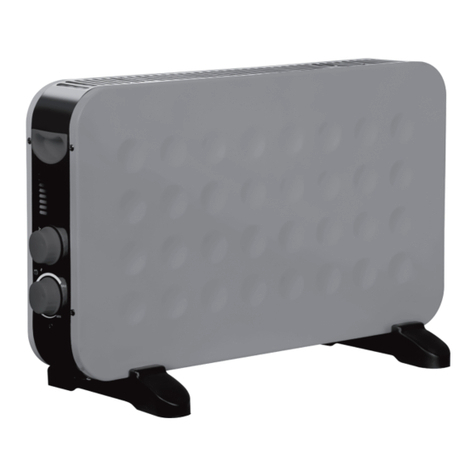
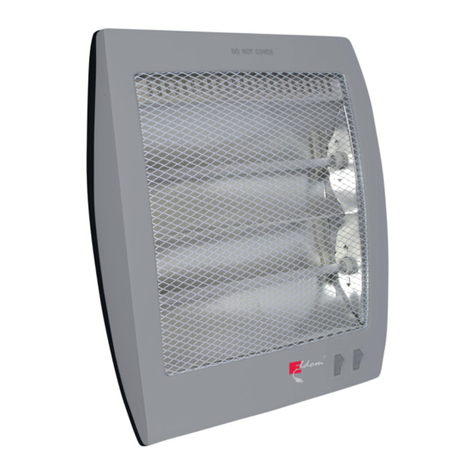
Eldom HC500C User manual

Eldom Sp. zo.o. •ul. Pawła Chromika 5a • 40-238 Katowice, POLAND
tel: +48 32 2553340 • fax: +48 32 2530412 • www.eldom.eu
HC500C
slab
/ PL / GRZEJNIK KONWEKTOROWO-RADIACYJNY / EN / CONVECTOR-RADIATION HEATER
/ DE / GLASKONVEKTOR / ES / CALEFACTOR CONVECTOR DE VIDRIO
/ RU /

/PL/ Usuwanie wyeksploatowanych urządzeń elektrycznych i elektronicznych (dotyczy krajów Unii Europejskiej iinnych krajów
europejskich zwydzielonymi systemami zbierania odpadów).
Ten symbol na produkcie lub jego opakowaniu oznacza, że produkt nie powinien być zaliczany do odpadów domowych. Należy go przekazać do
odpowiedniego punktu, który zajmuje się zbieraniem irecyklingiem urządzeń elektrycznych ielektronicznych. Prawidłowe usunięcie produktu
zapobiegnie potencjalnym negatywnym konsekwencjom dla środowiska naturalnego izdrowia ludzkiego wynikających zobecności substancji
niebezpiecznych wprodukcie. Urządzenie elektryczne należy oddać tak, aby ograniczyć jego ponowne użycie iwykorzystanie. Jeżeli wurządzeniu
znajdują się baterie należy je wyjąć ioddać do punktu składowania osobno. URZĄDZENIA NIE WRZUCAĆ DO POJEMNIKA NA ODPADY KOMUNALNE.
Recykling materiałów pomaga wzachowaniu surowców naturalnych. Aby uzyskać szczegółowe informacje orecyklingu tego produktu, należy się
skontaktować zwładzami lokalnymi, rmą świadczącą usługi oczyszczania lub sklepem, wktórym produkt został kupiony.
/EN/ The disposal of used electrical and electronic equipment (applies to European Union countries and other European countries
with separate waste-collection systems).This symbol on the product or its packaging indicates that it should not be classied as household
waste. It should be handed over to an appropriate company dealing with the collection and recycling of electrical and electronic equipment. The
correct disposal of the product will prevent potential negative consequences for the environment and human health resulting from hazardous
substances present in the product. Electrical devices must be handed over to restrict their re-use and further treatment. If the device contains
batteries, remove them, and hand them over to astorage point separately. DO NOT THROW EQUIPMENT INTO THE MUNICIPAL WASTE BIN. Material
recycling helps to preserve natural resources. For detailed information on how to recycle this product, please contact your local authority, the
recycling company, or the shop where you bought it.
/DE/ Entsorgung von gebrauchten Elektro- bzw. Elektronikgeräten (gilt für Länder der Europäischen Union und andere europäische
Länder mit getrennten Abfallsammelsystemen).
Dieses Symbol auf dem Produkt oder seiner Verpackung weist darauf hin, dass das Produkt nicht als Hausmüll entsorgt werden darf. Übergeben
Sie Elektroschrott an die entsprechende Sammel- und Recyclingstelle für Elektro- bzw. Elektronikgeräte. Die ordnungsgemäße Entsorgung
des Produkts verhindert mögliche negative Folgen für die Umwelt und die menschliche Gesundheit, die sich aus den im Produkt enthaltenen
gefährlichen Stoen ergeben können. Das elektrische Gerät muss so übergeben werden, dass die Wiederverwendung und der weitere Gebrauch
eingeschränkt sind. Falls sich Batterien im Gerät benden, entfernen Sie diese und übergeben Sie sie separat an die Sammelstelle. NICHT IN DEN
HAUSMÜLL WERFEN. Das Recycling von Materialien trägt zur Schonung der natürlichen Ressourcen bei. Detaillierte Informationen zum Recycling
dieses Produkts erhalten Sie bei Ihren örtlichen Behörden, dem Entsorgungsbetrieb oder dem Geschäft, in dem Sie dieses Produkt gekauft haben.
/ES/ Eliminación de residuos de aparatos eléctricos y electrónicos (aplicable alos países de la Unión Europea y a otros países
europeos que poseen sistemas aislados de recogida de residuos).
Este símbolo en el producto oen su embalaje indica que el producto no debe clasicarse como residuo doméstico. Hay que entregarlo en un
punto autorizado de recogida y reciclaje de aparatos eléctricos y electrónicos. La eliminación adecuada del producto prevendrá las posibles
consecuencias negativas para el medio ambiente y la salud humana derivadas de la presencia de sustancias peligrosas en el producto. El dispositivo
eléctrico debe ser entregado de manera que se pueda limitar su reutilización y reuso. Si hay pilas en el aparato, hay que quitarlas y entregarlas por
separado al punto de almacenamiento. NO TIRAR EL DISPOSITIVO EN EL CUBO DE BASURA MUNICIPAL. El reciclaje de materias ayuda apreservar los
recursos naturales. Para obtener la información especíca sobre el reciclaje de este producto, póngase en contacto con las autoridades locales, con
un proveedor de servicios de reciclaje ocon la tienda en la que lo compró.
/RU/ Утилизация вышедшего из эксплуатации электрического и электронного оборудования (относится к странам
Европейского Союза и другим европейским странам с системами раздельного сбора отходов).
, .
.
,
. ,
. , .
. .
, , , ,
, , .
/ PL / Ten produkt jest odpowiedni tylko do sporadycznego użytku lub do stosowania
w dobrze izolowanych pomieszczeniach
/ EN / This product is only suitable for well insulated spaces or occasional use.
/ DE / Dieses Produkt ist nur für gut isolierte Räume oder für den gelegentlichen
Gebrauch geeignet.
/ ES / Este producto está indicado únicamente en lugares abrigados o para una
utilización puntual.
/ RU / Этот продукт подходит только для хорошо изолированных помещений или
периодического использования.
3
WSKAZÓWKI BEZPIECZEŃSTWA
Przed pierwszym użyciem należy uważnie zapoznać
się zcałością treści niniejszej instrukcji
1.
Urządzenie należy podłączyć do sieci zgodnej
z parametrami prądu podanymi na obudowie.
2. Nie prowadzić kabla zasilającego nad grzejnikiem
i otworami wylotowymi ciepłego powietrza.
3. Zabrania się przedłużania przewodu zasilającego lub
używania go w gniazdku mobilnym.
4. Należy zawsze odłączyć urządzenie od sieci przed
czyszczeniem i konserwacją, w razie nieprawidłowego
działania oraz po zakończeniu używania.
5. Urządzenie należy odłączać od sieci zawsze poprzez
pociągnięcie za wtyczkę a nie za przewód zasilający.
6. Nigdy nie używać urządzenia w pobliżu prysznica, wanny,
umywalki, basenu itp.
7. Nie używać w pobliżu materiałów łatwopalnych jak meble,
pościel, papier, ubrania, zasłony, wykładziny itp.
8. Nie używać w pomieszczeniach podwyższonego
ryzyka wybuchu gazu oraz gdzie używa się palnych
rozpuszczalników, lakierów lub klei.
9. Nie używać na wolnym powietrzu.
10. Nie dotykać urządzenia mokrymi lub wilgotnymi dłońmi
lub stopami.
11. Urządzenia nie wolno zanurzać w wodzie lub spryskiwać.
12. Nie pozwolić, aby dzieci lub zwierzęta miały dostęp do
urządzenia.Wczasieeksploatacjitemperaturapowierzchni
grzejnika może być dosyć wysoka.
13. Nie stosować urządzenia do suszenia ubrań.
14. Nie zakrywać otworów nawiewu i wylotowego w czasie
pracy urządzenia.
15. Nigdy nie wkładać żadnych przedmiotów do otworów
nawiewu i wylotowego, aby uniknąć wypadku związanego
z porażeniem prądem elektrycznym.

4
16. Niniejszy sprzęt może być użytkowany przez dzieci
w wieku co najmniej 8 lat i przez osoby o obniżonych
możliwościach zycznych, umysłowych i osoby o braku
doświadczenia i znajomości sprzętu, jeżeli zapewniony
zostanie nadzór lub instruktaż odnośnie do użytkowania
sprzętu w bezpieczny sposób, tak aby związane z tym
zagrożenia były zrozumiałe. Dzieci nie powinny bawić się
sprzętem. Dzieci bez nadzoru nie powinny wykonywać
czyszczenia i konserwacji sprzętu.
17. Nie wolno pozostawiać włączonego urządzenia bez
nadzoru.
18. Przed schowaniem urządzenia należy odczekać aż
ostygnie.
19. Należy regularnie sprawdzać czy przewód zasilający
i całe urządzenie nie ma jakichkolwiek uszkodzeń. Nie
wolno włączyć urządzenia jeżeli uszkodzenia zostaną
stwierdzone.
20. Jeżeli przewód zasilający ulegnie uszkodzeniu, aby
zapobiec niebezpieczeństwu musi on zostać wymieniony
w Serwisie Producenta.
21. Napraw sprzętu może dokonać jedynie autoryzowany
punkt serwisowy (lista serwisów w załączniku oraz
na stronie www.eldom.eu). Wszelkie modernizacje
lub stosowanie nieoryginalnych części zamiennych
lub elementów urządzenia jest zabronione i zagraża
bezpieczeństwu użytkowania.
22. Firma Eldom Sp. z o. o. nie ponosi odpowiedzialności za
ewentualne szkody powstałe w wyniku niewłaściwego
używania urządzenia.
UPROSZCZONA DEKLARACJA ZGODNOŚCI UE
Eldom Sp. z o.o., ul. Pawła Chromika 5a, 40-238 Katowice niniejszym
oświadcza, że typ urządzenia radiowego: grzejnik konwektorowo-radiacyjny
Eldom HC500C jest zgodny z dyrektywą 2014/53/UE. Pełny tekst deklaracji
zgodności UE jest dostępny pod następującym adresem internetowym:
www.eldom.eu/wsparcie/deklaracje

5
INSTRUKCJA OBSŁUGI
GRZEJNIK KONWEKTOROWO-RADIACYJNY HC500C PL
OPIS OGÓLNY
1. Panel sterowania
2. Obudowa przednia
3. Nóżki z kółkami
4. Uchwyty do montażu na ścianie
5. Włącznik główny
6. Obudowa tylna
7. Pilot
PRZEZNACZENIE
Grzejnik konwektorowo-radiacyjnyHC500Cprzeznaczony jest do ogrzewania pomieszczeń
zarówno poprzez promieniowanie jak i konwekcję. Dzięki temu może szybko zwiększyć
temperaturę w pomieszczeniu, jest super cichy, bezpieczny, wydajny i energooszczędny.
UŻYTKOWANIE URZĄDZENIA
Po rozpakowaniu urządzenia należy upewnić się, czy nie uległo ono uszkodzeniu w czasie
transportu. W razie jakichkolwiek wątpliwości należy wstrzymać się z jego użyciem do
czasu skontaktowania się z punktem serwisowym.
ŚRODKI OSTROŻNOŚCI
• Grzejnik można podłączać tylko do uziemionego gniazdka elektrycznego.
• Grzejnik nie może być umieszczony bezpośrednio pod gniazdkiem.
• Zabrania się bezpośredniego podłączania lub odłączania przewodu zasilającego w celu
włączania i wyłączania urządzenia.
• Podczas korzystania z grzejnika należy go ustawić stabilnie, nie przewracać ani nie
DANE TECHNICZE
- moc: 1300-1500W
- napięcie zasilania: 220-240V ~ 50Hz
- timer: 1-24 godziny
- regulacja temperatury: 10-49°C
- powierzchnia: 20 m2
1
2
3
4
5
6
7
rys. 1

6
przechylać urządzenia w trakcie jego użytkowania.
• Zabrania się używania grzejnika w miejscu, w którym wiszący przedmiot może łatwo
spaść.
• Zabronione jest używanie grzejnika w miejscu niestabilnym lub narażonym na wstrząsy.
• W przypadku zawieszenia grzejnika upewnić się, że zamocowanie jest bezpieczne i nie
grozi oderwaniem grzejnika od ściany.
• Nie wolno używać grzejnika wokół basenu.
• Podczas użytkowania grzejnika przewód zasilający należy umieścić w tylnej części
korpusu,umieszczeniegoprzedkorpusem spowodujejegoprzegrzanielubuszkodzenie
i może grozić niebezpieczeństwem.
• Nie wolno podłączać innych urządzeń elektrycznych dużej mocy do tego samego
gniazdka.
INSTALACJA
Przed montażem upewnić się, że urządzenie jest wyłączone i odłączone od sieci.
Montaż nóżek z kółkami (rys. 2)
• Odwróćkorpusgrzejnikadogórynogami,wyjąćśrubyinóżkidostarczonez urządzeniem.
• Dopasować otwory na śruby w nóżkach do otworów montażowych na spodzie tylnej
obudowy, a następnie włożyć śruby przez okrągłe otwory w nóżkach i dokręć.
• Po zakończeniu montażu korpus odwrócić i ustawić urządzenie na płaskim, stabilnym
i odpornym na wysokie temperatury podłożu i podłączyć do prądu.
Montaż na ścianie (rys. 3)
UWAGA! Grzejnik musi być zainstalowany co najmniej 15 cm od podłogi i 50 cm od
sutu. Przed rozpoczęciem wiercenia należy się upewnić, że w miejscu wiercenia nie
ma ukrytych żadnych przewodów elektrycznych ani innych instalacji.
• Wywierć dwa otwory o średnicy 8 mm i głębokości 40 mm zgodnie z rysunkiem 3.
• W otwory włożyć dołączone kołki rozporowe, a następnie wkręcić śruby - śruby muszą
wystawać 6 mm z kołka, na koniec zawiesić produkt w otworach hakowych z tyłu.
• Podłączyć do prądu.
420
275
rys. 2 rys. 3

7
OBSŁUGA URZĄDZENIA
Panel sterowania (1) / Pilot (7)
I. Wyświetlacz
II. Włącznik
III. Zmiana trybu pracy
IV. „+”
V. „-”
VI. Timer
VII. Programowanie
VIII. Funkcja„window”
Wyświetlacz (I)
a) Kontrolka wi-
b) Kontrolka blokady klawiszy
c) Wskaźnik temperatury
d) Kontrola timera
e) Kontrolka harmonogramu pracy
f) Kontrolka trybu dziennego
g) Kontrolka trybu nocnego
h) Kontrolka trybu„anti-frost”
i) Kontrolka funkcji„window”
j) Kontrolka„koniec pracy”
k) Czas
l) Kontrolka grzania
m) Kontrolka„początek pracy”
n) Kontrolki dni tygodnia
Grzejnikiem można sterowaćtakżeprzy pomocy smartfonuz zainstalowanąaplikacją.
Dokładną instrukcję można pobrać ze strony: www.eldom.eu
DZIAŁANIE URZĄDZENIA
Wszystkie zmiany ustawień są sygnalizowane dźwiękiem.
Przed pierwszym użyciem należy zamontować nóżki lub zawiesić grzejnik na ścianie (patrz
INSTALACJA).
Pierwsze uruchomienie
Przy pierwszym uruchomieniu grzejnika może wydzielać się specyczny zapach
z elementów grzejnych i izolacji. Jest to zjawisko normalne.
• Przed podłączeniem do sieci należy sprawdzić, czy parametry prądu sieciowego
(napięcie) odpowiadają parametrom podanym na urządzeniu, a włącznik (5) jest
ustawiony w pozycji„0”.
• Podłączyć grzejnik do prądu, a następnie przełączyć włącznik (5) w pozycję „I” –
wyświetlacz zamiga i wyłączy się.
• Nacisnąć przycisk (II) na panelu sterowania (1) lub pilocie (7), aby włączyć grzejnik.
III
III
VI
VII
IV
V
II VII
III VI
IV V
f
e
dc
n
m
a
b
g
h
i
j
kl
rys. 4
rys. 5

8
• Wyświetlacz (I) włączy się, pokazując bieżącą temperaturę (c), czas (k) i dzień tygodnia (n).
• Po każdorazowym podłączeniu grzejnika do prądu należy ustawić czas i dzień tygodnia.
• Domyślne ustawienia grzejnika to: godzina – „12:30”, dzień tygodnia – „7” (niedziela),
temperatura –„20°C”.
Ustawienie godziny i dnia tygodnia (ustawienie tylko za pomocą panelu sterowania (1))
• Włączyć grzejnik.
• Nacisnąć i przytrzymać przycisk (VI) na panelu sterowania przez ok 3s – pole (c) na
wyświetlaczu (I) zacznie migać.
• Przyciskami (+) i (–) ustawić godzinę.
• Ponownie na nacisnąć i przytrzymać przez ok 3s przycisk (VI) - zacznie migać pole
minut.
• Przyciskami (+) i (–) ustawić minuty.
• Ponownie nacisnąć i przytrzymać przez ok 3s przycisk (VI) – zacznie migać znacznik dnia
tygodnia (n).
• Przyciskami (+) i (–) ustawić dzień tygodnia. Cyfry „1” – „7” w polu (n) oznaczają dni
tygodnia od poniedziałku do niedzieli.
• Odczekać ok 5s, aż znacznik dnia tygodnia (n) przestanie migać.
Ustawienie temperatury (ustawienie za pomocą panelu sterowania (1) i pilota (7))
• Po włączeniu grzejnika domyślnie ustawiona temperatura to 20°C.
• Temperaturę można zmienić przyciskami (+) i (–).
• Można ustawić temperaturę w zakresie od 10-49°C.
• Po wybraniu temperatury cyfry w polu (c) zamigają, a po chwili zostanie wyświetlona
aktualna temperatura otoczenia.
Tryby pracy
Grzejnik może pracować w trzech trybach:
• (f) dziennym – urządzenie pracuje z pełną mocą
• (g) nocnym – urządzenie pracuje z połową mocy
• (h) anti-frost – urządzenie włącza grzanie, gdy wykryta zostanie temperatura
otoczenia niższa niż 5°C, wtedy grzejnik automatycznie włączy ogrzewanie z połową
mocy i będzie działał do momentu ogrzania powietrza w pomieszczeniu do 9°C,
a następnie wyłącza grzałkę.
Ustawienie trybu pracy (ustawienie za pomocą panelu sterowania (1) i pilota (7))
• Po włączeniu grzejnika przyciskiem (II) należy wybrać tryb pracy.
• W tym celu należy naciskać przycisk (III), aż do podświetlenia odpowiedniej kontrolki
na wyświetlaczu (I).
Funkcja „window” (ustawienie za pomocą panelu sterowania (1) i pilota (7))
• Po włączeniu tej funkcji, gdy temperatura otoczenia spadnie o 5 stopni w ciągu 10
minut, uważa się, że użytkownik otworzył okno i grzejnik przestanie grzać i przechodzi
w stan czuwania.
• Aby włączyć funkcję należy nacisnąć przycisk (VIII) na pilocie lub nacisnąć i przytrzymać

9
przycisk (III) na panelu sterowania.
• Włączenie funkcji sygnalizowane jest kontrolką (i) na wyświetlaczu (I).
• Abywyłączyćfunkcjęnależy nacisnąć przycisk(VIII) na pilocie lub nacisnąć i przytrzymać
przycisk (III) na panelu sterowania.
Timer (ustawienie za pomocą panelu sterowania (1) i pilota (7))
• Włączyć urządzenie, wybrać tryb pracy i ustawić temperaturę.
• Nacisnąć przycisk (VI) – zaczną migać cyfry czasu (k) na wyświetlaczu (I).
• Ponownie naciskać przycisk (VI), aż do ustawienia czas z zakresu od 1 do 24 godzin.
• Po wybraniu czasu odczekać, aż cyfry (k) przestaną migać – na wyświetlaczu zostanie
pokazany czas.
• Włączenie funkcji sygnalizowane jest kontrolką (d) na wyświetlaczu.
• Aby zobaczyć ile czasu zostało do wyłączenia grzejnika należy nacisnąć jednokrotnie
przycisk (VI) – w polu (k) pojawi się na kilka sekund czas pozostały do wyłączenia
grzejnika.
• Przy aktywnej funkcji TIMER można zmieniać ustawienia temperatury i tryb pracy.
• Aby wyłączyć funkcję należy nacisnąć przycisk (VI) i ustawić„00:00”
Opóźniony start (ustawienie tylko za pomocą panelu sterowania (1))
• Urządzenie musi być podłączone do prądu, a włącznik (5) ustawiony w pozycji„I”.
• Nacisnąć i przytrzymać przycisk (VI) na panelu sterowania (1) – zaczną migać cyfry
czasu (k) na wyświetlaczu (I).
• Ponownie naciskać przycisk (VI), aż do ustawienia czas z zakresu od 1 do 24 godzin.
• Po wybraniu czasu odczekać, aż cyfry (k) przestaną migać.
• Włączenie funkcji sygnalizowane jest kontrolką (d) na wyświetlaczu i odliczaniem czasu.
• Po włączeniu grzejnik będzie działał zgodnie z wcześniej zaprogramowanymi
ustawieniami.
• Aby wyłączyć funkcję należy dwukrotnie nacisnąć przycisk (II) na panelu sterowania (1)
lub pilocie (7).
Blokada klawiszy (ustawienie tylko za pomocą panelu sterowania (1))
• Aby zablokować klawisze należy jednocześnie nacisnąć przyciski (+) i (–).
• Włączenie funkcji sygnalizowane jest kontrolką (b) na wyświetlaczu (I).
Wszystkie opisane powyżej operacje są dostępne przy wyłączonym tygodniowym
harmonogramie pracy.
TYGODNIOWY HARMONOGRAM PRACY
• W urządzeniu można ustawić harmonogram pracy na każdy dzień tygodnia.
• Dla każdego dnia można ustawić 6 okresów pracy – łącznie można ustawić 42 okresy
pracy na 7 dni.
• Przed zaprogramowaniem harmonogramu pracy należy ustawić czas i dzień tygodnia
(patrz Ustawienie godziny i dnia tygodnia).
• Harmonogram będzie aktywny do momentu jego wyłączenia lub odłączenia urządzenia
od sieci.

10
Zaprogramowanie tygodniowego harmonogramu pracy (ustawienie tylko za pomocą
panelu sterowania (1))
• Aby rozpocząć programowanie harmonogramu należy nacisnąć i przytrzymać przycisk
(VII), na wyświetlaczu pojawi się ikonka (e).
• Następnie należy nacisnąć przycisk (VI) – na wyświetlaczu w polu (n) zamiga cyfra„1”.
• Przyciskami (+) i (–) wybrać dzień tygodnia. Cyfry „1” – „7” w polu (n) na wyświetlaczu
oznaczają dni tygodnia od poniedziałku do niedzieli.
• Ponownie nacisnąć przycisk (VI) – w polu (c) na wyświetlaczu zacznie migać liczba
oznaczająca numer okresu w danym dniu. Okresów może być maksymalnie 6 na dzień.
• Przyciskami (+) i (–) wybrać odpowiedni okres.
• Ponownie nacisnąć przycisk (VI) – w polu (k) na wyświetlaczu liczby zaczną migać
i podświetlona jest kontrolka (m).
• Przyciskami (+) i (–) wybrać godzinę rozpoczęcia pracy.
• Nacisnąć przycisk (VI).
• Przyciskami (+) i (–) wybrać minutę rozpoczęcia pracy.
• Nacisnąć przycisk (VI). W polu (k) na wyświetlaczu liczby zaczną migać i podświetli
się kontrolka (j).
• Przyciskami (+) i (–) wybrać godzinę zakończenia pracy.
• Nacisnąć przycisk (VI).
• Przyciskami (+) i (–) wybrać minutę zakończenia pracy.
• Nacisnąć przycisk (VI). W polu (c) na wyświetlaczu zacznie migać liczba.
• Przyciskami (+) i (–) wybrać odpowiednią temperaturę.
• Powtórzyć powyżej opisane operacje dla każdego okresu w każdym dniu tygodnia.
CZYSZCZENIE I KONSERWACJA
- przed czyszczeniem odłączyć urządzenie od sieci i odczekać do wystygnięcia,
- urządzenia nie wolno zanurzać w wodzie,
- nie używać do czyszczenia silnych lub niszczących powierzchnię środków czystości,
- obudowę przecierać wilgotną szmatką,
OCHRONA ŚRODOWISKA
- urządzenie jest zbudowane z materiałów, które mogą być poddane ponownemu
przetwarzaniu lub recyklingowi,
- należy je przekazać do odpowiedniego punktu, który zajmuje się zbieraniem
i recyklingiem urządzeń elektrycznych i elektronicznych.
GWARANCJA
- urządzenie przeznaczone jest do użytku prywatnego w gospodarstwie domowym,
- nie może być używane do celów zawodowych,
- gwarancja traci ważność w przypadku nieprawidłowej obsługi.
Warunki gwarancji podane są w załączniku.

11
SB
HC500C
2,0
1,0
0,001

SAFETY
Please read all these instructions carefully before using
this appliance.
1. The device should be plugged in the socket with the
working parameters described on the shell.
2. The device should be unplugged before cleaning and
maintenance and in case of improper working or after
using the device.
3. The device should be unplugged by pulling the plug not
the cable.
4. It is forbidden to extend the power cord or use it on a
mobile socket.
5. Do not use close to shower, bath, washbasin, pool, etc.
6. Do not useclose to combustible materials such as furniture,
bedding, paper, clothes, curtains, carpets, etc.
7. Do not operate in with high risk of gas explosion or when
ammable solvents, lacquers or adhesives are used.
8. Do not use outdoors.
9. Do not touch with wet or moistened hands or feet.
10. Do not immerse in water or sprinkle.
11. Do not let children or animals to have access to the device.
While operating the device the surface temperature may
be high.
12. Do not use for drying clothes.
13. Do not cover outlets while operating the device.
14. The device can be used by children aged 8 and older
and by persons with limited physical, sensory or mental
capabilities, or persons without sucient experience
and knowledge only under supervision or if previously
instructed on the safe use of the appliance and the possible
risks. Children shall not play with the appliance. Cleaning
and maintenance that are the responsibility of the user
shall not be carried out by children without supervision.
Protect the appliance and the power cord against children
under 8 years old.

13
15. Do not direct the cord over the heater and outlets, to avoid
an accident due to electric shock.
16. Do not leave working device without supervision.
17. Let heater cool down before putting it to a hide.
18. Check regularly whether the device or the cord have any
damages. Do not operate if any damages are noticed.
19. Do not use if the cord is damaged, when the device fell
over or was otherwise damaged. Any mending of the
device should be let to authorized service providers. List of
service providers can be found in the annex or on website
www.eldom.eu.
20. If the cord is damaged, to avoid danger, exchange it by
authorized service providers.
21. Any mending of the device should be held by authorized
service providers. Any modernizations or using spare parts
or other elements other than original is forbidden and
dangerous.
22. Eldom sp. z o.o. shall not be responsible for any damages
occurring as a result of improper usage.
SIMPLIFIED EU DECLARATION OF CONFORMITY
Hereby, Eldom Sp. z o.o., ul. Pawła Chromika 5a, 40-238
Katowicedeclaresthattheradioequipmenttype CONVECTOR
HEATER HC500C is in compliance with Directive 2014/53/EU.
The full text of the EU declaration of conformity is available at
the following internet address:
www.eldom.eu/deklaracje

14
INSTRUCTION MANUAL
CONVECTORRADIATION HEATER HC500C
EN
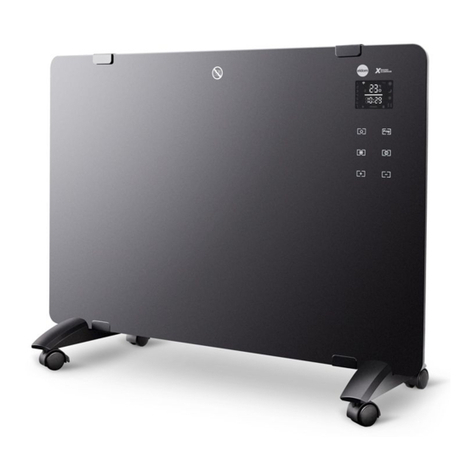
GENERAL DESCRIPTION
1. Control panel
2. Front cover
3. Feet with castor wheels
4. Wall mount handles
5. Mains switch
6. Rear cover
7. Remote control
INTENDED USE
The HC500C convector heater is designed to heat rooms by both radiation and convection.
This allows the heater to quickly increase the temperature in the room and the appliance is
super quiet, safe, eective and energy ecient.
GETTING STARTED
After unpacking the appliance, make sure that it has not been damaged during transport.
In case of any doubts, do not use the appliance until the service centre has been contacted.
PRECAUTIONS
• The heater may only be connected to a grounded electrical outlet.
• The heater must not be placed directly under an outlet.
• It is forbidden to turn the appliance on or o by directly connecting or disconnecting
the power cord.
• When using the heater, place it on a stable surface and do not tip or tilt the unit during use.
TECHNICAL DATA
- power output: 1300-1500W
- power supply voltage: 220-240V ~ 50Hz
- timer: 1-24 godziny
- temperature control: 10-49°C
- ecommended room area: up to 20 m2
1
2
3
4
5
6
7
Fig. 1

15
• It is forbidden to use the heater where hanging objects can easily fall.
• It is forbidden to use the heater in an unstable or shock-prone location.
• If the heater is wall-mounted, make sure that the xing is secure and there is no danger
of the heater being torn o the wall.
• Do not use the heater around a pool.
• When using the heater, the power cord must be placed in the back of the body, placing
it in front of the body will cause overheating or damage, and could be dangerous.
• Do not connect other high power electrical appliances to the same outlet.
INSTALLATION
Before starting the assembly, make sure the appliance is switched o and disconnected
from the power source.
Installing the feet with castor wheels (Fig. 2)
• Turn the heater body upside down, remove the screws and feet supplied with the unit.
• Align the screw holes in the feet with the mounting holes on the bottom of the rear
housing, then insert the screws through the round holes in the feet and tighten the
them.
• After completing the assembly, turn the body over and place the unit on a at, stable
and heat-resistant surface, and connect it to the power source.
Wall mounting (Fig. 3)
CAUTION. The heater must be installed at least 15 cm from the oor and 50 cm from
the ceiling.Before drilling, make sure that there are no hidden electrical wires or pipe
in the drilling area.
• Drill two holes, 8 mm diameter and 40 mm depth, as shown in gure 3.
• Insert the supplied rawl plugs into the holes and then screw in the screws - the screws
must protrude by 6 mm from the wall, nally hang the product using the hook holes at
the back.
• Connect to the power supply.
420
275
Fig. 2 Fig. 3

16
APPLIANCE OPERATION
Control panel (1) /
Remote controller (7)
I. Display
II. Mains switch
III. Changing the
operating mode
IV. “+”
V. “-”
VI. Timer
VII. Programming
VIII. The“window”function
Display (I)
a) Wi-Fi indicator light
b) Key lock indicator light
c) Temperature indicator
d) Timer indicator light
e) Operating mode indicator light
f) Day mode indicator light
g) Night mode indicator light
h) Anti-frost mode indicator light
i) “Window” function indicator light
j) “Operation end”indicator light
k) Time
l) Heating indicator light
m) “Operation start” indicator light
n) Day of the week indicator lights
The heater can also be controlled by a smartphone with an installed app.
Detailed instructions can be downloaded from www.eldom.eu
OPERATION OF THE APPLIANCE
All setting changes are signalled with a sound.
Before the rst use, install the feet or hang the heater on the wall (see INSTALLATION).
Start-up
When used for the rst time, the heating elements and insulation can emit characteristic
smell. It is a normal phenomenon.
• Before connecting the appliance to the mains, check that the mains current parameters
(voltage) correspond to the parameters indicated on the device and the switch (5) is set at“0”.
• Connect the heater to the mains and then move the switch (5) to the “I” position - the
display will ash and turn o.
• Press button (II) on the control panel (1) or on the remote control (7) to turn on the
III
III
VI
VII
IV
V
II VII
III VI
IV V
f
e
dc
n
m
a
b
g
h
i
j
kl
Fig. 4
Fig. 5

17
heater.
• The display (I) will turn on, showing the current temperature (c), time (k) and day of the
week (n).
• Each time the heater is connected to the mains, the time and day of the week must
be set.
• The default heater settings are: time -“12:30”, day of the week -“7”(Sunday), temperature
-“20°C”.
Setting the time and day of the week (setting is possible only using the control panel (1))
• Turn on the heater.
• Press and hold the (VI) button on the control panel for approx. 3s - the hour eld on the
display (I) will start ashing.
• Press the (+) or (-) buttons to set the hours.
• Press and hold the (VI) button for approx. 3s again - the minute eld starts ashing.
• Press the (+) or (-) to set the minutes.
• Press and hold the (VI) button for approx. 3s again - the day of the week indicator (n)
will start ashing.
• Set the day of the week using the (+) and (-) buttons. Digits “1” - “7” in eld (n) indicate
days of the week, from Monday to Sunday.
• Wait approx. 5s until the day of the week indicator (n) stops ashing.
Temperature setting (using the control panel (1) and the remote control (7))
• When the heater is switched on, the default set temperature is 20°C.
• The temperature can be changed using the (+) and (-) buttons.
• Air temperature can be set in the range of 10-49°C;
• Once the temperature is selected, digits in the (c) eld will ash and the current ambient
temperature will be displayed after a moment.
Operating modes
The device can operate in three modes:
• (f) daytime – the appliance operates at full power
• (g) night – the appliance operates at half power
• (h) anti-frost - the unit turns the heating on when an ambient temperature lower than
5°C is detected, then the heater will automatically turn the heating on at half power and
continue to run until the room is heated to 9°C, then the heater is turned o.
Setting the operating mode (using the control panel (1) and the remote control (7))
• After switching the heater on, select the operating mode using the (II) button.
• To do this, press the (III) button until the corresponding indicator light on the display (I)
is illuminated.
“Window” function (using the control panel (1) and the remote control (7))
• When this function is activated and if the ambient temperature drops 5 degrees over
10 minutes, the user is considered to have opened a window and the heater will stop
heating and enter standby mode.

18
• Press the (VIII) button on the remote control to activate the function.
• The function activation is indicated by the indicator light (b) on the display (1).
• To deactivate the function, press the (VIII) button on the remote control.
Timer (set using the control panel (1) and the remote control (7))
• Turn on the unit, select the operating mode and set the temperature.
• Press the (VI) button - the time digits (k) will start ashing on the display (I).
• Press the (VI) button again until the time is set to between 1 and 24 hours.
• After selecting the time, wait until the digits (K) stop ashing - the display will now show
the time.
• The function activation is indicated by an indicator light (d) on the display.
• To see how much time is left until the heater switches o, press the (VI) button once
- the time left until the heater switches o will be displayed in the (k) eld for a few
seconds.
• When the TIMER function is active, temperature settings and the operating mode can
be changed.
• To deactivate the function press the (VI) button and set “00:00”.
Delayed start (setting available only via control panel (1))
• The appliance must be connected to the mains and the (5) switch set to “I”.
• Press and hold the “VI” button on the control panel (1) - the time digits (k) will start
blinking on the display (I).
• Press the “VI” button again, until a time in the range between 1 and 24 hours has
been set.
• After selecting the time, wait until the digits (k) stop blinking.
• The function activation is indicated by the indicator light (d) on the display and by the
countdown.
• Once switched on, the heater will operate according to the pre-programmed settings.
• To deactivate the function, press the“II”button on the control panel (1) or on the remote
control (7) twice.
Key lock (can only be set using the control panel (1))
• To lock the keys, press the (+) and (-) buttons simultaneously.
• The function activation is indicated by the indicator light (b) on the display (1).
All operations described above are available with the weekly heating schedule
disabled.
WEEKLY HEATING SCHEDULE
• The user can set an operating schedule for each day of the week in the unit.
• The user can set 6 work periods for each day - a total of 42 work periods can be set for 7 days.
• Before programming an operation schedule, the time and day of the week should be set
(see Setting the time and day of the week).
• The schedule will remain active until it is switched o or the device is disconnected from
the mains.

19
Programming a weekly schedule (setting available only from the control panel (1))
• To start programming the schedule, press and hold the (VII) button, the (e) icon will
appear on the display.
• Then press the (VI) button - the “1”digit will blink on the display, in the (n) eld.
• Using the (+) and (-) buttons select the day of the week. Digits“1” - “7” in the (n) eld on
the display indicate days of the week, from Monday to Sunday.
• Press the (VI) button again - a number indicating the work period number during the
given day will begin ashing in the (c) eld. A maximum of 6 periods can be dened
per day.
• Use the (+) and (-) buttons to select the appropriate period.
• Press the (VI) button again - the numbers in the (k) eld on the display start ashing and
the (M) indicator light is illuminated.
• Use the (+) and (-) buttons to select the operation start hour.
• Press the (VI) button.
• Use the (+) and (-) buttons to select the operation start minute.
• Press the (VI) button. In the (k) eld on the display, the numbers will start ashing and
the (j) light will illuminate.
• Use the (+) and (-) buttons to select the operation end hour.
• Press the (VI) button.
• Use the (+) and (-) buttons to select the operation end minute.
• Press the (VI) button. A number will ash in the (c) eld on the display.
• Use the (+) and (-) buttons to select the appropriate temperature.
• Repeat the operations described above for each period, for each day of the week.
CLEANING AND MAINTENANCE
- Before cleaning remove the power cable from the socket.
- The appliance cannot be submersed in water.
- Do not use any cleansing agents which are strong and damage the surface.
- Wipe the housing with a moistened cloth.
PROTECTION
- The appliance is made of materials which can be recovered or recycled.
- The appliance should be handed over to the appropriate center of collection and
recycling of electrical and electronic equipment.
WARRANTY
- the appliance is intended for personal use at a household,
- it is not intended for professional purposes,
- in case of misuse, the warranty is rendered null and void.

20
SB
HC500C
2,0
1,0
0,001
Other manuals for HC500C
1
Table of contents
Languages:
Other Eldom Heater manuals

Eldom
Eldom HL10 User manual

Eldom
Eldom HR30 User manual

Eldom
Eldom HR10 User manual

Eldom
Eldom convi HC210 User manual

Eldom
Eldom HC120T User manual

Eldom
Eldom HC100 User manual

Eldom
Eldom antracyt HLC01 User manual

Eldom
Eldom STAR HM1300 User manual

Eldom
Eldom rovi HO70C User manual

Eldom
Eldom STAR HM1300 User manual
Popular Heater manuals by other brands

Thermor
Thermor Emotion 3 instruction manual

ATC Electrical & Mechanical
ATC Electrical & Mechanical Bavaro DF2000 Installation and operation manual

SIC
SIC CFR Series Installation, use & maintenance manual

Dimplex
Dimplex CXD2000H-NA Series installation instructions

BIEMMEDUE
BIEMMEDUE 163100 instruction manual

emerio
emerio FH-110692.4 instruction manual