manuals.online logo
Brands
  1. Home
  2. •
  3. Brands
  4. •
  5. Epilog Laser
  6. •
  7. Engraver
  8. •
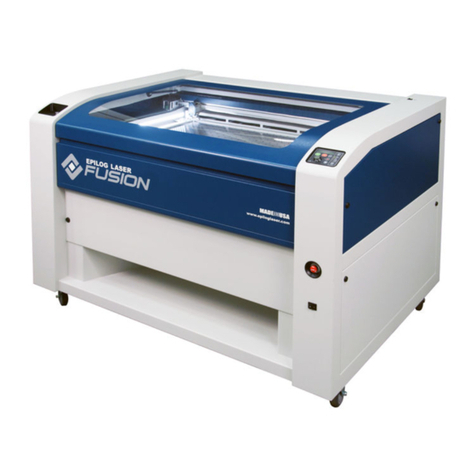
  9. Epilog Laser Fusion Use and care manual

Epilog Laser Fusion Use and care manual

www.epiloglaser.com
tech@epiloglaser.com
303-215-9171
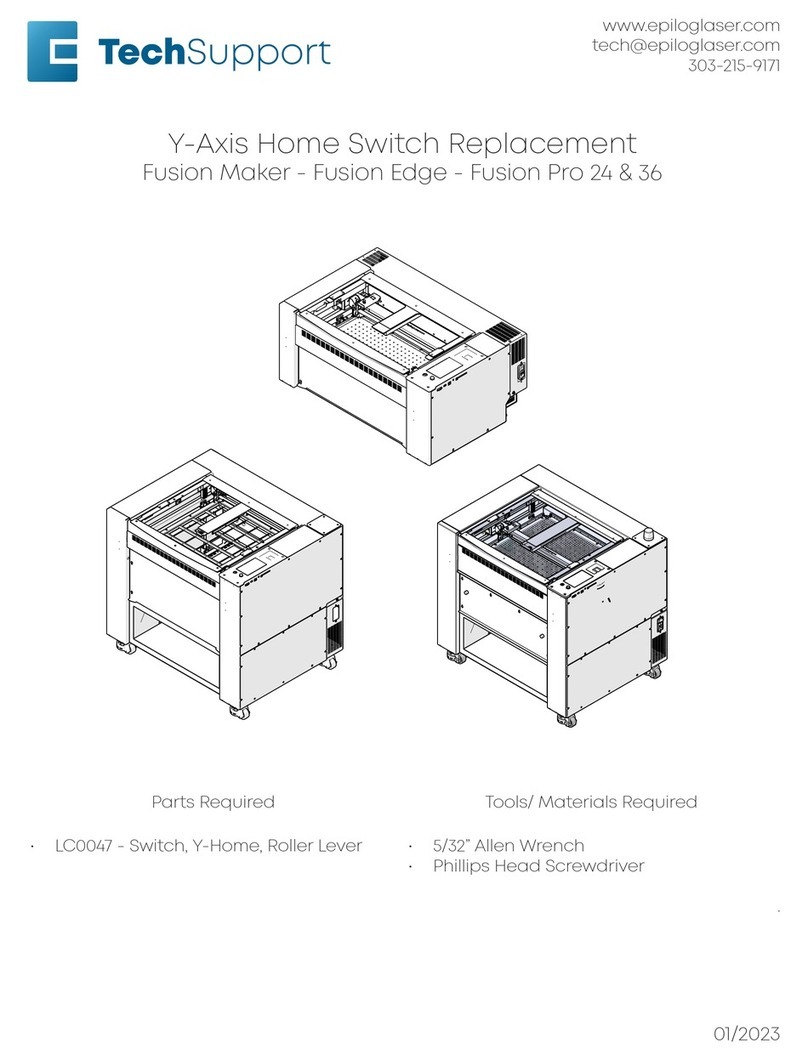
X-Axis Assembly Replacement
Fusion Maker - Fusion Edge - Fusion Pro 24 & 36
Parts Required Tools Required
• X-Axis assembly for engraver model- refer
to page 2 for part number and description
• 5/32” Allen wrench
• Phillips head screwdriver
• Anti-static strap
.
03/2023
17000 X-Axis Assembly Replacement
Fusion Edge & Fusion Pro X-Axis Assembly Reference Guide
Model Part Number Description
Maker 12 LC1060-TS Assy, X-Axis Rail, 24x12, Maker, TS
Edge 12 CO2 LC0485-TS Assy, X-Axis Rail, 24x12, CO2, TS
Edge 12 Fiber LC0486-TS Assy, X-Axis Rail, 24x12, Fiber, TS
Edge 24 CO2 LC0970-TS Assy, X-Axis Rail, 24x24, Edge, CO2, TS
Edge 24 Fiber LC0971-TS Assy, X-Axis Rail, 24x24, Pro, Fiber, TS
Pro 24 CO2 LC1034-TS Assy, X-Axis Rail, 24x24, Pro, CO2, TS
Pro 24 Dual LC1035-TS Assy, X-Axis Rail, 24x24, Pro, Dual, TS
Edge 36 CO2 LC1056-TS Assy, X-Axis Rail, 36x24, Edge, CO2, TS
Pro 36 CO2 LC1057-TS Assy, X-Axis Rail, 36x24, Pro, CO2, TS
Pro 36 Dual LC1058-TS Assy, X-Axis Rail, 36x24, Pro, Dual, TS
2
Fusion Maker engravers are not manufactured with the x-axis drive board
referenced in this document. If removing the x-axis assembly in a Fusion Maker,
disregard steps which reference the x-axis drive board.
!
17000 X-Axis Assembly Replacement
3
X-Axis Assembly
Replacement
X-Axis Assembly Removal
1. Turn o the engraver.
2. Disconnect the engraver from power
source.
3. Remove the le and right panels of the
engraver:
4. Loosen and remove the lens tube
assembly from the x-axis assembly:
5. Remove the x-axis drive board cover:
6. Disconnect the air assist tubing from
the right side of the x-axis assembly:
The AA tubing is held by a tubing coupler.
To remove the tubing, press the tubing
into the fixture. Then, while holding the
retaining ring tight to the fixture, pull the
AA tubing away from it.
17000 X-Axis Assembly Replacement
4
7. Remove the six (6) electrical
connections on the drive board:
8. Loosen and remove the three (3)
Phillips screws that secure the x-axis
drive board mounting bracket to the
x-axis assembly:
9. Remove the x-axis drive board and
housing:
10. Disconnect the belows on the le and
right side of the engraver.
11. Remove the four (4) fasteners that
secure the x-axis assembly to the
y-axis bearings. There are two (2) on
the right side and two (2) on the le
side:
17000 X-Axis Assembly Replacement
5
12. Gently li on the x-axis assembly to
free it from the locator pins on the
y-axis bearing blocks:
13. Slide the x-axis assembly out of the
cabinet through the right side of the
engraver:
X-Axis Assembly Installation
1. Slide the x-axis assembly into the
cabinet through the right side of the
engraver:
2. Place the x-axis assembly on the
y-axis bearing blocks ensuring that it
sits on the locator pins:
17000 X-Axis Assembly Replacement
6
3. Install and tighten the four (4) fasteners
that secure the x-axis assembly to the
y-axis bearings. There are two (2) on
the right side and two (2) on the le
side:
4. Place the x-axis drive board and
housing into position:
5. Install and tighten the three (3) Phillips
screws that secure the x-axis drive
board mounting bracket to the x-axis
assembly:
6. Connect the six (6) electrical harnesses
on the drive board:
7. Connect the air assist tubing to the
right side of the x-axis assembly:
17000 X-Axis Assembly Replacement
7
8. Install x-axis drive board cover:
9. Install the lens tube assembly in the
x-axis assembly:
10. Replace the le and right panels of
the engraver:
Updates and Programming
The x-axis assembly contains many
components, including circuit boards,
cameras, and a motor. Further
procedures are required.
Updating the Carriage
Camera (Pro Models Only)
1. On the display, press the gear icon to
enter the Settings menu:
2. Press and hold the word “Settings” that
appears at the touch of the touchpad
to gain access to the Advanced
Settings menu:
17000 X-Axis Assembly Replacement
8
3. Enter the Diagnostics menu and
scroll to the Camera tab. Press Test &
Update:
4. Press Update:
5. Allow the engraver to complete
the update. Once done, a success
message will appear:
In some cases the focus calibration and
camera calibration procedures must also
be completed. Please refer to the Fusion
Edge/Pro User’s Manual for more infor-
mation on the focus and camera calibra-
tions.
Updating the Peripherals
1. At the display panel, press the gear
icon in the upper right-hand corner of
the display to open the Settings menu:
17000 X-Axis Assembly Replacement
9
2. Press Program to enter the Peripheral
Update menu:
3. Once in the Peripheral Update menu,
select Motor Drives and FPGA. Press
Update:
When running a peripheral update, do
not power o the engraver. During a
peripheral update it is common for the
display to power o. Once the update
has been applied, the engraver will
prompt to restart.
4. Once the engraver prompts you to
restart, power cycle the engraver.
If further assistance is required, please
contact Epilog Tech Support by phone at
303-215-9171, or by email at
tech@epiloglaser.com

Other manuals for Fusion

10

This manual suits for next models

3

Other Epilog Laser Engraver manuals

Epilog Laser FiberMark User manual

Epilog Laser

Epilog Laser FiberMark User manual

Epilog Laser MINI User manual

Epilog Laser

Epilog Laser MINI User manual

Epilog Laser Helix User manual

Epilog Laser

Epilog Laser Helix User manual
Epilog Laser Zing User manual

Epilog Laser

Epilog Laser Zing User manual

Epilog Laser MINI 18 User manual

Epilog Laser

Epilog Laser MINI 18 User manual

Epilog Laser Helix Installation and operation manual

Epilog Laser

Epilog Laser Helix Installation and operation manual

Epilog Laser Fusion User manual

Epilog Laser

Epilog Laser Fusion User manual

Epilog Laser FusionPro 16000 User manual

Epilog Laser

Epilog Laser FusionPro 16000 User manual

Epilog Laser Mini Series User manual

Epilog Laser

Epilog Laser Mini Series User manual

Epilog Laser Fusion Pro 32 User manual

Epilog Laser

Epilog Laser Fusion Pro 32 User manual

Epilog Laser Fusion Pro 32 User manual

Epilog Laser

Epilog Laser Fusion Pro 32 User manual

Epilog Laser MINI User manual

Epilog Laser

Epilog Laser MINI User manual

Epilog Laser FiberMark User manual

Epilog Laser

Epilog Laser FiberMark User manual

Epilog Laser Fusion User manual

Epilog Laser

Epilog Laser Fusion User manual

Epilog Laser Fusion User manual

Epilog Laser

Epilog Laser Fusion User manual

Epilog Laser Helix User manual

Epilog Laser

Epilog Laser Helix User manual

Epilog Laser Fusion User manual

Epilog Laser

Epilog Laser Fusion User manual

Epilog Laser Fusion M2 32 User manual

Epilog Laser

Epilog Laser Fusion M2 32 User manual

Epilog Laser FiberMark Fusion 13000 User manual
Epilog Laser

Epilog Laser FiberMark Fusion 13000 User manual

Epilog Laser Zing User manual

Epilog Laser

Epilog Laser Zing User manual
Epilog Laser Fusion User manual

Epilog Laser

Epilog Laser Fusion User manual

Epilog Laser Zing User manual

Epilog Laser

Epilog Laser Zing User manual

Epilog Laser MINI User manual

Epilog Laser

Epilog Laser MINI User manual

Epilog Laser Fusion User manual

Epilog Laser

Epilog Laser Fusion User manual

Popular Engraver manuals by other brands

Silverline DIY Series Original instructions

Silverline

Silverline DIY Series Original instructions

Ortur Laser Master 2 user manual

Ortur

Ortur Laser Master 2 user manual

Redsail M500 Assembly & Use Manual

Redsail

Redsail M500 Assembly & Use Manual

Vision Express S5 user manual

Vision

Vision Express S5 user manual

Ingersoll-Rand 140EP Product information

Ingersoll-Rand

Ingersoll-Rand 140EP Product information

Parkside PMGS 12 A1 Operation and safety notes

Parkside

Parkside PMGS 12 A1 Operation and safety notes

Dremel 290-01 Operating/safety instructions

Dremel

Dremel 290-01 Operating/safety instructions

Xtool P2 Riser Base quick start guide

Xtool

Xtool P2 Riser Base quick start guide

Ingersoll-Rand EP50 Series Product information

Ingersoll-Rand

Ingersoll-Rand EP50 Series Product information

Dremel 290 Original instructions

Dremel

Dremel 290 Original instructions

Thunder Laser MINI-60 Unified User's manual

Thunder Laser

Thunder Laser MINI-60 Unified User's manual

Lasertack LE-445-6000 quick start guide

Lasertack

Lasertack LE-445-6000 quick start guide

GRAVOGRAPH M20 PIX user manual

GRAVOGRAPH

GRAVOGRAPH M20 PIX user manual

BAUKER EG013 instruction manual

BAUKER

BAUKER EG013 instruction manual

iMARC VET TAG Engraver user manual

iMARC

iMARC VET TAG Engraver user manual

Redsail X700 user manual

Redsail

Redsail X700 user manual

Vision Engraving & Routing Systems Express user manual

Vision Engraving & Routing Systems

Vision Engraving & Routing Systems Express user manual

manuals.online logo
manuals.online logoBrands
  • About & Mission
  • Contact us
  • Privacy Policy
  • Terms and Conditions

Copyright 2025 Manuals.Online. All Rights Reserved.