manuals.online logo
Brands
  1. Home
  2. •
  3. Brands
  4. •
  5. ETC
  6. •
  7. Touchscreen
  8. •
  9. ETC Paradigm Portable Touchscreen User manual

ETC Paradigm Portable Touchscreen User manual

Portable Touchscreen Setup Guide
Corporate Headquarters
3031 Pleasant View Road, P.O. Box 620979, Middleton, Wisconsin 53562-0979 USA Tel +608 831 4116 Fax +608 836 1736
London, UK
Unit 26-28, Victoria Industrial Estate, Victoria Road, London W3 6UU, UK Tel +44 (0)20 8896 1000 Fax +44 (0)20 8896 2000
Rome, IT
Via Ennio Quirino Visconti, 11, 00193 Rome, Italy Tel +39 (06) 32 111 683 Fax +44 (0) 20 8752 8486
Holzkirchen, DE
Ohmstrasse 3, 83607 Holzkirchen, Germany Tel +49 (80 24) 47 00-0 Fax +49 (80 24) 47 00-3 00
Hong Kong
Rm 1801, 18/F, Tower 1 Phase 1, Enterprise Square, 9 Sheung Yuet Road, Kowloon Bay, Kowloon, Hong Kong Tel +852 2799 1220 Fax +852 2799 9325
Service:
(Americas) service@etcconnect.com
(UK) service@etceurope.com (DE) techserv-hoki@etcconnect.com
(Asia) service@etcasia.com
Web:
www.etcconnect.com
Copyright © 2009 ETC. All Rights Reserved. Product information and specifications subject to change.
7184M2130
Rev A Released 2009-06

ETC intends this documenttobeprovidedinits entirety.
Page 1 of 2
Overview
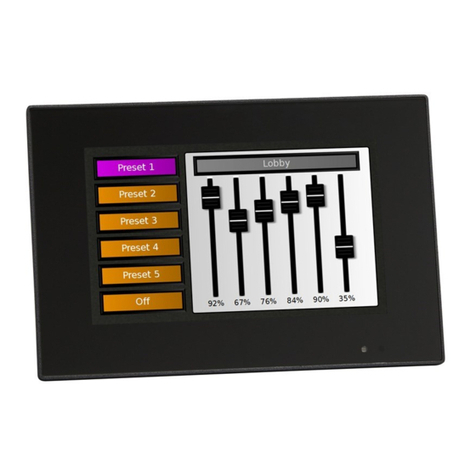
The Paradigm Portable Touchscreen uses a high-resolution, 7” wide-screen, color liquid-crystal display
that is bright and easy to read, with controllable back lights. The station is touch-sensitive and provides
visual as well as optional feedback that tells you when your commands are fully registered.
Each control on the display is designed to your specifications using ControlDesigner™ software.
Additional features include:
•A “Ready-When-You-Are” built-in proximity and ambient light sensor.
•Portable LinkConnect, using Echelon®LonTalk protocol with LinkPower, the topology-free system gives
you the freedom to connect the LCD where you need it, and provide unique controls for each connection
point to the system.
•USBConnect support, a USB flash drive connection for configuration and theme upload and download.
•Quickload, SD media support (2GB or smaller) for upload and backup of the configuration and theme.
•Supports standard or custom graphical control pages.
Connect Paradigm Portable Touchscreen
gniweivysaerofsedivorpdnatsehtfoelgnaehT.dnatspotelbataetaercottinuehtdnuorayletelpmocrevocehtgniwS:1petS
of the LCD.
.)SR1HU(noitatselcatpecerehtottcennoC:2petS
NOTE: Startup takes a minimum of 20 seconds depending on the configuration.
detcennocsitinoitatselcatpecerehtotgnidroccaemehtdnanoitarugifnocderotsyllanretniehtsneponeercshcuoTehT:3petS
to. Utilize the controls on the display to access the lighting system.
NOTE: For configuration or theme upload and download, see page 2 of this document.
Cleaning the Display
Use a dry micro fibre or lint-free cloth to clean the LCD. Do not use any chemical or water-base solutions.
Page 2 of 2
ResetMode Aux Act Svc Svc Data
LON
Status
ResetMode Aux Act Svc Svc Data
LON
Status
Step 1: Open the I/O access door to reveal the access points for removable media (USB and SD) and the Status and
LON LEDs.
Step 2: Insert removable media into the appropriate port.
Step 3: Press the “Mode” pin to initiate the “Setup” menu.
Step 4: Press the [Setup] button located on the top left corner of the display.
Step 5: Press [Files] button. A keypad displays for passcode entry.
Step 6: Enter passcode 4116 to access the Files menu.
NOTE: Standard ETC provided themes used in your configuration do not need to be manually uploaded to
the LCD. These themes are loaded for you at the factory and will display beneath the “Themes”
directory.
Step 7: Press the [Config] button to load the configuration file(s) to the Touchscreen or press [Theme] to load the theme
file(s) to the Touchscreen.
Step 8: Press [Load From] and choose the removable media source the configuration files will be loaded from, then
press [OK].
Step 9: Select the specific file (or select multiple files) from the list that you would like to load onto the Touchscreen.
NOTE: It is possible to retrieve configuration files from the Paradigm ACP on the Touchscreen, however
ETC recommends using removable media to load configurations and themes on portable
Touchscreens to reduce commissioning time. If an automatic configuration file transfer begins,
press the [Cancel] button to stop the transfer and manually upload the configuration.
I/O Indicators
• Reset pin - when pressed, resets the Portable LCD software
• Mode pin - press once for Setup menu. Press and hold for 4 seconds to calibrate the Touchscreen.
• Aux LED - indicates the Touchscreen is powered (Aux 24 Vdc)
• Act LED - application activity is detected
• Svc pin- when pressed, sends the stations Neuron ID to the connected processor
• Svc LED- service pin indicator
• Data LED - indicates LON network activity
Bind the Portable Touchscreen
Before binding your Portable Touchscreen, please confirm the installation meets the following requirements:
• Both the receptacle station (UH1RS) and the Portable Touchscreen (P-LCD-P) have been added to the configured
space in LightDesigner.
• The Portable Touchscreen must be enabled for use with the specific receptacle station (UH1RS). This is set in the
“Portable” property of the LightDesigner Property Editor for the Touchscreen. You can enable a Portable Touchscreen
to more than one receptacle station in a configuration. The displayed configuration and theme may be different for
each configured Touchscreen and receptacle station connector depending on the assignments in the configured
space.
• The receptacle station’s physical ID (found on a label on the front of the UH1RS station) must be associated to the
configured receptacle station in LightDesigner. This ID should be manually entered into the “Connector ROM” property
in the LightDesigner Property Editor for that station. This is the recommended approach as it avoids manual binding at
the Paradigm processor.
• The LightDesigner configuration has been uploaded to the Paradigm ACP(s). Reference the LightDesigner online help
system for details on uploading a configuration.
Step 1: Physically connect the Portable Touchscreen to the receptacle station (UH1RS).
NOTE: Startup takes a minimum of 20 seconds depending on the configuration. If the receptacle station‘s
physical ID is associated in the Paradigm configuration, the Portable LCD will automatically bind
at startup. If you receive a “No Response from Server” message, proceed to Step 2.
Step 2: At the Paradigm processor facepanel, press enter to access the menu.
Step 3: Navigate to the Arch Setup > LonWorks Connections menu and bind the Touchscreen station using the
“Connect Device” option. Reference the Paradigm ACP Configuration Manual for complete details on
connecting a device.
Configuration and Theme Files
Exporting Files from LightDesigner
Step 1: From the LightDesigner configuration, select (File) “Export Portable LCD Files”. The “Export Portable LCD
Files” dialog displays.
Step 2: Select which Portable LCD files will be exported from the selection and click [OK]. The “Browse For Folder”
dialog displays for selection of a location the files will be exported to, such as a removable USB device. Two file
types will be exported, the configuration file saves with a “.lcdconf” extension and the theme saves with an
“.lcdtheme” extension.
NOTE: It is best to store the configuration and theme files to removable media for loading to the
Touchscreen.
Loading Files onto the Touchscreen
NOTE: If the Portable Touchscreen is already bound to the Paradigm processor, it will automatically begin
retrieving its LCD configuration file when powered. Press the [Cancel] button to stop the transfer
and manually load the configuration files instead.
Other ETC Touchscreen manuals

ETC Unison Paradigm P-LCD-FBB User manual

ETC

ETC Unison Paradigm P-LCD-FBB User manual

ETC Mosaic 5 User manual

ETC

ETC Mosaic 5 User manual

ETC Paradigm P-TS7-E User manual

ETC

ETC Paradigm P-TS7-E User manual

ETC Unison Paradigm P-TS7 User manual

ETC

ETC Unison Paradigm P-TS7 User manual

ETC Paradigm P-LCD Series User manual

ETC

ETC Paradigm P-LCD Series User manual

ETC Mosaic 5 User manual

ETC

ETC Mosaic 5 User manual

ETC PARADIGM User manual

ETC

ETC PARADIGM User manual

ETC Unison Paradigm P-TS7 User manual

ETC

ETC Unison Paradigm P-TS7 User manual

ETC Unison Paradigm P-TS7 User manual

ETC

ETC Unison Paradigm P-TS7 User manual

ETC Unison Paradigm P-TS7 User manual

ETC

ETC Unison Paradigm P-TS7 User manual

Popular Touchscreen manuals by other brands

Elo Touch Solutions ET3201L user manual

Elo Touch Solutions

Elo Touch Solutions ET3201L user manual

Tyco Electronics Elo TouchSystems ET1225L-7SWC-1 user guide

Tyco Electronics

Tyco Electronics Elo TouchSystems ET1225L-7SWC-1 user guide

Advantech IDP31-150 Series user manual

Advantech

Advantech IDP31-150 Series user manual

BeiJer X2 extreme 12 HP web installation manual

BeiJer

BeiJer X2 extreme 12 HP web installation manual

Russound XTS5.5 installation manual

Russound

Russound XTS5.5 installation manual

Russound Sphere E Series installation manual

Russound

Russound Sphere E Series installation manual

ADT WTS700 Installation and setup guide

ADT

ADT WTS700 Installation and setup guide

Magenta Mondo TC Quick reference & setup guide

Magenta

Magenta Mondo TC Quick reference & setup guide

Kenwood LZ-7500 instruction manual

Kenwood

Kenwood LZ-7500 instruction manual

Elo TouchSystems ET1724L-7SWR-1-NL, ET1724L-8SW user guide

Elo TouchSystems

Elo TouchSystems ET1724L-7SWR-1-NL, ET1724L-8SW user guide

PenMount Touchscreen 6000 installation guide

PenMount

PenMount Touchscreen 6000 installation guide

Winmate R12IBWS-MHM2 user manual

Winmate

Winmate R12IBWS-MHM2 user manual

Elo TouchSystems 3243L user manual

Elo TouchSystems

Elo TouchSystems 3243L user manual

TimeLink TS32M manual

TimeLink

TimeLink TS32M manual

ASYS Totech EU SUPER DRY XSDB-1402-53 1416 201 Operation manual

ASYS

ASYS Totech EU SUPER DRY XSDB-1402-53 1416 201 Operation manual

Touchjet Wave + Lily Getting started

Touchjet

Touchjet Wave + Lily Getting started

IBT Technologies IBT-3601 manual

IBT Technologies

IBT Technologies IBT-3601 manual

Crestron TPMC-8X-GA Operation guide

Crestron

Crestron TPMC-8X-GA Operation guide

manuals.online logo
manuals.online logoBrands
  • About & Mission
  • Contact us
  • Privacy Policy
  • Terms and Conditions

Copyright 2025 Manuals.Online. All Rights Reserved.