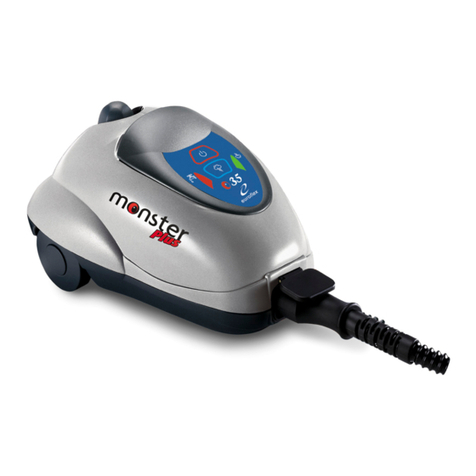
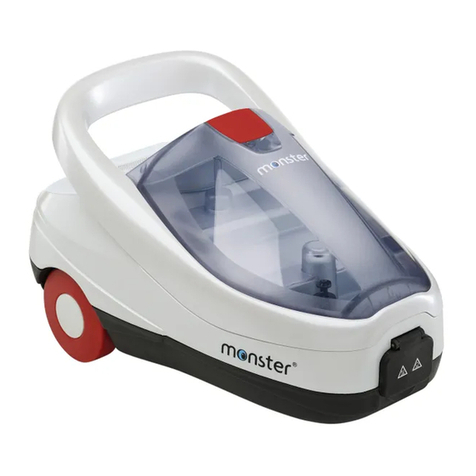
Euroflex MONSTER SUPERCLEAN SC20 User manual

MONSTER 1200
SANITIZING STEAM CLEANER
SUPERCLEAN SC20
MONSTER 1200
SANITIZING STEAM CLEANER
SUPERCLEAN SC20

2

3
Index Page
Important safeguards .....................................................4
Handy steam generator ..................................................5
Description ........................................................................6
Instructions for use ...........................................................6
Assembly and Use ...........................................................7
Starting the Steam Cleaner ............................................8
Refilling the Water Tank ...................................................9
Sanitizing system ...............................................................9
Maintenance ....................................................................10
Technical specifications .................................................11
Troubleshooting guide ....................................................11
Electrical requirements ...................................................11
Guarantee and service information .............................11
After sales service returns form - guarantee slip ..........11
SUPERCLEAN CONCEPT
The by-product of many years of research, the Superclean family of pro-
ducts are designed to combine maximum cleaning and true sanitizing ca-
pability in one easy step. By combining the purity and performance of eco
friendly steam with the unique properties of our eco friendly Clean Blast for-
mula results in appliances that give you extreme clean faster and easier
than ever before.

4
IMPORTANT SAFEGUARDS
When using your Steam Cleaner, basic safety precautions should always be observed, including
the following:
1. Read all instructions before using your Steam
Cleaner.
2. Use the system only for its intended use.
3. To protect against a risk of electric shock, do
not immerse any part of the system in water
or other liquids.
4. Never yank cord to disconnect from outlet;
instead, grasp plug and pull to disconnect.
5. Do not allow cord to touch hot surfaces. Let
the system cool completely before putting
away or opening water tank (removing the
safety cap). Wrap cord loosely around inte-
gral fold-out cord winders when storing.
6. Always disconnect system from electrical
outlet when filling with water or emptying
and when not in use. Always turn the safety
cap slowly when opening the water tank .
This will allow any remaining steam to esca-
pe gradually.
7. Do not operate the system with a damaged
cord or plug, or if the appliance or any other
part of the system has been dropped or da-
maged. To avoid the risk of electric shock,
do not disassemble or attempt to repair the
Steam Cleaner. Return the system to the sel-
ler or contact one of our licensed servicing
centers for examination and repair.
Incorrect re-assembly or repair can cause
a risk of electrical shock or injury to persons
when the Steam Cleaner is used.
8. Do not leave the system in use without sur-
veillance and presence of children.
9. Burns can occur from touching hot metal
parts, hot water or steam. Use caution when
draining unit after use as there may be hot
water in the unit. Never direct steam at
any person. The steam is very hot and can
cause burns.
10. Do not operate in the presence of explosive
and/or flammable fumes.
11. This appliance is intended only for hou-
sehold use. Follow all user instructions in
this manual.
12. Never use any chemicals or substance
other than tap water in the machine. Use
of chemicals may damage the machine.
Use of chemicals will automatically void
your warranty.
13 Appliance has to work on flat surfaces.
14 Never direct steam at any electrical ap-
pliance or appliance including electrical
parts (TV, radio, electrical oven, ...).
To reduce the risk of fire, electric shock, or
injury:
• Do not leave the Steam Cleaner plugged
in when unattended. Unplug the electrical
cord when not in use and before servicing
or refilling water tank.
• Use only as described in this manual. Use
only manufacturer’s recommended acces-
sories.
• Do not pull cord, use cord as a handle, close
a door on cord, or pull cord around sharp
edges or corners. Keep cord away from
heated surfaces.
• Do not use extension cords or outlets with
inadequate current carrying capacity.
• Turn off all controls as applicable before
unplugging from electrical outlet.
• Do not unplug by pulling on cord. To unplug,
grasp the plug, not the cord.
• Do not handle plug or steam cleaner with
wet hands or operate without shoes.
• Do not put any objects into openings. Do
not use with any opening blocked.
• Store your appliance indoors in a cool, dry
area.
• Keep your work area well lit.
• When in use, never turn the appliance over
or on its side. Never direct steam towards
people, animals or plants.
• Do not immerse the steam cleaner into water
or other liquids. Always unplug the power
cord from the electrical socket when filling
the steam cleaner.
• Do NOT add cleaning solutions, scented
perfumes, oils or any other chemicals to
the water used in this appliance as this may
damage the unit or make it unsafe for use.
Use tap water or distilled/purified water if the
tap water in your area is very hard.
SAVE THESE INSTRUCTIONS

5
HANDY STEAM CLEANER
Model: Monster Superclean SC20
KEY FEATURES
1. Body.
2. Resistance indicator light on.
3. Power Cord.
4. Steam Lever.
5. Boiler cap.
6. Extension Hose - for increasing the flexibility of the appliance.(*)
7. Upholstery Nozzle - the flat surface covers wide areas.(*)
8. Cloth Cover - the fabric cover is best for stain removal from upholstery and carpets.(*)
9. Angled Nozzle - attaches to (10) for hard to reach areas.(*)
10. Bayonet Tip - Standard attachment with fine point spray end.
11. Nylon Round Brush - For Smaller areas and appliances. Ideal for detail work and scrub-
bing.(*)
12. Window Squeegee - attaches to the Upholstery Nozzle for cleaning glass.(*)
13. Water refill - for filling the appliance with water.
14. Tote Bag. (*)
15. Clean Blast solution release button
16. Clean Blast solution container release button
17. Clean Blast solution container
18. Clean Blast solution bottle.
(*) These accessories are available and OPTIONAL depending on the model purchased.
3
13
16
17
9
12
8
14
2
1
15
4
5
10
1200 WATT
18 11
6
7
CLEANERS
S
T
E
A
M
A
C
T
I
V
A
T
O
R
24 Clean
Blaster
24 Clean
Blaster

6
HANDY STEAM CLEANER
DESCRIPTION
“Congratulations on your purchase of the MONSTER 1200 SANITIZING STEAM CLEANER. This pro-
duct has many unique and patented features that will change the way you clean. Its versatile
design lets you clean with the eco friendly power of EXTREME steam and, at your demand,
instantly integrate our special CLEAN BLAST formula into the steam that results in true on contact
sanitizing of almost any surface.
INSTRUCTIONS FOR USE
The Steam Cleaner can clean and sanitize all types of surfaces designed to withstand high
temperatures such as marble, ceramic, stone sealed wood, sealed grout, cook tops, window,
mirrors, etc. It is not recommended for use on unsealed wood surfaces, cold glass and soft
plastic areas.
WARNING: On surfaces that have been treated with wax, the wax may be removed by the
heat and steam action. Do not use on unsealed wood floors or direct steam on any
wood floor for an extended period of time. This could cause the wood grain to rise.
It is therefore, recommended that you check the use and care instructions of any
surface from the manufacturer to ensure suitability to steam cleaning and that sample
cleansing be carried out on an isolated area of the desired surface. In case steam is
used to smooth wrinkled fabric or clothing, do not direct steam at the body.

7
ASSEMBLY AND USE
WARNING: The steam lever must be held in operation until all steam pressure has been released
prior to removing the Water Tank Cap. Please also note that the unit is not to be plugged into
an electrical outlet until step 8.
Bayonet Tip
Handy to use on
floors and edges
Extension Hose (*)
Recommended to use for
hard to reach areas.
Upholstery Nozzle (*)
Great for steaming
wrinkles and creases
out of fabrics
1. Press the Water tank cap and Unscrew it to the empty
water tank. Using the measuring cup fill tank with one
measure of water equivalent to 300 ml (10 once liq-
uid).
NOTE:
Do not overfill, to reduce the risk that water
coming out.
2. Re-seal the water tank by screwing the Water Tank Cap
back into place.
1200 WATT
TT
USE OF ACCESSORIES
Before using the Power Steamer, the attachment of an
accessory will be required in conjunction with the type of
surface to be cleaned.
3. Please put the Spray-Nozzle and the slot of the machine in
order, along the direction arrow, and insert it, then clock-
wise turn 90°. To remove the Spray-Nozzle, please operate
reversely.
4. To use the Flexible Hose, the Jet Nozzle or the Fabric Acces-
sory must be attached onto the end using the same process
as outlined in step 3.
(*) “Optional Accessories available with some kits.”

8
ASSEMBLY AND USE
5. The Round Brush and the Curved Nozzle Accessory can be attached to end of the Jet Nozzle
by pushing the accessory on using the hexagonal alignment as a guide.
6. To use the Window Cleaning attachment it must be clipped
into the Fabric Accessory by hooking the two hinges onto the
tabs and lifting the window cleaner around to the top of the
fabric tool and clipping the latch onto the fabric cleaner to
secure in place. To remove the window cleaner, simply lift the
latch to unclip and separate.
WARNING: Using window cleaner on cold glass may cause the
glass to break. Proceed with caution when carrying out this
operation.
7. To use the Fabric Accessory, stretch the Cloth Covering to fit
over the Fabric Accessory.
It is recommended that the Fabric Accessory be attached to
the flexible hose for maximum accessibility for clothing, uphol-
stery and window furnishings.
Angled Nozzle
(*)
Curved Nozzle recommend-
ed for hard to reach area
such as window sills and toilet
Nylon Round Brush (*)
Round Brush recom-
mended for sealed
grout, cook tops and
bench tops.
Window Squeegee
Cloth Cover
(*)
STARTING THE STEAM CLEANER
8. Plug the power cord into an electrical outlet. Resistance indicator light goes on.
9. After 3-4 minutes the appliance is ready to generate the steam..
WARNING: Do not leave the steam cleaner unattended while waiting for steam.
10. Press the Steam Lever to emit the steam and begin passing slowly over the surfaces intended
for cleaning. For disinfecting areas, hold the steam cleaner no more than 1 inch away from
the surface and pass over slowly until entire area is covered.
(*) “Optional Accessories available with some kits.”

9
ASSEMBLY AND USE
FURTHER WATER TANK FILLING
11. Unplug the power cord from electrical outlet.
12. Press and hold Steam Lever until all pressure has been released.
13. Before opening Water Tank Cap it is important to wait approximately 3 minutes for the ap-
pliance to cool down. Slowly turn the cap, only a half turn, and wait for the hissing sound
(if any) to completely stop. The hissing sound may be present due to residual pressure not
released while holding the steam lever.
14. Carefully press the cap and unscrew it and follow process outlined in step 1 and 2.
CLEAN BLAST SYSTEM
This appliance is equipped with an important function that ensure perfect clean blast while
cleaning all surfaces. Monster Superclean combines the power of steam cleaning with the
effi cacy of the product “clean blast” sanitizing.
The clean blast solution is placed into the box.
Unscrew the cap of the clean blast tank and fi ll with bottle contents.
Release the clean blast solution container.
To release the solution and combine with the steam, press the
button on the handle as shown on the picture.
S
T
E
A
M
A
C
T
I
V
A
T
O
R
24 Clean
Blaster
24 Clean
Blaster
S
T
E
A
M
A
C
T
I
V
A
T
O
R
24 Clean
Blaster
24 Clean
Blaster

10
TECHNICAL SPECIFICATIONS
Voltage: 120V - 60 Hz
Power: 1200 Watt
Tank capacity: 0,3 L (10 once liquid)
Cable: 5 m
TROUBLE SHOOTING GUIDE
PROBLEM POSSIBLE SOLUTION
Unit will not switch on. Ensure the power cord has been plugged into a power socket and
the outlet is switch ON.
Check the water tank is filled correctly
Try another power outlet.
Unit is not
producing steam.
Unit sprays out water from
nozzle.
Level in water tank may be too high. Check water tank and do
not overfill max 300ml (10 once liquid).
Hold in upright position. Do not turn the steamer on its side.
Unit not fully heated. Allow the unit time to heat the water.
Accessories, once
attached do not stay on.
Check that enough force has been applied to ensure the acces-
sories are secured.
Read over accessory installation steps.
Ensure that the water tank has been filled with the correct level of
water. Ensure the unit is plugged into a power outlet.
Press Steam Lever. Ensure there is no blockage, try changing
accessory.
NOTE: Please ensure the steam cleaner has been unplugged from the power source and cooled
down before any cleaning and maintenance is carried out.
15. Always empty any excess water from water tank after each use. This operation will prolong
the life of your appliance.
16. Always ensure the unit has cooled before putting it away in a dry, cool place.
17. To ensure the highest level of operation over a long period of time, it is recommended that
the water tank be rinsed out with water at least once a month to clean any water calcifica-
tion accumulated. Do not use vinegar or other substances to remove lime scale deposits.
18. To clean fill with one measure of water, replace cap and shake unit to loosen any lime scale
deposits. Remove cap and empty water from tank.
WARNING: Do not immerse the steam cleaner in water.
19. DO NOT USE WITH ANY OTHER SANITIZING OR CLEANING AGENTS. THIS PRODUCT IS DESIGNED
TO BE USED WITH CLEAN BLAST ONLY.
MAINTENANCE

11
AFTER SALES SERVICE RETURNS FORM - GUARANTEE SLIP
Should your appliance require After Sales Service, please contact your retailer who will advise
you of the returns procedure. Alternatively, please contact Euroflex at phone number 001 212
8251189.
In order to enjoy the benefits of the two-years guarantee, please. retain your proof of purchase,
ensuring that it shows the date of purchase, or ask your retailer to stamp this guarantee slip with
the date of purchase. Please retain in your possession in case of future claims. Proof of purchase
will be required to qualify for free service within the guarantee period.
IMPORTANT
Electrical Requirements:
Please ensure that the voltage shown on the rating plate of your appliance corresponds with
your household electricity supply which must be A.C. (alternating current).
Appliances supplied with a fitted plug:
If the electrical sockets in your home are not suitable for the plug fitted to this appliance, the
plug should not be removed. Use a standard adapter.
Note: Any plug detached from the cable must be destroyed because a plug with a damaged
cable can cause serious injury or death if inserted in the power outlet.
GUARANTEE AND SERVICE INFORMATION
This guarantee does not cover normal wear and tear, damage caused by overloading, negli-
gence, accident or improper use. Any change or modification made by the purchaser or user
to the appliance will invalidate the guarantee, as would any attempted repair.
The guarantee applies only when the appliance has been operated in accordance with the
instructions and connected to an electricity supply which matches that shown on the base of
the appliance.
The guarantee will be rendered invalid if the product is resold. The product must be used solely
for domestic purposes.

12
Índice Página
Instrucciones importantes de seguridad .......................13
Generador de vapor portátil .........................................14
Descripción .......................................................................15
Instrucciones para el uso ................................................15
Ensamblaje y utilización ..................................................16
Puesta en marcha del generador de vapor ................17
Rellenado del depósito ...................................................18
Sistema higienizante ........................................................18
Mantenimiento .................................................................19
Especificaciones técnicas ..............................................20
Guía para el diagnóstico de problemas ......................20
Características eléctricas ...............................................21
Garantía e informaciones sobre la asistencia .............21
Impreso para el servicio de asistencia
post-venta - tarjeta de garantía ....................................21
CONCEPTO DE SÚPER LIMPIEZA
Súper limpieza (superclean) es una nueva familia de productos que revolu-
ciona la tradicional limpieza a vapor. Gracias a recientes estudios y a test
de laboratorio hemos creado la formula perfecta de productos higienizan-
tes , biodegradables y seguros al 100%, que unido a la fuerza del vapor,
permite obtener una HIGIENE TOTAL en todas las superficies tratadas.
Toda la familia de productos “Superclean” representa la nueva frontera de
la limpieza, cuando es útil, más allá de un normal limpiador a vapor pueden
decidir tratar la superficie para restituirla segura e higiénica al 100%
SUPERCLEAN, HIGINE ABSOLUTA

13
NORMAS IMPORTANTES DE SEGURIDAD
Al usar el aparato a vapor, siempre se deben tomar precauciones básicas de seguridad, in-
cluyendo las siguientes:
1. Lea atentamente todas las instrucciones
antes de usar el generador de vapor.
2. Utilice el aparato exclusivamente para los
usos para los que està concebido.
3. Para evitar el peligro de folgoración, no
sumerja el aparato o alguna parte en agua
u otros líquidos.
4. No tire del cable para desenchufar el
aparato de la toma de corriente. Siempre
desconectelo removiendo el enchufe
5. Evite que el cable toque superficies calien-
tes. Deje enfriar por completo el aparato
antes de reponerlo o de abrir el depósito
del agua (remueva el tapón de seguridad).
Enrolle el cable alrededor del aparato antes
de reponerlo, sin estrecharlo.
6. Siempre desconecte el enchufe del aparato
de la toma de corriente antes de rellenarlo
con agua o vaciarlo y cuando no está en
uso. Siempre desenrosque lentamente el ta-
pón de seguridad cuando abre el depósito
del agua. Esto permitirá al vapor residual de
salir gradualmente.
7. No opere el aparato si el cable o el enchufe
están dañados, tampoco cuando el apa-
rato o cualquiera de sus componentes se
hubiese dañado o haya caído. Para evitar
el riesgo de choque eléctrico, no desarme
ni intente reparar el generador de vapor.
Devuelvalo al revendedor o contacte con
unos de los centros de asistencia autorizados
para su revisión y reparación. El reensam-
blaje o reparación inadecuados pueden
causar choque eléctrico o lesiones a las
personas cuando usen el aparato.
8. No deje el sistema en uso sin vigilancia y la
presencia de niños.
9. Los componentes metálicos, el agua y el
vapor calientes pueden producir quemadu-
ras. Tenga mucho cuidado cuando vacía el
aparato después del uso, dado que podría
contener agua caliente. No dirija el chorro
de vapor hacia personas. El vapor alcanza
temperaturas muy elevadas que pueden
producir quemaduras.
10. No ponga en función el aparato cerca de
substancias explosivas e/o inflamables.
11. El aparato está concebido sólo para el uso
doméstico. Siga atentamente todas las
instrucciones para el uso en este manual.
12. No introduzca substancias químicas en el
aparato. Siempre utilice agua del grifo. El
utilizo de substancias químicas podría dañar
el aparato y anular automáticamente la
garantía.
13. Utilice el aparato sobre supeficies llanas.
14.
Nunca dirija el chorro de vapor hacia apara-
tos eléctricos u otros aparatos que incluyen
componentes eléctricos (TV, radio, horno,...).
Para reducir el peligro de incendio, folgora-
ción o lesiones:
• No deje el aparato desatendido cuando
esté enchufado. Desenchufelo siempre de
la toma de corriente cuando no esté en
uso o antes de efectuar operaciones de
mantenimiento o de rellenado del depósito
del agua.
• Utilice sólo según las instrucciones conteni-
das en este manual. Utilice sólo accesorios
recomendados por el fabricante.
• No tire del cable, no utilicelo como asa
para cargar el aparato, no abra puertas
por encima del cable, no tire del cable
sobre bordes o esquinas filosas. Mantengalo
alejado de superficies calientes.
• No utilice cables de extensión o tomas de
corriente con una capacidad inadecua-
da.
• Apague todos los controles antes de des-
enchufar el aparato de la toma de corrien-
te.
• Para desconectar el aparato de la toma de
corriente, no tire del cable. Hagalo tirando
del enchufe, no del cable.
• No manipule el enchufe o el aparato con
las manos mojadas ni lo opere estando
descalzo.
• No introduzca objetos en las aberturas del
aparato, ni lo opere si alguna abertura está
obstruida.
• Guarde el generador de vapor en un área
interior fresca y seca.
• El área de trabajo debe estar bien ilumina-
da.
• Nunca ponga el aparato de lado o al revés
cuando está en función. Nunca dirija el
chorro de vapor hacia personas, mascotas
o llantas.
• No sumerja el aparato en agua u otros
líquidos. Siempre desconecte el cable de
la toma de corriente durante el rellenado
del generador de vapor.
• Nunca añada detergentes, perfumes u
otros productos químicos al agua utilizada
por este aparato, dado que podría dañarlo
y su uso no sería seguro.
• Utilice agua del grifo o agua destilada/des-
mineralizada si el agua de su zona es muy
calcárea.
CONSERVAR ESTAS INSTRUCCIONES

14
GENERADOR DE VAPOR PORTÁTIL
Modelo: Monster Superclean SC20
LEYENDA
1. Aparato
2. Señal luminosa de alimentación
3. Cable eléctrico
4. Pulsador del vapor
5. Tapón de la caldera
6. Manguera flexible – para aumentar la flexibilidad del aparato
7. Accesorio para tejidos – su superficie llana alcanza áreas grandes
8. Revestimiento de paño – ideal para remover manchas de tapicería y alfombras
9. Boquilla curva – se conecte al (10) para superficies difícilmente accesibles
10. Pistola a vapor – accesorio estándar con pico para salpicar
11. Escobilla redonda de nylon – para áreas y aparatos pequeños. Ideal para limpiar con
cuidado y para frotar
12. Limpiacristales – conectado a la boquilla para embutidos es ideal para limpiar cristales.
13. Medidor para el agua – para el rellenado del aparato con agua
14. Bolsa para el transporte
15. Tecla liberadora del desinfectante
16. Botón para desmontar el depósito del desinfectante
17. Tapón depósito higienizante
18. Botella de líquido higienizante
3
13
16
17
9
12
8
14
2
1
15
4
5
10
1200 WATT
18 11
6
7
CLEANERS
S
T
E
A
M
A
C
T
I
V
A
T
O
R
24 Clean
Blaster
24 Clean
Blaster
Table of contents
Other Euroflex Steam Cleaner manuals

Euroflex
Euroflex VAPOUR M4S User manual

Euroflex
Euroflex SC4X2 AUS User manual

Euroflex
Euroflex VAPOUR M4S User manual

Euroflex
Euroflex Steam Shark User manual

Euroflex
Euroflex Monster EZ1 User manual

Euroflex
Euroflex Monster Superclean EZ2-S User manual

Euroflex
Euroflex vapour M2R User manual

Euroflex
Euroflex monster mop User manual

Euroflex
Euroflex monster SC35 PLUS User manual

Euroflex
Euroflex monster SC50 User manual