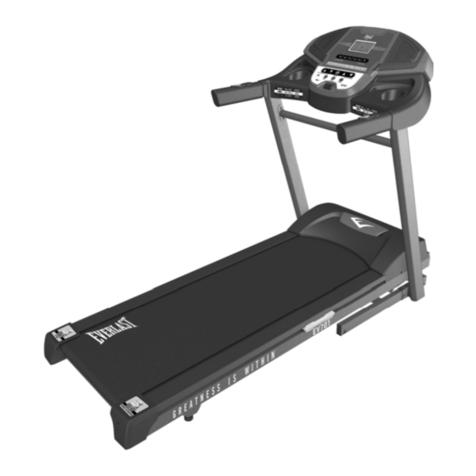
Everlast 1653501 User manual

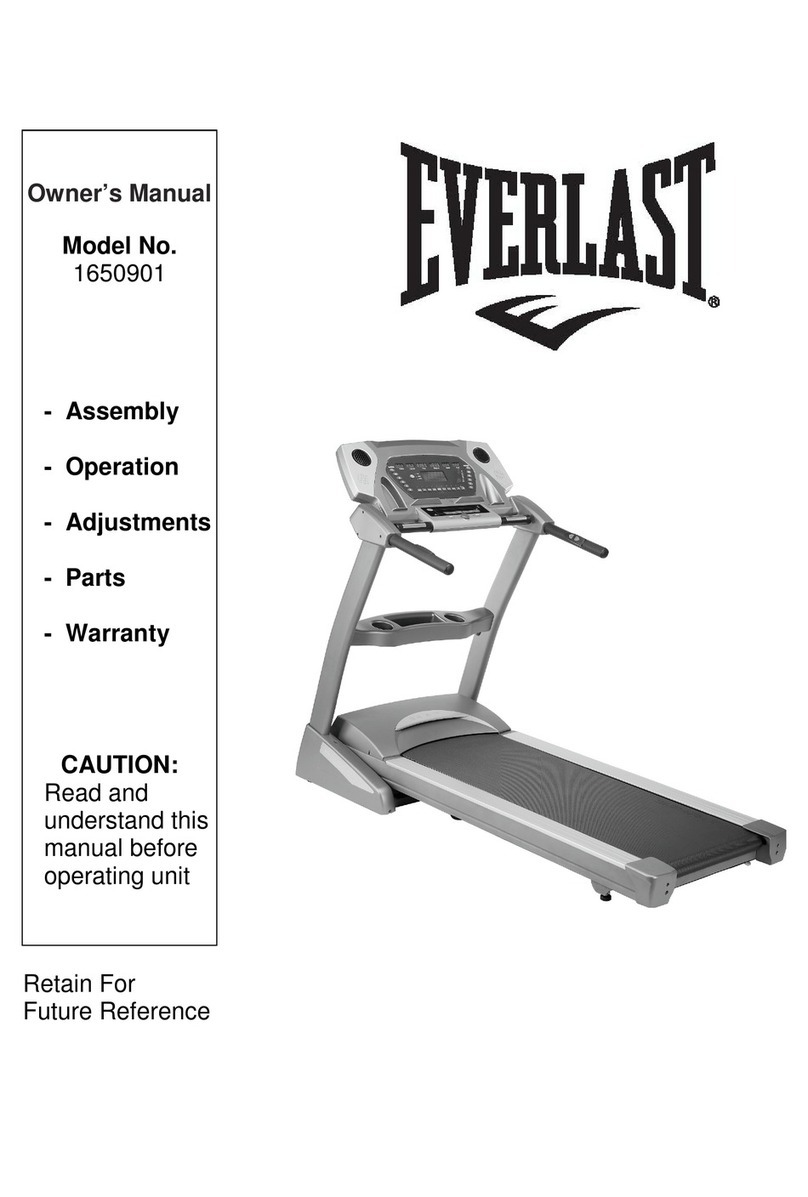
Owner’s Manual
Model No.
1653501
- Assembly
- Operation
- Adjustments
- Parts
- Warranty
CAUTION:
Read and
Understand this
Manual before
Operating unit
Retain For
Future Reference

Customer Service 1-888-707-1880 Dyaco Canada Inc. 2013
1
TABLE OF CONTENTS
Important Safety Instructions…………………………………………………. 2
Important Electrical Instructions……………………………………………… 4
Assembly instructions…………………………………………………………. 5
Folding/ Transport Instructions……………………………………………… 10
Operation of Your New Treadmill……………………………………………11
Exploded View Diagram/Parts List…………………………………………. 15
General Maintenance………………………………………………………….19
Manufacturer’s Limited Warranty…………………………………………… 22

Customer Service 1-888-707-1880 Dyaco Canada Inc. 2013
2
IMPORTANT SAFETY INFORMATION
THIS UNIT IS INTENDED FOR HOUSEHOLD USE ONLY
READ ALL INSTRUCTIONS BEFORE USING THIS TREADMILL
▲CAUTION: Before starting any exercise program, it is recommended that you consult your
physician.
▲WARNING: Connect this unit to a properly grounded outlet only.
▲DANGER: To reduce the risk of electric shock, always unplug the treadmill from the electrical
outlet immediately after using and before cleaning.
WARNING
To reduce the risk of burns, fire, electric shock, or injury to persons:
1. Use 120 volt a.c. household current on a dedicated circuit.
Grounding Instructions
This product must be grounded. If it should malfunction or breakdown, grounding provides a path of least
resistance for electric current to reduce the risk of electric shock. This product is equipped with a cord having
an equipment-grounding conductor and a grounding plug. The plug must be plugged into an appropriate
outlet that is properly installed and grounded in accordance with all local codes and ordinances. See diagram
below for grounding methods.
2. It is the responsibility of the owner to ensure that all users of this treadmill are adequately informed
of all warnings and precautions.
3. The use of an extension cord with this product is not recommended. If an extension cord is needed,
use a short (less than 10 feet) heavy gauge (14 gauge or better) extension cord with a three prong
(grounded) plug and receptacle.
4. Never leave the treadmill unattended when plugged in. Remove the safety key and unplug the unit
from the outlet when not in use and before removing or replacing parts.
5. Never operate the treadmill if it has a damaged cord or plug, if it is not working properly, if it has
been dropped, damaged, or exposed to water. Never move the treadmill belt while the power is
turned off.
6. Do not pull the treadmill by the power supply cord or use cord as a handle. Keep cord away from
heated surfaces and open flames.
7. Fitness equipment must always be installed and used on a flat surface. Do not use outdoors or
near water. Do not place the unit on a loose rug or uneven surface. It is recommended to use an
equipment mat to prevent the unit from moving while it is being used, which could possibly scratch
or damage the surface of your floor. It is recommended to have a minimum of 3 metres safe
clearance on all sides of the treadmill while in use.
8. Keep the treadmill indoors, away from moisture and dust. Do not put the treadmill in a garage,
covered patio or near water.
9. Do not operate the treadmill where aerosol products are used or where oxygen is being
administered.
10. Read, understand, and test the emergency stop procedure before using the treadmill. Do not insert
any objects into any openings.
11. Inspect and properly tighten all parts of the treadmill regularly.
12. Keep children and pets away from this equipment at all times while exercising.
13. Handicapped individuals should have medical approval and close supervision when using this
treadmill.
14. Do not place hands or feet under the treadmill. Always keep hands and legs off of the treadmill
when others are using it.
Customer Service 1-888-707-1880 Dyaco Canada Inc. 2013
3
15. Never turn on treadmill while standing on treadbelt. Always hold the handrails while using the
treadmill. Always return the treadmill to the slowest speed to provide for safe dismount and low
speed restart.
16. To disconnect, turn all controls to the off position, then remove plug from outlet.
17. Do not attempt to raise, lower or move the treadmill until it is properly assembled. See assembly on
page 5and to fold and move the treadmill on page 10. Care must be taken when lifting or moving
the equipment, so as not to injure your back. Always use proper lifting techniques. You must use
any attachments that are not recommended by the manufacturer.
18. Use the treadmill only for its intended use as described in this manual. Do not use any attachments
that are not recommended by the manufacturer.
19. User weight should not exceed 350lbs (159 kg).
20. Never allow more than one person on the treadmill at once.
21. Warm up 5 to 10 minutes before each workout and cool down 5 to 10 minutes afterward. This
allows your heart rate to gradually increase and decrease and will help prevent straining muscles.
22. Never hold your breath while exercising. Breathing should remain at a normal rate in conjunction
with the level of exercise being performed.
23. Start your program slowly and very gradually increase your speed and distance.
24. Always wear suitable clothing and footwear while exercising. Do not wear loose fitting clothing that
could become entangled with the moving parts of your treadmill. Do not walk or jog barefoot, in
stocking feet or loose fitting shoes or slippers.
25. This treadmill is intended for in-home use only. Do not use the treadmill in any commercial, rental
or institutional setting.
▲WARNING: Before beginning any exercise program consult your physician. This is especially important for
individuals over the age of 35 or persons with preexisting health problems. Read all instructions before using
any fitness equipment. We assume no responsibility from personal injury or property damage sustained by
or through the use of this product.
SAVE THESE INSTRUCTIONS

Customer Service 1-888-707-1880 Dyaco Canada Inc. 2013
4
WARNING!
●NEVER use a ground fault circuit interrupt (GFCI) wall outlet with this treadmill. Route the power cord
away from any moving part of the treadmill including the elevation mechanism and transport wheels.
●NEVER remove any cover without first disconnecting AC power.
●If voltage varies by ten percent (10%) or more, the performance of your treadmill may be affected. Such
conditions are not covered under your warranty. If you suspect the voltage is low, contact your local
power company or a licensed electrician for proper testing. See Diagnosis Guide, page 21.
●NEVER expose this treadmill to rain or moisture. This product is NOT designed for use outdoors, near a
pool or spa, or in any other high humidity environment.
This product must be grounded. If the treadmill should malfunction or breakdown, grounding provides a
path of least resistance for electric current, reducing the risk of electric shock. This product is equipped with
a cord having an equipment-grounding plug. The plug must be plugged into an appropriate outlet that is
properly installed and grounded in accordance with all local codes and ordinances.
DANGER - Improper connection of the equipment-grounding conductor can result in a risk of electric
shock. Check with a qualified electrician or serviceman if you are in doubt as to whether the product
is properly grounded. Do not modify the plug provided with the product if it will not fit the outlet;
have a proper outlet installed by a qualified electrician.
●NEVER operate this treadmill without reading and completely understanding the results of any operational
change you request from the computer.
●Understand that changes in speed and incline do not occur immediately. Set your desired work level on the
computer console and release the adjustment key. The computer will obey the command gradually.
●NEVER use your treadmill during an electrical storm. Surges may occur in your household power supply that
could damage treadmill components.
●Use caution while participating in other activities while walking on your treadmill, such as watching television,
reading, etc. These distractions may cause you to lose balance or stray from walking in the center of the belt;
which may result in serious injury.
●NEVER mount or dismount the treadmill while the belt is moving. Our treadmills start with at a very low
speed and it is unnecessary to straddle the belt during start up. Simply standing on the belt during slow
acceleration is proper after you have learned to operate the unit.
●Always hold on to a handrail or hand bar while making control changes (incline, speed, etc.).
Do not use excessive pressure on console control keys. They are precision set to function properly with little
finger pressure. Pushing harder is not going to make the unit go faster or slower. If you feel the buttons are
not functioning properly with normal pressure, contact your dealer.
Important Electrical Information

Customer Service 1-888-707-1880 Dyaco Canada Inc. 2013
5
!!ATTENTION: IMPORTANT UNPACKING INSTRUCTIONS.
PLEASE READ BEFORE UNPACKING YOUR FOLDING TREADMILL!!
Serious injury could occur if this folding treadmill is not unpacked properly.
There is a Velcro strap installed around the treadmill base that prevents the treadmill from
unfolding accidentally during shipping. If this strap is not removed properly the treadmill
could spring open unexpectedly and cause injury if someone is standing near the treadmill
when the strap is removed.
To ensure your personal safety during removal of the shipping strap please make sure the
treadmill is positioned flat on the ground, in the orientation it would be in if you were using
the treadmill. Do not turn the treadmill up on its side while removing the shipping strap. This
could cause the treadmill’s folding mechanism to spring open. If the end of the Velcro strap
(that you need to grab to remove it) happens to be under the treadmill deck, reach under
the deck to grab it, but do not tilt the treadmill up to gain access to the strap end.
Unpack the treadmill and locate the hardware pack. The hardware pack is separated into
five sections; one section containing tools and four sections labeled steps 1-4 which
contain the hardware needed for assembly of each step. The assembly steps below are
numbered one through four and correspond to the hardware in the numbered sections of
the hardware pack. Remove only the hardware for the step you are currently assembling to
avoid confusion and mix ups.
Assembly Instructions

Customer Service 1-888-707-1880 Dyaco Canada Inc. 2013
Assembly Instructions
#156. M5×15m/m
Phillips Head Screw (6pcs) #100. Ø8ר18×1.5m/m
Flat Washer (8pcs) #99. 5/16" ×1/2"
Hex Head Bolt (8pcs)
#125. 5/16" × 3/4"
Button Head Socket Bolt
(10pcs) #126.Ø8 × Ø19 × 1.5T
Curved Washer (2pcs)
#44. Safety Key
(1pc) #104. Lubricant
(1pc)
#103. M6 (66 × 86)
L Allen Wrench (1pc)
#102. Combination M5 Allen Wrench
& Phillips Head Screw Driver (1pc)
#90. 13m/m
Wrench(1pc)

Customer Service 1-888-707-1880 Dyaco Canada Inc. 2013
7
Step 1.
Remove the treadmill from the carton and lay it on a smooth level surface.
Step2.
Connect Computer Cable (Middle) (54) with Computer Cable (Lower) (55) then insert
Right and Left Uprights (4) and (5) into the Frame Base (2) and use 13m/m Wrench
(90) to tighten 8 pcs of 5/16" × 1/2" Hex Head Bolts (99) and 8pcs of Ø8 × Ø18 × 1.5T
Flat Washers (100).
99
55 99
99
100
100
99
99
100
100
100
100
100
99
99
99
100
54
90
4
5
2
Assembly Instructions

Customer Service 1-888-707-1880 Dyaco Canada Inc. 2013
8
Step 3
Connect Computer Cable (Middle) (54) with Computer Cable (Upper) (53)
53
54
Step 4.
Install the Console Support (6) into the Uprights (L,R) (5,4) with the 6pcs of 5/16" ×
3/4" Button Head Socket Bolts (125) and 2pcs ofψ8 x 19 x 1.5T Curved Washers
(126) by using the Combination M5 Allen Wrench & Phillips Head Screw Driver (102).
125
125
125
126
125 102
125
126
125
5
4
Step 5.
1. Connecting the Speed/Hand Pulse Complex (28) with the Console Assembly (21).
2. Connecting the Incline/Hand Pulse Complex (29) with the Console Assembly (21).
3. Connecting the Computer Cable (Upper) (53) with the Console Assembly (21).
28
29 53
21

Customer Service 1-888-707-1880 Dyaco Canada Inc. 2013
9
Step 6.
Insert Console Assembly (21) into Console Support (6) and secure with 6 pcs ofM5 ×
15m/m_Phillips Head Screws (156) by using Combination M5 Allen Wrench & Phillips
Head Screw Driver (102).
Step 7.
Install Handrail Support (9) between left and right Uprights (5) and (4) and use
Combination M5
Allen Wrench & Phillips Head Screw Driver (102) to tighten 4 pcs of 5/16" × 3/4"
Button Head Socket Bolts (125).
102
9
125
125
125
NOTE: Please Tighten All Screws After All Components Assembly Complete.

Customer Service 1-888-707-1880 Dyaco Canada Inc. 2013
10
Do not attempt to move the unit unless it is in the folded and locked position. Be sure the power cord is
secured to avoid possible damage. Use both handrails to maneuver the unit to the desired position.
■TO FOLD THE TREADMILL
Lift the deck until the latch clicks in place.
■TO UNFOLD THE TREADMILL
Press the tube with your foot at the yellow sticker
To release latch, see picture to the right.
The treadmill is equipped with four transport wheels that are engaged when the treadmill is folded. After
folding simply roll the treadmill away.
Folding Instructions
Transportation

Customer Service 1-888-707-1880 Dyaco Canada Inc. 2013
Operation of Your Treadmill
Button Function:
A > SPEED (FAST):Pressing this button increases the speed by 0.1(km/mile). Press and hold
this button for 3 seconds to increase speed rapidly. Press this button during setting the program
to adjust the value (to increase).
B > SPEED (SLOW):Pressing this button decreases the speed by 0.1(km/mile). Press and hold
this button for 3 seconds to decrease speed rapidly. Press this button during setting the program
to adjust the value (to decrease).
C > INCLINE (UP):Pressing this button increases the incline level by 1. Press and hold this
button for 3 seconds to increase the incline level rapidly. Press this button during setting the
program to adjust the value (to increase).
D > INCLINE (DOWN) :Pressing this button decreases the incline level by 1. Press and hold
this button for 3 seconds to decrease the incline level rapidly. Press this button during setting the
program to adjust the value (to decrease).
E > ENTER : for program setting: Press this button to set Time, Distance, Calorie and and other
functions. Press and hold this button for more than 3 seconds, all set value will reset to zero.
F > PROGRAM :Press to select desired training programs P1 ~ P24, HRC.
G > START/ STOP :Press to select treadmill speed starting from 0.5/1.0 (mile / km); Pressing
this button during the training, the treadmill will enter pause mode, and the speed will slow down
gradually until stop with the incline returning to the starting position. Pressing this button once
again during the pause mode, the system returns to ready mode.
H > FAN :Press this button to turn on the fan. Press again to turn off.
I > Speed shortcut key:3、6、9 (km/mile) To set the speed rapidly.
J > incline shortcut key:3、6、9To set the incline rapidly.

Customer Service 1-888-707-1880 Dyaco Canada Inc. 2013
12
Treadmill Operation
After turning on the power on, place the safety key on the console for the treadmill to enter the ready
mode. Press the start button to start the treadmill or press PROGRAM button to select the training
mode, normal or manual mode, preset programs (P1~P24) or heart rate control mode.
Manual/Normal Mode: Turn on the power, put on the safety key and the console enters MANUAL or
normal mode then press start button to start the treadmill or press ENTER to
set the count-down parameters (time, distance and calorie). Press SPEED▲
and ▼to adjust time, distance and calorie then press ENTER to confirm. The
system can only accept the last parameter entered, for instance, if the last
entered parameter is distance, then parameters entered previously will be
void. Only distance is accepted. Distance will be counted down, others will be
counted up.
Preset time value: 30:00(5:00~99:00) with increment of 1:00.
Preset distance value: 5.00 km/mile (1.00~9.00) with increment of 1.00.
Preset calorie value: 500(10~9990) with increment of 10.
The starting speed is 0.5/1.0(mile/km) with the incline level 0.
Preset PROGRAM: There are 24 built in programs (P1~P24). Press PROGRAM button to choose
program P1~P24or press START button to start. The preset time is (30:00) or
press ENTER button to enter time parameter setting. 30:00(5:00~99:00) with
increment of 1:00
HRC:This program controls Heart Rate. Please consult doctor or professional training guide before
training. Press PROGRAM to choose HRC.
Press START button to start the training with preset values weight 70, age 30, HR target 114 and time
30:00 to count down, or press ENTER button for setting (Weight, age, target HR and time). Use
SPEED▲▼ and INCLINE▲▼ to adjust.
a > Time preset value: 30:00(5:00~99:00) with increment value of 1:00.
b > When target heart rate is not set, default setting will be 116 (60 to 220), value can be increased or
decrease at intervals of 1.
Once started, heart rate detection will control incline to allow heart rate to reach and maintain set
target heart rate.
For example:
When heart rate is lower than target, incline will increase to increase level of workout raising heart
rate. When heart rate reaches target, no changes will be made. When heart rate is higher than
target, incline will decrease to lower heart rate. If heart rate does not lower and incline is not able to
lower any further, The machine will stop to protect user.


Customer Service 1-888-707-1880 Dyaco Canada Inc. 2013
15
KEY NO. PART NO. DESCRIPTION Q'TY
1 350101 Main Frame 1
2 350102 Frame Base 1
3 350103 Incline Bracket 1
4 350104 Right Upright 1
5 350105 Left Upright 1
6 350106 Console Support 1
7 350107 Outer Slide 1
8 350108 Seat Slider 1
9 350109 Handrail Support 1
10 350110 Incline Motor 1
11 350111 Drive Belt 1
12 350112 Motor Bracket 1
13 350113 Drive Motor 1
14 350114 Running Belt 1
15 350115 Running Deck 1
16 350116 Front Roller W/Pulley/Magnet 1
17 350117 Rear Roller 1
18 350118 Deck Cross Brace 1
19 350119 Sliding Tube Spring 1
21 350121 Console Assembly 1
21~1 350121~1 Console Top Cover 1
21~2 350121~2 Console Bottom Cover 1
21~5 350121~5 Square Magnet Stop Plate 1
21~6 350121~6 Console Anchor 2
21~7 350121~7 Console Inner Cover 1
21~12 350121~12 400m/m_Sensor W/Cable 1
21~15 350121~15 Speaker Grill Anchor 6
21~16 350121~16 750m/m_Speaker W/Cable 1
21~17 350121~17 0.5W_Amplifier Controller 1
21~18 350121~18 500m/m_Amplifier Cable 1
21~19 350121~19 300m/m_Speaker W/Cable 1
21~20 350121~20 Interface Board 1
21~22 350121~22 500m/m_Sound Board W/Cable 1
21~24 350121~24 Ø3.0 × 10m/m_Sheet Metal Screw 6
21~25 350121~25 Ø3.5 × 12m/m_Sheet Metal Screw 21
21~26 350121~26 Deflector Fan Grill 2
21~27 350121~27 Fan Grill Anchor 4
21~28 350121~28 Ø3.5 × 32m/m_Sheet Metal Screw 8
21~32 350121~32 Fan Assembly 2
22 350122 Anti-Colliding Plug 1
23 350123 Metal Tube End Cap 4
25 350125 Motor Top Cover 1
26 350126 Adjustment Base (L) 1
27 350127 Adjustment Base (R) 1
28 350128 Speed/Hand Pulse Complex 1
29 350129 Incline/Hand Pulse Complex 1
30 350130 Breaker 1
31 350131 On/Off Switch 1
32 350132 Transportation Wheel 4
33 350133 Button Head Plug 2
35 350135 Cushion 6
Parts List and Diagram

Customer Service 1-888-707-1880 Dyaco Canada Inc. 2013
16
36 350136 Handgrip Foam 2
37 350137 Foot Rail 2
40 350140 Motor Cover Anchor(D) 5
43 350143 30 × 60m/m_Square End Cap 2
44 350144 Safety Key 1
45 350145 Power Socket 1
46 350146 3/8" × 7T_Nut 3
47 350147 Sensor Rack 1
48 350148 Power Cord 1
49 350149 300m/m_Connecting Wire (White) 1
50 350150 300m/m_Connecting Wire (Black) 1
51 350151 100m/m_Connecting Wire (Black) 1
52 350152 Motor Controller 1
53 350153 700m/m_Computer Cable (Upper) 1
54 350154 1250m/m_Computer Cable (Middle) 1
55 350155 1200m/m_Computer Cable (Lower) 1
56 350156 Sensor W/Cable 1
58 350158 1/2" × 1"_Hex Head Bolt 2
59 350159 3/8" × 3-1/2"_ Hex Head Bolt 1
61 350161 3/8" × 1-1/2"_Hex Head Bolt 1
62 350162 3/8" × 3/4"_Hex Head Bolt 4
63 350163 M8 × 60m/m_Hex Head Bolt 1
64 350164 M8 × 12m/m_Hex Head Bolt 2
65 350165 5/16" × 3"_Button Head Socket Bolt 2
66 350166 3/8" × 1-3/4"_Hex Head Bolt 1
67 350167 5/16" × 1-1/2"_Flat Head Socket Bolt 4
68 350168 3/8" × 3/4"_Button Head Socket Bolt 2
69 350169 M8 × 80m/m_Socket Head Cap Bolt 2
70 350170 M8 × 25m/m_Flat Head Countersink Bolt 6
71 350171 Motor Bottom Cover 1
73 350173 Ø5 × 16m/m_Tapping Screw 7
74 350174 Ø3.5 × 12m/m_Sheet Metal Screw 2
75 350175 1/2" × 8.0T_Nyloc Nut 2
76 350176 3/8" × 7.0T_Nyloc Nut 4
77 350177 5/16" × 7.0T_Nyloc Nut 4
78 350178 M8 × 7.0T_Nyloc Nut 1
79 350179 Ø10 × 2.0T_Split Washer 4
80 350180 Ø8 × 1.5T_Split Washer 4
81 350181 Ø5 × 1.5T_Split Washer 4
82 350182 Ø19 × Ø10 × 1.5T_Flat Washer 2
83 350183 Ø10 × Ø25 × 2.0T_Flat Washer 4
84 350184 Ø8 × Ø18 × 1.5T_Flat Washer 4
85 350185 Ø50 × Ø13 × 3T_Nylon Washer (B) 2
86 350186 Ø24 × Ø10 × 3T_Nylon Washer (A) 4
87 350187 Ø25 × Ø20 × Ø16 × Ø5 × 4.5H × 1.1T_Concave Washer 8
88 350188 Ø5 × 1.5T_Star Washer 4
89 350189 Ø5 × 19m/m_Tapping Screw 1
90 350190 13m/m_Wrench 1
91 350191 Ø4 × 12m/m_Sheet Metal Screw 12
92 350192 Belt Guide 2
93 350193 Ø5 × 16m/m_Tapping Screw 24
94 350194 Nylon Washer 2

Customer Service 1-888-707-1880 Dyaco Canada Inc. 2013
17
95 350195 Cylinder 1
96 350196 M8 × 50m/m_Flat Head Countersink Bolt 2
99 350199 5/16" × 1/2"_Hex Head Bolt 8
100 3501100 Ø8 × Ø18 × 1.5T_Flat Washer 8
102 3501102 Combination M5 Allen Wrench & Phillips Head Screw Driver 1
103 3501103 M6 (66 × 86)_L Allen Wrench 1
104 3501104 Lubricant 1
105 3501105 Adjustment Foot 2
111 3501111 Ø3.5 × 16m/m_Tapping Screw 5
112 3501112 Wire Tie Mount 5
113 3501113 Top Motor Cover Plate 1
116 3501116 Ø3 × 10m/m_Sheet Metal Screw 2
117 3501117 400m/m_Console Ground Wire 1
125 3501125 5/16" × 3/4"_Button Head Socket Bolt 10
126 3501126 Ø8 × Ø19 × 1.5T_Curved Washer 2
128 3501128 M5 × 10m/m_Phillips Head Screw 4
135 3501135 Ø3 × 25m/m_Sheet Metal Screw 2
140 3501140 Ø4 × 19m/m_Sheet Metal Screw 4
146 3501146 Drink Bottle 1
151 3501151 400m/m_Audio Cable 1
154 3501154 1000m/m_Ground Wire 1
155 3501155 Console Gusset 1
156 3501156 M5 × 15m/m_Phillips Head Screw 10
157 3501157 M5 × 1.5T_Nyloc Nut 4
159 3501159 Handgrip Side Cap(L) 1
160 3501160 Handgrip Side Cap(R) 1
162 3501162 Controller Back Plate 1
163 3501163 Ø3 × 8m/m_Sheet Metal Screw 2


Customer Service 1-888-707-1880 Dyaco Canada Inc. 2013
19
Belt and Bed - Your treadmill uses a very high-efficient low-friction bed. Performance is
maximized when the bed is kept as clean as possible. Use a soft, damp cloth or paper towel to
wipe the edge of the belt and the area between the belt edge and frame. Also reach as far as
practical directly under the belt edge. This should be done once a month to extend belt and bed
life. Use water only - no cleaners or abrasives. A mild soap and water solution along with a nylon
scrub brush will clean the top of the textured belt. Allow to dry before using.
Belt Dust - This occurs during normal break-in or until the belt stabilizes. Wiping excess off with
adamp cloth will minimize buildup.
General Cleaning - Dirt, dust, and pet hair can block air inlets and accumulate on the running
belt. On a monthly basis, vacuum underneath your treadmill to prevent buildup. Once a year, you
should remove the black motor hood and vacuum out dirt that may accumulate. UNPLUG
POWER CORD BEFORE THIS TASK.
BELT ADJUSTMENTS:
Treadbelt Tension Adjustment - Belt tension is not critical for most users. It is very important for
joggers and runners in order to provide a smooth, steady running surface. Adjustment must be
made from the right side of the rear roller in order to adjust tension with the 6 mm Allen wrench
provided in the parts package. The adjustment bolt is located at the end of the right side rail as
noted in diagram below.
Tighten the rear roller only enough to prevent slippage at the front roller. Turn the treadbelt
tension adjusting bolt in increments of 1/4 turn and inspect for proper tension.
When an adjustment is made to the belt tension, you must also make a tracking
adjustment to compensate for the change in belt tension. This is accomplished by turning
both the tension and tracking Allen bolts an equal amount. This adjustment should be made by
turning both bolts clockwise by no more than a 1/4 turn at a time.
DO NOT OVERTIGHTEN – Over tightening will cause belt damage and premature bearing
failure.
Note: Adjustment is through small hole in end cap.
Tracking /
Tension
Adjustment Tracking / Tension
Adjustment
General Maintenance
Table of contents
Other Everlast Treadmill manuals

Everlast
Everlast 1654701 User manual

Everlast
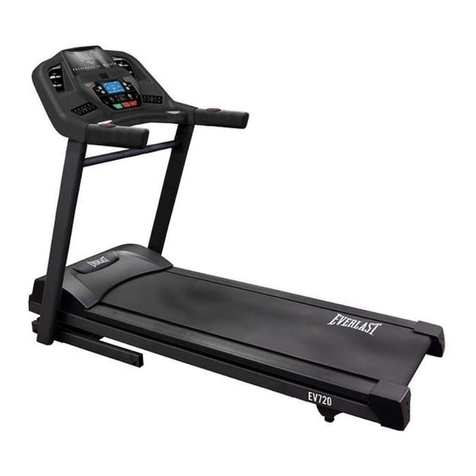
Everlast EV720 User manual

Everlast
Everlast EV2.5 User manual

Everlast
Everlast Pacer Treadmill User manual

Everlast
Everlast EV651 User manual

Everlast
Everlast EV7000 Owner's manual

Everlast
Everlast 1650901 User manual

Everlast
Everlast Smart XV10 Owner's manual

Everlast
Everlast CARDIO TREADMILL User manual
Popular Treadmill manuals by other brands

Keys Fitness
Keys Fitness Health Trainer 702t Treadmill HT702t owner's manual

Reebok
Reebok TREADMILL RBTL12921 user manual

Healthstream
Healthstream HC10TVTM owner's manual

Sunny Health & Fitness
Sunny Health & Fitness SF-T1408M user manual

AbodeFit
AbodeFit WalkSlim 920 user manual

STAR TRAC FITNESS
STAR TRAC FITNESS E-TR owner's manual