7
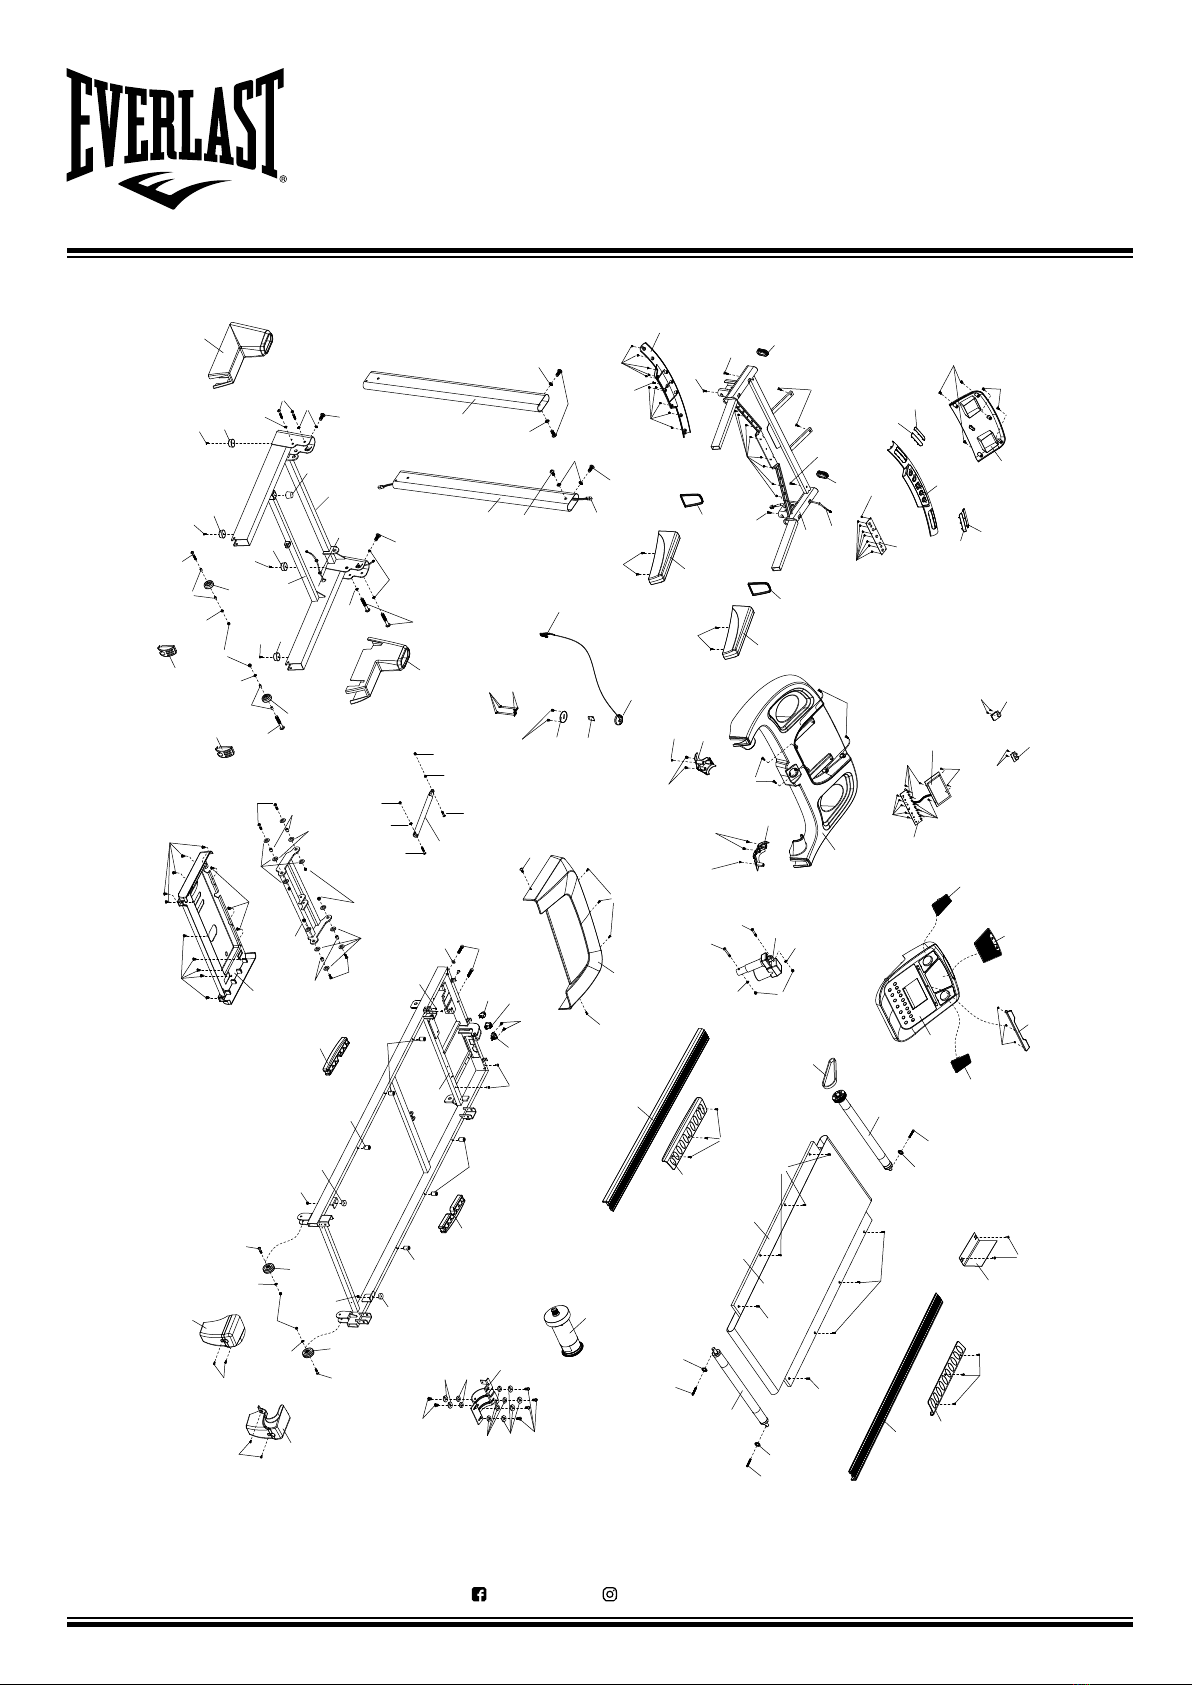
EXPLODED DIAGRAM PARTS LIST
For queries or additional product information, please call our Service Centre on:
087 997 0865
Please have your model name on hand.
www.everlastsa.co.za
Everlast/SA everlast_sa
Part
No. Description Q'ty Description Q'ty Description Q'ty
A01 Base frame 1 C23 Oval inner plug 2 D31 Amplifier wire 1
A02 Main frame 1 C24 Motor belt 1 D32 USB board 1
A03 Incline bracket 1 C25 Cone-shape cushion 1 D33 Amplifier 1
A04 Console bracket 1 C26 Flat foot pad 4 D34 Volume connecting wire 1
A05 Left upright tube 1 C27 Adjustable wheel 2 D35 MP3 connecting wire 1
A06 Right upright tube 1 C28 Wire protector 2 D36 Speaker 2
A07 Motor bracket 1 C29 Plastic pad 4 D37 Bluetooth board 1
B01 Front roller 1 C30 Safety key bracket 1 D38 Bluetooth wire 1
B02 Back roller 1 C31 Safety key 1 D39 Screw (ST2.9*6.0) 4
B03 Air pressure cylinder 1 C32 Transport wheel plug 2 D40 Nut (M6) 2
B04 Hand pulse sheet iron 1 2 C33 Handle bar decoration ring 2 D41 Nut (M6) 6
B05 Hand pulse sheet iron 2 2 C34 Handle bar left cover 1 D42 Nut (M10) 6
B06 Transport wheel cover 4 C35 Handle bar right cover 1 D43 Bolt (M10x60) 1
B07 Spring sheet 2 D01 Computer board 1 D44 Bolt (M10*45) 1
B08 Left speaker net 1 D02 Control board 1 D45 Bolt (M10*30) 4
B09 Right speaker net 1 D03 Handle bar button board 1 D46 Bolt (M8*50) 6
B10 Turning bushing 4 D04 Top signal wire 1 D47 Bolt (M8*40) 2
B11 Copper sheet 1 D05 Middle signal wire 1 D48 Bolt (M8*30) 1
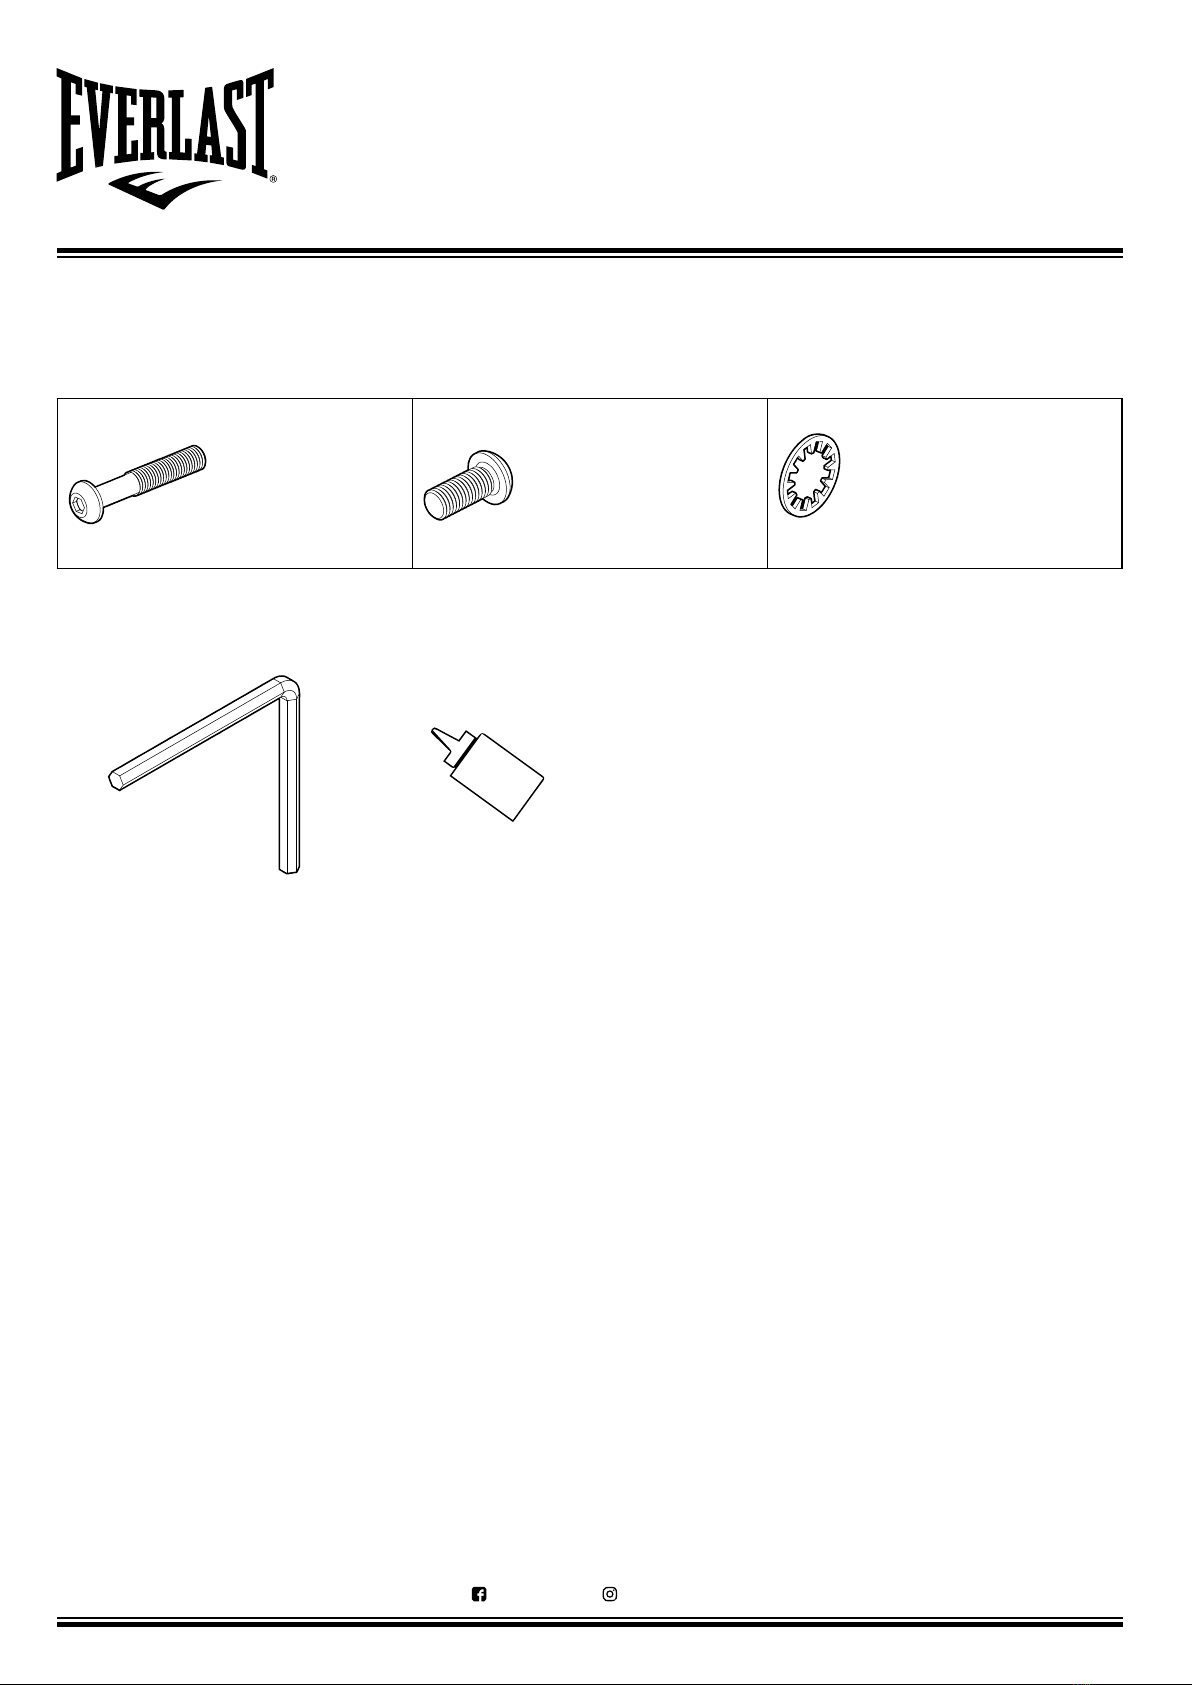
B12 Allen wrench (5mm) 1 D06 Bottom signal wire 1 D49 Bolt (M8*20) 4
B13
Spanner with Screw Driver (S=13/14/15)
1 D07 Shortcut top wire 1 D50 Bolt (M8*15) 8
B14 Cushion Spring 6 D08 Shortcut bottom wire 1 D51 Bolt (M8*40) 2
C01 Console top cover 1 D09 Hand pulse top wire 1 D52 Bolt (M8*42) 1
C02 Console middle cover 1 D10 Hand pulse middle wire 2 D53 Bolt (M6*55) 3
C03 Console bottom cover 1 D11 Hand pulse bottom wire 2 D54 Bolt (M6*40) 2
C04 Hand pulse top cover 1 D12 Speed sensor 1 D55 Bolt (M6*25) 6
C05 Hand pulse bottom cover 1 D13 DC motor 1 D56 Bolt (M5*16) 11
C06 Motor top cover 1 D14 Incline motor 1 D57 Bolt (M5*8) 9
C07 Motor bottom cover 1 D15 Running board 1 D58 Screw (ST4.2*30) 2
C08 Left upright tube cover 1 D16 Overload protector 1 D59 Screw (ST4.2*30) 4
C09 Right upright tube cover 1 D17 Square switch 1 D60 Screw (ST4.2*12) 17
C10 Left back end cover 1 D18 Power socket 1 D61 Screw (ST4.2*15) 6
C11 Right back end cover 1 D19 Magnetic ring 1 D62 Screw (ST4.2*12) 9
C12 Handle bar foam 2 D20 Magnetic core 1 D63 Washer (6) 3
C13 Rubber pad 1 D21 Power wire 1 D64 Washer (8) 14
C14 Plastic bracket 1 D22 Safety key wire 1 D65 Washer (10) 2
C15 Side rail 2 D23 Grounding wire 2 D66 Washer (8) 6
C16 Running belt 1 D24 AC single wire 1 D67 Flat washer C (8) 7
C17 Air cushion 2 D25 AC single wire 1 D68 Flat washer C (ø10*ø26*2.0) 8
C18 Side rail anti-slip pad 2 D26 Wire 1 1 D69 Screw (ST2.9*8) 46
C19 Black cushion 4 D27 Wire 2 1 D70 Screw (ST3.5*10) 20
C20 Blue cushion 2 D28 Wire 3 1 D71 Bolt (M5*12) 4
C21 Blue cushion 2 D29 Filter 1 D72 Screw (ST2.9*4) 4
C22 Transportation wheels 2 D30 Inductance 1 D73 Button board 1
Part
No.
Part
No.