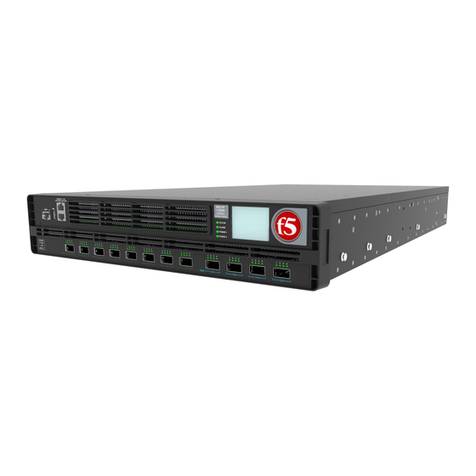
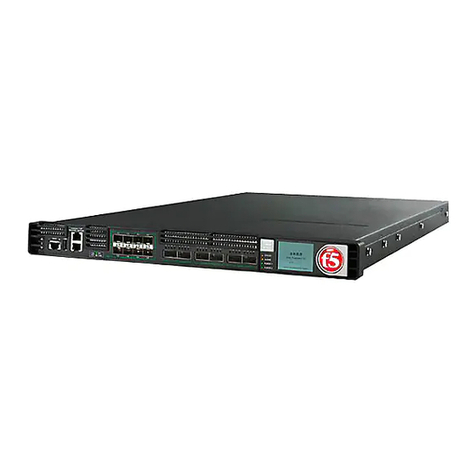
F5 6900 User manual

Installation Guide for 6900/8900
Hard Drives
PUB-0193-02


Installation Guide for 6900/8900 Hard Drives i
Product Version
This manual applies to the platforms 6900 and 8900 created by F5 Networks, Inc.
Publication Date
This guide was published on October 30, 2009.
Legal Notices
Copyright
Copyright 2009, F5 Networks, Inc. All rights reserved.
F5 Networks, Inc. (F5) believes the information it furnishes to be accurate and reliable. However, F5
assumes no responsibility for the use of this information, nor any infringement of patents or other rights of
third parties which may result from its use. No license is granted by implication or otherwise under any
patent, copyright, or other intellectual property right of F5 except as specifically described by applicable
user licenses. F5 reserves the right to change specifications at any time without notice.
Trademarks
F5, F5 Networks, the F5 logo, BIG-IP, 3-DNS, iControl, Internet Control Architecture, VIPRION, iRules,
OneConnect, Packet Velocity, SYN Check, Control Your World, ZoneRunner, uRoam, FirePass,
TrafficShield, Swan, WANJet, WebAccelerator, and TMOS are registered trademarks or trademarks, and
Ask F5 is a service mark, of F5 Networks, Inc. in the U.S. and certain other countries. All other trademarks
mentioned in this document are the property of their respective owners. F5 Networks' trademarks may not
be used in connection with any product or service except as permitted in writing by F5.
Export Regulation Notice
This product may include cryptographic software. Under the Export Administration Act, the United States
government may consider it a criminal offense to export this product from the United States.
RF Interference Warning
This is a Class A product. In a domestic environment this product may cause radio interference, in which
case the user may be required to take adequate measures.
FCC Compliance
This equipment has been tested and found to comply with the limits for a Class A digital device pursuant
to Part 15 of FCC rules. These limits are designed to provide reasonable protection against harmful
interference when the equipment is operated in a commercial environment. This unit generates, uses, and
can radiate radio frequency energy and, if not installed and used in accordance with the instruction manual,
may cause harmful interference to radio communications. Operation of this equipment in a residential area
is likely to cause harmful interference, in which case the user, at his own expense, will be required to take
whatever measures may be required to correct the interference.
Any modifications to this device, unless expressly approved by the manufacturer, can void the user's
authority to operate this equipment under part 15 of the FCC rules.
Canadian Regulatory Compliance
This Class A digital apparatus complies with Canadian ICES-003.
Standards Compliance
This product conforms to the IEC, European Union, ANSI/UL and Canadian CSA standards applicable to
Information Technology products at the time of manufacture.

ii
VCCI Class A Compliance
This is a Class A product. In a domestic environment, this product may cause radio interference, in which
case the user may be required to take corrective actions. The power cables included with this platform are
designed for use solely with this platform.

Replacing Hard Drives
• About the hard drives
• If a hard drive fails
• Replacing the primary hard drive with the spare
hard drive
• Creating a spare disk
• Halting the system


Replacing Hard Drives
Installation Guide for 6900/8900 Hard Drives 1
About the hard drives
The BIG-IP® 6900 and 8900 platforms have two removable hard drives
(shown in Figure 1). You can change or replace the hard drives as part of the
routine maintenance of the unit or in the event of a drive failure.
Important
We recommend that you back up your BIG-IP configuration files any time
you change them. In the event of a drive failure, you can replace the hard
drive, and then you can reinstall the version of the BIG-IP software you
were running and use the configuration backup to restore the system to its
previous state.
Figure 1 The front of a 6900/8900 platform and the location of the hard
drive bays with front bezel removed
1. Primary hard drive
2. Spare hard drive

2
If a hard drive fails
The tasks you perform if you experience a hard drive failure vary,
depending on the BIG-IP software version installed on your system.
For version 9.x and 10.0.0
Your system cannot use the spare disk as a replacement, but if your primary
disk fails, you have two options:
◆If you would like to get the system up and running while you wait for a
replacement hard drive from F5 Networks, you can perform the
following steps:
1. Swap the hard drives.
2. Reinstall the BIG-IP software.
3. Copy a backup configuration file to the system.
◆If you would like to wait until you receive the replacement hard drive,
you can perform the following steps:
1. Remove the failed hard drive and replace it with the new one that
you received from F5 Networks.
2. Reinstall the BIG-IP software.
3. Copy a backup configuration file to the system.
For version 10.0.1
If you have run the sparedisk utility previously, you can move the spare
hard drive to the primary hard drive bay. The sparedisk utility enables you
to copy the contents of your primary hard drive to the secondary hard drive
in the same system. For more information on replacing the primary hard
drive with the spare hard drive, see Replacing the primary hard drive with
the spare hard drive, on page 3.
For a version later than 10.0.1
Refer to the Ask F5SM Knowledge Base for detailed instructions.

Replacing Hard Drives
Installation Guide for 6900/8900 Hard Drives 3
Replacing the primary hard drive with the spare hard
drive
If you are running version 10.0.1 of the BIG-IP software and have
previously used the sparedisk utility to copy the contents of your primary
hard drive to the spare hard drive, you can move the spare hard drive to the
primary hard drive bay.
Figure 2 Example of a hard drive partially removed from the system
To replace the primary hard drive with the spare hard drive
1. Ensure that the system is properly halted and shut down. For more
information, see Halting the system, on page 6.
2. Remove the front bezel from the unit.
3. Remove the primary hard drive:
a) Loosen the hard drive screw by turning it counterclockwise,
using an appropriate screwdriver if necessary.
Note: The screws that hold the hard drives to the chassis are
captive and cannot be removed.
b) Grasp the ejector handle and pull straight toward you to eject the
hard drive from the system.
4. Move the spare hard drive from hard drive bay 2 to hard drive bay 1.
5. Tighten the screw into place by turning it clockwise, using an
appropriate screwdriver if necessary.
The hard drive is connected to the system when you tighten the
screw completely.
6. Power up the system by pressing the Check button on the LCD
panel.
7. Connect to the system using a console server.

4
8. Suspend the boot process at the GRUB boot menu by pressing the
down arrow key.
9. Select TMOS maintenance from the menu to boot into the TMOS
maintenance operating system and press Enter.
10. Type the following command:
tmidiag -r HD1
11. Reboot the system by typing the following command:
reboot
After you have replaced the primary hard drive with the spare hard drive,
you can add the replacement hard drive that you received from F5 Networks
to the new system.
To add the replacement hard drive
1. Ensure that the system is properly halted and shut down. For more
information, see Halting the system, on page 6.
2. Slide the new hard drive into hard drive bay 2 (see Figure 1).
3. Tighten the screw into place by turning it clockwise, using an
appropriate screwdriver if necessary.
The hard drive is connected to the system when you tighten the
screw completely.
4. Power up the system by pressing the Check button on the LCD
panel.
5. Attach the front bezel to the unit by grasping the bezel on either side
using the indentations provided.
Note: Failure to use the indentations could result in pinched
fingers.
6. Create a new spare disk, as described in Creating a spare disk, on
page 5.

Replacing Hard Drives
Installation Guide for 6900/8900 Hard Drives 5
Creating a spare disk
If you are running version 10.0.1, you can use the sparedisk utility to create
a backup of the primary disk in your system.
Important
F5 Networks recommends that you perform the following backup procedure
when you make changes to your system, especially if you make
configuration changes. This procedure is not intended as a replacement for
a regularly-scheduled backup process. It provides a quick way to get up and
running again if your primary hard drive fails.
To create a spare disk
1. Boot the BIG-IP system into the TMOS maintenance operating
system:
a) Use a console server to log on to the system using the root
account.
b) Type the following command:
mosreboot
2. Type the following command:
sparedisk
This process takes several minutes. As the new hard drive is written,
you will see status updates on the screen.
3. Verify the status of the spare disk by typing the following
command:
sparedisk --query
Output similar to the following example displays:
bash (try 'info') / >sparedisk --query
info: Skipping HD1; it is not a spare.
info: Checking spare disk HD2
Found product: BIG-IP 10.0.1 build 283.0
Filesystem created: Mon Aug 24 21:45:21 2009
4. Reboot the system by typing the following command:
reboot

6
Halting the system
You must halt the system and shut it down before you add or remove a hard
drive.
To halt and power off the unit
1. On the LCD panel, press the X button, then use the arrow keys to
navigate to the System menu.
2. Press the Check button.
3. Navigate to the Halt menu.
4. Press the Check button.
5. Press the Check button again at the confirmation screen.
6. Wait 30 seconds.
7. Hold the X button for four seconds to power off the unit.
After you halt and power off the system, you can add or remove a
hard drive.
Other manuals for 6900
1
This manual suits for next models
1
Table of contents
Other F5 Network Hardware manuals

F5
F5 i5000 Series Assembly Instructions

F5
F5 WANJet 500 Technical manual

F5
F5 BIG-IP 11050 User manual

F5
F5 iSeries User manual

F5
F5 ARX-500 Manual

F5
F5 BIG-IP 1600 Assembly Instructions

F5
F5 6900 Assembly Instructions

F5
F5 WANJet 500 Assembly Instructions

F5
F5 ARX-4000 Use and care manual

F5
F5 BIG-IP 3900 User manual
Popular Network Hardware manuals by other brands

Lowrance
Lowrance General information Pamplet General information

SS Telecoms
SS Telecoms SS-10 3G installation manual

Huawei
Huawei FusionPower6000 3.0 user manual

Infolock
Infolock INSIGHT DLP SENSOR 0310S Hardware installation guide

ATEN
ATEN SN0108A user manual

Infoblox
Infoblox Trinzic TE-2205 installation guide