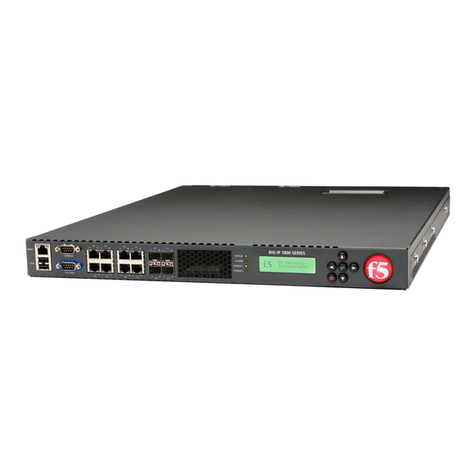
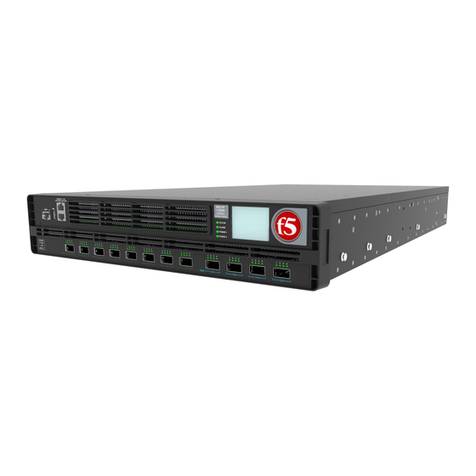
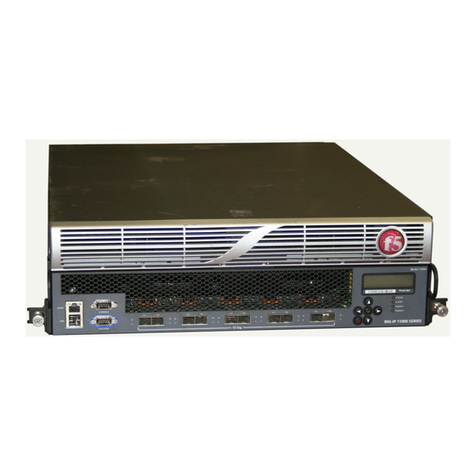
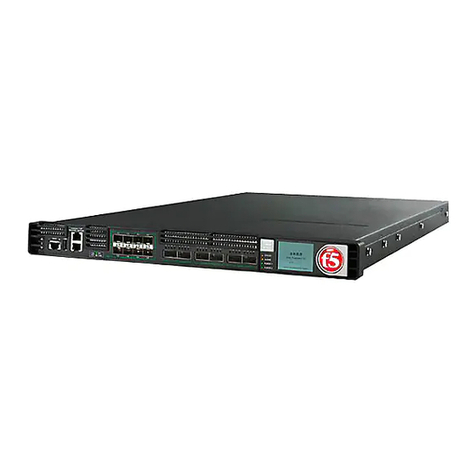
F5 iSeries User manual

Field Testing F5 Hardware: iSeries
Platforms
MAN-0638-02


Table of Contents
The End-User Diagnostic (EUD)................................................................................................5
About the End-User Diagnostic (EUD)...............................................................................5
End-User Diagnostic notes................................................................................................ 5
Supported platforms...........................................................................................................5
Downloading the EUD Files.......................................................................................................7
Deciding which files to download.......................................................................................7
Determining the EUD version installed on the system............................................7
Downloading the EUD IM file from F5.....................................................................7
Downloading the EUD ISO file from F5...................................................................8
Verifying, Installing, and Loading the EUD Files..................................................................... 9
After you download the EUD files...................................................................................... 9
Using MD5 checksum to check the integrity of the file............................................9
Installing the EUD from an IM installation package.................................................9
Loading the EUD onto a USB flash drive................................................................9
Running the EUD Tests............................................................................................................11
About running the EUD tests........................................................................................... 11
Booting the EUD from a USB flash drive...............................................................11
Booting the EUD from a USB CD/DVD drive.........................................................11
Starting the EUD from the boot menu...................................................................11
EUD Tests..................................................................................................................................13
1 System Report..............................................................................................................13
2 Transceiver Report........................................................................................................13
3 Sensor Test...................................................................................................................13
4 Memory Test................................................................................................................. 14
5 Drive Test......................................................................................................................14
6 Packet Path Test............................................................................................................15
7 Power Supply Test.........................................................................................................15
8 Fan Test.........................................................................................................................15
9 Config Module Test....................................................................................................... 15
20 LED Test......................................................................................................................16
21 LCD Keypad Test........................................................................................................ 16
A Run All (Non-Interactive) Tests.....................................................................................16
B Run tests in [A] but exclude test 4 (System Memory Test)...........................................16
D Display Test Report Log............................................................................................... 17
S Display Test Summary..................................................................................................17
Q Quit EUD and Reboot the System................................................................................17
Legal Notices............................................................................................................................ 19
Legal Notices................................................................................................................... 19
Table of Contents
3

Table of Contents
4

The End-User Diagnostic (EUD)
About the End-User Diagnostic (EUD)
The End-User Diagnostic (EUD) is a compilation of tests for checking the integrity of F5® hardware. The
EUD exists independently from the host software, and is available as a separate download. You should
run the EUD only when you are advised to do so by your F5 Support representative.
Important: You must download and install the latest EUD software version for your platform before you
run any tests.
End-User Diagnostic notes
Caution: You should not run these test tools on a system that is actively processing traffic in a production
environment. These tests stop the unit and prevent it from processing traffic. Run this tool only if you are
verifying a hardware issue with a unit that is already removed from production, or if you are instructed to
by an F5® Support representative.
Caution: Before you run these tests, you should disconnect all network cables from the system. Any
cables connected to the system during the tests could cause false-positive results.
Supported platforms
This table lists the platforms supported by this version of the EUD.
Platform name Platform ID
BIG-IP® i800 Series C117
BIG-IP i2000 Series C117
BIG-IP i4000 Series C115
BIG-IP i5000 Series C119
BIG-IP i7000 Series C118
BIG-IP i10000 Series C116
BIG-IP i11000 Series C123
BIG-IP i15000 Series D116
Herculon® i2800 C120
Herculon i5800 C121
Herculon i10800 C122

The End-User Diagnostic (EUD)
6

Downloading the EUD Files
Deciding which files to download
There are several file types available from the F5 download site http://downloads.f5.com for the
EUD.
File Name Description
ISO image The ISO image is provided for burning a CD or DVD of the EUD. You can boot
the CD/DVD from a powered USB CD/DVD drive plugged in to your F5®
system.
IM file The IM file is a self-extracting installation file. You can scp this file directly to
your F5 system and use it to upgrade the EUD on the system or load a USB flash
drive.
MD5 file There is a corresponding MD5 file for each ISO image and IM file that you
download. Use the MD5 file to verify the integrity of the file you download.
Readme-EUD.txt This file includes details about the release, such as supported platforms.
Determining the EUD version installed on the system
Perform this task before you download update files to determine the EUD version installed on your
system, or to verify that the installation of a new version was successful.
You can use the eud_info command to determine which EUD version is installed on your system:
1. Log in to the command line of the system using an account with root access.
2. Verify the EUD version installed on your system.
eud_info
The version number of the EUD installed on the system displays.
Downloading the EUD IM file from F5
F5® recommends that you obtain the latest version of the EUD IM file that is supported on your platform
from the F5 download site (http://downloads.f5.com) before you run these tests.
1. Log on to http://downloads.f5.com/ and click Find a Download.
2. In the Hardware-Specific area, click Platform / EUD.
3. Select your platform from the list.
4. Click the name of the release with the most recent date.
You must accept the software terms and conditions before you can proceed.
5. Click the file name <file_name>.im to start the download.
The <file_name> consists of the platform family and the build number.
Note: You should copy the IM file to /var/tmp on the system you intend to update.
6. Download the corresponding checksum file.
The corresponding checksum file has the same name as the IM file, except that .md5 is the file
extension.

After the download completes, verify the integrity of the file by checking the MD5 checksum.
Downloading the EUD ISO file from F5
F5® recommends that you obtain the latest version of the EUD ISO file that is supported on your platform
from the F5 download site (http://downloads.f5.com) before you run these tests.
1. Log on to http://downloads.f5.com/ and click Find a Download.
2. In the Hardware-Specific area, click Platform / EUD.
3. Select your platform from the list.
4. Click the name of the release with the most recent date.
You have to accept the software terms and conditions before you can proceed.
5. Click the file name <file_name>.iso to start the download.
The <file_name> consists of the platform family and the build number.
6. Download the corresponding checksum file.
The corresponding checksum file has the same name as the ISO file, except that .md5 is the file
extension.
After the download completes, verify the integrity of the ISO file by checking the MD5 checksum.
Downloading the EUD Files
8

Verifying, Installing, and Loading the EUD Files
After you download the EUD files
There are several actions you can take after you download the EUD files.
Task Description
Use the MD5 checksum to
verify the files
Use the MD5 file to verify the integrity of the file you download.
Install the EUD from the IM
installation package
Use secure copy (scp) to copy the IM file directly to your F5®
system, and use the IM file to upgrade the EUD on the system.
Load the EUD onto a USB
flash drive
Load the EUD onto a USB flash drive, and run the EUD from the
flash drive.
Using MD5 checksum to check the integrity of the file
You can perform this task after you download update files and their corresponding .md5 files from the
F5® downloads site (http://downloads.f5.com).
Verify the MD5 checksum on each file you download using the md5sum command. Use the output to
verify the integrity of the downloaded file.
1. Log in to the command line of the system using an account with root access.
2. Verify the integrity of the downloaded file, where <file_name>.md5 is the name of the .md5 file
you downloaded.
md5sum -c <file_name>.md5
If the output is OK, the download was successful. If not, you should download the file again and repeat
the process.
Installing the EUD from an IM installation package
You should copy the IM file to /var/tmp on the system you intend to update before you begin this
procedure.
Installing the EUD from an IM file is one method that you can use to get the latest EUD installed on your
hardware.
1. Log in to the command line of the system using an account with root access.
2. Install the EUD, where <file_name>.im is the name of the file you downloaded.
im <file_name>.im
The latest EUD is installed on your hardware.
Loading the EUD onto a USB flash drive
You can run the EUD by booting the system from a USB flash drive loaded with the EUD software. Use
this procedure to load the EUD onto a USB flash drive.
1. Log in to the command line of the system using an account with root access.
2. Download the IM file to /tmp/eud.

3. Loopback mount the IM file, where <file_name> is the name of the file you downloaded.
mkdir /tmp/eud; mount -o ro,loop <file_name>.im /tmp/eud
4. Insert a USB flash drive into the platform on which you mounted the IM file.
5. Run the mkdisk utility.
cd /tmp/eud; ./mkdisk
Follow the prompts to load the EUD onto the USB flash drive.
After the installation is complete, remove the USB flash drive from the system.
Verifying, Installing, and Loading the EUD Files
10

Running the EUD Tests
About running the EUD tests
There are several options for running the EUD tests.
Important: Before you run any EUD tests, you must download and install the latest EUD software
version for your platform.
Task Description
Boot the EUD from a USB
flash drive
Plug your EUD USB flash drive into the system, and boot to the EUD.
Boot the EUD from a USB
DVD drive
Plug your USB DVD drive into the system, and boot to the EUD.
Run the EUD from the system
boot menu
As the system is booting, select the EUD option from the boot menu.
Booting the EUD from a USB flash drive
You must load the EUD image onto the USB flash drive to run the EUD from the drive. You must have a
console connected to the system to run the EUD.
You can boot the EUD from a USB flash drive.
1. If the system is powered on, turn it off.
2. Plug the USB flash drive that holds the EUD image into the USB port on the system.
3. Power on the system to boot the EUD.
When the EUD starts, the EUD menu displays on the console.
Booting the EUD from a USB CD/DVD drive
You must create a disk using the EUD ISO image before you can boot the EUD from a USB CD/DVD
drive. You must have a console connected to the system to run the EUD.
You can boot the EUD from an externally-powered USB CD/DVD drive.
1. If the system is powered on, power it off.
2. Plug the USB CD/DVD drive into the USB port on the system, and insert the EUD disk.
3. Power on the system to boot the EUD.
When the EUD starts, the EUD menu displays on the console.
Starting the EUD from the boot menu
You should install the latest version of the EUD before you boot the EUD from the boot (grub) menu.
You must have a console connected to the system to run the EUD.
You can boot the EUD installed on the system from the boot (grub) menu.
1. If the system is powered on, reboot it.

2. As the unit boots, it pauses briefly on the boot menu. Use the arrow keys to highlight End User
Diagnostics.
When the EUD starts, the EUD menu displays on the console.
Running the EUD Tests
12

EUD Tests
1 System Report
The System Report provides comprehensive details about all system hardware components, including:
• Serial number
• F5® part number
• Host information
• BIOS version
• Firmware version
• Bootloader version
• Processor, processor version
• Power supply firmware version
• Memory in each socket
• Total memory
• Storage drives
When you start the test, you see this message:
Test Begin: System Report
After the report completes successfully, a summary of information displays, and you see this message:
Test Complete: System Report: PASSED
2 Transceiver Report
This test checks for transceiver modules installed in the system and reports this information about those
modules:
• Vendor name
• Part number
• Revision
• Media type
When you start the test, you see this message:
Test Begin: Transceiver Report
After the report completes successfully, you see this message:
Test Complete: Transceiver Report: PASSED
3 Sensor Test
This sensor test performs the hardware sensor test on both the motherboard and the switchboard, if
applicable, and displays this information:
• Host temperatures
• Host voltages

• Mezzanine temperature
• Mezzanine voltages
• CPU temperature
• CPU fan speeds
• SuperIO temperatures
When you start the test, you see this message:
Test Begin: Sensor Test
After the report completes successfully, you see this message:
Test Complete: Sensor Test: PASSED
4 Memory Test
This test verifies the system memory, including this information:
• Error count
• Hardware incident count
• Memory copy rate
When you start the test, you see this message:
Test Begin: Memory Test
After the test completes successfully, you see this message:
Test Complete: Memory Test: PASSED
5 Drive Test
This test verifies the internal status of installed storage drives, including this information:
• Read error rate
• Start/Stop count
• Re-allocated sector count
• Power on hours count
• Spin-up retry count
• Drive calibration retry count
• Drive power cycle count
• Offline scan uncorrectable sector count
• Ultra ATA CRC error rate and multi-zone error rate
When you start the test, you see this message:
Test Begin: Drive Test
After the test completes successfully, you see this message:
Test Complete: Drive Test: PASSED
EUD Tests
14

6 Packet Path Test
This test verifies the internal paths to test the Ethernet interfaces in the system, including between the
front panel switch, HSBs, processors, and more.
When you start the test, you see this message:
Test Begin: Packet Path Test (excluding modules)
After the test completes successfully, you see this message:
Test Complete: Packet Path Test (excluding modules): PASSED
7 Power Supply Test
This test reports status about the power supplies installed in the system, including information about the
supply manufacturer, voltage, and current and temperature measurements.
When you start the test, you see this message:
Test Begin: Power supply Test
After the test completes successfully, you see this message:
Test Complete: Power supply Test: PASSED
8 Fan Test
This test reports status about the fan trays installed in the system.
When you start the test, you see this message:
Test Begin: Fan Test
After the test completes successfully, you see this message:
Test Complete: Fan Test: PASSED
9 Config Module Test
This test verifies the internal paths to test the configuration modules installed in the system.
When you start the test, you see this message:
Test Begin: Config Module Test
After the test completes successfully, you see this message:
Test Begin: Config Module Test
Field Testing F5 Hardware: iSeries Platforms
15

20 LED Test
This test sets each of the possible LED status levels, and prompts you to verify the corresponding color
and operation. You must perform this test from the LCD panel.
Important: After you start this interactive test, it times out after five minutes if you do not complete it.
When you start the test, you see this message:
Test Begin: Host LED test
After the test completes successfully, you see this message:
Test Complete: Front Port LED test: PASSED
21 LCD Keypad Test
The LCD Keypad Test verifies the functionality of the LCD panel, including LCD backlight, colors,
pixels, and keys. To successfully perform these tests, you need physical access to the LCD panel on the
unit that you want to test.
Important: After you start this interactive test, it times out after five minutes if you do not complete it.
When you start the test, you see this message:
Test Begin: LCD test
Flashing the F5 logo ball to assist with locating the chassis...
Please answer all questions on the DUT's LCD screen.
When the test is finished, the content of the log will be displayed below.
Test Start
Test Begin: LCD test
Flashing the F5 logo ball to assist with locating the chassis...
Please answer all questions on the DUT's LCD screen.
When the test is finished, the content of the log will be displayed below.
Test Start
After the test completes successfully, you see this message:
Test Complete: LCD Test: PASSED
A Run All (Non-Interactive) Tests
This option runs all tests that are applicable to the system, excluding the interactive tests.
This process takes approximately a half hour.
B Run tests in [A] but exclude test 4 (System Memory Test)
This option runs all tests that are applicable to the system, excluding the interactive tests and the System
Memory test.
EUD Tests
16

D Display Test Report Log
This option displays a test report. A report log is stored as the text file /shared/log/eud.log in the
host file system.
Important: You must run eud_log from the command line to create output for this report.
S Display Test Summary
This option displays a test summary report that contains the results of all tests run during a test session.
Q Quit EUD and Reboot the System
This option quits the EUD and reboots the system.
Important: Using other methods, such as the reboot command or the command menu option can
destabilize the system.
Field Testing F5 Hardware: iSeries Platforms
17

EUD Tests
18

Legal Notices
Legal Notices
Publication Date
This document was published on May 15, 2018.
Publication Number
MAN-0638-02
Copyright
Copyright © 2018, F5 Networks, Inc. All rights reserved.
F5 Networks, Inc. (F5) believes the information it furnishes to be accurate and reliable. However, F5
assumes no responsibility for the use of this information, nor any infringement of patents or other rights
of third parties which may result from its use. No license is granted by implication or otherwise under
any patent, copyright, or other intellectual property right of F5 except as specifically described by
applicable user licenses. F5 reserves the right to change specifications at any time without notice.
Trademarks
For a current list of F5 trademarks and service marks, see http://www.f5.com/about/guidelines-policies/
trademarks.
All other product and company names herein may be trademarks of their respective owners.
Patents
This product may be protected by one or more patents indicated at: https://f5.com/about-us/policies/
patents.
Export Regulation Notice
This product may include cryptographic software. Under the Export Administration Act, the United
States government may consider it a criminal offense to export this product from the United States.
RF Interference Warning
This is a Class A product. In a domestic environment this product may cause radio interference, in which
case the user may be required to take adequate measures.
FCC Compliance
This equipment has been tested and found to comply with the limits for a Class A digital device pursuant
to Part 15 of FCC rules. These limits are designed to provide reasonable protection against harmful
interference when the equipment is operated in a commercial environment. This unit generates, uses, and
can radiate radio frequency energy and, if not installed and used in accordance with the instruction
manual, may cause harmful interference to radio communications. Operation of this equipment in a
residential area is likely to cause harmful interference, in which case the user, at his own expense, will be
required to take whatever measures may be required to correct the interference.

Any modifications to this device, unless expressly approved by the manufacturer, can void the user's
authority to operate this equipment under part 15 of the FCC rules.
Canadian Regulatory Compliance
This Class A digital apparatus complies with Canadian ICES-003.
Standards Compliance
This product conforms to the IEC, European Union, ANSI/UL and Canadian CSA standards applicable to
Information Technology products at the time of manufacture.
Brazil Compliance
This product is homologated by ANATEL, in accordance with the procedures regulated by Resolution n.
242/2000 and meets the technical requirements applied.
This product is homologated by ANATEL, in accordance with the procedures regulated by Resolution n.
242/2000 and meets the technical requirements applied including the exposure limits of the Specific
Absorption Rate for electric, magnetic and electromagnetic fields of radio frequency in accordance with
Resolutions 303/2002 and 533/2009.
This equipment is not subject to the protection from harmful interference and may not cause interference
with duly authorized systems.
For more information, see the ANATEL website at www.anatel.gov.br.
VCCI Class A Compliance
This is a Class A product. In a domestic environment, this product may cause radio interference, in which
case the user may be required to take corrective actions. VCCI-A
この製置は、クラス A情報技術製置です。この製置を家庭環境で使用す ると電波妨害を引き
起こすことがあります。 この場合には使用者が適切 な対策を講ずるよう要求されることがあ
ります。 VCCI-A
Legal Notices
20
Table of contents
Other F5 Network Hardware manuals

F5
F5 i4000 Series Assembly Instructions

F5
F5 WANJet 300 Technical manual

F5
F5 6900 Assembly Instructions

F5
F5 BIG-IP 11050 User manual

F5
F5 ARX-500 Operating and maintenance manual

F5
F5 BIG-IP 1600 Assembly Instructions

F5
F5 i5000 Series Assembly Instructions

F5
F5 520 User manual

F5
F5 ARX-500 Manual

F5
F5 Herculon SSL Orchestrator Manual
Popular Network Hardware manuals by other brands

2N Telekomunikace
2N Telekomunikace EasyGate IP Brief manual

HP
HP ProCurve Secure Router 7203dl J8753A J8753A Advanced management and configuration guide

Patton
Patton RocketLink-G Getting started

XtendLan
XtendLan XL-VCQ802 user guide

Western Digital
Western Digital WDA4NC80000 - ShareSpace NAS Server Specifications

Allied Telesis
Allied Telesis AR440S How to configure