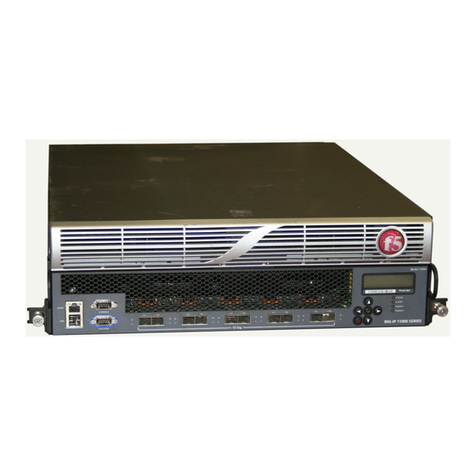
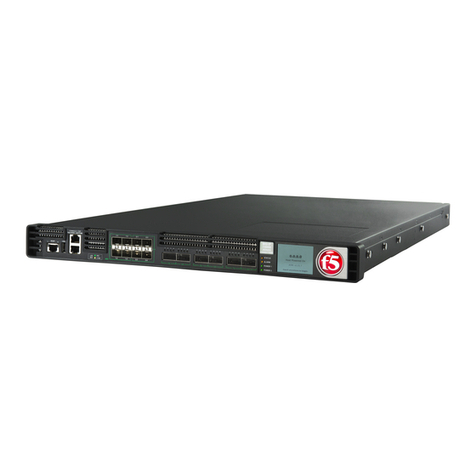
F5 BIG-IP 1600 Assembly Instructions

Platform Guide: 1600, 3600, and 3900
MAN-0270-01


Platform Guide: 1600, 3600, and 3900 i
Product Version
This manual applies to platforms 1600, 3600, and 3900 created by F5 Networks, Inc.
Publication Date
This manual was published on August 31, 2009.
Legal Notices
Copyright
Copyright 2008-2009, F5 Networks, Inc. All rights reserved.
F5 Networks, Inc. (F5) believes the information it furnishes to be accurate and reliable. However, F5
assumes no responsibility for the use of this information, nor any infringement of patents or other rights of
third parties which may result from its use. No license is granted by implication or otherwise under any
patent, copyright, or other intellectual property right of F5 except as specifically described by applicable
user licenses. F5 reserves the right to change specifications at any time without notice.
Trademarks
F5, F5 Networks, the F5 logo, BIG-IP, 3-DNS, Acopia, Acopia Networks, Application Accelerator, Ask
F5, Application Security Manager, ASM, ARX, ControlPoint, Data Guard, Enterprise Manager, EM, F5
Management Pack, FirePass, FreedomFabric, Global Traffic Manager, GTM, iControl, Internet Control
Architecture, IP Application Switch, iRules, Link Controller, LC, Local Traffic Manager, LTM, Message
Security Module, MSM, NetCelera, OneConnect, Packet Velocity, SSL Accelerator, SYN Check, Traffic
Management Operating System, TMOS, TrafficShield, Transparent Data Reduction, uRoam, VIPRION,
WANJet, WebAccelerator, and ZoneRunner, are trademarks or service marks of F5 Networks, Inc., in the
U.S. and other countries, and may not be used without F5's express written consent.
Export Regulation Notice
This product may include cryptographic software. Under the Export Administration Act, the United States
government may consider it a criminal offense to export this product from the United States.
RF Interference Warning
This is a Class A product. In a domestic environment this product may cause radio interference, in which
case the user may be required to take adequate measures.
FCC Compliance
This equipment has been tested and found to comply with the limits for a Class A digital device pursuant
to Part 15 of FCC rules. These limits are designed to provide reasonable protection against harmful
interference when the equipment is operated in a commercial environment. This unit generates, uses, and
can radiate radio frequency energy and, if not installed and used in accordance with the instruction manual,
may cause harmful interference to radio communications. Operation of this equipment in a residential area
is likely to cause harmful interference, in which case the user, at his own expense, will be required to take
whatever measures may be required to correct the interference.
Any modifications to this device, unless expressly approved by the manufacturer, can void the user's
authority to operate this equipment under part 15 of the FCC rules.
Canadian Regulatory Compliance
This Class A digital apparatus complies with Canadian ICES-003.
Standards Compliance
This product conforms to the IEC, European Union, ANSI/UL and Canadian CSA standards applicable to
Information Technology products at the time of manufacture.
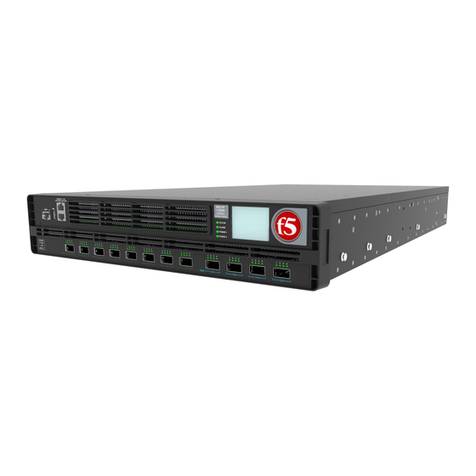
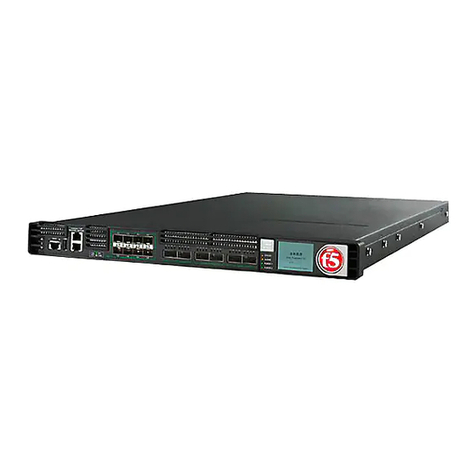
ii
VCCI Class A Compliance
This is a Class A product. In a domestic environment, this product may cause radio interference, in which
case the user may be required to take corrective actions. VCCI-A

Table of Contents


Table of Contents
Platform Guide: 1600, 3600, and 3900 v
1
Introducing the 1600, 3600, and 3900 Platforms
Working with the 1600/3600/3900 platform ...........................................................................1-1
Getting started with the 1600/3600/3900 platform ................................................................1-2
Components provided with the 1600/3600/3900 platform .........................................1-2
Peripheral hardware that you provide ..............................................................................1-3
Familiarizing yourself with the 1600/3600/3900 platform .....................................................1-4
Using the 1600/3600/3900 platform hardware ...............................................................1-4
About this guide ..............................................................................................................................1-7
Finding additional information .............................................................................................1-8
Stylistic conventions ..............................................................................................................1-9
Finding help and technical support resources ....................................................................... 1-11
2
Installing the 1600/3600/3900 Platform
Installing and connecting the hardware .....................................................................................2-1
General recommendations for mounting a unit in a rack ............................................2-1
Installing the unit using a front-mounting kit ...................................................................2-2
Installing the unit using a rail-mounting kit ......................................................................2-4
Connecting the cables and other hardware ....................................................................2-8
3
Operating the LCD Panel
Introducing the LCD panel ...........................................................................................................3-1
Using the LCD panel ......................................................................................................................3-2
Pausing on a screen ...............................................................................................................3-2
Using LCD menus ..................................................................................................................3-2
Powering up the unit .............................................................................................................3-2
Halting the unit .......................................................................................................................3-2
Powering down the unit .......................................................................................................3-3
Rebooting the unit .................................................................................................................3-3
Clearing alerts .........................................................................................................................3-3
Navigating through the LCD menus ...........................................................................................3-4
LCD config menu ...................................................................................................................3-4
Screens menu ..........................................................................................................................3-5
System menu ...........................................................................................................................3-6
4
Using Additional 1600/3600/3900 Platform Functionality
Understanding indicator LED behavior ......................................................................................4-1
Indicator LED actions ...........................................................................................................4-1
Standard operating states ....................................................................................................4-1
Alert conditions indicated by the alarm LED ..................................................................4-2
Specific status indicated by the indicator LEDs ..............................................................4-3
Working with interfaces ................................................................................................................4-4
Status and settings for interfaces .......................................................................................4-4
Media type and duplex mode for interfaces ....................................................................4-5
Network interface LED behavior .......................................................................................4-7
SFP port LED behavior .........................................................................................................4-7

Table of Contents
vi
5
Using Always-On Management
Introducing Always-On Management .........................................................................................5-1
Accessing the AOM Command Menu ........................................................................................5-2
Options for accessing the AOM Command Menu ........................................................5-2
Setting up Always-On Management SSH access .............................................................5-3
Using the AOM Command Menu ......................................................................................5-3
6
Working with AC Power Supplies
Reviewing maintenance options and operations .....................................................................6-1
Adding a power supply .........................................................................................................6-1
Replacing a power supply .....................................................................................................6-3
7
Working with DC Power Supplies
Reviewing maintenance options and operations .....................................................................7-1
Getting started .......................................................................................................................7-1
Wiring the DC power supply terminal .............................................................................7-1
Connecting the DC power supply .....................................................................................7-2
8
Changing the Fan Tray
Reviewing maintenance options and operations .....................................................................8-1
Replacing the fan tray ............................................................................................................8-2
9
Working with Environmental Guidelines for the 1600, 3600, and 3900 Platforms
Environmental requirements ........................................................................................................9-1
General environmental guidelines ......................................................................................9-1
Guidelines for DC-powered equipment ...........................................................................9-2
10
Understanding Platform Airflow
Platform airflow information ..................................................................................................... 10-1
Airflow for 1600, 3600, and 3900 platforms ................................................................ 10-1
11
Reviewing Hardware Specifications
General specifications for system features ............................................................................ 11-1
1600 platform hardware and operating specifications ........................................................ 11-2
3600 platform hardware and operating specifications ........................................................ 11-4
3900 platform hardware and operating specifications ........................................................ 11-6
Additional acoustic, airflow, and altitude specifications ...................................................... 11-8

Table of Contents
Platform Guide: 1600, 3600, and 3900 vii
A
Platform-Specific Hazardous Substance Levels for China
1600 platform .................................................................................................................................A-1
3600 platform .................................................................................................................................A-2
3900 platform .................................................................................................................................A-3
Glossary
Index

Table of Contents
viii


Introducing the 1600, 3600, and 3900 Platforms
Platform Guide: 1600, 3600, and 3900 1 - 1
Working with the 1600/3600/3900 platform
The BIG-IP®1600, 3600, and 3900 platforms are powerful systems capable
of managing traffic for any size of enterprise and are designed for the best
performance at the price.
Externally, the 1600, 3600, and 3900 platforms look similar. However, there
are internal differences and some minor external differences.
◆1600 platform
The 1600 platform (Figure 1.1) features a single dual-core processor, and
supports two small form-factor pluggable (SFP) transceivers (LC
connector type) and four (10/100/1000) interfaces, with SSL processing
available as an additional add-on through the software license.
◆3600 platform
The 3600 platform (Figure 1.2) features a single dual-core processor, and
supports two SFPs (LC connector type) and eight (10/100/1000)
interfaces, with SSL processing available as an additional add-on through
the software license.
◆3900 platform
The 3900 platform (Figure 1.3, on page 1-2) features a single quad-core
processor, and supports four SFPs (LC connector type) and eight
(10/100/1000) interfaces, with SSL processing available as an additional
add-on through the software license.
Important
F5 Networks provides support only for F5-branded optics.
For detailed specifications about the 1600, 3600, and 3900 platforms, see
Chapter 11, Reviewing Hardware Specifications.
Figure 1.1 An external front view of the 1600 platform
Figure 1.2 An external front view of the 3600 platform

Chapter 1
1 - 2
Figure 1.3 An external front view of the 3900 platform
Getting started with the 1600/3600/3900 platform
There are several basic tasks you must complete to get the 1600/3600/3900
platform installed and set up.
◆Review the hardware requirements.
For more information about the hardware requirements, read the
following sections, Components provided with the 1600/3600/3900
platform, following, and Peripheral hardware that you provide, on page
1-3.
◆Understand the environmental guidelines.
For more information, see Environmental requirements, on page 9-1.
◆Familiarize yourself with the 1600/3600/3900 platform hardware.
For more information, see Familiarizing yourself with the
1600/3600/3900 platform, on page 1-4.
◆Connect the 1600/3600/3900 platform to the network and optionally
connect the peripheral hardware.
For more information on mounting the hardware and attaching cables,
see Installing and connecting the hardware, on page 2-1.
The 1600/3600/3900 platform comes with the hardware that you need for
installation. However, you must also provide standard peripheral hardware,
such as a serial terminal, if you want to administer the 1600/3600/3900
platform directly.
Components provided with the 1600/3600/3900 platform
When you unpack the 1600/3600/3900 platform, you should make sure that
the following components are included:
• One power cable (black)
• One failover cable (blue)
• One console cable (beige)
• Rack-mounting hardware (front-mounting kit and rail-mounting kit)

Introducing the 1600, 3600, and 3900 Platforms
Platform Guide: 1600, 3600, and 3900 1 - 3
Peripheral hardware that you provide
For each 1600/3600/3900 platform, you may need to provide additional
peripheral hardware.
◆You need standard input/output hardware if you plan to use direct
administrative access to the platform. This requires a serial terminal and
a null modem cable.
◆You must have an administrative workstation on the same IP network as
the platform if you want to use the default platform configuration.
◆You need network hubs, switches, or concentrators to connect to the
platform network interfaces. The devices you select must be compatible
with the network interface cards installed in the platform. The devices
can support 10/100 Ethernet or Gigabit Ethernet:
• Ethernet requires either a 10 Mbps or 100 Mbps hub or switch.
• Gigabit Ethernet requires a compatible Gigabit Ethernet switch.
◆You can use a USB drive compatible with the system for installing
upgrades and for system recovery. You can perform an upgrade or
system recovery with almost any non-CDRW USB drive. Even though
most USB CD-ROM and compact flash drives should work, we cannot
guarantee compatibility with all makes and models.
If you plan on doing remote administration from your own PC workstation
as most users do, we recommend that you have your workstation already in
place on the same subnet to which the management interface is connected.

Chapter 1
1 - 4
Familiarizing yourself with the 1600/3600/3900
platform
Before you begin to install the 1600/3600/3900 platform, you may want to
quickly review the following figures that illustrate the controls and ports on
both the front and the back of the platforms.
Using the 1600/3600/3900 platform hardware
You need to be familiar with both the front and back layout of the 1600,
3600, and 3900 platforms. On the back of the unit, you can turn the unit off
and on. On the front of the unit, you can reset the unit using the LCD panel,
and also view the indicator LEDs for hard disk access. You can use the
front-panel LEDs to assess the condition of the unit. For details about the
behavior of the LEDs, see Understanding indicator LED behavior, on page
4-1.
The interfaces on every platform are labeled, so it should be clear what each
port is, no matter which hardware configuration you have purchased.
Figure 1.4 illustrates the front of a 1600 platform.
Figure 1.4 Front view of a 1600 platform
1. Management port
2. USB ports
3. Console port
4. Hard-wired failover port
5. 10/100/1000 interfaces
6. SFP ports
7. Indicator LEDs
8. LCD display
9. LCD control buttons

Introducing the 1600, 3600, and 3900 Platforms
Platform Guide: 1600, 3600, and 3900 1 - 5
Figure 1.5 illustrates the front of the 3600 platform.
Figure 1.5 Front view of the 3600 platform
Figure 1.6 illustrates the front of the 3900 platform.
Figure 1.6 Front view of the 3900 platform
1. Management port
2. USB ports
3. Console port
4. Hard-wired failover port
5. 10/100/1000 interfaces
6. SFP ports
7. Indicator LEDs
8. LCD display
9. LCD control buttons
1. Management port
2. USB ports
3. Console port
4. Hard-wired failover port
5. 10/100/1000 interfaces
6. SFP ports
7. Indicator LEDs
8. LCD display
9. LCD control buttons

Introducing the 1600, 3600, and 3900 Platforms
Platform Guide: 1600, 3600, and 3900 1 - 7
About this guide
This guide describes the features of the 1600, 3600, and 3900 platforms and
contains the following information about these platforms:
•Installing the hardware
You can learn how to install the hardware into a rack. For more
information, see Chapter 2, Installing the 1600/3600/3900 Platform.
• Using the LCD panel
You can learn how to understand and use the LCD panel. For more
information, see Chapter 3, Operating the LCD Panel.
•Understanding LED behavior
You can learn how to decipher what conditions are signaled by the
LEDs. For more information, see Chapter 4, Using Additional
1600/3600/3900 Platform Functionality.
•Understanding the ports and interfaces
You can understand the intended use of the ports and interfaces on each
platform. For more information, see Working with interfaces, on page
4-4.
• Using Always-On Management (AOM)
You can learn how to manage the platform remotely even if the host
subsystem is powered down. For more information, see Chapter 5, Using
Always-On Management.
•Changing the power supply
You can learn how to replace the AC or DC power supply. For more
information see either Chapter 6, Working with AC Power Supplies, or
Chapter 7, Working with DC Power Supplies.
•Changing the fan tray
You can learn how to replace the fan tray. For more information, see
Chapter 8, Changing the Fan Tray.
•Understanding the environmental guidelines
You can read detailed environmental guidelines for each platform. For
more information, see Chapter 9, Working with Environmental
Guidelines for the 1600, 3600, and 3900 Platforms.
•Understanding platform airflow
You can see detailed airflow information for each platform. For more
information, see Chapter 10, Understanding Platform Airflow.
•Learning the hardware specifications
You can read details about the hardware specifications for each platform.
For more information, see Chapter 11, Reviewing Hardware
Specifications.

Chapter 1
1 - 8
Finding additional information
In addition to this guide, there are other sources of documentation you can
use to work with the BIG-IP system. The information is available in the
guides and documents described below.
The following printed documentation is included with the BIG-IP system:
◆BIG-IP system setup instructions
All hardware from F5 Networks contains printed system setup
instructions that describe the basic configuration steps required to get the
BIG-IP system up and running in the network.
◆Configuration Worksheet
This worksheet provides you with a place to plan the basic configuration
for the BIG-IP system.
The following guides are available in PDF format on the F5 Technical
Support web site, https://support.f5.com:
◆BIG-IP®Systems: Getting Started Guide
This guide provides detailed information about installing upgrades to the
version 10.x BIG-IP system. It also provides information about licensing
the BIG-IP system software and connecting the system to a management
workstation or network.
◆TMOS™Management Guide for BIG-IP®Systems
This guide contains any information you need to configure and maintain
the network and system-related components of the version 10.x BIG-IP
system. With this guide, you can perform tasks such as configuring
VLANs, assigning self IP addresses, creating administrative user
accounts, and managing a redundant system.
◆Installation, Licensing, and Upgrades for BIG-IP®Systems
This guide provides detailed information about installing upgrades to the
version 9.x BIG-IP system. It also provides information about licensing
the BIG-IP system software and connecting the system to a management
workstation or network.
◆BIG-IP®Network and System Management Guide
This guide contains any information you need to configure and maintain
the network and system-related components of the version 9.x BIG-IP
system. With this guide, you can perform tasks such as configuring
VLANs, assigning self IP addresses, creating administrative user
accounts, and managing a redundant system.
This manual suits for next models
2
Table of contents
Other F5 Network Hardware manuals

F5
F5 6900 User manual

F5
F5 WANJet 500 Assembly Instructions

F5
F5 WANJet 500 Technical manual

F5
F5 ARX-500 Manual

F5
F5 i15000 Series User instructions

F5
F5 8900 Assembly Instructions

F5
F5 BIG-IP 3900 User manual

F5
F5 520 User manual

F5
F5 ARX-500 Operating and maintenance manual

F5
F5 WANJet 300 Technical manual