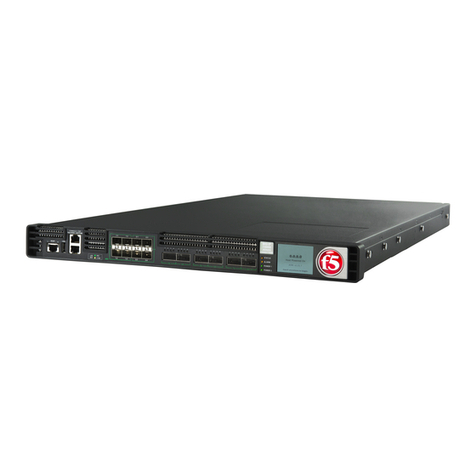
F5 BIG-IP 3900 User manual

Platform Guide: 3900
MAN-0328-00


Platform Guide: 3900 i
Product Version
This manual applies to the 3900 platform created by F5 Networks, Inc.
Publication Date
This manual was published on April 29, 2010.
Legal Notices
Copyright
Copyright 2008-2010, F5 Networks, Inc. All rights reserved.
F5 Networks, Inc. (F5) believes the information it furnishes to be accurate and reliable. However, F5
assumes no responsibility for the use of this information, nor any infringement of patents or other rights of
third parties which may result from its use. No license is granted by implication or otherwise under any
patent, copyright, or other intellectual property right of F5 except as specifically described by applicable
user licenses. F5 reserves the right to change specifications at any time without notice.
Trademarks
F5, F5 Networks, the F5 logo, BIG-IP, 3-DNS, Access Policy Manager, APM, Acopia, Acopia Networks,
Application Accelerator, Ask F5, Application Security Manager, ASM, ARX, Data Guard, Edge Client,
Edge Gateway, Enterprise Manager, EM, FirePass, FreedomFabric, Global Traffic Manager, GTM,
iControl, Intelligent Browser Referencing, Internet Control Architecture, IP Application Switch, iRules,
Link Controller, LC, Local Traffic Manager, LTM, Message Security Module, MSM, NetCelera,
OneConnect, Packet Velocity, Protocol Security Module, PSM, Secure Access Manager, SAM, SSL
Accelerator, SYN Check, Traffic Management Operating System, TMOS, TrafficShield, Transparent Data
Reduction, uRoam, VIPRION, WANJet, WAN Optimization Module, WOM, WebAccelerator, WA, and
ZoneRunner are trademarks or service marks of F5 Networks, Inc., in the U.S. and other countries, and
may not be used without F5's express written consent.
All other product and company names herein may be trademarks of their respective owners.
Export Regulation Notice
This product may include cryptographic software. Under the Export Administration Act, the United States
government may consider it a criminal offense to export this product from the United States.
RF Interference Warning
This is a Class A product. In a domestic environment this product may cause radio interference, in which
case the user may be required to take adequate measures.
FCC Compliance
This equipment has been tested and found to comply with the limits for a Class A digital device pursuant
to Part 15 of FCC rules. These limits are designed to provide reasonable protection against harmful
interference when the equipment is operated in a commercial environment. This unit generates, uses, and
can radiate radio frequency energy and, if not installed and used in accordance with the instruction manual,
may cause harmful interference to radio communications. Operation of this equipment in a residential area
is likely to cause harmful interference, in which case the user, at his own expense, will be required to take
whatever measures may be required to correct the interference.
Any modifications to this device, unless expressly approved by the manufacturer, can void the user's
authority to operate this equipment under part 15 of the FCC rules.
Canadian Regulatory Compliance
This Class A digital apparatus complies with Canadian ICES-003.
ii
Standards Compliance
This product conforms to the IEC, European Union, ANSI/UL and Canadian CSA standards applicable to
Information Technology products at the time of manufacture.
VCCI Class A Compliance
This is a Class A product. In a domestic environment, this product may cause radio interference, in which
case the user may be required to take corrective actions. VCCI-A

Table of Contents
Chapter 1: About the 3900 platform..............................................................5
The 3900 Platform....................................................................................................................................6
Components provided with the platform..................................................................................................6
Peripheral hardware that you provide......................................................................................................7
LCD panel................................................................................................................................................7
About LCD menus.......................................................................................................................7
Using LCD menus........................................................................................................................8
Indicator LEDs.........................................................................................................................................9
Indicator LED actions..................................................................................................................9
Standard operating states of the status and alarm LEDs............................................................10
Standard operating states of the power supply LEDs.................................................................10
LED alert conditions..................................................................................................................10
Defining custom alerts...............................................................................................................10
Additional indicator LED status conditions...............................................................................11
Platform Interfaces.................................................................................................................................11
Viewing the status of a specific interface...................................................................................11
Viewing the status of all interfaces.............................................................................................12
About interface media type and duplex mode............................................................................12
Viewing valid media types for an interface................................................................................12
Valid media types.......................................................................................................................13
Network interface LED behavior...............................................................................................13
Always-On Management........................................................................................................................14
AOM Command Menu options..................................................................................................14
Accessing the AOM Command Menu from the serial console..................................................15
Setting up Always-On Management SSH access.......................................................................15
Accessing the AOM Command Menu using SSH......................................................................15
Chapter 2: Platform Installation..................................................................17
Determine which rail kit to use..............................................................................................................18
General recommendations for rack mounting........................................................................................18
About the front-mounting kit.................................................................................................................18
Front-mounting kit hardware......................................................................................................18
Installing using a front-mounting kit..........................................................................................18
About the rail-mounting kit....................................................................................................................19
Rail-mounting kit hardware........................................................................................................19
Installing the rail-mounting kit hardware...................................................................................20
Installing the unit into a rail-mount rack....................................................................................21
Connecting the cables and other hardware.............................................................................................23
| 3
Table of Contents

Chapter 3: Platform Maintenance................................................................25
About AC power supplies.......................................................................................................................26
Installing an AC power supply...................................................................................................26
About DC power supplies......................................................................................................................27
Installing a DC power supply.....................................................................................................28
About the fan tray...................................................................................................................................28
Replacing the fan tray.................................................................................................................29
Appendix A: Environmental Guidelines......................................................31
General environmental guidelines..........................................................................................................32
Guidelines for DC-powered equipment.................................................................................................32
Appendix B: Platform Airflow......................................................................35
Platform Airflow Diagram......................................................................................................................36
Appendix C: Platform Specifications...........................................................37
General specifications for system features.............................................................................................38
Platform hardware specifications...........................................................................................................38
Platform operating specifications...........................................................................................................39
Agency Approvals..................................................................................................................................40
Appendix D: China RoHS Requirements....................................................41
Hazardous Substance Levels for China..................................................................................................42
4|
Table of Contents

Chapter
1
About the 3900 platform
Before you install the 3900 platform, you may want to quickly review
information about the controls and ports on both the front and the back of the
platform.
Topics:
•The 3900 Platform
•Components provided with the
platform
•Peripheral hardware that you
provide
•LCD panel
•Indicator LEDs
•Platform Interfaces
•Always-On Management

The 3900 Platform
The BIG-IP®3900 platform is a powerful system that is capable of managing traffic for any size of enterprise and is
designed for the best performance for the price.
On the front of the 3900 platform, you can reset the unit using the LCD panel and view the indicator LEDs for hard disk
access.You can also use the front-panel LEDs to assess the condition of the unit. On the back of the unit, you can power
the unit off and on.
1. Management port
2. USB ports
3. Console port
4. Hard-wired failover port
5. 10/100/1000 interfaces
6. SFP ports
7. Indicator LEDs
8. LCD display
9. LCD control buttons
Figure 1: Front view of the platform
The back of the platform includes one or two power supplies.
1. Handle
2. Power input panel (power switch and power receptacle)
3. Unused power supply bay
Figure 2: Back view of the platform
Components provided with the platform
When you unpack the 3900 platform, you should make sure that the following components are included.
HardwareQuantity
power cable (black)1
DC terminal blocks, DC power option only2
failover cable (blue)1
console cable (beige)1
front-mounting kit1
rail-mounting kit1
6| Platform Guide: 3900

Peripheral hardware that you provide
For each 3900 platform, you may need to provide additional peripheral hardware. If you plan to remotely administer the system,
we recommend having a workstation already connected to the same subnet as the management interface.
DescriptionType of Hardware
You must provide networking devices that are compatible with the network
interface cards installed in the platform.You can use either 10/100 Ethernet
or Gigabit Ethernet switches and hubs.
Network hubs, switches, or connectors
to connect to the platform network
interfaces
You can use these devices for installing upgrades and for system recovery.
Even though most USB CD/DVD-ROM drives and USB compact flash drives
should work, we cannot guarantee compatibility with all makes and models.
External USB CD/DVD-ROM drive or
a USB compact flash drive
You can remotely manage the platform by connecting to a serial terminal
console via the console port.
Serial terminal console
You can use the default platform configuration if you have an administrative
workstation set up.
Administrative workstation on the same
IP network as the platform
LCD panel
The LCD panel provides the ability to manage the unit without attaching a console or network cable.
About LCD menus
There are three menus on the LCD panel.You can configure the LCD panel to meet your needs.
Figure 3:The LCD panel and control buttons
LCD config menu
You can use the LCD config menu to adjust the display properties of the LCD panel.
DescriptionOption
Specifies an LCD screen backlighting option. Select from the following
options:
Backlight
• ON enables the backlight.
•GRAY enables the software to specify when the backlight is illuminated.
• OFF disables the backlight.
Sets the contrast of the LCD panel.Contrast
Adjusts the LCD backlight brightness.On Brightness
Controls the brightness of the LCD panel when the backlight is off.Off Brightness
Platform Guide: 3900 | 7
About the 3900 platform

Screens menu
You can use the Screens menu to view various statistics and information about the system.
DescriptionOption
Displays the date and time.DateScreen
Displays the information screen menu.InfoScreen
Displays the MAC addresses on the unit.MACscreen
Displays system information.SysinfoScreen
Displays the number of authentication requests being processed.TMMAuthScreen
Displays the CPU usage percentage.TMMCPUScreen
Displays the memory usage.TMMMemoryScreen
Displays simple statistics, such as bytes and packets in and out of the system.TMMStatScreen
Displays the product version information.VersionScreen
System menu
You can use the System menu to view options for rebooting, halting, and netbooting the hardware. This menu also provides
options for configuring the management interface.
DescriptionOption
Changes the management interface information. Select from the following
options:
Management
• Mgmt IP sets the management interface IP address.You can use only an
IPv4 address.
• Mgmt Mask sets the netmask for the management interface IP address.
•Mgmt Gateway sets the default route for the management interface. This
route is necessary if you plan to manage the unit from a different
subnetwork.
• Commit saves your changes.
Changes the baud rate of the serial port. Select from the following options:Serial Speed
• 9600
• 19200
• 57600
• 115200
Reboots the unit.Reboot
Halts the unit.Halt
Boots the unit over an IP network. Select this option if you are installing
software from a PXE server.
Netboot
Using LCD menus
Press the X button to put the LCD panel in Menu mode.
The Left Arrow, Right Arrow, Up Arrow, and DownArrow buttons are functional only when the LCD panel is in
Menu mode.
8| Platform Guide: 3900

Pausing on a screen
Normally, the screens cycle on the LCD panel at a constant rate, but you can pause on a specific screen.
Push the Check button to toggle the LCD screen between Hold and Rotate modes.
In Hold mode, a single screen is displayed. The Rotate mode changes the screen displayed on the LCD panel every
four seconds.
Powering on the unit
Press the Check button to power on a unit that is shut down.
When you initially power on the unit, use the power switch located on the power supply at the back of the unit.
Halting the unit
We recommend that you halt the unit before you power it down or reboot it using the LCD menu options.
1. Press the X button, then use the arrow keys to navigate to the System menu.
2. Press the Check button.
3. Navigate to the Halt menu.
4. Press the Check button.
5. Press the Check button again at the confirmation screen.
Wait 30 seconds before powering the machine off or rebooting it.
Powering off the unit
Hold the X button for four seconds to power off the unit.
We recommend that you halt the system before you power off the system in this manner.
Rebooting the unit
Hold the Check button for four seconds to reboot the unit.
You should only use this option after you halt the unit.
Clearing alerts
Press the Check button to clear any alerts on the LCD screen.
You must clear any alerts on the screen before you can use the LCD panel.
Indicator LEDs
The behavior of each LED indicates the status of the system.
Indicator LED actions
DescriptionAction
LED is not lit and does not display any color.Off (none)
Platform Guide: 3900 | 9
About the 3900 platform

DescriptionAction
LED is lit and does not blink.Solid
LED turns on and off at a regular frequency.Blinking
LED turns on and off with an irregular frequency and may sometimes appear
solid.
Intermittent
Standard operating states of the status and alarm LEDs
When the unit is in a standard operating state, the status and alarm LEDs behave in a defined manner.
Alarm LEDStatus LEDDescriptionSystem State
off/nonegreen solidUnit is active in a redundant
system configuration.
Active mode
yellow solidyellow solidUnit is on standby in a
redundant system
configuration.
Standby mode
red solidgreen solidHost subsystem is halted.Power standby mode
off/noneoff/noneUnit is halted and powered
down.
Powered off
Standard operating states of the power supply LEDs
When the unit is in a standard operating state, the power supply LEDs behave in a defined manner.
Not presentPresent and failurePresent and normalPower Supply
off/noneyellow solidgreen solidPower 1
off/noneyellow solidgreen solidPower 2
LED alert conditions
When there is an alert condition on the unit, the alarm LED behaves in a specific manner.
DescriptionAction
Alarm LED behaviorSystem situation
red blinkingEmergency
red solidAlert or Critical
yellow blinkingError
Defining custom alerts
The /etc/alertd/alert.conf and the /config/user_alert.conf files on the BIG-IP system define alerts
that cause the indicators to change. The /etc/alertd/alert.conf file defines standard system alerts, and the
/config/user_alert.conf filedefines custom settings.You should editonly the /config/user_alert.conf
file.
1. Open a command prompt on the BIG-IP system.
2. Type the following command:
10 | Platform Guide: 3900

cd /config
3. Using a text editor, such as vi or Pico, open the /config/user_alert.conf file.
4. Add the following lines to the end of the file:
alert BIGIP_MCPD_MCPDERR_POOL_MEMBER_MON_DOWN "Pool member (.*?):(.*?) monitor
status down."
{
snmptrap OID=".1.3.6.1.4.1.3375.2.4.0.10";
lcdwarn description="Node down" priority="1"
}
alert BIGIP_MCPD_MCPDERR_NODE_ADDRESS_MON_DOWN "Node (.*?) monitor status
down." {
snmptrap OID=".1.3.6.1.4.1.3375.2.4.0.12";
lcdwarn description="Node address down" priority="1"
}
alert BIGIP_MCPD_MCPDERR_POOL_MEMBER_MON_UP "Pool member (.*?):(.*?) monitor
status up."
{
snmptrap OID=".1.3.6.1.4.1.3375.2.4.0.11"
}
alert BIGIP_MCPD_MCPDERR_NODE_ADDRESS_MON_UP "Node (.*?) monitor status up."
{
snmptrap OID=".1.3.6.1.4.1.3375.2.4.0.13"
}
5. Save the file and exit the text editor.
The front panel LEDs now indicate when a node is down.
Additional indicator LED status conditions
A few LED status conditions are not covered in the definition tables in the /etc/alertd/alert.conf file.
Yellow intermittent status LED indicator
A yellow intermittent status LED indicates that the unit is not under host computer control. This might be due to the
host being halted or due to a software or hardware problem that interferes with the host’s control of the LED.
Green/Yellow solid status LED indicator
When the status LED indicator is solid yellow or green, it indicates that the BIG-IP unit is in a Standby state (yellow)
or anActive state (green). It displays solid green if the unit is Standalone or if it is theActive unit of a redundant system
configuration. It displays yellow if the unit is the Standby member of a redundant system configuration.
Platform Interfaces
You can perform configuration tasks such as displaying interface status and settings and setting the media type using
either the Traffic Management Shell (tmsh) or the bigpipe utility.
When using the bigpipe interface command or the tmsh interface command, you can either apply the command
to all interfaces or to a specific interface key.
Viewing the status of a specific interface
You can use bigpipe or tmsh to view the status of a specific interface on a platform.
From the command line interface, use the following syntax to display the current status of a specific interface:
Platform Guide: 3900 | 11
About the 3900 platform

b interface <interface_key> show
The following is an example of the output you see when you issue this command on interface 1.3:
INTERFACE 1.3
| Speed Pkts Pkts Drop Coll Bits Bits Errs Trunk
| Mbps in out in out
| UP 100 FD 667 0 667 0 342544 0 0
Viewing the status of all interfaces
You can use bigpipe or tmsh to view the status of all interfaces on the platform.
From the command line interface, use the following syntax to display the current status of all interfaces:
b interface show
The following is an example of the output you see when you issue this command on interface 1.3:
INTERFACE
Key Speed Pkts Pkts Drop Coll Bits Bits Errs Trunk
Mbps in out in out
1.1 DN 100 FD 0 213 0 0 0 74.2K 0
1.2 DN 100 FD 20 25 0 0 28.6K 33.9K 0
About interface media type and duplex mode
All interfaces on the BIG-IP system default to auto-negotiate speed and duplex settings. We recommend that you also
configure any network equipment that you plan to use with the BIG-IP system to auto-negotiate speed and duplex
settings. If you connect the BIG-IP system to network devices with forced speed and duplex settings, you must force
the speed and duplex settings of the BIG-IP system to match the settings of the other network device.
Important: If the BIG-IP system is attempting to auto-negotiate interface settings with an interface that has the
speed and duplex settings forced, you will experience severe performance degradation.
By default, the media type on interfaces is set to automatically detect speed and duplex settings, but you can specify a
media type. Use the following syntax to set the media type: b interface <interface_key> media <media
type> | auto.
If the media type does not accept the duplex mode setting, a message indicates this. If media type is set to auto, or if the
interface does not accept the duplex mode setting, the duplex setting is not saved to the /config/bigip_base.conf
file.
Important: If you manually configure the platform to use specific speed and duplex settings on interfaces, Auto
MDI/MDIX functionality is turned off by default. Additionally, when an interface is set manually, it functions as
a data terminal equipment (DTE) port. This means that crossover cables are required to connect to other DTE
devices (for example, servers), and straight-through cables are required for connecting to data communications
equipment (DCE) devices (for example, switches or routers). Be sure to use the correct cable type (straight-through
or crossover) if you manually set interface speed and duplex settings.
Viewing valid media types for an interface
This platform may not support all of the media type options that are available in bigpipe and tmsh.You can use bigpipe
or tmsh to view the valid media types for an interface.
From the command line interface, use the following syntax to display the valid media types for a specific interface:
b interface <interface_key> media show
Important: In all Gigabit Ethernet modes, the only valid duplex mode is full duplex.
12 | Platform Guide: 3900

The following is an example of the output you see when you issue this command on interface 2.1:
INTERFACE 2.1 - media: auto (none) options:
none
auto
1000baseLX full
1000baseSX full
1000baseT full
Valid media types
This table lists the valid media types for the bigpipe interface command and the tmsh interface command.
tmshbigpipe
autoauto
10Base-T half10Base-T half
10Base-T full10Base-T full
100Base-TX half100Base-TX half
100Base-TX full100Base-TX full
1000Base-T half1000Base-T half
1000Base-T full1000Base-T full
1000Base-SX full1000Base-SX full
1000Base-LX full1000Base-LX full
10GBase-T full10GBase-T full
10GBase-SR full10GBase-SR full
10GBase-LR full10GBase-LR full
10GBase-ER full10GBase-ER full
none
no-phy
Network interface LED behavior
The appearance and behavior of the network interface LEDs on the platform indicate network traffic activity, interface
speed, and interface duplexity.
RJ45 Copper interface LED behavior
The appearance and behavior of the RJ45 network interface LEDs indicate network traffic activity, interface speed, and interface
duplexity.
Activity LEDSpeed LEDLink
Not litNot litNo Link
Yellow solidYellow blinking10Mbps, half duplex
Green blinkingYellow blinking10Mbps, full duplex
Yellow solidYellow solid100Mbps, half duplex
Green blinkingYellow solid100Mbps, full duplex
Platform Guide: 3900 | 13
About the 3900 platform

Activity LEDSpeed LEDLink
Yellow blinkingGreen solid1000Mbps, half duplex
Green blinkingGreen solid1000Mbps, full duplex
SFP port LED behavior
The appearance and behavior of the RJ45 network interface LEDs indicate network traffic activity, interface speed, and interface
duplexity.
Activity LEDSpeed LEDLink
Not litNot litNo Link
Yellow solidYellow blinking10Mbps, half duplex
Green blinkingYellow blinking10Mbps, full duplex
Yellow solidYellow solid100Mbps, half duplex
Green blinkingYellow solid100Mbps, full duplex
Yellow blinkingGreen solid1000Mbps, half duplex
Green blinkingGreen solid1000Mbps, full duplex
Always-On Management
TheAlways-On Management (AOM) subsystem enables you to manage the BIG-IP system remotely using SSH or serial
console, even if the host is powered down. TheAOM Command Menu operates independently of the BIG-IP®Traffic
Management Operating System®(TMOS) through the management port, the serial port console, and remotely through
the traffic management ports.You can use the command menu to reset the unit if TMOS®has locked up.You can also
get console access to the Traffic Management Operating System itself, so that you can configure TMOS from the
command line interface.
AOM consists of the host console shell (hostconsh), the shell that provides access to the command menu, and the
Command Menu, which contains the options for AOM.
AOM Command Menu options
The AOM Command Menu provides theAOM options for the BIG-IP system.
DescriptionOptionNumber/Letter
Exits the AOM Command Menu and returns to terminal
emulation mode.
Connect to Host subsystem console1
Reboots the host subsystem. In this case, the Traffic Management
Operating System (TMOS) is rebooted.
Reboot Host subsystem (sends reboot
command)
2
Halts the host subsystem. In this case, the Traffic Management
Operating System (TMOS) is halted.
Halt Host subsystem (sends halt
command)
3
Resets the host subsystem. In this case, the system is reset with
a hardware reset.
Reset Host subsystem (issues
hardware reset--USEWITH CARE!)
4
Important: We do not recommend using this option under
normal circumstances. It does not allow for graceful
shutdown of the BIG-IP system.
14 | Platform Guide: 3900

DescriptionOptionNumber/Letter
Reboots theAOM subsystem. In this case, the AOM subsystem
is reset.
Reboot AOM subsystem (issues
hardware reset--USEWITH CARE!)
5
Configures the baud speed for connecting to AOM using the
serial console.
AOM baud rate configuratorB
Presents a logon prompt for theAOM subsystem. This subsystem
cannot be configured by end users.
AOM subsystem loginL
Runs theAOM network configuration utility. This utility enables
you to reconfigure the IP address, netmask, and default gateway
AOM network configuratorN
used by AOM. If you use this option while connected using
SSH, your session will be disconnected as a part of the network
configuration operation.
Displays information about the AOM platform.AOM platform informationP
Accessing the AOM Command Menu from the serial console
You can access theAOM Command Menu through the host console shell (hostconsh) using the front panel serial console.
From the serial console connected to the CONSOLE port, type the following key sequence:
Esc (
The AOM Command Menu displays.
Setting up Always-On Management SSH access
You can use the AOM Command Menu to set up remote SSH access to the BIG-IP system.You can connect remotely
with the SSH client only through the management network connected to the management port (MGMT).You can use
the LCD panel to configure the management network interface.
1. Access the AOM Command Menu using the front panel serial console.
2. Select the AOM network configuration utility (Option N in the Command Menu).
3. Configure an IP address, netmask, and gateway for the AOM subsystem.
You can now access theAOM subsystem remotely using SSH.
Accessing the AOM Command Menu using SSH
Before you can access the command menu using SSH, you must have an IP address configured for Always-On
Management.
You can access the AOM Command Menu through the host console shell (hostconsh) remotely through SSH.
1. Open the SSH client on a management workstation connected to the MGMT port on the BIG-IP system.
2. Type the following command, where <IP addr> is the IP address you configured for AOM:
ssh root@<ip addr>
The host console shell opens.
3. Type the following command to use the hostconsh shell:
hostconsh
4. To open the command menu, type the following key sequence:
Esc (
The AOM Command Menu displays.
Platform Guide: 3900 | 15
About the 3900 platform


Chapter
2
Platform Installation
After you have reviewed the hardware requirements and become familiar with
the 3900 platform, you can install the unit.
Topics:
•Determine which rail kit to use
•General recommendations for
rack mounting
•About the front-mounting kit
•About the rail-mounting kit
•Connecting the cables and other
hardware

Determine which rail kit to use
The 3900 platform comes with two types of rack mounting kits: stationary front-mounting and sliding rail-mounting.
An advantage of installing the sliding rail-mounting kit is that you can then slide the unit in and out of the rack as needed.
The tasks you need to perform to install the platform differ, depending on the type of rack mount you decide to use or
which type of cabinet unit you are installing into (single two-post cabinet or four-post cabinet).
General recommendations for rack mounting
Although not required, a 1U space between units makes it easier for you to remove the unit from the rack if that the unit
requires service. A 1U space between units also provides additional cable routing options.
We recommend 100 mm spacing from the front panel of the unit to the rack front or rack door. This provides enough
room for you to route the cables without excessive bending or insulation damage.
A shelf or similar device is required to support the unit if only one person is installing the unit.
Caution: To prevent personal injury or damage to the unit, we recommend that at least two people perform the
installation.
Caution: This product is sensitive to electrostatic discharge (ESD). We recommend that you use proper ESD
grounding procedures and equipment when you install or maintain the unit.
Caution: Do not power on the platform until the management serial console or the management network is
connected to the unit.
About the front-mounting kit
You can use the front-mounting kit if you are installing into a two-post cabinet.
Front-mounting kit hardware
The front-mounting kit includes these parts.
HardwareQuantity
front-mounting brackets2
#8-32 thumb screws4
5/16 inch pan head screws4
Installing using a front-mounting kit
Before you install this platform, review the environmental guidelines to make sure that you are installing and using the
platform in the appropriate environment.
This platform includes front-mounting brackets, which you can use to attach the unit directly to the rack.
1. Align the bracket's keyhole slots with the PEM fasteners on the side of the unit.
2. Slide the bracket toward the back of the unit to lock the bracket into place.
18 | Platform Guide: 3900
Table of contents
Other F5 Network Hardware manuals

F5
F5 iSeries User manual

F5
F5 i4000 Series Assembly Instructions

F5
F5 6900 Assembly Instructions

F5
F5 WANJet 500 Assembly Instructions

F5
F5 BIG-IP 11050 User manual

F5
F5 ARX-500 Operating and maintenance manual

F5
F5 ARX-4000 Use and care manual

F5
F5 WANJet 300 Technical manual

F5
F5 520 User manual

F5
F5 Herculon SSL Orchestrator Manual