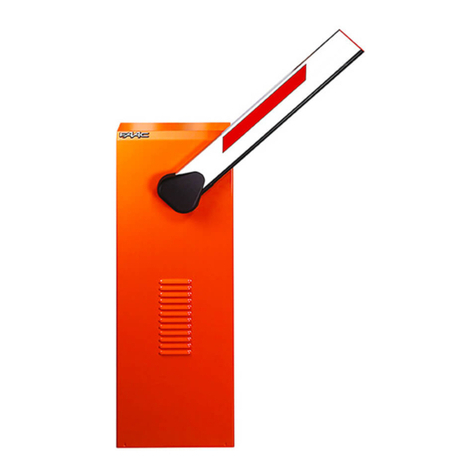
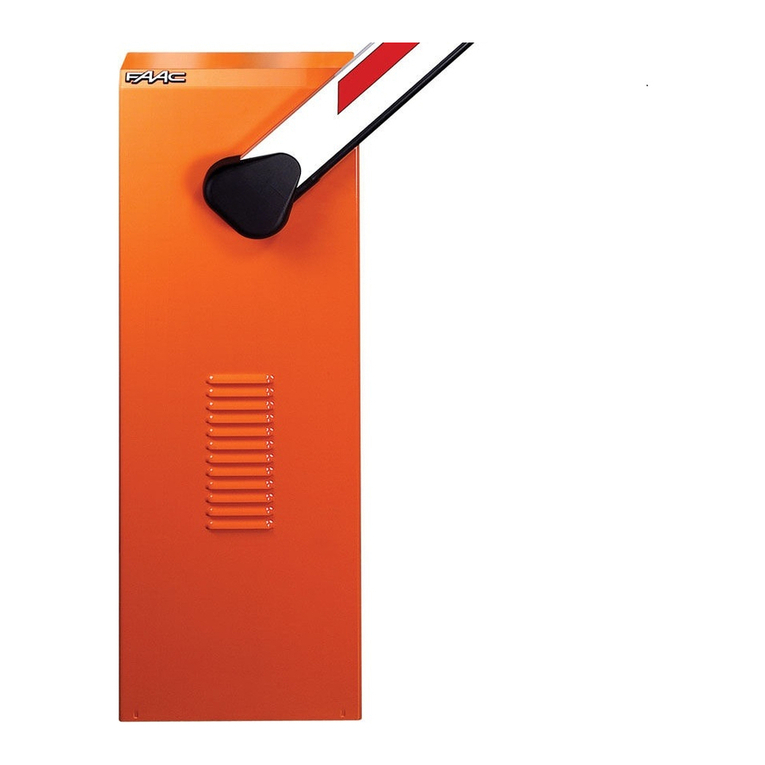
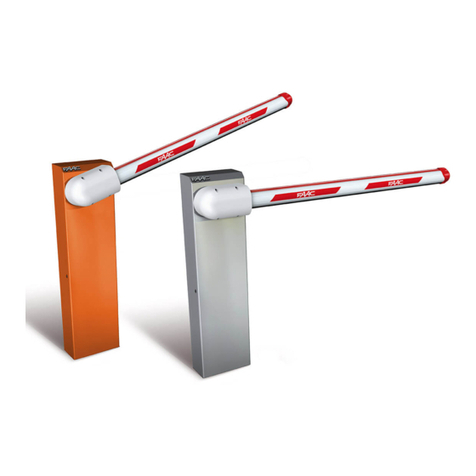
FAAC 615 User manual

KIT ARTICOLATA
KIT ARTICOLATA
615/620
615/620


1
Fig. 5
Fig. 4
Fig. 3
Fig. 1 Fig. 2
615 620
615/620 620
615/620
H
110
A
930
B
A
85
LT
L
Quote in mm
Values in mm
Cotes en mm
Maße in mm
Cotas en mm
Waarden in mm.
H
A
930 85 110
A
L
LT
B
햶
햹
햽
햿
햴
햾
햷
햺
헀
햻
헃
헂
헁
햲
햳
햵
햸
A= H - 1155
B= L - A
LT= L + 165
H MAX=3200
A MAX= 2075
A= H - 1155
B= L - A
LT= L + 205
H MAX=3200
A MAX= 2075
30
30
헀
A
B
헄
헅

2
ISTRUZIONE KIT ARTICOLAZIONE BARRIERA 615/620
Il Kit articolazione barriera è stato creato per la trasformazione di sbarre rigide in sbarre articolate. Il montaggio è realizzabile in
abbinamento ai corpi barriera 615 standard, 620 standard sx, 620 standard dx, 620 rapida sx e 620 rapida dx.
NOTA. : Il Kit articolazione è adatto per altezze massime di passaggio di metri 3,2.
Seguire attentamente le operazioni sottoelencate :
1) Calcolare la lunghezza delle due parti A e B come in fig. 1 o 2.
2) Tagliare i due spezzoni di sbarra e praticare le forature per il fissaggio degli snodi come in fig. 3.
3) Assemblare i particolari 햲e 햳con lo snodo 햴inserendo il perno 햵come in fig. 5.
4) Inserire il gruppo 햲, 햳, 햴e 햵negli spezzoni delle sbarre ed assemblare con i particolari 햶e 햷utilizzando le viti in dotazione
come in fig. 5.
5) Montare il supporto 햸sul corpo barriera come in fig. 5,utilizzando il distanziale 헄solo con tasche vecchie antecedenti set-
tembre 2005.
Attenzione : Il cofano della 615 viene fornito già forato. Per il cofano 620,se non si utilizza un cofano preforato,eseguire le fo-
rature facendo riferimento alla fig. 4.
6) Inserire la boccola 햹e la forcella 햺sul supporto 햸ed applicare il seeger 햻come in fig. 5.
7) Inserire la forcella 햽con la boccola 햾sull’ attacco 햷ed assemblare con il perno 햿e i seeger 헀.
8) Avvitare i dadi 헁e 헂sulle forcelle 햺e 햽.
Attenzione : una forcella e un dado hanno filettatura sinistra.
9) Avvitare il tubo 헃fino a un quarto della forcella con filettatura sinistra.
10) Posizionare i due spezzoni di sbarra perfettamente in orizzontale ed allineare il tubo q sulla forcella con filettatura destra.
11) Tracciare la posizione di taglio del tubo 헃a un quinto della filettatura della forcella destra.
12) Tagliare il tubo 헃e filettarlo con maschio M10 destro per circa 20 mm.
13) Avvitare in senso orario il tubo 헃sulla forcella destra in modo che la sbarra risulti allineata.
14) Serrare i dadi 헁e 헂sul tubo 헃.
15) Terminare l’installazione, applicando il coperchio di protezione 헅.
INSTRUCTIONS FOR BARRIER ARTICULATION KIT 615/620
The barrier articulation Kit was created to convert rigid beams into articulated beams. Assembly is possible by combining with the
following barrier bodies: 615 standard, 620 standard LH, 620 standard RH, 620 rapid LH and 620 rapid RH.
NOTE. : The articulation Kit is suitable for a maximum transit height of 3,2 metres.
Carefully observe the following operations:
1) Calculate the length of the two parts A and B as shown in fig. 1 or 2.
2) Cut the two beam sections and drill the holes for securing the joints as in fig. 3.
3) Assemble parts 햲and 햳with joint 햴inserting pin 햵as in fig. 5
4) Insert group 햲, 햳, 햴and 햵in the beam sections and assemble with parts 햶and 햷, using the supplied screws as in fig. 5.
5) Fit support 햸on the barrier body as in fig. 5,using the spacer 헄with old pockets dated before September 2005.
Important : The housing of 615 is supplied drilled. As regards the 620 housing, if you are not using a pre-drilled housing, drill the
holes referring to fig. 4.
6) Insert the bush 햹and the fork 햺on support 햸and fit the seeger ring j as in fig. 5.
7) Insert fork 햽with bush 햾on fitting 햷and assemble with pin 햿and seeger rings 헀.
8) Screw nuts 헁and 헂on forks 햺and 햽.
Important : one fork and one nut are threaded on the left.
9) Screw tube 헃up to one fourth of the fork threaded on the left.
10) Position the two beam sections perfectly horizontally and align tube 헃with the fork threaded on the right.
11) Trace the cutting position of tube 헃at one fifth of the thread of the right-hand fork.
12) Cut tube 헃and thread it with RH male M10 to about 20 mm.
13) Screw tube 헃clockwise on the right-hand fork to align the beam.
14) Tighten nuts 헁and 헂on tube 헃.
15) Finish installing by fitting the protective cover 헅.
KIT D’ ARTICULATION POUR BARRIERES 615/620
Le Kit d’ articulation pour barrière a été conçu pour transformer une lisse rigide rectangulaire en lisse articulèe.Le montage peut
être réalisé indifféremment sur les corps de barrière modèles : 615 standard, 620 standard gauche ou droit, 620 rapide gauche
ou drite.
REMARQUE : le Kit d’articulation ne peut être utilisé, que pour des passages disposants d’une hauteur sous plafond maxi de
3,20 mètres.
Passage libre maxi pour véhicule : 3,20 m.
Suivre attentivement et dans l’ordre les opèrations suivantes :
1) Calculer les longueurs exactes des deux parties A et B de la lisse, comme indiquè dans les figs. 1 ou 2.
2) Couper la lisse à l’endroit souhaité en pratiquant les onglets, pour obtenir les deux parties A et B. Pratiquer les perçages néces-
saires à la fixation de l’ articulation comme mentionné fig. 3.
3) Assembler les pièces 햲et 햳avec l’articulation 햴. Insérer l’axe 햵comme indiquè fig. 5.
4) Insérer l’ensemble obtenu 햲, 햳, 햴, 햵dans les deux parties de la lisse. Assembler et fixer le tout avec les pièces 햶et 햷.
Utiliser la visserie fournie comme en fig. 5.
5) Monter le support 햸sur le corps de barrière, comme indiqué fig. 5,en utilisant l’entretoise 헄avec les vieilles poches datant
d’avant septembre 2005.
GB
I
F

3
Attention : le corps de barrière du modèle 615 est fourni déjà percé. Pour le modèle 620, si celui-ci ne l’est pas, il faut procèder
à son perçage en se référant aux cotes de la fig. 4.
6) Insérer la douille 햹et l’attache filetée 햺sur le support 햸. Bloquer l’ ensemble par le clips 햻, comme indiqué sur la fig. 5.
7) Insérer l’attache filetée 햽avec la douille 햾sur l’attache 햷. Maintenir l’ ensemble avec l’axe 햿et les clips 헀.
8) Visser les écrous 헁et 헂sur les attaches filetées 햺et 햽.
Attention : le filetage et l’écrou de l’une des deux attaches filetées dispose d’un pas à gauche.
9) Visser le tube 헃sur 1/4 de l’attache filetée, dotée du filetage avec pas à gauche.
10) Posittioner parfaitement à l’horizontal les deux parties de la lisse. Aligner le tube 헃avec l’attache filetée ayant le pas à droi-
te.
11) Tracer l’endroit de la coupe sur le tube 헃à 1/5 du filetage de l’attache ayant son filetage avec le pas à droite.
12) Couper le tube 헃, et le fileter à l’aide d’un taraud M10 droite, sur une profondeur de 20 mm.
13) Visser dans le sens des aiguilles d’une montre, le tube 헃sur l’attache filetée avec pas à droite, pour obteiner un bon aligne-
ment de la lisse.
14) Serrer les écrous 헁et 헂sur le tube 헃.
15) Terminer l’installation en appliquant le couvercle de protection 헅.
ANLEITUNG BAUSATZ GELENKSCHRANKE 615/620
Der Bausatz Gelenkschranke wurde entwickelt, um starre Balken in Gelenkbalken umzubauen. Die Montage kann mit den
Schrankenkörpern 615 Standard, 620 Standard links, 620 Standard rechts, 620 Schnellschranke links und 620 Schnellschranke
rechts erfolgen.
Anmerkung : der Gelenkbausatz ist für Durchfahrtshöhen von maximal 3,2 m geeignet.
Die nachfolgend aufgeführten Arbeitsvorgänge sind sorgfältig auszuführen:
1) Die Länge der beiden Teile A und B, wie in Abb. 1 oder 2 veranschaulicht, berechnen.
2) Die beiden Balkenabschnitte schneiden und die Bohrungen für die Befestigung der Gelenkstücke, wie in Abb. 3 gezeigt, au-
sführen.
3) Die Teile 햲und 햳mit dem Gelenk 햴montieren und dabei den Stift 햵, wie in Abb. 5 gezeigt, einführen.
4) Die Gruppe 햲, 햳, 햴und 햵in die Balkenabschnitte einführen und mit den Teilen 햶und 햷unter Verwendung der mitgelieferten
Schrauben gemäß Abb. 5 befestigen.
5) Die Stütze 햸auf den Schrankenkörper montieren, wie in Abb. 5 gezeigt, wie in Abb. 5 gezeigt. Dazu ist der Abstandhalter 헄
mit alten Taschen (vor September 2005) zu verwenden.
Achtung : die Haube der Version 615 wird bereits in gelo chtem Zustand geliefert. Für die Haube des Modells 620 werden die
Bohrungen, soweit keine vorgebohrte Hau be verwendet wird, unter Bezugnahme auf Abb. 4 ausge führt.
6) Die Buchse 햹und die Gabel 햺auf die Stütze 햸montieren und den Seeger-Ring 햻wie in Abb. 5 gezeigt, anbringen.
7) Die Gabel 햽mit der Buchse 햾auf dem Anschluß 햷anbringen und mit dem Stift 햿und den Seeger-Ringen 헀zusammen-
bauen.
8) Die Muttern 헁und 헂auf den Gabeln 햺und 햽anschrauben.
Achtung : eine Gabel und eine Mutter verfügen über ein linksgängiges Gewinde.
9) Das Rohr 헃bis auf ein Viertel der Gabel mit linksgängigem Gewinde anschrauben.
10) Die beiden Balkenabschnitte korrekt horizontal positionieren und das Rohr 헃auf der Gabel mit rechtsgängigem Gewinde
ausrichten.
11) Die Schnittposition des Rohrs 헃bei einem Fünftel des Gewindes der rechten Gabel anzeichnen.
12) Das Rohr 헃schneiden und mit einer rechtsgängigen Schraube M10 für ca. 20 mm gewindeschneiden.
13) Das Rohr 헃im Uhrzeigersinn auf der rechten Gabel anschrauben, so daß der Balken ausgerichtet wird.
14) Die Muttern 헁und 헂auf dem Rohr 헃anziehen.
15) Die Montage beenden und den Schutzdeckel 헅anbringen.
INSTRUCCIONES DE USO DEL KIT ARTICULACIÓN BARRERA 615/620
El Kit articulación barrera ha sido ideado para la transformación de barras rígidas en barras articuladas. El montaje puede lle-
varse a cabo en combinación a los cuerpos barrera 615 estándar, 620 estándar izq., 620 estándar dcha., 620 rápida izq. y 620
rápida dcha.
NOTA : El Kit articulación es apto para alturas máximas de paso de 3,2 metros.
Siga atentamente las operaciones que se describen a continuación:
1) Calcule la longitud de las dos partes A y B tal y como se indica en las figuras 1 o 2.
2) Corte los dos trozos de barra y efectúe los taladrados para la fijación de las articulaciones como se indica en la figura 3.
3) Ensamble las piezas 햲y 햳con la articulación 햴introduciendo el perno 햵como se muestra en la figura 5.
4) Introduzca el grupo 햲, 햳, 햴y 햵en los trozos de las barras y ensamble con las piezas 햶y 햷utilizando los tornillos sumini-
strados en dotación, como se indica en la figura 5.
5) Monte el soporte 햸sobre el cuerpo barrera como se muestra en la figura 5, utilizando el distanciador 헄con bolsillos viejos
(antes de Septiembre 2005).
Atención : El cárter de la 615 se suministra con los taladrados ya efectuados. Para el cárter de la 620, si no se utiliza un cárter
ya pretaladrado, efectúe los taladrados tomando como referencia la figura 4.
6) Introduzca el casquillo 햹y la horquilla 햺sobre el soporte 햸y coloque el anillo seeger 햻como se muestra en la figura 5.
7) Introduzca la horquilla 햽con el casquillo 햾sobre el empalme 햷y ensamble con el perno 햿y los anillos seeger. 헀.
8) Enrosque las tuercas 헁y 헂sobre las horquillas 햺y 햽.
Atención : una horquilla y una tuerca tienen el roscado a la izquierda.
9) Enrosque el tubo 헃hasta un cuarto de la horquilla con roscado a la izquierda.
10) Coloque los dos trozos de barra perfectamente horizontales y alinee el tubo 헃sobre la horquilla con roscado a la dere-
cha.
11) Trace la posición de corte del tubo 헃a un quinto del roscado de la horquilla derecha.
12) Corte el tubo 헃y enrósquelo con macho M10 derecho aproximadamente 20 mm.
D
E
4
13) Enrosque en sentido horario el tubo q sobre la horquilla derecha de modo que la barra quede alineada.
14) Apriete las tuercas 헁y 헂en el tubo 헃.
15) Termine la instalación aplicando la tapa de protección 헅.
INSTRUCTIES SCHARNIERKIT SLAGBOOM 615/620
De scharnierkit voor slagbomen is gerealiseerd om rechte slagbomen om te zetten in scharnierende slagbomen. Hij kan worden
gemonteerd in combinatie met de slagbomen 615 standaard, 620 standaard links, 620 standaard rechts, 620 snel links e 620
snel rechts.
OPMERKING. : De scharnierkit is geschikt voor een doorgangshoogte van maximaal 3,2 meter.
Volg de hieronder aangegeven handelingen nauwgezet:
1) Bereken de lengte van de twee delen A en B zoals in fig. 1 of 2.
2) Zaag de twee stukken van de slagboom af, en maak de gaten voor de bevestiging van de scharnieren zoals in fig. 3.
3) Assembleer de onderdelen 햲en 햳met het scharnier 햴door de spil 햵erin te steken zoals in fig. 5.
4) Steek de groep 햲, 햳, 햴en 햵in de stukken van de slagbomen en monteer de onderdelen 햶en 햷erop met behulp van
de bijgeleverde schroeven zoals in fig. 5.
5) Monteer de steun 햸op de behuizing van de slagboom zoals in fig. 5, met gebruikmaking van afstandsstuk 헄met de oude
zakken van voor september 2005.
15) Voltooi de installatie door de beschermingskap 헅aan te brengen.
Let op : De kap van de 615 wordt geleverd met de gaten er al in. Bij de kap 620 moeten er, als er geen reeds geperforeerde
kap wordt gebruik, gaten worden gemaakt overeenkomstig fig. 4.
6) Zet de bus 햹erin en de vork 햺op de steun 햸en breng de seegerring 햻aan zoals in fig. 5.
7) Zet de vork 햽erin met de bus 햾op de aansluiting 햷en assembleer ze met de spil 햿en de seegerring 헀.
8) Draai de schroeven 헁en 헂vast op de vorken 햺en 햽.
Let op : een vork en een moer hebben een linksdraaiende schroefdraad.
9) Draai de buis 헃vast tot op een kwart van de vork met linksdraaiende schroefdraad.
10) Zet de twee stukken van de slagboom perfect horizontaal en breng de buis 헃op één lijn op de vork met rechtsdraaiende
schroefdraad.
11) Markeer de plaats waar de buis 헃moet worden afgezaagd op een vijfde van de schroefdraad van de rechtervork.
12) Zaag de buis 헃af en breng er ongeveer 20 mm schroefdraad op aan met een mannelijke M10 rechtsdraaiend.
13) Draai de buis 헃met de wijzers van de klok mee zodanig op de rechtervork vast dat de slagboom uitgelijnd is.
14) Draai de moeren 헁en 헂op de buis 헃.
15) Terminare l’installazione, applicando il coperchio di protezione 헅.
NL


Le descrizioni e le illustrazioni del presente manuale non sono impegnative. La FAAC si riserva il diritto, lasciando inal-
terate le caratteristiche essenziali dell’apparecchiatura, di apportare in qualunque momento e senza impegnarsi
ad aggiornare la presente pubblicazione, le modifiche che essa ritiene convenienti per miglioramenti tecnici o per
qualsiasi altra esigenza di carattere costruttivo o commerciale.
The descriptions and illustrations contained in the present manual are not binding. FAAC reserves the right, whilst
leaving the main features of the equipments unaltered, to undertake any modifications it holds necessary for either
technical or commercial reasons, at any time and without revising the present publication.
Les descriptions et les illustrations du présent manuel sont fournies à titre indicatif. FAAC se réserve le droit d’apporter à
tout moment les modifications qu’elle jugera utiles sur ce produit tout en conservant les caractéristiques essentielles,
sans devoir pour autant mettre à jour cette publication.
Die Beschreibungen und Abbildungen in vorliegendem Handbuch sind unverbindlich. FAAC behält sich das Recht
vor, ohne die wesentlichen Eigenschaften dieses Gerätes zu verändern und ohne Verbindlichkeiten in Bezug auf die
Neufassung der vorliegenden Anleitungen, technisch bzw. konstruktiv/kommerziell bedingte Verbesserungen vorzu-
nehmen.
Las descripciones y las ilustraciones de este manual no comportan compromiso alguno. FAAC se reserva el derecho,
dejando inmutadas las características esenciales de los aparatos, de aportar, en cualquier momento y sin compro-
meterse a poner al día la presente publicación, todas las modificaciones que considere oportunas para el perfec-
cionamiento técnico o para cualquier otro tipo de exigencia de carácter constructivo o comercial.
De beschrijvingen in deze handleiding zijn niet bindend. FAAC behoudt zich het recht voor op elk willekeurig moment de
veranderingen aan te brengen die het bedrijf nuttig acht met het oog op technische verbeteringen of alle mogelijke
andere productie- of commerciële eisen, waarbij de fundamentele eigenschappen van de apparaat gehandhaafd
blijven, zonder zich daardoor te verplichten deze publicatie bij te werken.
FAAC S.p.A.
Via Benini, 1
40069 Zola Predosa (BO) - ITALIA
Tel. 0039.051.61724 - Fax. 0039.051.758518
www.faac.it
www.faacgroup.com
732017 - Rev. C
Other manuals for 615
4
This manual suits for next models
1
Table of contents
Other FAAC Automatic Barrier manuals
Popular Automatic Barrier manuals by other brands

Holland
Holland TG Series installation manual

Maxon
Maxon GPC 17 X-1 User & maintenance manual

fadini
fadini CORAL 1050 instruction manual

Nice
Nice HySecurity StrongArmPark DC Series installation instructions

Telcoma Automations
Telcoma Automations RAP-4 INSTRUCTION HANDBOOK AND SPARE PARTS CATALOGUE

Thorn
Thorn TEA BOLLARD installation instructions