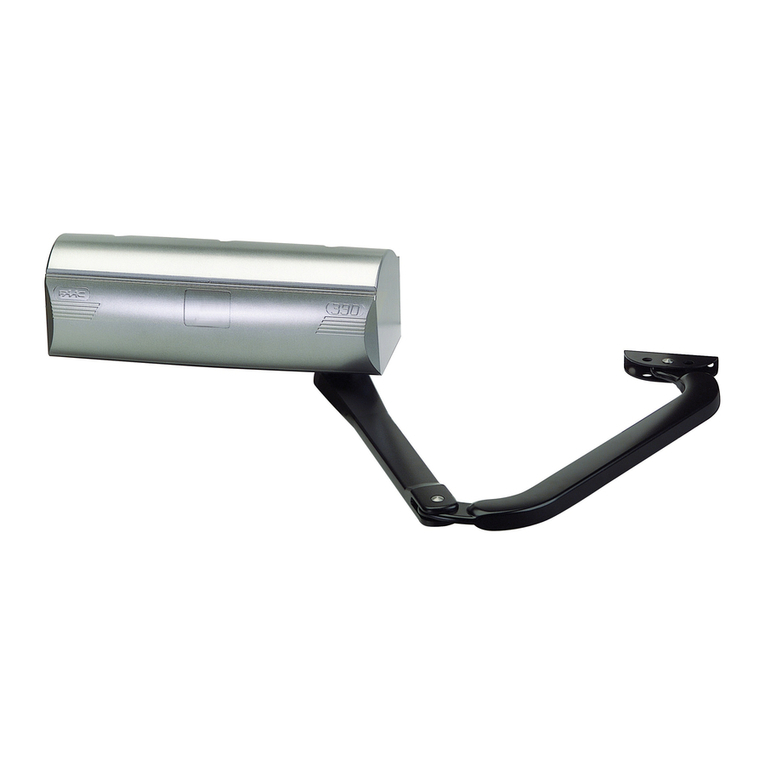
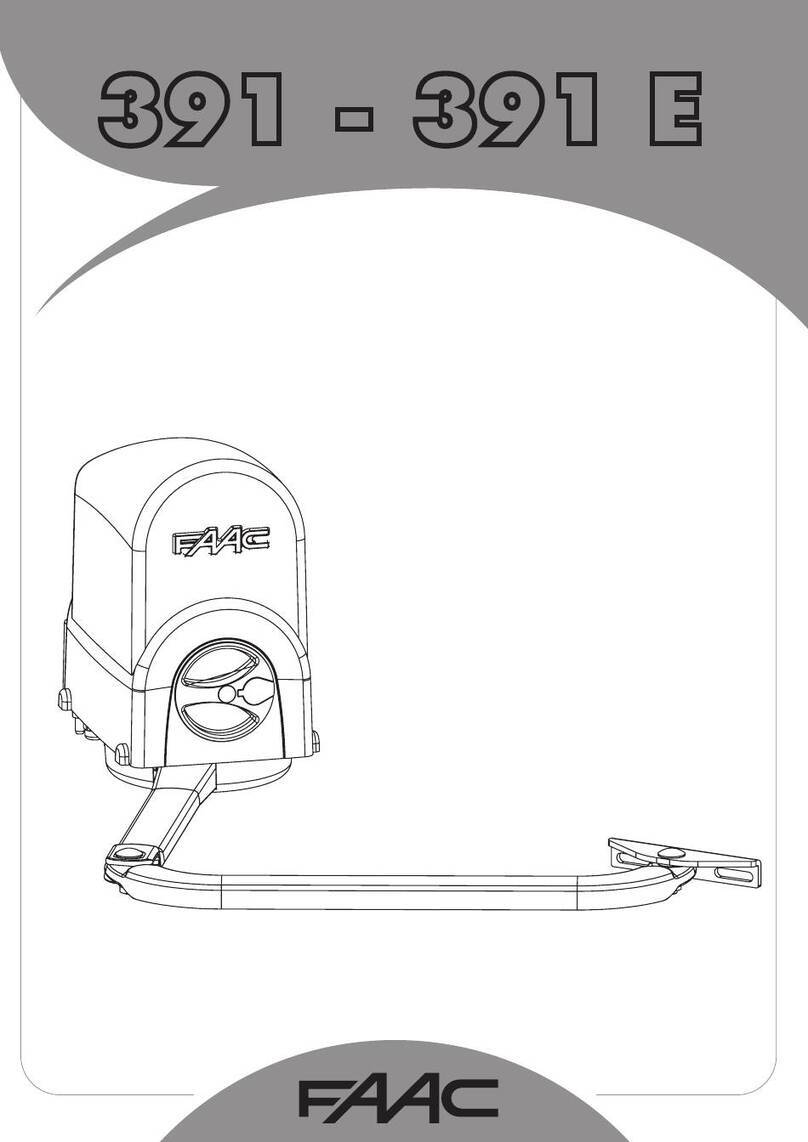
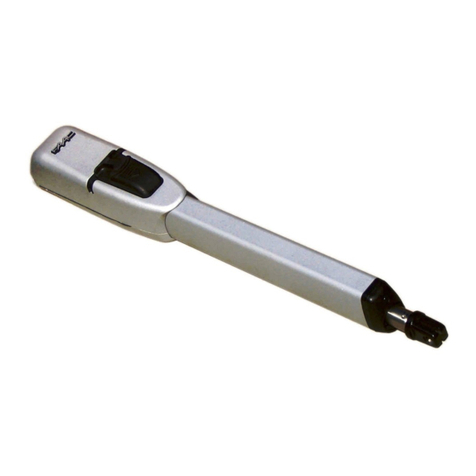
FAAC 390 User manual

390
390

ITALIANO
AVVERTENZE PER L’INSTALLATORE
OBBLIGHI GENERALI PER LA SICUREZZA
ATTENZIONE! È importante per la sicurezza delle persone seguire
attentamente tutta l’istruzione. Una errata installazione o un errato
uso del prodotto può portare a gravi danni alle persone.
Leggere attentamente le istruzioni prima di iniziare l’installazione del prodotto.
I materiali dell’imballaggio (plastica, polistirolo, ecc.) non devono essere lasciati alla
portata dei bambini in quanto potenziali fonti di pericolo.
Conservare le istruzioni per riferimenti futuri.
Questo prodotto è stato progettato e costruito esclusivamente per l’utilizzo indicato in
questadocumentazione.Qualsiasialtroutilizzononespressamenteindicatopotrebbe
pregiudicare l’integrità del prodotto e/o rappresentare fonte di pericolo.
FAAC declina qualsiasi responsabilità derivata dall’uso improprio o diverso da quello
per cui l’automatismo è destinato.
Non installare l’apparecchio in atmosfera esplosiva: la presenza di gas o fumi infiam-
mabili costituisce un grave pericolo per la sicurezza.
Glielementicostruttivimeccanicidevonoessereinaccordo con quanto stabilito dalle
Norme EN 12604 e EN 12605.
Per i Paesi extra-CEE, oltre ai riferimenti normativi nazionali, per ottenere un livello di
sicurezza adeguato, devono essere seguite le Norme sopra riportate.
FAAC non è responsabile dell’inosservanza della Buona Tecnica nella costruzione
delle chiusure da motorizzare, nonché delle deformazioni che dovessero intervenire
nell’utilizzo.
L’installazionedeveessere effettuata nell’osservanza delle Norme EN 12453 eEN12445.
Il livello di sicurezza dell’automazione deve essere C+D.
Prima di effettuare qualsiasi intervento sull’impianto, togliere l’alimentazione elettrica
e scollegare le batterie.
Prevedere sulla rete di alimentazione dell’automazione un interruttore onnipolare con
distanza d’apertura dei contatti uguale o superiore a 3 mm. È consigliabile l’uso di un
magnetotermico da 6A con interruzione onnipolare.
Verificare che a monte dell’impianto vi sia un interruttore differenziale con soglia da
0,03 A.
Verificare che l’impianto di terra sia realizzato a regola d’arte e collegarvi le parti
metalliche della chiusura.
L’automazionedisponediunasicurezza intrinseca antischiacciamento costituita da un
controllodicoppia.E’comunquenecessarioverificarnelasoglidiinterventosecondo
quanto previsto dalle Norme indicate al punto 10.
I dispositivi di sicurezza (norma EN 12978) permettono di proteggere eventuali aree
di pericolo da Rischi meccanici di movimento, come ad Es. schiacciamento, convo-
gliamento, cesoiamento.
Per ogni impianto è consigliato l’utilizzo di almeno una segnalazione luminosa nonché
di un cartello di segnalazione fissato adeguatamente sulla struttura dell’infisso, oltre ai
dispositivi citati al punto “16”.
FAAC declina ogni responsabilità ai fini della sicurezza e del buon funzionamento
dell’automazione, in caso vengano utilizzati componenti dell’impianto non di pro-
duzione FAAC.
Per la manutenzione utilizzare esclusivamente parti originali FAAC.
Non eseguire alcuna modifica sui componenti facenti parte del sistema d’automa-
zione.
L’installatore deve fornire tutte le informazioni relative al funzionamento manuale del
sistemaincasodiemergenza e consegnareall’Utenteutilizzatoredell’impiantoillibretto
d’avvertenze allegato al prodotto.
Non permettere ai bambini o persone di sostare nelle vicinanze del prodotto durante
il funzionamento.
L’applicazione non può essere utilizzata da bambini, da persone con ridotte ca-
pacità fisiche, mentali, sensoriali o da persone prive di esperienza o del necessario
addestramento.
Tenerefuoridallaportatadeibambiniradiocomandioqualsiasialtro datoredi impulso,
per evitare che l’automazione possa essere azionata involontariamente.
Il transito tra le ante deve avvenire solo a cancello completamente aperto.
L’utente utilizzatore deve astenersi da qualsiasi tentativo di riparazione o d’intervento
e deve rivolgersi solo ed esclusivamente a personale qualificato FAAC o centri d’as-
sistenza FAAC.
Tutto quello che non è previsto espressamente in queste istruzioni non è permesso.
ENGLISH
IMPORTANT NOTICE FOR THE INSTALLER
GENERAL SAFETY REGULATIONS
ATTENTION! To ensure the safety of people, it is important that you read
all the following instructions. Incorrect installation or incorrect use
of the product could cause serious harm to people.
Carefully read the instructions before beginning to install the product.
Do not leave packing materials (plastic, polystyrene, etc.) within reach of children
as such materials are potential sources of danger.
Store these instructions for future reference.
Thisproduct was designed and built strictly for the use indicated inthisdocumentation.
Any other use, not expressly indicated here, could compromise the good condition/
operation of the product and/or be a source of danger.
FAAC declines all liability caused by improper use or use other than that for which the
automated system was intended.
Donot install the equipment in an explosive atmosphere:the presence of inflammable
gas or fumes is a serious danger to safety.
The mechanical parts must conform to the provisions of Standards EN 12604 and EN
12605.
For non-EU countries, to obtain an adequate level of safety, the Standards mentioned
above must be observed, in addition to national legal regulations.
FAACis not responsible for failureto observe Good Techniqueinthe construction of the
closing elements to be motorised, or for any deformation that may occur during use.
The installation must conform to Standards EN 12453 and EN 12445. The safety level of
the automated system must be C+D.
Before attempting any job on the system, cut out electrical power and disconnect
the batteries.
Themains power supply of the automated systemmust be fitted with an all-pole switch
with contact opening distance of 3mm or greater. Use of a 6A thermal breaker with
all-pole circuit break is recommended.
Make sure that a differential switch with threshold of 0.03 A is fitted upstream of the
system.
Make sure that the earthing system is perfectly constructed, and connect metal parts
of the means of the closure to it.
Theautomated system is supplied with anintrinsicanti-crushing safety device consisting
1.
2.
3.
4.
5.
6.
7.
8.
9.
10.
11.
12.
13.
14.
15.
16.
17.
18.
19.
20.
21.
22.
23.
24.
25.
26.
27.
1.
2.
3.
4.
5.
6.
7.
8.
9.
10.
11.
12.
13.
14.
15.
of a torque control. Nevertheless, its tripping threshold must be checked as specified
in the Standards indicated at point 10.
Thesafety devices (EN 12978 standard) protectany danger areas againstmechanical
movement Risks, such as crushing, dragging, and shearing.
Use of at least one indicator-light is recommended for every system, as well as a
warning sign adequately secured to the frame structure, in addition to the devices
mentioned at point “16”.
FAACdeclines all liability as concerns safety and efficient operation of the automated
system, if system components not produced by FAAC are used.
For maintenance, strictly use original parts by FAAC.
Do not in any way modify the components of the automated system.
The installer shall supply all information concerning manual operation of the system
in case of an emergency, and shall hand over to the user the warnings handbook
supplied with the product.
Do not allow children or adults to stay near the product while it is operating.
Theapplication cannot be used by children,by people with reducedphysical, mental,
sensorial capacity, or by people without experience or the necessary training.
Keep remote controls or other pulse generators away from children, to prevent the
automated system from being activated involuntarily.
Transit through the leaves is allowed only when the gate is fully open.
The User must not in any way attempt to repair or to take direct action and must solely
contact qualified FAAC personnel or FAAC service centres.
Anything not expressly specified in these instructions is not permitted.
FRANÇAIS
CONSIGNES POUR L’INSTALLATEUR
RÈGLES DE SÉCURITÉ
ATTENTION! Il est important, pour la sécurité des personnes, de suivre
à la lettre toutes les instructions. Une installation erronée ou un
usage erroné du produit peut entraîner de graves conséquences
pour les personnes.
Lire attentivement les instructions avant d’installer le produit.
Les matériaux d’emballage (matière plastique, polystyrène, etc.) ne doivent pas être
laissés à la portée des enfants car ils constituent des sources potentielles de danger.
Conserver les instructions pour les références futures.
Ce produit a été conçu et construit exclusivement pour l’usage indiqué dans cette
documentation. Toute autre utilisation non expressément indiquée pourrait compro-
mettre l’intégrité du produit et/ou représenter une source de danger.
FAACdécline toute responsabilité qui dériverait d’usageimpropreou différentde celui
auquel l’automatisme est destiné.
Ne pas installer l’appareil dans une atmosphère explosive: la présence de gaz ou de
fumées inflammables constitue un grave danger pour la sécurité.
Les composants mécaniques doivent répondre aux prescriptions des Normes EN
12604 et EN 12605.
Pour les Pays extra-CEE, l’obtention d’un niveau de sécurité approprié exige non
seulement le respect des normes nationales, mais également le respect des Normes
susmentionnées.
FAAC n’est pas responsable du non-respect de la Bonne Technique dans la construc-
tion des fermetures à motoriser, ni des déformations qui pourraient intervenir lors de
l’utilisation.
L’installation doit être effectuée conformément aux Normes EN 12453 et EN 12445. Le
niveau de sécurité de l’automatisme doit être C+D.
Couper l’alimentation électrique et déconnecter la batterie avant toute intervention
sur l’installation.
Prévoir,surlesecteur d’alimentationdel’automatisme, un interrupteuromnipolaireavec
unedistance d’ouverture des contacts égale ou supérieureà 3 mm. On recommande
d’utiliser un magnétothermique de 6A avec interruption omnipolaire.
Vérifier qu’il y ait, en amont de l’installation, un interrupteur différentiel avec un seuil
de 0,03 A.
Vérifier que la mise à terre est réalisée selon les règles de l’art et y connecter les pièces
métalliques de la fermeture.
L’automatisme dispose d’une sécurité intrinsèque anti-écrasement, formée d’un con-
trôle du couple. Il est toutefois nécessaire d’en vérifier le seuil d’intervention suivant les
prescriptions des Normes indiquées au point 10.
Les dispositifs de sécurité (norme EN 12978) permettent de protéger des zones éven-
tuellement dangereuses contre les Risques mécaniques du mouvement, comme
l’écrasement, l’acheminement, le cisaillement.
On recommande que toute installation soit doté au moins d’une signalisation lumi-
neuse, d’un panneau de signalisation fixé, de manière appropriée, sur la structure de
la fermeture, ainsi que des dispositifs cités au point “16”.
FAAC décline toute responsabilité quant à la sécurité et au bon fonctionnement de
l’automatisme si les composants utilisés dans l’installation n’appartiennent pas à la
production FAAC.
Utiliser exclusivement, pour l’entretien, des pièces FAAC originales.
Ne jamais modifier les composants faisant partie du système d’automatisme.
L’installateurdoit fournir toutes les informations relativesau fonctionnement manuel du
systèmeencas d’urgence et remettreà l’Usager qui utilise l’installation les “Instructions
pour l’Usager” fournies avec le produit.
Interdire aux enfants ou aux tiers de stationner près du produit durant le fonction-
nement.
Ne pas permettre aux enfants, aux personennes ayant des capacités physiques,
mentales et sensorielles limitées ou dépourvues de l’expérience ou de la formation
nécessaires d’utiliser l’application en question.
Eloignerdela portée des enfants les radiocommandes ou tout autre générateur d’im-
pulsions, pour éviter tout actionnement involontaire de l’automatisme.
Le transit entre les vantaux ne doit avoir lieu que lorsque le portail est complètement
ouvert.
L’utilisateur doit s’abstenir de toute tentative de réparation ou d’intervention et doit
s’adresser uniquement et exclusivement au personnel qualifié FAAC ou aux centres
d’assistance FAAC.
Tout ce qui n’est pas prévu expressément dans ces instructions est interdit.
ESPAÑOL
ADVERTENCIAS PARA EL INSTALADOR
REGLAS GENERALES PARA LA SEGURIDAD
ATENCION! Es sumamente importante para la seguridad de las perso-
nas seguir atentamente las presentes instrucciones. Una instalación
incorrecta o un uso impropio del producto puede causar graves
daños a las personas.
Lean detenidamente las instrucciones antes de instalar el producto.
Los materiales del embalaje (plástico, poliestireno, etc.) no deben dejarse al alcance
16.
17.
18.
19.
20.
21.
22.
23.
24.
25.
26.
27.
1.
2.
3.
4.
5.
6.
7.
8.
9.
10.
11.
12.
13.
14.
15.
16.
17.
18.
19.
20.
21.
22.
23.
24.
25.
26.
27.
1.
2.

1
ITALIANO
DICHIARAZIONE CE DI CONFORMITÁ PER MACCHINE
(DIRETTIVA 98/37/CE)
Fabbricante: FAAC S.p.A.
Indirizzo: Via Benini, 1 - 40069 - Zola Predosa - Bologna - ITALIA
Dichiara che: L’operatore mod. 390 / 390 24 con alimentazione 230Vac
è costruito per essere incorporato in una macchina o per essere assemblato con altri macchinari per costituire una macchina ai sensi della Direttiva
98/37/CE;
è conforme ai requisiti essenziali di sicurezza delle seguenti altre direttive CEE:
2006/95/CE direttiva Bassa Tensione.
2004/108/CE direttiva Compatibilità elettromagnetica.
Inoltre dichiara che non è consentito mettere in servizio il macchinario fino a che la macchina in cui sarà incorporato o di cui diverrà componente sia
stata identificata e ne sia stata dichiarata la conformità alle condizioni della Direttiva 89/392/CEE e successive modifiche tresposta nella legislazione
nazionale dal DPR n°459 del 24 liuglio 1996.
Bologna, 30 Maggio 2008
L’Amministratore Delegato
A. Marcellan
•
••
•
Note per la lettura dell’istruzione
Leggere completamente questo manuale di installazione prima di iniziare l’installazione del prodotto.
Il simbolo evidenzia note importanti per la sicurezza delle persone e l’integrità dell’automazione.
Il simbolo richiama l’attenzione su note riguardanti le caratteristiche od il funzionamento del prodotto.
INDICE
1. DESCRIZIONE E CARATTERISTICHE TECNICHE pag.2
2. DIMENSIONI pag.2
3. PREDISPOSIZIONI ELETTRICHE (impianto standard) pag.3
4. INSTALLAZIONE DELL’AUTOMAZIONE pag.3
4.1. VERIFICHE PRELIMINARI pag.3
4.2. QUOTE D’INSTALLAZIONE pag.3
4.3. SEQUENZA DI MONTAGGIO pag.4
4.4. PROVA DELL’AUTOMAZIONE pag.4
5. FUNZIONAMENTO MANUALE pag.4
6. RIPRISTINO DEL FUNZIONAMENTO NORMALE pag.4
7. MANUTENZIONE pag.4
8. RIPARAZIONI pag.4
1. PROCEDIMENTO DI INSTALLAZIONE pag.5

2
ITALIANO
AUTOMAZIONE 390
Le presenti istruzioni sono valide per il seguente modello:
390
L’automazioneesterna abraccisnodati, consentedi automatizzare cancelli
abattente residenzialicon antefinoa 3m. dilunghezza,ed èparticolarmen-
te idonea per applicazioni su pilastri di grandi dimensioni senza bisogno di
realizzarenicchie (talvolta necessarieper rispettarelequote d’installazione
degli operatori a pistone).
È costituita da un operatore elettromeccanico irreversibile con carter di
protezione e un sistema di azionamento a bracci snodati da applicare al
cancello con gli opportuni accessori.
Ilsistemairreversibilegarantisce ilblocco meccanico delcancello quando
il motore non è in funzione, e per ante fino a 2 m. di lunghezza non occorre
installare alcuna serratura.
Uno sblocco manuale rende manovrabile il cancello in caso di black-out
o disservizio.
Per ottenere la sicurezza antischiacciamento è necessario utilizzare
apparecchiature elettroniche dotate del dispositivo elettronico di
regolazione della coppia.
L’automazione è stata progettata e costruita per controllare l’accesso
veicolare. Evitare qualsiasi altro diverso utilizzo.
1. DESCRIZIONE E CARATTERISTICHE TECNICHE
Fig. 1Fig. 1
햲Carter di copertura
햳Piastra base per fissaggio operatore
햴Chiave di sblocco
햵Dispositivo di sblocco
햶Motoriduttore
햷Albero di trasmissione
햸Leva dritta del braccio snodato
햹Leva curva del braccio snodato
햺Attacco anteriore
햲Carter di copertura
햳Piastra base per fissaggio operatore
햴Chiave di sblocco
햵Dispositivo di sblocco
햶Motoriduttore
햷Albero di trasmissione
햸Leva dritta del braccio snodato
햹Leva curva del braccio snodato
햺Attacco anteriore
TAB. 1 CARATTERISTICHE TECNICHE MOTORIDUTTORE
Modello 390
Alimentazione 230V~ 50Hz 24 Vdc
Potenza assorbita 280 W 40 W
Corrente assorbita 1.2 A 2 A
Coppia Max. 250 Nm 200 Nm
Condensatore di spunto 8 µF /
Lunghezza max. anta 햲3 m
Termoprotezione avvolgimento 140 °C /
Rapporto di riduzione 1:700
Velocità angolare 8 °/sec
Temperatura ambiente -20 °C +55 °C
Frequenza d’utilizzo S3 - 30% S3 - 100%
Cicli / ora >30 >100
Peso motoriduttore 11.5 Kg
Grado di protezione IP 44
Dimensioni Vedi Fig. 2
햲Conante superioriai 2metri,per garantireilblocco dell’anta,è necessaria
l’installazione di un’elettroserratura.
2. DIMENSIONI
Fig. 2Fig. 2

3
ITALIANO
3. PREDISPOSIZIONI ELETTRICHE (impianto standard)
Per la messa in opera dei cavi utilizzare adeguati tubi rigidi e/o flessi-
bili.
Separare sempre i cavi di collegamento degli accessori a bassa
tensioneda quellidialimentazione a230/115 V~.Perevitarequalsiasi
interferenza utilizzare guaine separate.
4. INSTALLAZIONE DELL’AUTOMAZIONE
4.1. VERIFICHE PRELIMINARI
Per la sicurezza e per un corretto funzionamento dell’automazione,
verificare l’esistenza dei seguenti requisiti:
La struttura del cancello deve essere idonea per essere automatizzata.
In particolare verificare che sia sufficientemente robusta e rigida e che
le dimensioni siano conformi a quelle indicate nelle caratteristiche tec-
niche.
Verificare il movimento regolare e uniforme delle ante, privo di attriti
irregolari durante tutta la corsa.
Verificare il buono stato delle cerniere.
Verificare lapresenzadegli arrestimeccanici di finecorsa.Si raccomanda
di effettuare gli eventuali interventi fabbrili prima d’installare l’automa-
zione.
4.2. QUOTE D’INSTALLAZIONE
Determinare la posizione di montaggio dell’operatore facendo riferimento
alle Fig. 4-5-6.
•
•
•
•
햲Operatori
햳Fotocellule
햴Apparecchiatura elettronica
햵Pulsante a chiave
햶Ricevente radio esterna
햷Lampeggiante
햲Operatori
햳Fotocellule
햴Apparecchiatura elettronica
햵Pulsante a chiave
햶Ricevente radio esterna
햷Lampeggiante Fig. 3Fig. 3
Fig. 4Fig. 4
4.2.1. QUOTE CONSIGLIATE APERTURA VERSO L’INTERNO
Per aperture di 120° il braccio curvo deve essere fissato nel foro
contrassegnato con la lettera “X”
4.2.2. QUOTE CONSIGLIATE APERTURA VERSO L’ESTERNO
A (mm) B (mm) C max. (mm) α (°)
60 ÷ 110
110 ÷ 130
730
90
110 ÷ 160 720
160 ÷ 210 710
210 ÷ 260 700
260 ÷ 310 690
310 ÷ 360 670
60 ÷ 110 190 ÷ 210 650 120110 ÷ 160 230 ÷ 250 600
160 ÷ 210 290 ÷ 310 540
210 ÷ 260 310 ÷ 330 510 120
A (mm) B (mm) C max. (mm) α (°)
60 ÷ 110
110 ÷ 130
730
90
110 ÷ 160 720
160 ÷ 210 710
210 ÷ 260 700
260 ÷ 310 690
310 ÷ 360 670
60 ÷ 110 190 ÷ 210 650 120110 ÷ 160 230 ÷ 250 600
160 ÷ 210 290 ÷ 310 540
210 ÷ 260 310 ÷ 330 510 120
Fig. 5Fig. 5
A (mm) B (mm) C max. (mm) α (°)
60 ÷ 110
110 ÷ 130
430
90
110 ÷ 160 380
160 ÷ 210 330
210 ÷ 260 280
260 ÷ 310 240
A (mm) B (mm) C max. (mm) α (°)
60 ÷ 110
110 ÷ 130
430
90
110 ÷ 160 380
160 ÷ 210 330
210 ÷ 260 280
260 ÷ 310 240
Fig. 6Fig. 6

4
ITALIANO
4.3. SEQUENZA DI MONTAGGIO
L’operatore, la piastra base e il braccio snodato sono predisposti per l’in-
stallazione sinistra oppure destra (Fig. 7).
Fissare, verificando la perfetta orizzontalità, la piastra base al pilastro
utilizzando viti Ø10 e adeguati tasselli (Fig. 8).
Inserire il gruppo motoriduttore nella piastra base e fissarlo con le due viti
e relativi dadi e rondelle elastiche (Fig. 8).
L’albero di trasmissione va sempre rivolto verso il basso.
Assemblare il braccio snodato e l’attacco anteriore come in Fig. 9.
Inserire la leva dritta del braccio snodato nell’albero del motoriduttore e
serrarla con la vite e la rondella in dotazione (Fig. 10).
Sbloccare l’operatore (capitolo 5.)
Determinarelaposizione difissaggiodell’attacco anterioresull’anta, rispet-
tando la quota “C” precedentemente definita (capitolo 4.2.). Verificare
la perfetta orizzontalità del braccio e dell’attacco.
L’attacco può essere direttamente saldato all’anta (Fig. 11) oppure
avvitato utilizzando inserti filettati (Fig. 12).
In entrambi i casi, segnare la posizione dell’attacco anteriore e smontare
momentaneamente l’attacco dal braccio per fissarlo.
Una volta fissatto l’attacco anteriore rimontare il braccio.
Applicare il carter di protezione sull’operatore (Fig. 10).
Ribloccare l’operatore (capitolo 6.)
Effettuare i collegamenti elettrici dell’apparecchiatura elettronica pre-
scelta seguendo le istruzioni allegate.
•
•
•
•
•
•
•
•
•
•
•
Fig. 7Fig. 7
Fig. 8Fig. 8
Fig. 9Fig. 9
Fig. 10Fig. 10
Fig. 11Fig. 11 Fig. 12Fig. 12
4.4. PROVA DELL’AUTOMAZIONE
Terminata l’installazione, procedere alla verifica funzionale accurata
dell’automazione e di tutti gli accessori ad essa collegati; in particolare i
dispositivi di sicurezza.
Consegnareal Clientela pagina“Guida per l’utente” edillustrare ilcorretto
funzionamentoe utilizzo dell’operatore,evidenziando le zonedi potenziale
pericolo dell’automazione.
5. FUNZIONAMENTO MANUALE
Nelcaso sia necessarioazionare manualmenteil cancelloa causadi man-
canzadi alimentazioneelettricao disserviziodell’automazione, ènecessario
agire sul dispositivo di sblocco come segue:
Togliere alimentazione al sistema.
Inserire la chiave a brugola in dotazione e ruotare di circa mezzo giro fino
all’arresto nel senso indicato in Fig. 13 in relazione al tipo di montaggio.
Muovere manualmente il cancello.
6. RIPRISTINO DEL FUNZIONAMENTO NORMALE
Per evitare che un impulso involontario possa azionare il cancello
durante la manovra, prima di ribloccare l’operatore togliere ali-
mentazione all’impianto.
Inserire la chiave a brugola in dotazione e ruotare di circa mezzo giro fino
all’arresto nel senso indicato in Fig. 13 in relazione al tipo di montaggio.
Assicurarsi che il cancello non si possa muovere manualmente.
Dare alimentazione al sistema.
7. MANUTENZIONE
Al fine d’assicurare nel tempo un corretto funzionamento ed un costante
livello di sicurezza è opportuno eseguire,almeno con cadenza semestrale,
un controllo generale dell’impianto. Nel fascicolo “Guida utente” è stato
predisposto un modulo per la registrazione degli interventi.
8. RIPARAZIONI
L’utente utilizzatore deve astenersi da qualsiasi tentativo di riparazione
o d’intervento e deve rivolgersi solo ed esclusivamente a personale
qualificato FAAC o centri d’assistenza FAAC.
•
•
•
•
•
Fig. 13Fig. 13

5
ENGLISH
Notes on reading the instruction
Read this installation manual to the full before you begin installing the product.
The symbol indicates notes that are important for the safety of persons and for the good condition of the automated system.
The symbol draws your attention to the notes on the characteristics and operation of the product.
CE DECLARATION OF CONFORMITY FOR MACHINES
(DIRECTIVE 98/37/EC)
Manufacturer: FAAC S.p.A.
Address: Via Benini, 1 - 40069 - Zola Predosa - Bologna - ITALY
Declares that: Operator mod. 390 / 390 24 with 230 Vac power supply
is built to be integrated into a machine or to be assembled with other machinery to create a machine under the provisions of Directive 98/37/EC;
conforms to the essential safety requirements of the following EEC directives:
2006/95/EC Low Voltage directive.
2004/108/EC Electromagnetic Compatibility directive.
and also declares that it is prohibited to put into service the machinery until the machine in which it will be integrated or of which it will become a com-
ponent has been identified and declared as conforming to the conditions of Directive 89/392/EEC and subsequent modifications assimilated in Italian
National legislation under Presidential decree No.459 of 24 July 1996.
Bologna, 30 May 2008
Managing Director
A. Marcellan
•
••
•
INDEX
1. DESCRIPTION AND TECHNICAL SPECIFICATIONS page.6
2. DIMENSIONS page.6
3. ELECTRICAL EQUIPMENT (standards system) page.7
4. INSTALLATION OF AUTOMATION page.7
4.1. PRELIMINARY CHECKS page.7
4.2. INSTALLATION DIMENSIONS page.7
4.3. INSTALLATION STEPS page.8
4.4. TEST OF THE AUTOMATION page.8
5. MANUAL OPERATING MODE page.8
6. RESTORING NORMAL OPERATING MODE page.8
7. MAINTENANCE page.8
8. REPAIRS page.8

6
ENGLISH
AUTOMATION 390
These instructions apply to the following model:
390
Theexternal automationwith articulated armsautomates residentialswing-
leaf gates with leaves of up to 3m in length, and is ideal for applications on
large pilasters without the need to provide niches (sometimes required to
observe the installation dimensions of piston driven devices).
It consists of an irreversible electro-mechanical operator with guard and
an articulated-arm activation system to be fitted to the gate with the ap-
propriate accessories.
Theirreversiblesystemensuresthegate ismechanicallockedwhenthe motor
is not operating. No lock need be installed for leaves up to 2m in length.
A manual release makes it possible to move the gate in the event of a
power-cut or fault.
To obtain anti-crushing protection, you have to use electronic applian-
ces with a torque control electronic device.
The automation was designed and manufactured to control access of
vehicles. Avoid any other use whatever.
1. DESCRIPTION AND TECHNICAL SPECIFICATIONS
Fig. 1Fig. 1
햲Guard
햳Operator securing base-plate
햴Release wrench
햵Release
햶Gearmotor
햷Transmission shaft
햸Straight lever of articulated arm
햹Curved lever of articulated arm
햺Front coupling
햲Guard
햳Operator securing base-plate
햴Release wrench
햵Release
햶Gearmotor
햷Transmission shaft
햸Straight lever of articulated arm
햹Curved lever of articulated arm
햺Front coupling
TAB. 1 TECHNICAL SPECIFICATION OF OPERATOR
MODEL 390
Power supply 230V~ 50Hz 24 Vdc
Power absorption 280 W 40 W
Current absorption 1.2 A 2 A
Max torque 250 Nm 200 Nm
Starting capacitor 8 µF /
Leaf max length 햲3 m
Thermal protection for winding 140 °C /
Reduction ratio 1:700
Angular velocity 8 °/sec
Ambient temperature -20 °C +55 °C
Use frequency S3 - 30% S3 - 100%
Cycles / hour >30 >100
Weight of gearmotor 11.5 Kg
Protection class IP 44
Gearmotor overall dimension Vedi Fig. 2
햲Anelectrolockshould beinstalledin theeventof leavesexceeding2 metres,
in order to guarantee the leaf blocking.
2. DIMENSIONS
Fig. 2Fig. 2

7
ENGLISH
3. ELECTRICAL EQUIPMENT (standards system)
To lay electrical cables, use adequate rigid and/or flexible tubes.
Always separate low voltage accessories from those operating at
230/115 V~. To avoid any interference, always use separate shea-
ths.
4. INSTALLATION OF AUTOMATION
4.1. PRELIMINARY CHECKS
To ensure safety and an efficient automation, make sure the following
requirements are met:
The gate structure must be suitable for automation. In particular, make
sure it is sufficiently sturdy and rigid, and that its dimensions are in line with
those indicated in the technical specifications.
Make sure that the leaves move properly and uniformly, without any
irregular friction during their entire travel.
Check if hinges are in good condition.
Make sure the travel limit mechanical stops are present. We advise you to
carry out any metalwork jobs before installing the automation.
4.2. INSTALLATION DIMENSIONS
Establish the installation position of the operator by consulting Fig. 4-5-6.
•
•
•
•
햲Operators
햳Photocells
햴Electronic equipment
햵Key-operated push-button
햶Radio receiver
햷Flashlight
햲Operators
햳Photocells
햴Electronic equipment
햵Key-operated push-button
햶Radio receiver
햷Flashlight Fig. 3Fig. 3
Fig. 4Fig. 4
4.2.1. RECOMMENDED DIMENSIONS FOR INWARD OPENING
Asfor120° openingsthecurvedarm mustbefixedto thehole marked
with the letter “X”
4.2.2. RECOMMENDED DIMENSIONS FOR OUTWARD OPENING
A (mm) B (mm) C max. (mm) α (°)
60 ÷ 110
110 ÷ 130
730
90
110 ÷ 160 720
160 ÷ 210 710
210 ÷ 260 700
260 ÷ 310 690
310 ÷ 360 670
60 ÷ 110 190 ÷ 210 650 120110 ÷ 160 230 ÷ 250 600
160 ÷ 210 290 ÷ 310 540
210 ÷ 260 310 ÷ 330 510 120
A (mm) B (mm) C max. (mm) α (°)
60 ÷ 110
110 ÷ 130
730
90
110 ÷ 160 720
160 ÷ 210 710
210 ÷ 260 700
260 ÷ 310 690
310 ÷ 360 670
60 ÷ 110 190 ÷ 210 650 120110 ÷ 160 230 ÷ 250 600
160 ÷ 210 290 ÷ 310 540
210 ÷ 260 310 ÷ 330 510 120 Fig. 5Fig. 5
A (mm) B (mm) C max. (mm) α (°)
60 ÷ 110
110 ÷ 130
430
90
110 ÷ 160 380
160 ÷ 210 330
210 ÷ 260 280
260 ÷ 310 240
A (mm) B (mm) C max. (mm) α (°)
60 ÷ 110
110 ÷ 130
430
90
110 ÷ 160 380
160 ÷ 210 330
210 ÷ 260 280
260 ÷ 310 240
Fig. 6Fig. 6

8
ENGLISH
4.3. INSTALLATION STEPS
The operator, base-plate and articulated arm are designed either for right-
hand or left-hand (Fig. 7) installation.
Secure the base-plate to the pilaster, using Ø10 screws and suitable
expansion plugs (Fig. 8), and check it is perfectly horizontal.
Fitthe gearmotorunit onthe base-plateand secureitwith the twoscrews,
nuts and flexible washers (Fig.8).
The transmission shaft must always face downward.
Assemble the articulated arm and front coupling as shown in Fig. 9.
Fit the straight lever of the articulated arm on the gearmotor shaft and
tighten it with the supplied screw and washer (Fig. 10).
Release the operator (chapter 5.)
Establish the securing position of the front coupling on the leaf, observing
dimension “C” defined previously (chapter 4.2). Check that arm and
coupling are perfectly horizontal.
Thecoupling maybe weldeddirectlyonto theleaf (Fig.11) orscrewed
by using the threaded inserts (Fig. 12).
Inboth cases,mark thepositionofthefront fittingandprovisionally remove
the coupling from the arm in order to secure it.
After having fastened the front fitting, mount the arm again
Fit the guards on the operator (Fig. 10).
Re-lock the operator (chapter 6.)
•
•
•
•
•
•
•
•
•
•
Fig. 7Fig. 7
Fig. 8Fig. 8
Fig. 9Fig. 9
Fig. 10Fig. 10
Fig. 11Fig. 11 Fig. 12Fig. 12
Make the electrical connections of the selected electronic appliance,
observing the annexed instructions.
4.4. TEST OF THE AUTOMATION
Whenyou havefinishedinstallation, carefullycheckthe operatingefficiency
of the automation and of all accessories connected to it, safety devices
in particular.
Handthe “User’s Guide”page tothe Client,and describehow theoperator
should function and be used correctly, stressing the potentially dangerous
areas of the automation.
5. MANUAL OPERATING MODE
Ifthe gate hasto beoperated manuallyin theevent ofapower-cutor fault
to the automation, use the release device as follows:
Cut power to the system.
Fit the supplied Allen wrench and turn it by about a half turn until it stops,
in the direction shown in Fig. 13, depending on type of installation.
Move the gate by hand.
6. RESTORING NORMAL OPERATING MODE
To avoid an involuntary pulse from activating the gate during the
manoeuvre, before re-locking the operator , switch off power to the
system.
Fit the supplied Allen wrench and turn it by about a half turn until it stops,
in the direction shown in Fig. 13, depending on type of installation.
make sure that the gate cannot be moved manually.
Restore power to the system.
7. MAINTENANCE
To ensure correct long-term operation and a constant level of safety, we
advise you to generally control the system at least every 6 months. In the
“User’s Guide” booklet, there is a form for recording jobs.
8. REPAIRS
The User must not in any way attempt to repair or to take direct action
and must solely contact qualified FAAC personnel or FAAC service
centres.
•
•
•
•
•
•
Fig. 13Fig. 13

9
FRANÇAIS
DÉCLARATION CE DE CONFORMITÉ POUR MACHINES
(DIRECTIVE 98/37/CE)
Fabricant: FAAC S.p.A.
Adresse: Via Benini, 1 - 40069 - Zola Predosa - Bologna - ITALIE
Déclare que: L’opérateur mod. 390 / 390 24 avec alimentation 230Vca
est construit pour être incorporé dans une machine ou pour être assemblé à d’autres appareillages, afin de constituer une machine conforme aux
termes de la Directive 98/37/CE;
est conforme aux exigences essentielles de sécurité des directives CEE suivantes:
2006/95/CE directive Basse Tension.
2004/108/CE directive Compatibilité Électromagnétique.
On déclare en outre que la mise en service de l’outillage est interdite tant que la machine à laquelle il sera incorporé ou dont il deviendra un compo-
sant n’a pas été identifiée et déclarée conforme aux conditions de la Directive 89/392/CEE et modifications successives transposée dans la législation
nationale par le DPR n°459 du 24 juillet 1996.
Bologna, le 30 Mai 2008
L’Administrateur Délégué
A. Marcellan
•
••
•
Remarques pour la lecture de l’instruction
Lire ce manuel d’installation dans son ensemble avant de commencer l’installation du produit.
Le symbole souligne des remarques importantes pour la sécurité des personnes et le parfait état de l’automatisme.
Le symbole attire l’attention sur des remarques concernant les caractéristiques ou le fonctionnement du produit.
INDEX
1. DESCRIPTION ET CARACTERISTIQUES TECHNIQUES page.10
2. DIMENSIONS page.10
3.
PREDISPOSITIONS ELECTRIQUES (installation standard) page.11
4. INSTALLATION DE L’AUTOMATION page.11
4.1. VERIFICATIONS PRELIMINAIRES page.11
4.2. COTES D’INSTALLATION page.11
4.3. SEQUENCE DE MONTAGE page.12
4.4. TEST DU SYSTEME D’AUTOMATION page.12
5. FONCTIONNEMENT MANUEL page.12
6. RETOUR AU FONCTIONNEMENT NORMAL page.12
7. MAINTENANCE page.12
8. REPARATIONS page.12

10
FRANÇAIS
AUTOMATION 390
Ces instructions sont valables pour le modèle suivant:
390
Le systèmed’automation externeà brasarticuléspermetd’automatiserdes
grilles à battant (maisons résidentielles) dont les vantaux peuvent atteindre
3 m. de longueur; il est tout particulièrement indiqué pour l’application sur
des piliers de grandes dimensions, sans qu’il soit nécessaire de réaliser des
niches (nécessaires, quelquefois, pour respecter les cotes d’installation des
opérateurs à piston).
Il est formé d’un opérateur électromécanique irréversible avec un carter
de protection et un système d’actionnement à bras articulés, qui doit être
appliqué à la grille avec les accessoires correspondants.
Le système irréversiblegarantitle blocagemécanique de lagrille lorsquele
moteur n’est pas activé; l’installation d’une serrure n’est pas indispensable
pour les vantaux jusqu’à 2 m. de longueur.
Un dispositif de déblocage manuel permet de manoeuvrer la grille en cas
de coupure de courant ou de dysfonctionnement.
Utiliser des appareillages électroniques équipés du dispositif électro-
nique du couple pour obtenir une sécurité anti-écrasement.
L’automation a été conçue et construite pour contrôler l’accès des
véhicules. Eviter toute autre différente utilisation.
1. DESCRIPTION ET CARACTERISTIQUES TECHNIQUES
Fig. 1Fig. 1
햲Carter
햳Plaque base de fixation de l’opérateur
햴Clé de déblocage
햵Dispositif de déblocage
햶Motoréducteur
햷Arbre de transmission
햸Levier droite du bras articulé
햹Levier courbe du bras articulé
햺Raccord AV.
햲Carter
햳Plaque base de fixation de l’opérateur
햴Clé de déblocage
햵Dispositif de déblocage
햶Motoréducteur
햷Arbre de transmission
햸Levier droite du bras articulé
햹Levier courbe du bras articulé
햺Raccord AV.
TAB. 1 CARACTERISTIQUES TECHNIQUES DE L’OPERATEUR
MODELE 390
Alimentazione 230V~ 50Hz 24 Vdc
Puissance absorbée 280 W 40 W
Courant absorbé 1.2 A 2 A
Couple max. 250 Nm 200 Nm
Condensateur de décollage 8 µF /
Longueur max. vantail 햲3 m
Thermoprotection enroulement 140 °C /
Rapport de réduction 1:700
Vitesse angulaire 8 °/sec
Température ambiante -20 °C +55 °C
Fréquence d’utilisation S3 - 30% S3 - 100%
Cycles/heure >30 >100
Poids du motoréducteur 11.5 Kg
Degré de protection IP 44
Encombrement voir Fig. 2
햲Avec des vantaux supérieurs à 2 mètres, installer une électroserrure pour
garantir le blocage du vantail.
2. DIMENSIONS
Fig. 2Fig. 2

11
FRANÇAIS
3.
PREDISPOSITIONS ELECTRIQUES (installation standard)
Pour la mise en place des câbles électriques utiliser des tubes rigides
appropriés et/ou des tuyaux flexibles.
Séparer toujours les câbles de connexion des accessoires à basse
tension des câbles d’alimentation à 230/115 V~. Utiliser des gaines
séparées pour éviter toute interférence.
4. INSTALLATION DE L’AUTOMATION
4.1. VERIFICATIONS PRELIMINAIRES
Vérifierl’existencedes conditionssuivantes pours’assurerdela sécurité
et de la fiabilité du fonctionnement du système d’automation:
La structure de la grille doit être appropriée per être automatisée. En
particulier vérifier qu’elle soit suffisamment robuste et rigide et que les
dimensions soient conformes à celles reprises dans les caractéristiques
techniques.
Vérifier que le mouvement des vantaux soit régulier et uniforme, sans
aucun frottement irrégulier durant toute la course.
Vérifier le bon état des charnières.
Vérifier la présence des arrêts mécaniques de fin de course. Effectuer
les interventions éventuelles du forgeron avant d’installer le système
d’automation
4.2. COTES D’INSTALLATION
Déterminer la position de montage de l’opérateur en consultant les Fig.
4-5-6.
•
•
•
•
햲Opérateurs
햳Photocellules
햴Appareillage électronique
햵Poussoir à clé
햶Récepteur radio
햷Clignotant
햲Opérateurs
햳Photocellules
햴Appareillage électronique
햵Poussoir à clé
햶Récepteur radio
햷Clignotant
Fig. 3Fig. 3
Fig. 4Fig. 4
4.2.1. COTES CONSEILLEES POUR L’OUVERTURE VERS L’INTERIEUR
Pour des ouvertures de 120° le bras courbe doit être fixé dans le trou
marqué par la lettre “X”
4.2.2. COTES CONSEILLEES POUR L’OUVERTURE VERS L’EXTERIEUR
A (mm) B (mm) C max. (mm) α (°)
60 ÷ 110
110 ÷ 130
730
90
110 ÷ 160 720
160 ÷ 210 710
210 ÷ 260 700
260 ÷ 310 690
310 ÷ 360 670
60 ÷ 110 190 ÷ 210 650 120110 ÷ 160 230 ÷ 250 600
160 ÷ 210 290 ÷ 310 540
210 ÷ 260 310 ÷ 330 510 120
A (mm) B (mm) C max. (mm) α (°)
60 ÷ 110
110 ÷ 130
730
90
110 ÷ 160 720
160 ÷ 210 710
210 ÷ 260 700
260 ÷ 310 690
310 ÷ 360 670
60 ÷ 110 190 ÷ 210 650 120110 ÷ 160 230 ÷ 250 600
160 ÷ 210 290 ÷ 310 540
210 ÷ 260 310 ÷ 330 510 120 Fig. 5Fig. 5
A (mm) B (mm) C max. (mm) α (°)
60 ÷ 110
110 ÷ 130
430
90
110 ÷ 160 380
160 ÷ 210 330
210 ÷ 260 280
260 ÷ 310 240
A (mm) B (mm) C max. (mm) α (°)
60 ÷ 110
110 ÷ 130
430
90
110 ÷ 160 380
160 ÷ 210 330
210 ÷ 260 280
260 ÷ 310 240
Fig. 6Fig. 6

12
FRANÇAIS
4.3. SEQUENCE DE MONTAGE
L’opérateur , la plaque de base et le bras articulé sont prédisposés pour
l’installation droite ou bien gauche (Fig. 7).
Fixer, en vérifiant que l’horizontalité soit parfaite, la plaque de base au
pilier en utilisant des vis Ø10 et des chevilles appropriées (Fig. 8).
Insérer le groupe motoréducteur dans la plaque de base et le fixer avec
deux vis, les écrous correspondants et les rondelles élastiques (Fig. 8).
L’arbre de transmission doit toujours être tourné vers le bas.
Assembler le bras articulé et le raccord AV. conformément à la Fig. 9.
Insérer le levier droit du bras articulé dans l’arbre du motoréducteur et le
serrer avec la vis et la rondelle fournie (Fig. 10).
Débloquer l’opérateur (chapitre 5.).
Déterminer la position de fixation du raccord AV. sur le vantail en res-
pectant la cote «C» préalablement définie (chapitre 4.2.). Vérifier la
parfaite horizontalité du bras et du raccord.
Leraccordpeut être directementsoudé àle vantail(Fig. 11)ou bien
vissé en utilisant des inserts filetés (Fig. 12).
Dans les deux cas, marquer la position de la patte d’attache antérieure
et démonter momentanément le raccord du bras pour le fixer.
Après avoir fixé la patte d’attache antérieure, remonter le bras.
Appliquer le carter de protection sur l’opérateur (Fig. 10).
Bloquer à nouveau l’opérateur (chapitre 6.).
•
•
•
•
•
•
•
•
•
•
Fig. 7Fig. 7
Fig. 8Fig. 8
Fig. 9Fig. 9
Fig. 10Fig. 10
Fig. 11Fig. 11 Fig. 12Fig. 12
Effectuer les connexions électriques de l’appareil électronique choisi en
respectant les instructions en annexe.
4.4. TEST DU SYSTEME D’AUTOMATION
Au terme de l’installation effectuer une vérification approfondie fonction-
nelle de l’automation et de tous les accessoires liés à cette automation, et
plus particulièrement les dispositifs de sécurité.
Remettre au Client la page «Instructions pour l’Usager» et illustrer un parfait
fonctionnement et une parfaite utilisation de l’opérateur, en mettant en
évidence les zones de danger éventuel du système d’automation.
5. FONCTIONNEMENT MANUEL
S’il faut actionner manuellement la grille par suite d’une coupure de cou-
rant ou d’un dysfonctionnement de l’automation, agir sur le dispositif de
déblocage comme suit:
Mettre le système hors tension.
Introduirela cléAllenfournie ettournersur undemi-tour environjusqu’à l’ar-
rêt dans le sens indiqué par la Fig. 13 en fonction du type de montage.
Actionner le portail manuellement.
6. RETOUR AU FONCTIONNEMENT NORMAL
Pour éviter qu’une impulsion involontaire ne puisse actionner la grille
durant la manoeuvre, couper le courant avant de rebloquer l’opéra-
teur.
Introduirela cléAllenfournie ettournersur undemi-tour environjusqu’à l’ar-
rêt dans le sens indiqué par la Fig. 13 en fonction du type de montage.
S’assurer que le portail ne peut pas être actionné manuellement.
Mettre le système sous tension.
7. MAINTENANCE
Pour assurer un fonctionnement correct et un niveau de sécurité constant,
exécuter, au moins tous les six mois, un contrôle général de l’installation.
Avec les “Instructions pour l’utilisateur”, on fournit un formulaire pour l’en-
registrement des interventions.
8. REPARATIONS
L’utilisateur doit s’abstenir de toute tentative de réparation ou d’in-
tervention et doit s’adresser uniquement et exclusivement à du
personnel qualifié FAAC ou aux centres d’assistance FAAC.
•
•
•
•
•
•
Fig. 13Fig. 13

390
390
Guida per l’utente – User’s guide
Instructions pour l’utilisateur
Guía para el usuario
Anweisungen für den Benutzer
Gebruikersgids
Gebruikersgids

2
ITALIANO
AUTOMAZIONE 390
Leggere attentamente le istruzioni prima di utilizzare il prodotto e
conservarle per eventuali necessità future
L’utente utilizzatore deve astenersi da qualsiasi tentativo di riparazione
o d’intervento e deve rivolgersi solo ed esclusivamente a personale
qualificato FAAC o centri d’assistenza FAAC.
NORME GENERALI DI SICUREZZA
L’automazione, se correttamente utilizzata, garantisce un elevato grado
di sicurezza.
Alcune semplici norme di comportamento possono evitare inoltre incon-
venienti accidentali:
Non transitare tra le ante quando queste sono in movimento. Prima di
transitare tra le ante, attendere l’apertura completa.
Non sostare assolutamente tra le ante.
Non sostare e non permettere a bambini, persone o cose di sostare
nelle vicinanze dell’automazione, evitandolo ancor più durante il
funzionamento.
Tenere fuori dalla portata dei bambini, radiocomandi o qualsiasi altro
datored’impulso perevitarechel’automazione possaessereazionata
involontariamente.
Non permettere ai bambini di giocare con l’automazione.
L’applicazione non può essere utilizzata da bambini, da persone con
ridotte capacità fisiche, mentali, sensoriali o da persone prive di espe-
rienza o del necessario addestramento.
Non contrastare volontariamente il movimento delle ante.
Evitare che rami o arbusti possano interferire col movimento delle
ante
Mantenere efficienti e ben visibili i sistemi di segnalazione luminosa.
Non tentare di azionare manualmente le ante se non dopo averle
sbloccate.
Incaso dimalfunzionamento,sbloccarele anteperconsentirel’accesso
ed attendere l’intervento tecnico di personale qualificato.
Una volta predisposto il funzionamento manuale, prima di ripristinare il
funzionamento normale, togliere alimentazione elettrica all’impianto.
Non eseguire alcuna modifica sui componenti facenti parte il sistema
d’automazione.
L’utente utilizzatore deve astenersi da qualsiasi tentativo di riparazione
o d’intervento e deve rivolgersi solo ed esclusivamente a personale
qualificato FAAC o centri d’assistenza FAAC.
Far verificare almeno semestralmente l’efficienza dell’automazione,
dei dispositivi di sicurezza e del collegamento di terra da personale
qualificato.
DESCRIZIONE
Le presenti istruzioni sono valide per i seguenti modelli:
390,
L’automazione 390 per cancelli a battente residenziali è costituita da un
operatore elettromeccanico irreversibile con carter di protezione e un
sistema di azionamento a bracci snodati, applicati al cancello con gli
opportuni accessori.
IlsIstema irreversibilegarantisce ilblocco meccanicodel cancelloquando
il motore non è in funzione, e per ante fino a 2m. di lunghezza non occorre
installare alcuna serratura.
Uno sblocco manuale rende manovrabile il cancello in caso di black-out
o disservizio.
Il funzionamento degli operatori è gestito da una centralina elettronica di
comando, racchiusa in un contenitore con adeguato grado di protezione
agli agenti atmosferici.
Le ante normalmente si trovano in posizione di chiusura.
Quando la centralina elettronica riceve un comando di apertura tramite
il radiocomando o qualsiasi altro datore di impulso, aziona l’operatore
ottenendo la rotazione delle ante, fino alla posizione di apertura che
consente l’accesso.
1.
2.
3.
4.
5.
6.
7.
8.
9.
10.
11.
12.
13.
14.
15.
Se è stato impostato il funzionamento automatico, le ante si richiudono da
sole dopo il tempo di pausa selezionato.
Seè statoimpostato ilfunzionamentosemiautomatico,ènecessario inviare
un secondo impulso per ottenere la richiusura.
Un impulso di stop (se previsto) arresta sempre il movimento.
Per il dettagliato comportamento dell’automazione nelle diverse logiche
di funzionamento, fare riferimento al Tecnico installatore.
Nelle automazioni sono presenti dispositivi di sicurezza (fotocellule,coste,...)
cheimpediscono ilmovimento delleante quandoun ostacolosi trovanella
zona da loro protetta.
La segnalazione luminosa indica il movimento in atto delle ante.
FUNZIONAMENTO MANUALE
Nelcaso sia necessarioazionare manualmenteil cancelloa causadi man-
canzadi alimentazioneelettricao disserviziodell’automazione, ènecessario
agire sul dispositivo di sblocco come segue:
Togliere alimentazione al sistema.
Inserire la chiave a brugola in dotazione e ruotare di circa mezzo giro fino
all’arresto nel senso indicato in Fig. 13 in relazione al tipo di montaggio.
Muovere manualmente il cancello.
RIPRISTINO DEL FUNZIONAMENTO NORMALE
Per evitare che un impulso involontario possa azionare il cancello
durante la manovra, prima di ribloccare l’operatore togliere ali-
mentazione all’impianto.
Inserire la chiave a brugola in dotazione e ruotare di circa mezzo giro fino
all’arresto nel senso indicato in Fig. 13 in relazione al tipo di montaggio.
Assicurarsi che il cancello non si possa muovere manualmente.
Dare alimentazione al sistema.
•
•
•
•
•
Fig. 1Fig. 1 Fig. 2Fig. 2

3
ENGLISH
AUTOMATION 390
Read the instructions carefully before using the product, and keep
them for future consultation
The User must not in any way attempt to repair or to take direct action
and must solely contact qualified FAAC personnel or FAAC service
centres.
GENERAL SAFETY REGULATIONS
If used correctly, the automation will ensure a high degree of safety.
Some simple rules regarding behaviour will avoid any accidental trouble:
Do not pass through the leaves while they are moving. Before passing
through the leaves, wait until they are fully open.
Do not, on any account, stand between the leaves.
Donot stand nearthe automationand donot allowchildren andother
people to stand there, especially while it is operating.
Keep remote controls or any other pulse generator well away from chi-
ldren to prevent the automation from being activated involuntarily.
Do not allow children to play with the automation.
The application cannot be used by children, by people with reduced
physical, mental, sensorial capacity, or by people without experience
or the necessary training.
Do not willingly obstruct movement of the leaves.
Do not allow branches or shrubs to interfere with leaf movement.
Keep illuminated signalling systems efficient and clearly visible.
Do not attempt to activate the leaves manually unless you have re-
leased them first of all.
In the event of a malfunction, release the leaves to allow access and
wait for qualified personnel to take appropriate action.
After enabling manual operating mode, switch off the power supply to
the system before restoring normal operating mode.
Do not make any alterations to the components of the automation.
The User must not in any way attempt to repair or to take direct action
and must solely contact qualified FAAC personnel or FAAC service
centres.
Callin qualifiedpersonnel atleast every 6months tocheck theefficien-
cy of the automation, safety devices and earth connection.
DESCRIPTION
These instructions apply to the following model:
390,
390 automation for residential swing-leaf gates consists of an irreversible
electro-mechanicaloperator withguardand anarticulated-arm activation
system fitted to the gate with the appropriate accessories.
The irreversible system ensures the gate is mechanically locked when the
motor is not operating. No lock need be installed for leaves up to 2 m in
length.
A manual release makes it possible to move the gate in the event of a
power-cut or fault.
The operators are supervised by an electronic control unit, housed in a
container adequately protected against atmospheric agents.
The leaves are normally in closed position.
Whenthe electroniccontrolunit receivesan openingcommand byremote
control or by any other pulse generator, it activates the operator to rotate
the leaves until they are sufficiently open to provide access.
If automatic operating mode was set, the leaves close on their own after
the selected pause time has elapsed.
If semi-automatic operating mode was set, a second pulse must be sent to
allow the leaves to close again.
A stop pulse (if supplied) always stops movement.
Fordetailon operationof theautomation underdifferentoperational logics,
consult the installation technician.
The automations include safety devices (photocells, sensitive edges,…)
which prevent the leaves from moving when there is an obstacle in the
area they protect.
1.
2.
3.
4.
5.
6.
7.
8.
9.
10.
11.
12.
13.
14.
15.
The light indicates that leaves are moving.
MANUAL OPERATING MODE
Ifthe gate hasto beoperated manuallyin theevent ofapower-cutor fault
to the automation, use the release device as follows:
Cut power to the system.
Fit the supplied Allen wrench and turn it by about a half turn until it stops,
in the direction shown in Fig. 13, depending on type of installation.
Move the gate by hand.
RESTORING NORMAL OPERATING MODE
To avoid an involuntary pulse from activating the gate during the
manoeuvre, before re-locking the operator , switch off power to the
system.
Fit the supplied Allen wrench and turn it by about a half turn until it stops,
in the direction shown in Fig. 13, depending on type of installation.
make sure that the gate cannot be moved manually.
Restore power to the system.
•
•
•
•
•
Fig. 1Fig. 1 Fig. 2Fig. 2

4
FRANÇAIS
AUTOMATION 390
Lire attentivement les instructions avant d’utiliser le produit et le con-
server pour toutes nécessités éventuelles.
L’utilisateur doit s’abstenir de toute tentative de réparation ou d’in-
tervention et doit s’adresser uniquement et exclusivement à du
personnel qualifié FAAC ou aux centres d’assistance FAAC.
NORMES GENERALES DE SECURITE
Si correctement utilisé, le système d’automation garantit un degré de
sécurité important.
Par ailleurs quelques normes simples de comportement peuvent éviter des
inconvénients accidentels:
Ne pas transiter entre les vantaux lorsque ces dernières sont en mou-
vement. Avant de transiter entre les vantaux, attendre l’ouverture
complète.
Ne stationner absolument pas entre les vantaux.
Ne pas stationner et interdire aux enfants et aux tiers de stationner près
dusystème d’automation nepas yinterposerdes objets;respecterplus
encore cette norme durant le fonctionnement.
Eloigner de la portée des enfants les radiocommandes ou tout autre
dispositif d’impulsion, pour éviter que le système d’automation ne soit
actionné involontairement.
Interdire aux enfants de jouer avec l’automation.
Ne pas permettre aux enfants, aux personennes ayant des capacités
physiques,mentales etsensorielleslimitées oudépourvuesde l’expérien-
ce ou de la formation nécessaires d’utiliser l’application en question.
Ne pas contraster volontairement le mouvement des vantaux.
Eviter que des branches ou des arbustes n’interfèrent avec le mouve-
ment des vantaux
Faire ensorte queles systèmesde signalisationlumineuse soienttoujours
fiables et bien visibles.
Nejamais essayerd’actionnermanuellement lesvantaux:lesdébloquer
préalablement.
En cas de dysfonctionnement débloquer les vantauxpour permettre
l’accès et attendre l’intervention technique du personnel qualifié.
Lorsque lefonctionnement manuela étéprédisposé,couperlecourant
sur l’installation avant de rétablir le fonctionnement normal.
N’effectuer aucune modification sur les composants qui font partie du
système d’automation.
L’utilisateur doit s’abstenir de toute tentative de réparation ou d’inter-
ventionet doit s’adresseruniquement et exclusivementà dupersonnel
qualifié FAAC ou aux centres d’assistance FAAC.
Faire vérifier,tous lessixmois auminimum,la fiabilitédel’automation, des
dispositifs de sécurité et de la mise à terre par un personnel qualifié.
DESCRIPTION
Ces instructions sont valables pour les modèles suivants:
390,
Le système d’automation 390 pour grilles à battant (maisons résidentielles)
estformé d’un opérateurélectro-mécaniqueirréversible avecun carterde
protection et un système d’actionnement à bras articulés, appliqués à la
grille avec les accessoires appropriés.
Le système irréversiblegarantitle blocagemécanique de lagrille lorsquele
moteur n’est pas activé; l’installation d’une serrure n’est pas indispensable
pour les vantaux jusqu’à 2 m. de longueur.
Un dispositif de déblocage manuel permet de manoeuvrer la grille en cas
de coupure de courant ou de dysfonctionnement.
Le fonctionnement des opérateurs est géré par une centrale électronique
de commande, logée dans un contenant avec un degré de protection
approprié contre les agents atmosphériques.
Les vantaux se trouvent normalement dans une position de fermeture.
Lorsque la centrale électronique reçoit une commande d’ouverture par
l’intermédiaire de la radiocommande ou par tout autre dispositif d’impul-
sion, elle actionne l’opérateur et obtient la rotation des vantaux jusqu’à la
1.
2.
3.
4.
5.
6.
7.
8.
9.
10.
11.
12.
13.
14.
15.
position d’ouverture qui permet l’accès.
Si le fonctionnement automatique a été programmé, les vantaux se refer-
ment automatiquement après le temps de pause sélectionné.
Si le fonctionnement semi-automatique a été programmé, il faut envoyer
une deuxième impulsion pour obtenir une nouvelle fermeture.
Une impulsion d’arrêt (si prévue) arrête toujours le mouvement.
Pour un comportement détaillé du système d’automation dans les dif-
férentes logiques de fonctionnement, contacter le Technicien préposé à
l’installation.
Les systèmes d’automation contiennent des dispositifs de sécurité (pho-
tocellules, bords,...) qui empêchent le mouvement des vantaux lorsqu’un
obstacle se trouve dans la zone protégée.
La signalisation lumineuse indique que le mouvement des vantaux est en
cours..
FONCTIONNEMENT MANUEL
S’il faut actionner manuellement la grille par suite d’une coupure de cou-
rant ou d’un dysfonctionnement de l’automation, agir sur le dispositif de
déblocage comme suit:
Mettre le système hors tension.
Introduirela cléAllenfournie ettournersur undemi-tour environjusqu’à l’ar-
rêt dans le sens indiqué par la Fig. 13 en fonction du type de montage.
Actionner le portail manuellement.
RETOUR AU FONCTIONNEMENT NORMAL
Pour éviter qu’une impulsion involontaire ne puisse actionner la grille
durant la manoeuvre, couper le courant avant de rebloquer l’opéra-
teur.
Introduirela cléAllenfournie ettournersur undemi-tour environjusqu’à l’ar-
rêt dans le sens indiqué par la Fig. 13 en fonction du type de montage.
S’assurer que le portail ne peut pas être actionné manuellement.
Mettre le système sous tension.
•
•
•
•
•
Fig. 1Fig. 1 Fig. 2Fig. 2

5
ESPAÑOL
AUTOMACION 390
Lean detenidamente las instrucciones antes de utilizar el producto y
consérvenlas para posibles usos futuros
El usuario debe abstenerse de intentar reparar o de intervenir directa-
mente, y debe dirigirse exclusivamente a personal cualificado FAAC
o a centros de asistencia FAAC.
NORMAS GENERALES DE SEGURIDAD
La automación, si se instala y utiliza correctamente, garantiza un elevado
grado de seguridad.
Algunassimples normasde comportamientopueden evitarinconvenientes
o accidentes:
No transiten entre las hojas cuando éstas están en movimiento. Antes
de pasar entre las hojas, esperen a que la apertura sea completa.
No se detengan por ningún motivo entre las hojas.
No se detengan y no permitan que niños, personas u objetos estén
detenidos cerca de la automación, especialmente durante el funcio-
namiento de la misma.
Mantenganfuera delalcance delosniños mandosremotoso cualquier
otro generador de impulsos, a fin de evitar que la automación pueda
accionarse involuntariamente.
No permitan que los niños jueguen con la automación.
La aplicación no puede ser utilizada por niños, personas con reducida
capacidad física, mental, sensorial o personas sin experiencia o la
necesaria formación.
No obstaculicen voluntariamente el movimiento de las hojas.
Eviten que ramas o arbustos interfieran con el movimiento de las
hojas
Mantengan en buen estado y bien visibles los sistemas de señalización
luminosa.
No intenten accionar manualmente las hojas si no están desbloquea-
das.
En caso de mal funcionamiento, desbloqueen las hojas para permitir
el acceso y esperen a que personal técnico cualificado intervenga
para solucionar el problema.
Con la automación en funcionamiento manual, antes de restable-
cer el funcionamiento normal, quiten la alimentación eléctrica a la
instalación.
No efectúen ninguna modificación en los componentes que formen
parte del sistema de automación.
El usuario debe abstenerse de intentar reparar o de intervenir directa-
mente, y debe dirigirse exclusivamente a personal cualificado FAAC
o a centros de asistencia FAAC.
Hagan verificar por lo menos semestralmente el funcionamiento de
la automación, de los dispositivos de seguridad y la conexión a tierra
por personal cualificado.
DESCRIPCIÓN
Las presentes instrucciones son válidas para los siguientes modelos:
390,
La automación 390 para verjas de batiente residenciales, está formada
por un operador electromecánico irreversible con cárter de protección y
un sistema de accionamiento de brazos articulados, aplicados a la verja
con los específicos accesorios.
Elsistemairreversiblegarantiza elbloqueo mecánico dela verjacuando el
motor no está en funcionamiento, y para hojas de hasta 1.8 m. de longitud
no es necesario instalar cerradura alguna.
Un desbloqueo manual permite el movimiento de la verja en caso de
black-out o avería.
Elfuncionamiento deloperadorestá gestionadoporuna centralelectrónica
demando,ubicada enuncontenedor conadecuadogradodeprotección
a los agentes atmosféricos.
Las hojas se encuentran normalmente en posición de cierre.
Cuando la central electrónica recibe un mando de apertura mediante
1.
2.
3.
4.
5.
6.
7.
8.
9.
10.
11.
12.
13.
14.
15.
el mando a distancia o cualquier otro generador de impulso, acciona el
operadorobteniendo larotaciónde lashojas, hastalaposición deapertura
que permite el acceso.
Si se ha programado el funcionamiento automático, las hojas de cierran
solas transcurrido el tiempo de pausa seleccionado.
Si se ha programado el funcionamiento semiautomático, hay que enviar
un segundo impulso para obtener el cierre.
Un impulso de stop (si estuviera previsto) detiene siempre el movimiento.
Para conocer con detalle el comportamiento de la automación en las di-
ferentes lógicas de funcionamiento, consulten con el técnico instalador.
Las automaciones están equipadas con dispositivos de seguridad (fo-
tocélulas, bordes de sensibilidad,...) que impiden el movimiento de las
hojas cuando un obstáculo se encuentra en la zona protegida por dichos
dispositivos.
La señalización luminosa indica el movimiento en acto de las hojas.
FUNCIONAMIENTO MANUAL
Sifuera necesarioaccionarmanualmente laverja debidoafaltadealimen-
tación eléctrica o avería de la automación, hay que utilizar el dispositivo
de desbloqueo del siguiente modo:
Quite la alimentación al sistema.
Introduzcan la llave Allen en dotación y den aproximadamente media
vuelta hasta el tope en el sentido indicado en la Fig. 13 en relación al
tipo de montaje.
Mueva manualmente la cancela.
RESTABLECIMIENTO DEL FUNCIONAMIENTO NORMAL
Para evitar que un impulso involuntario pueda accionar la verja du-
rante la maniobra, antes de bloquear de nuevo el operador hay
que quitar la alimentación a la instalación.
Introduzcan la llave Allen en dotación y den aproximadamente una me-
dia vuelta hasta el tope en el sentido indicado en la Fig. 13 en relación
al tipo de montaje.
Asegúrese de que la cancela no se pueda mover manualmente.
Dé alimentación al sistema..
•
•
•
•
•
Fig. 1Fig. 1 Fig. 2Fig. 2

6
DEUTSCH
AUTOMATIKVORRICHTUNG 390
Die Anweisungen sollten vor dem Betrieb des Geräts aufmerksam
gelesen und aufbewahrt werden, um auch in Zukunft auf sie Bezug
nehmen zu können
Der Benutzer darf direkt keine Versuche für Reparaturen oder Arbeiten
vornehmen und hat sich ausschließlich an qualifiziertes FAAC-Fa-
chpersonal oder an FAAC-Kundendienstzentren zu wenden.
ALLGEMEINE SICHERHEITSVORSCHRIFTEN
Die Automatikvorrichtung gewährleistet bei fachgerechter Installation und
bestimmungsgemäßem Gebrauch einen hohen Sicherheitsstandard.
Einige einfache Verhaltensweisen können darüber hinaus Unfälle und
Schäden vermeiden:
Die Durchfahrt sollte vermieden werden, während sich die Flügeltore in
Bewegungbefinden. Vor derDurchfahrtsollte dievollständige Öffnung
der Flügel abgewartet werden.
Der Aufenthalt zwischen den Flügeln ist strikt untersagt.
Personenund insbesondereKindern sollteder Aufenthaltim Aktionsradius
der Automatikvorrichtung nicht gestattet werden. Auch Gegenstände
solltennicht indiesem Bereichabgestellt werden. Diesgilt insbesondere
während des Betriebs.
Die Funksteuerung oder andere Geräte, die als Impulsgeber dienen
können,solltenKindern unzugänglichaufbewahrt werden, umzuverhin-
dern, daß die Automatikvorrichtung versehentlich gestartet wird.
Die Automatikvorrichtung ist kein Spielzeug für Kinder.
Die Anwendung darf nicht von Kindern, von Personen mit verminderter
körperlicher, geistiger, sensorieller Fähigkeit oder Personen ohne Er-
fahrungen oder der erforderlichen Ausbildung verwendet werden.
Den Bewegungen der Flügeltoren ist nicht absichtlich entgegenzu-
wirken.
Es sollte vermieden werden, daß Zweige oder Sträucher die Bewegung
der Flügeltore behindern.
Die Leuchtanzeigen sollten stets einsatzbereit und gut sichtbar sein.
Die Flügeltore sollten nicht manuell betätigt werden, bevor diese en-
triegelt wurden.
Im Falle von Betriebsstörungen sollten die Flügeltore entriegelt werden,
umdenZugangzu ermöglichen.Danach istderEingriff vonqualifiziertem
Fachpersonal abzuwarten.
Nachdem die Anlage auf manuellen Betrieb umgestellt wurde, ist vor
der Wiederherstellung des normalen Betriebs die Stromzufuhr von der
Anlage abzunehmen.
Auf den Bestandteilen des Automatiksystems dürfen keinesfalls Verän-
derungen vorgenommen werden.
Der Benutzer darf direkt keine Versuche für Reparaturen oder Arbeiten
vornehmen und hat sich ausschließlich an qualifiziertes FAAC-Fachper-
sonal oder an FAAC-Kundendienstzentren zu wenden.
Die Funktionstüchtigkeit der Automatikvorrichtung, der Sicherheitsein-
richtungen und der Erdungsanschlüsse sollte mindestens halbjährlich
durch qualifiziertes Fachpersonal überprüft werden.
BESCHREIBUNG
Die vorliegenden Anleitungen beziehen sich auf die folgenden Modelle:
390,
Die Automatikvorrichtung 390 für Flügeltore für Wohngebäude besteht aus
einem elektromechanischen, irreversiblen Operator mit Schutzabdeckung
und einem Antriebssystem mit Gelenkarmen, die mit dem entsprechenden
Zubehör auf dem Tor angebracht werden.
Das irreversible System gewährleistet eine mechanische Verriegelung des
Tors,wenn sich derMotor nichtinBetrieb befindet,und für Flügelbis zueiner
Länge von bis zu 2 Metern muß keinerlei Schloß installiert werden.
Eine manuelle Entriegelungsvorrichtung ermöglicht den Betrieb des Tors im
Falle von Stromausfällen oder Störungen.
Der Betrieb der Operatoren wird durch eine elektronische Steuerzentrale
gesteuert,die sichin einemGehäuse miteiner geeignetenSchutzart gegen
1.
2.
3.
4.
5.
6.
7.
8.
9.
10.
11.
12.
13.
14.
15.
Witterungseinflüsse befindet.
Die Flügel befinden sich normalerweise in geschlossener Position.
Empfängt die elektronische Steuerzentrale einen Befehl zur Öffnung von
der Funksteuerung oder jedem anderen Impulsgeber, so startet sie den
Operator, der die Flügel bis zur Öffnungsposition dreht und somit die Zufahrt
ermöglicht.
Wurde der Automatikbetrieb eingestellt, so schließen sich die Flügel nach
einer angewählten Pausenzeit.
Wurde hingegen der halbautomatische Betrieb eingestellt, so ist für die
Schließung die Gabe eines zweiten Impulses erforderlich.
Ein Stoppimpuls (soweit vorgesehen) hält die Bewegung unverzüglich an.
Hinsichtlich der genauen Funktionsweise der Automatikvorrichtung in den
verschiedenen Betriebsarten sollte man sich an den Installationstechniker
wenden.
DieAutomatikvorrichtungensind mitSicherheitseinrichtungen (Photozellen,
Fühlerleisten, usw.) ausgestattet, die die Bewegung der Flügel verhindern,
wenn sich ein Hindernis innerhalb ihres Aktionsradius befindet.
Die Leuchtanzeige zeigt an, daß sich die Flügel in Bewegung befinden.
MANUELLER BETRIEB
Sollte aufgrund eines Stromausfalls oder einer Funktionsstörung der Auto-
matikvorrichtung ein manueller Betrieb des Tors erforderlich sein, so muß
hinsichtlich der Entriegelungsvorrichtung folgendermaßen vorgegangen
werden:
Die Stromzufuhr zum System unterbrechen.
Den mitgelieferten Imbusschlüssel einstecken und um etwa eine halbe
Umdrehung bis zum Anschlag drehen. Die Drehrichtung wird in Abb. 13
entsprechend der Montageart gezeigt.
Das Tor mit der Hand bewegen.
WIEDERHERSTELLUNG DES NORMALEN BETRIEBS
Um zu vermeiden, daß ein versehentlicher Impuls das Tor während
des Arbeitsvorganges in Bewegung setzt, sollte vor der erneuten
Entriegelung des Operators die Stromzufuhr von der Anlage abge-
nommen werden.
Den mitgelieferten Imbusschlüssel einstecken und um etwa eine halbe
Umdrehung bis zum Anschlag drehen. Die Drehrichtung wird in Abb. 13
entsprechend der Montageart gezeigt.
dass das Tor nicht mit der Hand bewegt werden kann.
Das System erneut mit Strom versorgen.
•
•
•
•
•
Fig. 1Fig. 1 Fig. 2Fig. 2
Other manuals for 390
4
Table of contents
Languages:
Other FAAC Gate Opener manuals

FAAC
FAAC Estate Swing User manual

FAAC
FAAC 104200177 User manual

FAAC
FAAC 770 COMPACT User manual

FAAC
FAAC Estate Swing User manual

FAAC
FAAC 940SM Series User manual

FAAC
FAAC Estate Slide E-SL 1200 Series User manual

FAAC
FAAC 400 CBC User manual

FAAC
FAAC 746 ER CAT User manual

FAAC
FAAC 770 COMPACT User manual

FAAC
FAAC B680 User manual
Popular Gate Opener manuals by other brands

Nice Apollo
Nice Apollo METRO ETL installation manual

WORKMASTER
WORKMASTER GO-A13-HA Operator's guide

Chamberlain
Chamberlain ART300 series manual

LIFE home integration
LIFE home integration ACER Instructions for installation, use and maintenance

Delton
Delton CARRERA Technical installation manual

Delton
Delton LINEAR-11 Technical installation manual