manuals.online logo
Brands
  1. Home
  2. •
  3. Brands
  4. •
  5. Faema
  6. •
  7. Coffee Maker
  8. •
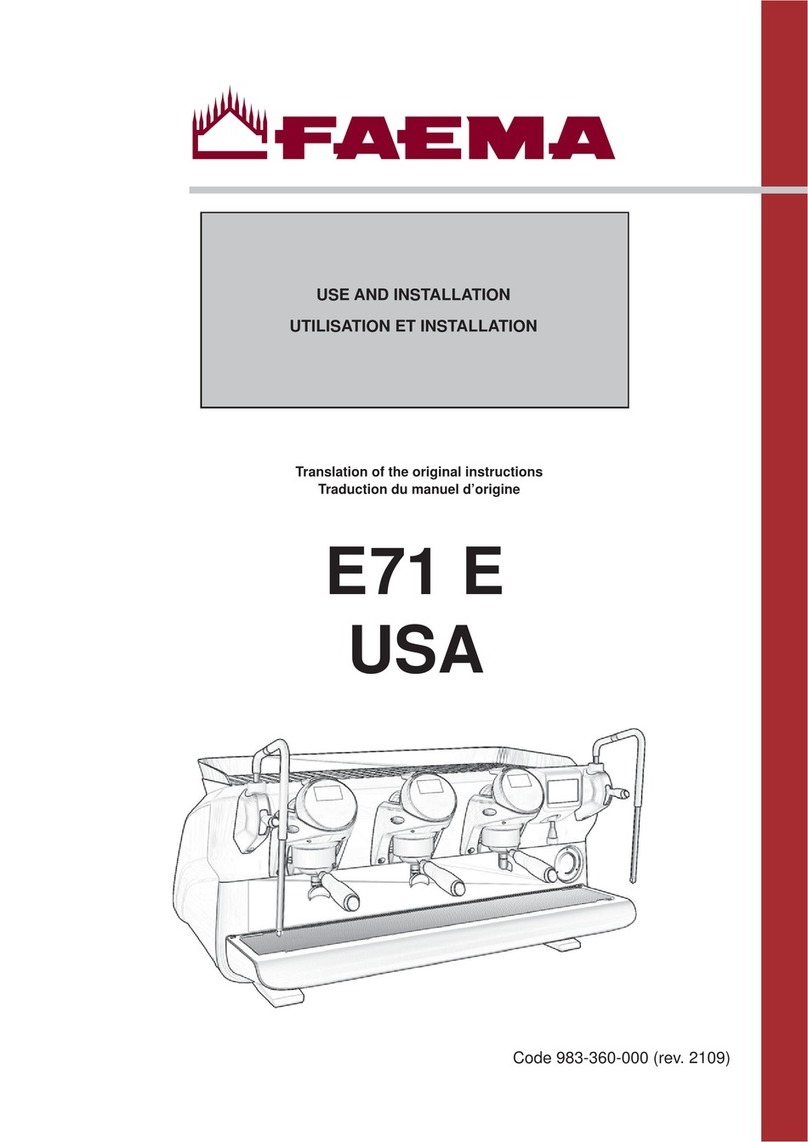
  9. Faema E61 3 GR User manual

Faema E61 3 GR User manual

1Code 903-056-060 (rev. 1013)
Dichiarazione di conformità CE
Con la presente il GRUPPO CIMBALI S.P.A. dichiara sotto la propria responsabilità che:
EC Declaration of conformity
GRUPPO CIMBALI S.P.A., hereby declares, under its own responsibility, that:
&HUWL¿FDWGHFRQIRUPLWp&(
Par la présente le GRUPPO CIMBALI S.P.A. déclare sous sa propre responsabilité que:
EG-Konformitätserklärung
Die GRUPPO CIMBALI S.P.A. hiermit in eigener Verantwortlichkeit wie folgt:
Declaraciòn de conformidad CE
Con la presente el GRUPPO CIMBALI S.P.A. declara bajo su propia responsabilidad que:
Declaração de conformidade
Com a presente o GRUPPO CIMBALI S.P.A. declara, sob a própria responsabilidade que:
è conforme alle seguenti direttive: is in compliance with the following directives:
est conforme aux normatives suivantes: entspricht den folgenden Gesetzesbestimmungen:
es conforme a las siguientes directivas: está conforme às seguintes directrizes:
2006/95/EC Direttiva bassa tensione - EC Low Voltage Directive - Normes CE Basse-tension
EG-Niederspannungrichtlinie - Directiva de la maquinaria CE - Directiva sobre a baixa tensão CE
(& (0&(&(OHFWURPDJQHWLF&RPSDWLELOLW\GLUHFWLYH1RUPHV&(&RPSDWLELOLWppOHFWURPDJQpWLTXH
EG-Richtlinie Elektromagnetische Verträglichkeit - Directiva de la maquinaria CE
Directiva sobre a compatibilidade el.magn. CE
2006/42/EC Direttiva macchine - EC Machinery Directive - Normes CE Machines -
EG-Maschinenrichtlinie - Directiva de la maquinaria CE - Directiva sobre as máquinas CE
97/23/EC Direttiva attrezzature a pressione (PED) (Vedere tabella nella pagina successiva)
Pressure Equipment Directive (PED) (See chart in the following page)
Directive Èquipements sous Pression (PED) (Voir tableau dans la page suivant)
Richtlinie-Druckgeräte (PED) (Siehe Tabelle auf der nächsten Seite)
Directiva equipos a presión (PED) (Véase cuadro en la página siguiente)
Directiva equipos sobre pressão (PED) (Veja quadro na página seguinte)
HVXFFHVVLYHPRGL¿FKHHGLQWHJUD]LRQL DQGODWHUPRGL¿FDWLRQVDQGLQWHJUDWLRQV
HWPRGL¿FDWLRQVXOWpULHXUHVHWLQWpJUDWLRQV VRZLHGHQQDFKIROJHQGHQbQGHUXQJHQXQG(UJlQ]XQJHQ
\VLJXLHQWHVPRGL¿FDFLRQHVHLQWHJUDFLRQHV HDOWHUDo}HVHLQWHJUDo}HVVXEVHTXHQWHV
6HGHOHJDOH5HJLVWHUHGRI¿FH6LqJHVRFLDO
Rechtssitz - Sede legal - Sede legal: Via A. Manzoni 17, Binasco (Mi), ITALY
Data - Date - Date
Datum - Fecha - Data 22.03.2010 ........................................................ ........................................................
Product Development Manager Industrial Manager
Apparecchio - Appliance - Appareil Gerätes - Aparato - Aparelho
Marca - Brand - Marque - Marke - Marca - Tipo Fabbricante - Manufacturer - Fabricant Hersteller - Fabricante - Fabricante
Tipo di macchina - Type of machine - Type de la machine Maschinentypen - Tipo de la màquina - Tipo de la màquina
N° della macchina - Serial number - N° de la machine
Maschinen-Nummer - N° de la máquina - No de la máquina
vedere targa dati refer to machine data voir étiquette données siehe Angaben zum Maschinentyp
ver la placa de la caracterìsticas
ver la plaqueta das características
/DSUHVHQWHGLFKLDUD]LRQHSHUGHODVXDYDOLGLWjQHOFDVRLQFXLO¶DSSDUHFFKLRYHQJDPRGL¿FDWRVHQ]DHVSUHVVDDXWRUL]]D]LRQHGHO
costruttore oppure se installato o utilizzato in modo non conforme a quanto indicato nel manuale d’uso e nelle istruzioni.
7KLVGHFODUDWLRQLVQXOODQGYRLGLIWKHPDFKLQHLVPRGL¿HGZLWKRXWWKHH[SUHVVDXWKRUL]DWLRQRIWKHPDQXIDFWXUHURULILPSURSHUO\
installed and used in such a way that does not comply with indications in the users’ manual and the instructions.
/DSUpVHQWHGpFODUDWLRQSHUGWRXWHYDOLGLWpGDQVOHFDVRO¶DSSDUHLOHVWPRGL¿pVDQVO¶DXWRULVDWLRQGXFRQVWUXFWHXURXVLO¶DSSDUHLO
HVWLQVWDOOpRXXWLOLVpGHIDoRQQRQFRQIRUPHjFHTXLHVWLQGLTXpGDQVOHPDQXHOHWGDQVOHPRGHG¶HPSORL
'LHYRUOLHJHQGH%HVFKHLQLJXQJYHUOLHUWLKUH*OWLJNHLWIDOOVGDV*HUlWRKQHDXVGUFNOLFKH*HQHKPLJXQJGHV+HUVWHOOHUPRGL¿]LHUW
werden sollte oder falls es nicht entsprechend der im Bedienungs- und Wartungshandbuch aufgeführten Anleitungen installiert
oder benutzt werden sollte.
/DSUHVHQWHGHFODUDFLyQSLHUGHVXYDOLGH]HQHOFDVRGHTXHHODSDUDWRVHDPRGL¿FDGRVLQH[SUHVDDXWRUL]DFLyQGHOFRQVWUXFWRU
o bien si ha sido instalado o utilizado de forma no conforme a lo indicado en el manual de uso y en las instrucciones.
$SUHVHQWHGHFODUDomRGHL[DGHWHUYDOLGDGHQRFDVRHPTXHRDSDUHOKRVHMDPRGL¿FDGRVHPDXWRUL]DomRGRFRQVWUXWRURXVH
LQVWDODGRRXXWLOL]DGRGHPDQHLUDQmRFRQIRUPHDRLQGLFDGRQRPDQXDOGHXVRHQDVLQVWUXo}HV
2
Caldaia
Service boiler
Chaudiére
Heizkessel
Caldera
Caldeira
Scambiatore
Heat exchanger
Èchangeur
Wrmeaustauscher
Intercambiador de calor
Trocador de calor
133° C
tipo di macchina
Type of machine
type de la machine
Maschinentypen
modelo de la machina
tipo de la màquina
acqua/vapore
water/steam
eau/vapeur
wasser/dampf
agua/vapor
água/vapor
acqua
water
eau
wasser
agua
água
1 gruppo
1 unit
1 groupe
1 gruppe
1 grupo
1 grupo
2 gruppi
2 units
2 groupes
2 gruppen
2 grupos
2 grupos
3 gruppi
3 units
3 groupes
3 gruppen
3 grupos
3 grupos
4 gruppi
4 units
4 groupes
4 gruppen
4 grupos
4 grupos
Tmax
[ °C ]
Pmax
[ bar ]
2 bar
Fluido - Fluid - Fluide
Flüssig - Fluido - Fluido
2.5 - 8 5 - 11 15 - 17.5 20 - 24.1
0.14 - 0.65
x 1
0.14 - 0.65
x 2
0.65
x 3
0.65
x 4
133° C12 bar
[ L ]
Capacità - Capacity - Capacitè
Kapazität - Capacidad - Capacidade
Caldaia
Service boiler
Chaudiére
Heizkessel
Caldera
Caldeira
Scambiatore
Heat exchanger
Èchangeur
Wrmeaustauscher
Intercambiador de calor
Trocador de calor
133° C
tipo di macchina
Type of machine
type de la machine
Maschinentypen
modelo de la machina
tipo de la màquina
acqua/vapore
water/steam
eau/vapeur
wasser/dampf
agua/vapor
água/vapor
acqua
water
eau
wasser
agua
água
X1
X2
X4
X53
X3
1 gruppo
1 unit
1 groupe
1 gruppe
1 grupo
1 grupo
X3
2 gruppi
2 units
2 groupes
2 gruppen
2 grupos
2 grupos
Tmax
[ °C ]
Pmax
[ bar ]
2 bar
Fluido - Fluid - Fluide
Flüssig - Fluido - Fluido
2.5 - 4 0.9 - 3.4 4.8
133° C12 bar
[ L ]
Capacità - Capacity - Capacitè
Kapazität - Capacidad - Capacidade
Boiler caffè
Coffee boiler
Boiler café
Boiler Kaffee
Boiler café
Boiler cafè
acqua
water
eau
wasser
agua
água
170° C12 bar
0.14 - 0.31 - -
- 0.9 0.9 x 2
3
1
2
5
6
7
14
9
8
16
22
7
6
10
10
13
15
17
18
1
510 18
2
17
6
7
14
16
9
8
13
15
1
10 18
217
6
7
14
16
9
8
13
15
E61 3 GR
E61 1 GR
E61 2 GR
4
Legenda - Legend - Legende - Legende - Leyenda - Legenda
19
LEGENDE
1Interrupteur général
2Levier de débit du café
5Levier de chargement de l’eau dans
la chaudière
6Tuyau (lance) de la vapeur
7Poignée de réglage de la vapeur
8Tuyau (lance) d’eau chaude
9Poignée de débit de l’eau chaude.
10 3RUWH¿OWUHV
13 Indicateur du niveau d’eau dans la
chaudière
14 Manomètre de la chaudière
15 Cuvette
16 Manomètre
17 Plan chauffe-tasses
18 Interrupteur verre rétro-éclairée
19 Verre rétro-éclairée
LEGENDA
1Interruttore generale
2Levetta erogazione caffè
5Leva caricamento acqua in
caldaia
6Tubo (lancia) vapore
7Manopola regolazione vapore
8Tubo (lancia) acqua calda
9Manopola erogazione acqua
calda
10 3RUWD¿OWUR
13 Indicatore livello acqua in caldaia
14 Manometro caldaia
15 Bacinella
16 Manometro pompa
17 Piano scaldatazze
18 Interruttore cristallo retroilluminato
19 Cristallo retroilluminato
LEGEND
1Main ON/OFF switch
2Coffee dispensing lever
5%RLOHUZDWHU¿OOLQJOHYHU
6Steam jet pipe
7Steam adjustment knob
8Hot water dispensing pipe
9Hot water dispensing knob
10 Filter holder
13 Boiler water level indicator
14 Boiler pressure gauge
15 Pan
16 Pressure gauge pump
17 Cup warmer tray
18 Backlit glass switch
19 Backlit glass
LEGENDA
1Interruptor geral
2 %RWmRGHGLVWULEXLomRGRFDIp
5 %RWmRGHFDUUHJDPHQWRGDiJXDQD
caldeira
6Tubo (bico) do vapor
7 0DQtSXORGHUHJXODomRGRYDSRU
8Tubo (bico) da água quente
9 0DQtSXORGHGLVWULEXLomRGDiJXD
quente
10 3RUWD¿OWUR
13 Indicador do nível da água na
caldeira
14 Manómetro caldeira
15 Tabuleiro
16 Manómetro da bomba
17 Tabuleiro para aquecer as chávenas
18 Interruptor de cristal retro-iluminado
19 Cristal retro-iluminado
LEYENDA
1Interruptor general
2Palanca para erogacion del café
5Palanca para cargar agua en la
caldera
6Tubo (lanza) vapor
7Mando regulación vapor
8Tubo (lanza) agua caliente
9Mando erogación agua caliente
10 3RUWD¿OWUR
13 Indicador nivel agua en la caldera
14 Manómetro caldera
15 Bandeja
16 Manómetro bomba
17 Bandeja calienta-tazas
18 Interruptor cristal retroiluminado
19 Cristal retroiluminado
LEGENDE
1Hauptschalter
2Hebel Kaffeeabgabe
5Hebel Wasserauffüllung in
Heizkessel
6Dampfabgaberohr
7Dampfabgaberegler
8Rohr Heißwasserabgabe
9Regler Heißwasserabgabe
10 Filterhalter
13 Anzeige Wasserstand in Heizkessel
14 Manometer Heizkessel
15 Wanne
16 Manometer Pumpe
17 $EVWHOOÀlFKH]XU  
Tassenvorwärmung
18 Schalter Leuchttaste aus Glas
19 Leuchttaste aus Glas
I GB F
PD E
Index
Page
1. General Rules 22
2. Installation Rules 23
3. Electrical Installation Rules 23
4. Equipotential Connection 24
5. Water Installation Rules 24
6. Installation Check-up 25
USE
7. Daily Switch-On 26
8. Heating phase 26
9. Delivery of the coffee 26
10. Other hot beverages 27
11. Water level control of boiler
(when provided) 27
12. Cleaning and maintenance 28
13. Rules for the worker operating the
machine 29
14. Caution 30
15. Maintenance and Repairs 30
16. The Group 31
17. Dismantling the machine 32
18. Defects - Malfunctions 33
ILLUSTRATIONS 91
Disassembly 92
Setting 94
Wiring diagram 96
Hydraulic circuit 98
Service Line 102
Dear Madam, Dear Sir
Congratulations on your new Faema!
With this purchase, you have chosen an advanced espresso coffee machine built with the most modern technologies. This
PDFKLQHQRWRQO\RIIHUV\RXDSHUIHFWFRPELQDWLRQRIHI¿FLHQF\DQGIXQFWLRQDOLW\EXWDOVRSURYLGHV\RXZLWKDOOWKHWRROV\RX
need to do your job in the best possible way.
We recommend that you take some time to read this Use and Maintenance Booklet. It will help you become more familiar with
your new espresso machine, which we’re sure you are looking forward to using.
Wishing you all the best.
GRUPPO CIMBALI S.p.A.
7KHVHFKDSWHUVLQWKHPDQXDODUHWREHXVHGE\TXDOL¿HGDXWKRUL]HGWHFKQLFDOVWDII
21
English
1. General Rules
Please read the warnings and rules in this User’s Manual carefully before using or handling the machine
in any way because they provide important information regarding safety and hygiene when operating the
machine.
Keep this booklet handy for easy reference.
The machine was designed solely for preparing espresso coffee and hot beverages using hot water or steam, and for
warming cups.
The machine must only be used by suitably trained employees who are well aware of the possible risks that can occur when
operating the machine.
The machine is for professional use only.
The machine must not be used by children or by people with physical, sensorial, or mental impairments: if such people use
the machine, they must be supervised during operation.
The machine must not be left unattended.
The machine must not be used outdoors.
If the machine is stored in rooms where the temperature can drop below freezing, empty the boiler and water circuit tubes.
Do not expose the machine to atmospheric agents (rain, sun, and cold).
Noise: the equipment does not exceed 70dB.
If the machine is used improperly or for purposes other than those described above, it can be a source of danger. The
manufacturer will not be held responsible for damages caused by improper use of the machine.
22
English
2. Installation Rules
WARNING
,QVWDOODWLRQ GLVPDQWOLQJ DQG DGMXVWPHQWV PXVW RQO\ EH SHUIRUPHG E\ TXDOL¿HG DQG DXWKRUL]HG
technicians.
Carefully read the warnings and rules in this manual because they provide important information regarding
VDIHLQVWDOODWLRQXVHDQGPDLQWHQDQFHRIWKHPDFKLQH
Keep this booklet handy for easy reference.
After removing the machine from its packing materials, make sure that the machine and its safety devices are intact.
,IWKHSRZHUVXSSO\FRUGLVGDPDJHGLWFDQRQO\EHUHSODFHGE\TXDOL¿HGDQGDXWKRUL]HGWHFKQLFLDQV
Packing materials (plastic bags, polystyrene foam, staples, etc.) must be kept out of the reach of children because they are
potentially hazardous.
Before plugging in the machine, make sure that the information on the nameplate (voltage, etc.) matches that of the electrical
and water systems.
Completely unwind the power supply cable.
7KHFRIIHHPDFKLQHVKRXOGVLWRQDÀDWVWDEOHVXUIDFHDWOHDVWPPIURPZDOOVDQGIURPWKHFRXQWHU.HHSLQPLQGWKDWWKH
highest surface on the machine (the cup warmer tray) sits at a height of at least 1.2 meters. Make sure there is a shelf nearby
for accessories.
Room temperature must range between 10° and 32°C (50°F and 90°F).
An electrical outlet, water connections, and a drain with siphon must be in the immediate vicinity.
Do not install in rooms (kitchens) that are cleaned with jets of water.
Do not clean the machine with jets of water.
Do not obstruct openings or ventilation and heat vents.
Do not install the machine outdoors.
Prior to installation, make sure there is a circuit breaker installed with a distance between the contacts that allows for complete
disconnection when there is a category III overload and that provides protection against current leakage equal to 30 mA. The
circuit breaker must be installed on the power supply in compliance with installation rules.
7KHHOHFWULFDOVDIHW\RIWKLVPDFKLQHLVRQO\HQVXUHGZKHQLWLVFRUUHFWO\FRQQHFWHGWRDQHI¿FLHQWHDUWKLQJV\VWHPLQFRPSOLDQFH
ZLWKWKHHOHFWULFDOVDIHW\ODZVLQIRUFH7KLVIXQGDPHQWDOVDIHW\UHTXLUHPHQWPXVWEHYHUL¿HG,ILQGRXEWUHTXHVWWKDWDTXDOL¿HG
electrician inspect the system. The manufacturer cannot be held responsible for any damage caused by the lack of an earthing
system on the electrical supply.
It is unadvisable to use adaptors, multiple plugs, and/or extension cords. If their use is indispensible, only use simple or multiple
adaptor plugs and extension cords that are in compliance with safety laws. Make sure these devices do not exceed the voltage
capacity marked on the simple adaptor and on extension cords, and the maximum voltage marked on the multiple adaptor.
Check that the type of connection and voltage correspond with the information on the nameplate: see LOOXVWUDWLRQVFKDSWHU¿JXUH.
For machines with a Y connection: see LOOXVWUDWLRQVFKDSWHU¿JXUH.
For machines with a 'connection: see LOOXVWUDWLRQVFKDSWHU¿JXUH.
For machines with a single-phase connection: see LOOXVWUDWLRQVFKDSWHU¿JXUH.
3. Electrical Installation Rules
23
English
This type of connection, required by some laws, prevents differences in the electric potential level between the earthing connections
of equipment installed in the same room.
This machine is provided with a clamp underneath the base for connection to an external equipotential cable.
After installation, this type of connection MUST be made:
Use a cable with a nominal section in compliance with the laws in force.
Connect one end of the cable to the clamp (see LOOXVWUDWLRQVFKDSWHU¿JXUH) and the other end to the earthing of adjacent
equipment.
Failure to follow this safety norm releases the manufacturer from any responsibility for machine breakdowns or damage to people
or property.
NOTE: DO NOT CONNECT TO THE POWER SUPPLY EARTHING BECAUSE IT IS NOT CONSIDERED AN EQUIPOTENTIAL
CABLE CONNECTION.
4. Equipotential Connection
Bear in mind that Gruppo Cimbali S.p.A. is not responsible for damage caused by improper electrical connections,
and that the installer is responsible for any damage.
5. Water Installation Rules
WATER REQUIREMENTS
Water used in coffee machines must be potable and suitable for human consumption (see laws and regulations in force).
Check on the machine’s water inlet that:
the pH level complies with the laws in force
the chloride value is less than 100 mg/l
If the values do not fall within the limits, an appropriate water treatment device must be inserted (respecting the local laws and
compatible with the machine).
,IWKHPDFKLQHXVHVZDWHUZLWKDKDUGQHVVH[FHHGLQJ)'DVSHFL¿FPDLQWHQDQFHSODQPXVWEHLPSOHPHQWHGDFFRUGLQJ
to the hardness detected and machine usage.
WARNING
Only use the supplied parts for installation. If other parts are installed, they must be new (not used) and they must be able to come
in contact with potable water suitable for human consumption (according to local laws in force).
WATER CONNECTIONS
3ODFHWKHPDFKLQHRQDÀDWVXUIDFHDQGVWDELOL]HLWE\DGMXVWLQJDQGVHFXULQJWKHIHHW
Hook up the water connections as shown in the ,OOXVWUDWLRQVFKDSWHU )LJXUH, respecting the hygiene, water safety, and anti-
pollution laws in the country of installation.
Note: If the water pressure can rise above six bar, install a pressure reducer set at 2-3 bar. See ,OOXVWUDWLRQVFKDSWHU)LJXUH.
Water draining tube: place the end of the water draining tube in a drain with a siphon for inspection and cleaning.
IMPORTANT: The curves of the draining tube must NOT bend as shown in ,OOXVWUDWLRQVFKDSWHU)LJXUH.
24
English
WATER CONNECTIONS
No leaks from the connections or tubes
FUNCTIONING
Boiler and operating pressures are normal.
The pressure gauge is working properly.
The self-leveling device is working properly.
The expansion valves are working properly
6. Installation Check-up
WARNING$)7(5,167$//$7,21&+(&.726((,)7+(0$&+,1(,6:25.,1*3523(5/<VHHWKH
Installation Module C)
GROUPS
+RRNXSWKH¿OWHUKROGHUVWRWKHJURXSVZLWKRXWFRIIHH
Let each group dispense water for about a minute.
HOT WATER
Continuously dispense hot water (pressing the appropriate button) until at least 4 liters of water have been used for a machine
with 1 group, 6 liters of water have been used for a machine with 2 groups, and 9 liters for a machine with 3 groups (see the
“Cleaning and Maintenance” Chapter in the User’s Manual).
STEAM
Dispense steam from the nozzles for about a minute, using the appropriate buttons.
WARNING: ONCE THE MACHINE HAS BEEN INSTALLED AND IS READY FOR USE, BEFORE ALLOWING THE
:25.(57267$5786,1* 7+( 0$&+,1(:$6+ 7+( ,17(51$/ &20321(176$&&25',1*727+(
INSTRUCTIONS BELOW:
25
English
“Before switching on the machine, ensure the
following:
The mains switch is on.
The water mains tap is open”.
Electric switching on
Turn the main switch (1) to position 1.
7KHERLOHULV¿OOHGXQWLOWKHVHWOHYHOLVUHDFKHG
Turn the main ON/OFF switch (1) to position 2.
“Heating” now begins.
At the end of the day, turn the machine OFF by turning the
main ON/OFF switch (1) to position 0.
7. Daily Switch-On
8. Heating phase
While awaiting for the machine to be ready for use, insert the
¿OWHUEDVNHWV10) in the groups.
Do not cover the cup warmer with cloths to prevent over-
heating of the machine.
When the pressure gauge (14) indicates normal working
pressure, the machine is ready to be used.
9. Delivery of the coffee
 8QKRRNWKH¿OWHUKROGHU10) from the group.
2. Place the grounds in the grounds drawer.
 )LOOWKH¿OWHUZLWKDGRVHRIJURXQGFRIIHH
4. Level out with the coffee press.
 ,QVHUWWKH¿OWHUKROGHU10) into the group ensuring it that
the gasket provides a good seal.
6. Place the cups (or cup) under the dispensing spouts.
7. Raise the lever (2) of the group to a vertical position.
From this moment, no coffee will be issued for 5-6 seconds.
This is the time required for the pressure to reach pump
delivery head value. Infusion occurs at this time, i.e. the
preliminary “cooking” of the coffee. Dispensing commences
DWWKHHQGRIWKHLQIXVLRQGXULQJZKLFKWKHFRIIHHÀRZVRXW
continuously. Once the required quantity of coffee has been
obtained, dispensing is stopped by replacing the lever (2)
in the horizontal position.
CAUTION: do not put any cloth on the cup-warmer.
USE
1
0
12
14
2
10
26
English
10. Other hot beverages
Steam dispensing
Put a cup with the beverage you wish to heat under the right
or left steam nozzle (6).
Completely immerse the steam nozzle in the beverage.
Gradually open up the steam ta (7) , allow the beverage to heat
WRWKHGHVLUHGWHPSHUDWXUHVWRSWKHÀRZRIVWHDPE\WXUQLQJ
knob (7) the other way (towards “0”).
Dispensing hot water
Put the pot below of pipe (8) and open the tap (9).
Heating milk for frothy coffee (cappuccino)
8VHDWDOOQDUURZMXJDQG¿OOLWXSWRDERXWWKHKDOIZD\PDUN
Then plunge the steam jet pipe (6) into the milk.
Gradually open up the steam tap (7) and heat the milk for a
few seconds.
When the required amount of froth has been made and the
WHPSHUDWXUHLV VXI¿FLHQWO\KLJK VWRSWKH ÀRZ RIVWHDP E\
turning knob (7) the other way (towards “0”).
When the steam jet pipe (6) is no longer required, clean it
thoroughly with a sponge and a clean cloth.
1RWH$WWKHFRQFOXVLRQRIHDFKVWHDPGLVSHQVLQJSKDVH
FOHDQWKHLQVLGHRIWKHVWHDPQR]]OHDVIROORZV
 7XUQWKHQR]]OHWRZDUGVWKHFXSWUD\DQGFDUHIXOO\
activate steam dispensing at least once.
11. Water level control of boiler (when provided)
7KHPDFKLQHLV¿WWHGZLWKDVHULHVRIDXWRPDWLFOHYHOFRQWURO
devices to keep the water in the boiler at a pre-set level.
Filling the boiler with water using the manual service tap
This function should be used only if the electronic level control
devices are not working correctly.
3UHVVWKH¿OOLQJOHYHU5), taking care not to exceed the MAX.
level on the boiler water level indicator (13).
999
6666
7777
888
13
5
27
English
12. Cleaning and maintenance
Cleaning the dispenser units
This procedure should be carried out at the end of the
working day on all dispenser units.
1) Clean the underpan gasket with a brush.
 )LWWKHEODQNULQJLQWRWKH¿OWHUKROGHU
 3RXULQWKH¿OWHUKROGHUWKHFRQWHQWRIDVDFKHWRUDPHDVXUH
of detergent powder.
&RQQHFWWKH¿OWHUFDUULHUWRWKHJURXSDQGSHUIRUPDIHZ
cycles.
5HPRYHWKH¿OWHUFDUULHUFOHDQWKHVSRXWZLWKDVSRQJH
6) Rinse by dispensing water from each group for about
30".
Filter Holders
1) Pour 1 litre of cold water and a dose of detergent into a
suitable receptacle.
5HPRYHWKH¿OWHUVIURPWKH¿OWHUKROGHUV
/HDYHWKH¿OWHUVDQG¿OWHUKROGHUVLQWKHVROXWLRQIRUDWOHDVW
two hours.
4) Remove any residues with a sponge and rinse in plenty of
cold water.
5H¿WWKH¿OWHUVLQWKH¿OWHUKROGHUVPDNLQJVXUHWKDWWKH
¿OWHU¿[LQJVSULQJLVLQWKHFRUUHFWSRVLWLRQ
Steam and hot water dispensing pipe
Using a clean sponge, wash with hot water removing any
organic residue present. Rinse carefully.
To clean the inside of the steam nozzle, follow these steps:
Turn the nozzle towards the cup tray and carefully activate
steam dispensing at least once.
Drip pan
Remove the drip plan and complete the cleaning with running
water
Discharge tank
At the end of the working day, pour a jug of hot water into the
discharge tank, removing any organic residue present.
Bodywork
Use a soft cloth and cleaning products WITHOUT ammonia
or abrasives, removing any organic residue present in the
work area.
N.B. Do not spray liquids into the panel slots.
For correct application of the HACCP
V\VWHPSOHDVHIROORZWKHLQVWUXFWLRQVLQWKLV
paragraph.
ATTENTION
When the machine has not been used for more
than 8 hours, and in any case once a day, the
internal components must be washed before use,
in accordance to the following instructions:
Supply Groups
,QVHUWWKH¿OWHUFDUULHUVLQWRWKHJURXSVZLWKRXWFRIIHHDQG
dispense from each group for one minute.
Hot water
Dispense hot water repeatedly (using the relative command)
until at least 4 liters of water have been dispensed from
the 1-group machine, 6 liters of water from the 2-group
machine and 9 liters from the 3-group machine.
Steam
Dispense steam from the steam pipe for about one minute,
using the relative commands.
1
2
3
28
English
BEFORE YOU START
Groups
+RRNXSWKH¿OWHUKROGHUVWRWKHJURXSVZLWKRXWFRIIHH
Let each group dispense water for about a minute.
Hot Water
Continuously dispense hot water (pressing the appropriate button) until at least 4 liters of water have been used for a machine
with 1 group, 6 liters of water have been used for a machine with 2 groups, and 9 liters for a machine with 3 groups (see the
“Cleaning and Maintenance” Chapter in the User’s Manual).
Steam
Dispense steam from the nozzles for about a minute, using the appropriate buttons.
ON THE JOB
Steam dispensing
Before heating the beverage (water, milk, etc.), open the steam nozzle for at least 3 seconds and let the steam escape so
that the condensation is eliminated.
Coffee dispensing
If the machine has not been used for more than an hour, before making coffee, dispense about 100 cc and discard the
liquid.
Hot water dispensing
If the machine has not been used for more than an hour, before using the hot water, dispense about 200 cc and discard the
liquid.
Cleaning the coffee circuits
3OHDVHUHDGWKHVSHFL¿FVHFWLRQLQWKHXVHU¶VPDQXDOWROHDUQKRZWRFOHDQWKHVHFLUFXLWV
13. Rules for the worker operating the machine
WARNING: BEFORE YOU START OPERATING THE MACHINE, WASH THE INTERNAL COMPONENTS
FOLLOWING THE INSTRUCTIONS INDICATED BELOW.
THESE STEPS MUST BE REPEATED AT LEAST ONCE A DAY AND WHEN THE MACHINE HAS NOT BEEN
OPERATED FOR MORE THAN 8 HOURS.
29
English
Danger of burns
The areas marked with this sign become hot. Great
care should be taken when in the vicinity of these
areas.
WARNING: Hot surface
ACHTUNG:+HLVVH2EHUÀlFKH
ATTENTION: Surface chaude
ATTENZIONE:6XSHU¿FLHFDOGD
15. Maintenance and Repairs
GENERAL
The manufacturer disclaims all liability for damages to
items or persons due to improper use or due to the coffee
machine being used for reasons other than its intended
use.
Never work the coffee machine with wet hands or naked
feet.
Danger of Burns
Do not place the hands or other parts of the body close to the
coffee distribution points, or near to the steam and hot water
nozzles.
Ensure that the machine is not handled by children or persons
who have not been instructed in its correct use.
Cup-warming plate
Place only coffee cups, cups and glasses to be used in
conjunction with the coffee machine on the cup-warming
plate.
Ensure that the coffee cups are completely drained before
placing them on the cup-warming plate.
No other objects shall be placed on the cup-warming plate.
MACHINE CLOSE-DOWN
When the machine remains unattended for
DORQJ SHULRGRI WLPHDWQLJKW GXULQJWKH
weekly closing day or during holidays) the
following operations shall be performed:
- Remove the plug or switch off the main
switch.
- Close the water tap.
Non-compliance with these safety measures
exonerates the manufacturer from all liability
for malfunctions or damage to persons or
items.
14. Caution
If the machine is not working properly, turn off the machine, turn
off the main off-on switch, and call the service center.
7R HQVXUHVDIHW\ GXULQJRSHUDWLRQLW LV
absolutely necessary to:
- follow all the manufacturer’s
instructions
;
 KDYHTXDOL¿HGDQGDXWKRUL]HGWHFKQLFLDQV
periodically check that all safety devices
are intact and functioning properly (the
first inspection within three years of
purchase and every year after that).
WARNING 0DLQWHQDQFH E\ XQTXDOL¿HG SHRSOH
can jeopardize the safety and conformity of the
machine.
2QO\XVHTXDOL¿HGDXWKRUL]HGWHFKQLFLDQVIRU
repairs.
WARNING
After maintenance, perform the installation
&+(&.83DVLQGLFDWHG LQWKH VSHFL¿F VHFWLRQ
of the user’s manual.
If the power supply cord is damaged, switch off the machine
and request a replacement from the service center.
WARNING
Only use original spare parts guaranteed by the
manufacturer.
If original spare parts are not used, the manufac-
turer warranty will no longer be valid.
30
English
Every group is independently thermoregulated, with its own separate
“THERMOSIPHON CIRCULATION”.
The following devices are found on the front of the machine where the
¿OWHUKROGHULVLQVHUWHG
WKHÀRZEORFN0
WKHVSRXW1
WKHXQGHUFXSJDVNHW3
2QWKHUHDUDUHWKHZDWHUHQWU\DQGH[LWSHUIRUDWLRQV$DQG%UHVSHFWLYHO\
for the themosiphon circulation water and for the coffee.
The three group valves perform the following functions:
7KHGLVSHQVLQJYDOYH(:KHQWKHJURXSLVRSHUDWLQJWKLVYDOYHLVRSHQ
and allows the passage of water to the ground coffee.
The valve is closed when the group is not operating and allows the
thermosiphon circulation.
,QIXVLRQYDOYH,'HWHUPLQHVWKH³FRRNLQJ´RIWKHFRIIHHWKDQNVWRDSOD\
on the pressure.
'UDLQDJHYDOYH67KLVYDOYHLVFORVHGGXULQJGLVSHQVLQJ,WRSHQVDQG
GUDLQVWKHJURXSDWWKHHQGRIWKHGLVSHQVLQJFRQWUROOHGE\WKHFRPPDQG
lever cam wheel.
HOW THE GROUP FUNCTIONS
A. Group at rest.
*URXSFRPPDQGOHYHUKRUL]RQWDO
7KHUPRVLSKRQFLUFXODWLRQWKHZDWHUFLUFXODWHVLQWKHFKDQJHUDURXQGWKH
FHQWUDOKHDG*PHWDOWXEHPDLQWDLQLQJWKHJURXSWKHUPRUHJXODWHG
'LVSHQVLQJYDOYH(&ORVHG
,QIXVLRQYDOYH,.HSWRSHQE\WKHFDP&
'UDLQDJHYDOYH6.HSWRSHQE\WKHFDP&
)LOWHUKROGHU,QVHUWHGDQGFRQWDLQLQJWKHSUHYLRXVFRIIHHJURXQGV
3XPS6WDQGVWLOO
%*URXSLQRSHUDWLRQ
)LOWHUKROGHU,QVHUWHGZLWKIUHVKO\JURXQGFRIIHH
*URXSFRPPDQGOHYHU9HUWLFDO
3XPS,QRSHUDWLRQ
'LVSHQVLQJYDOYH(.HSWRSHQE\WKHFDP&
,QIXVLRQYDOYH,&ORVHG
'UDLQDJHYDOYH6&ORVHG
*URXSFRPPDQGOHYHULQYHUWLFDOSRVLWLRQDFWVRQWKHFDPVKDIWZKLFK
SUHVVHVRQWKHPLFURVZLWFKEXWWRQRIWKHSXPSPRWRU
INFUSION TIME
 7KHSUHVVXUHLQWKHWKHUPRVLSKRQHFLUFXODWLRQUHDFKHVWKHSXPSGHOLYHU\
KHDGYDOXH·EDU
 7KHZDWHUXQGHUSUHVVXUHHQWHUVWKHFKDPEHUDERYHWKHQR]]OH+YLD
the 4 perforations in the central head.
 1R]]OH+SHUPLWVWKHSDVVDJHRIDVPDOOFDOLEUDWHGTXDQWLW\RIZDWHU
LQWRWKHJURXSFDPFKDPEHUGLVSHQVLQJFKDPEHUGXFWVDQGVSDFHRQ
WKHJURXQGFRIIHHZKLFKJUDGXDOO\¿OOVXSXQWLOWKHOHYHORISUHVVXUHLV
UHDFKHGWKDWRSHQVWKHLQIXVLRQYDOYH,
 $WWKLVSRLQWWKHLQIXVLRQFKDPEHU/LV¿OOHG
 :KLOHWKHLQIXVLRQFKDPEHULVEHLQJ¿OOHGWKHDLUFRQWDLQHGWKHUHLQKDV
FRQWDFWZLWKWKHJURXQGFRIIHH6WHDPLVIRUPHGLQWKLVDLUEXEEOH
 7KHHQWLUHJURXSLVQRZDWLQIXVLRQSUHVVXUHDQGUHPDLQVDWWKLVOHYHO
XQWLOWKHHQWLUHLQIXVLRQFKDPEHULV¿OOHG$WWKLVSRLQWWKHSUHVVXUHULVHV
to reach the pump delivery head value.
 &RPSOHWLRQRIWKHLQIXVLRQUHTXLUHVDERXWVHFRQGVIURPWKHPRPHQW
WKHJURXSFRPPDQGOHYHUULVHV7KLVLVWKH³,1)86,213(5,2'´
 'XULQJWKLVSHULRGKRWZDWHUFRPHVLQWRFRQWDFWZLWKWKHJURXQGFRIIHH
DWDSUHVVXUHWKDWLVQRWVXI¿FLHQWWRRYHUFRPHWKHUHVLVWDQFH
 7KHZDWHUSUHVVXUHJUDGXDOO\LQFUHDVHVRQWKHJURXQGFRIIHHFDXVLQJ
LWVSUHOLPLQDU\VZHOOLQJDQG³FRRNLQJ´
16. The Group
&2))((',63(16,1*
 $WWKHHQGRIWKHLQIXVLRQSHULRGLHZKHQWKHZDWHUSUHVVXUHRQWKH
ground coffee has reached the pump delivery head, dispensing of the
“coffee cream” commences and continues until the group is halted.
'LVSHQVLQJRIDQRUPDOFRIIHHPXVWODVWDERXWVHFRQGV
 7KHVHWLPHVDUHEDVHGRQWKHW\SHRIFRIIHHEOHQGXVHGLWVFRUUHFWURDVW
OHYHODQGDERYHDOOWRLWVJULQGLQJGHJUHH
127(7KHFORVXUHRIWKHJURXSPXVWEHPDGHTXLFNO\VRWKDWWKHFXVKLRQ
RIVWHDPWKDWIRUPVXSRQFRQWDFWZLWKWKHFRIIHHJURXQGVFDQFRQWULEXWH
WRDQHIIHFWLYHGUDLQDJHIURPWKHJURXSDQGFRQVHTXHQWO\WKHGU\LQJRIWKH
coffee grounds.
Upon completion of the dispensing, the group drains automatically to remove
WKHSUHVVXUHDQGWKXVPDNLQJLWVDIHWRUHPRYHWKH¿OWHUKROGHU
&',63(16,1*&203/(7,21
1. All the group components return to the point A position.
7KHRSHQLQJRIWKHLQIXVLRQYDOYHV,DQGGUDLQDJHYDOYHV6YLDWKHFDP
&HPSWLHVWKHVSDFHVXQGHUWKHGLVSHQVLQJYDOYH
H
A
B
G
E
2
C
I
S
L
M
N
P
31
English
DISMANTLING THE MACHINE
7R SURWHFWWKH HQYLURQPHQWSOHDVH
proceed in compliance with the local laws
in force.
17. Dismantling the machine
Electrical equipment cannot be disposed of as ordinary
urban waste: it must be disposed of according to the special
EU directive for the recycling of electric and electronic
equipment.
GRUPPO CIMBALI electrical equipment is marked with a
pictogram of a garbage can inside a barred circle. This symbol
means that the equipment was sold on the market after August
13, 2005, and must be disposed of accordingly.
Due to the substances and materials it contains, inappropriate
or illegal disposal of this equipment, or improper use of the
same, can be harmful to humans and the environment.
Improper disposal of electric equipment that fails to respect
WKHODZVLQIRUFHZLOO EHVXEMHFWWRDGPLQLVWUDWLYH¿QHVDQG
penal sanctions.
32
English
18. Defects - Malfunctions
Direct action by the customer
Before calling service personnel, to avoid useless expense, check whether the machine problem corresponds to one of the cases
listed below.
18. Defects - Malfunctions
PROBLEM
/HDNLQJIURPWKH¿OWHUKROGHUULP10).
Coffee dispensing time too short.
Coffee drips out of machine.
Loss of water under the machine.
SOLUTION
Clean using the special brush provided.
8VHD¿QHUJULQG
Use new coffee.
Clean.
Use a coarser grind.
Clean.
Clean.
CAUSE
Underpan gasket dirty with coffee.
Coffee ground too coarse.
Coffee too old.
)LOWHUKROHVEORFNHGRU¿OWHUKROGHU(10)
outlet hole dirty.
&RIIHHJURXQGWRR¿QH
Discharge well clogged up.
Discharge pan hole blocked.
,QWHUYHQWLRQVE\DVSHFLDOL]HVWHFKQLFLDQ
PROBLEM
Infusion time too short
Rapid dispensing.
Coffee very bland, without cream.
(Same defects on all groups).
Infusion time very short.
Rapid dispensing.
Coffee very bland, without cream.
(Same defects on all groups).
Low coffee yield.
Slow dispensing.
Coffee cold and bland.
Fast dispensing, coffee bland.
Pressure gauge pump indicates pressure
greater than 9 bar.
Low coffee yield.
Fast dispensing.
Coffee hot and bland.
Coffee cold, bland and without cream.
Normal infusion and dispensing times.
Coffee cold in the morning at start of
work.
SOLUTION
This defect is associated to other
secondary symptoms which may be
caused by a number of other causes as
per the previous points. Do not adjust the
machine until all other causes have been
excluded.
7KHFDSDFLW\ RIWKH JURXSZLWKRXW ¿OWHU
must be 100 cm³ in 8 ÷ 10 seconds.
,IWKHJURXSLVRSHUDWHGZLWKRXWWKH¿OWHU
holder, thin, isolated jets will be dispensed
instead of one central jet.
Coffee grounds in cup.
Move group to and fro to remove air
bubble.
When touching the water tube it is warm
near to the machine.
Pressure gauge calibrated with values that
are too low.
See switching on instructions.
CAUSE
Coffee grounds too course.
Old coffee.
Group nozzle widened through use.
OR gasket in cone-shaped section leaks.
Infusion valve remains open
Filter edge broken.
Spout dirty.
Pump out of calibration.
By-pass valve blocked.
Filters with perforations widened.
Coarse grinding.
Air bubble in thermosiphon circulation.
Check valve does not hold (with low
pressure in system).
Heat exchangers emptied.
Heat exchanger defective (shows
pressures higher than real values).
Air in boiler.
33
English
18. Defects - Malfunctions
,QWHUYHQWLRQVE\DVSHFLDOL]HVWHFKQLFLDQ
PROBLEM
Dispensing slow.
Coffee burnt and cold.
Cream very dark, with tendency of
formation of an “eye”.
Dispensing slow, coffee burnt.
Pressure gauge pump lower than 9 bar.
Drainage tube leaks when group is at rest
(defect only on one group).
Coffee dispensed normally.
Group at rest
Dispensing valve gasket fails rapidly.
Water leak from the drainage tube.
Coffee dispensed normally.
Defect on all groups.
Group at rest.
Continuous loss of cold water in the
drainage tray. Groups do not dispense
any more coffee and the pressure gauge
pump shows low values.
Group in operation.
Drainage tube leaks.
No coffee.
Group in operation.
Loss of cold water in drainage tray.
Coffee bland.
Dispensing slow.
Group leaks at cam shaft.
'LI¿FXOWWRPRYHWKHJURXSV
Machine does not go into pressure or
reaches pressure level slowly.
Groups function normally.
Pressure gauge pump does not give
correct pressure reading (8 ÷ 9 bar).
Pump does not reach pressure level.
No dispensing.
Pump noisy.
SOLUTION
If this defect is not corrected immediately, the
water softener runs out long before the expiry
time, with consequent scale deposit.
If this defect is not corrected immediately,
the water softener runs out long before
the expiry time, with consequent scale
deposit.
If this defect is not corrected immediately,
the water softener runs out long before
the expiry time, with consequent scale
deposit.
Remove the glands taking care not to mark
the housings. Do not use tools made of
steel or other hard materials.
Before remounting, clean the shaft
thoroughly, especially the grooves
Steam taps leak:
CAUSE
&RIIHHJURXQGVWRR¿QH
Low pressure in pump.
0HVK¿OWHUDERYHVSRXWGLUW\
Spout partially blocked.
Pump out of calibration.
Pump with reduced capacity.
Dispensing valve does not hold.
Expansion valve with calibration too high
(above 12 bar).
Expansion valve remained open.
Drainage valve does not hold.
Expansion valve out of calibration (opens
at less than 9 bar).
Leak on the two glands.
&DPSUR¿OHZRUQ
No electricity.
Automatic switch gone off.
Resistances burned.
Electric circuit to resistance interrupted.
No water in boiler.
Pressure gauge defective.
Motor does not work:
- No electricity.
- Capacitor burnt.
- Microswitch burnt.
- Motor burnt.
Check valve pump open.
By pass valve completely opened.
Pump defective.
No water in system.
34
English
91
MACCHINA
MACHINE
MACHINE
MASCHINE
MÁQUINA
MÁQUINA
A) eventuale dispositivo per il trattamento dell’acqua
A) possible water treatment device
A) éventuel dispositif pour le traitement de l’eau
A) Einheit zur Wasseraufbereitung (sofern installiert)
A) posible dispositivo para el tratamiento del agua
A) eventual dispositivo para o tratamento da água
A
Immagini - Illustrations - Images - Abbildungen - Imágenes - Imagens
Colore cavi - Wires colour - Couleur cables
Farbe der Drähte - Color cables - Cor cabos
Collegamento trifase - Three-phase connection
Raccordement triphasé - Dreiphasig Anschluß
Conexión trifásica - Ligação trifásica
TGrigio (Nero) - Grey (Black) - Gris (Noir)
Grau (Schwarz) - Gris (Negro) - Cinza (Preto)
SNero - Black - Noir - Schwarz - Negro - Preto
RMarrone - Brown - Brun - Braun - Maròn - Marron
NAzzurro - Blue - Bleu - Blau - Azùl - Azul
Collegamento monofase - Single phase connection
Raccordement monophase - Einphasigem Anschluß
Conexión monofásica - Ligação mono-fásica
N Bianco - White - Blanc NAzzurro - Blue - Bleu
Weiß - Blanco - Branco Blau - Azùl - Azul
T Nero - Black - Noir TMarrone - Brown - Marron
Schwarz - Negro - Preto Braun - Maròn - Marron
1 2
Installare un rubinetto alimentazione acqua
Install a water feeding tap
installer un Robinet alimentation eau
Wasserversorgungshahn erforderlich
Instalar un grifo alimentación agua
Instalar um Torneira alimentação água
PRESSIONE MAX. RETE
WATER MAINS MAX. PRESSURE
PRESSION MAX. EAU DE VILLE
MAX. DRUCK DER
WASSERLEITUNG
PRESION MAX. RED
PRESSÃO MAX. REDE
6 bar - 0,6 MPa
(per pressioni più alte installare un riduttore di pressione)
(for pressure beyond this value, install a pressure reducer)
(pour pression plus haute installer un deténdeur)
(bei höheren Druckwerten Druckreduzierer erforderlich)
(para presiones más altas instalar un reductor de presión)
(para pressões mais elevadas instalar um redutor de
pressão)
Ø 3/8 GAS - GAZ -
GÁS
SCARICO A
PAVIMENTO
DRAIN
VIDANGE DU LOCAL
BODENABFLUSS
DESCARGA
DESCARGA
Min. Ø 50 mm.
Fig. 7
Abb.
Fig. 8
Abb.
Fig. 6
Abb.
Fig. 5
Abb.
Fig. 1
Abb.
Fig. 2
Abb.
Fig. 3
Abb.
Fig. 4
Abb.
92
Smontaggio - Disassembly - Demontage - Abmontierung - Desmontaje - Desmontage
C
C
Smontaggio pannelli superiore
Svitare le viti (C) e rimuovere il pannello.
Disassembly of top panels
Unscrew screws (C) and remove the panel.
Démontage des panneaux supérieurs
Dévisser les vis (C) et retirer le panneau.
Demontage der oberen Paneele
Lösen Sie die Schrauben (C), und nehmen Sie das obere
Paneel ab.
Desmontaje panel superior
Destornillar los tornillos (C) y quitar el panel.
Desmontagem dos painéis superiores
Desaparafusar os parafusos (C) e remover o painel.
B
Smontaggio piano scaldatazze e vetrinetta
$OOHQWDUHL¿VVDJJLB) e rimuovere il piano.
Disassembly of the cup warmer tray and glass panels
Loosen fasteners (B) and remove the tray.
Démontage du plan de chauffe-tasses et de petite
vitrine
'HVVHUUHUOHV¿[DJHVB) et retirer le plan.
'HPRQWDJHGHU$EVWHOOÀlFKH]XU7DVVHQYRUZlUPXQJ
Lösen Sie die Feststellklemmen (B), und nehmen Sie Abstel-
OÀlFKH]XU7DVVHQYRUZlUPXQJDE
Desmontaje bandeja calienta-tazas y vitrina
'HVWRUQLOODUODV¿MDFLRQHV%\TXLWDUODEDQGHMD
Desmontagem do tabuleiro para aquecer as chávenas e
da montra
$IURX[DURVSDUDIXVRVGH¿[DomRB) e remover o tabuleiro.
A
Smontaggio pannelli laterali
Svitare la vite (A) e rimuovere il pannello.
Disassembly of side panels
Unscrew screw (A) and remove the panel.
Démontage des panneaux latéraux
Dévisser la vis (A) et retirer le panneau.
Demontage der Seitenpaneele
Lösen Sie die Schrauben (A), und nehmen Sie das Seiten-
paneel ab.
Desmontaje paneles laterales
Destornillar el tornillo (A) y quitar el panel.
Desmontagem dos painéis laterais
Desaparafusar o parafuso (A) e remover o painel
I
P
GB
F
D
E
I
P
GB
F
D
E
I
P
GB
F
D
E

Other manuals for E61 3 GR

1

This manual suits for next models

2

Other Faema Coffee Maker manuals

Faema E61 Jubile Technical manual

Faema

Faema E61 Jubile Technical manual

Faema Teorema User manual

Faema

Faema Teorema User manual

Faema SMART / S Technical manual

Faema

Faema SMART / S Technical manual

Faema E91 Ambassador User manual

Faema

Faema E91 Ambassador User manual

Faema E98/S-1 User manual

Faema

Faema E98/S-1 User manual

Faema X30 User manual

Faema

Faema X30 User manual

Faema SMART/A R User manual

Faema

Faema SMART/A R User manual

Faema X2 GRANDITALIA User manual

Faema

Faema X2 GRANDITALIA User manual

Faema Carisma Technical manual

Faema

Faema Carisma Technical manual

Faema X20 User manual

Faema

Faema X20 User manual

Faema E71 E Quick start guide

Faema

Faema E71 E Quick start guide

Faema E61 Legend Technical manual

Faema

Faema E61 Legend Technical manual

Faema E61 3 GR User manual

Faema

Faema E61 3 GR User manual

Faema PRESTIGE + Technical manual

Faema

Faema PRESTIGE + Technical manual

Faema E61 Jubile Technical manual

Faema

Faema E61 Jubile Technical manual

Faema Emblema R Technical manual

Faema

Faema Emblema R Technical manual

Faema CARISMA S-1 Technical manual

Faema

Faema CARISMA S-1 Technical manual

Faema E71 E Technical manual

Faema

Faema E71 E Technical manual

Faema E92 User manual

Faema

Faema E92 User manual

Faema Enova S Technical manual

Faema

Faema Enova S Technical manual

Faema X2 GRANDITALIA User manual

Faema

Faema X2 GRANDITALIA User manual

Faema Enova  A Technical manual

Faema

Faema Enova A Technical manual

Faema E71 E Technical manual

Faema

Faema E71 E Technical manual

Faema E61 Jubile User manual

Faema

Faema E61 Jubile User manual

Popular Coffee Maker manuals by other brands

Braun KF 3100 quick start guide

Braun

Braun KF 3100 quick start guide

Dipacci CAFELLO TUTTO V2 quick start guide

Dipacci

Dipacci CAFELLO TUTTO V2 quick start guide

anko CM5400D-SA instruction manual

anko

anko CM5400D-SA instruction manual

Curtis GEM-120A Specification sheet

Curtis

Curtis GEM-120A Specification sheet

Miele CM 5200 operating instructions

Miele

Miele CM 5200 operating instructions

Rancilio EPOCA E-S-S-Tank Use and maintenance

Rancilio

Rancilio EPOCA E-S-S-Tank Use and maintenance

Philips HD7502/31 manual

Philips

Philips HD7502/31 manual

DèLonghi EN97 Series instructions

DèLonghi

DèLonghi EN97 Series instructions

Cuisinart Thermal Coffee Center SS-20 Series Instruction booklet

Cuisinart

Cuisinart Thermal Coffee Center SS-20 Series Instruction booklet

CAMAR AROMA KICCO User manual and maintenance

CAMAR

CAMAR AROMA KICCO User manual and maintenance

GE 169185 instructions

GE

GE 169185 instructions

Nespresso EXPERT user manual

Nespresso

Nespresso EXPERT user manual

Keurig K10 Mini Plus owner's manual

Keurig

Keurig K10 Mini Plus owner's manual

TEFAL 896741 manual

TEFAL

TEFAL 896741 manual

Heinner HCM-900RBK instruction manual

Heinner

Heinner HCM-900RBK instruction manual

Krups XP52 AUTOMATIC manual

Krups

Krups XP52 AUTOMATIC manual

Black & Decker CM0755S-LA use and care manual

Black & Decker

Black & Decker CM0755S-LA use and care manual

Isomac Venus Use and maintenance manual

Isomac

Isomac Venus Use and maintenance manual

manuals.online logo
manuals.online logoBrands
  • About & Mission
  • Contact us
  • Privacy Policy
  • Terms and Conditions

Copyright 2025 Manuals.Online. All Rights Reserved.