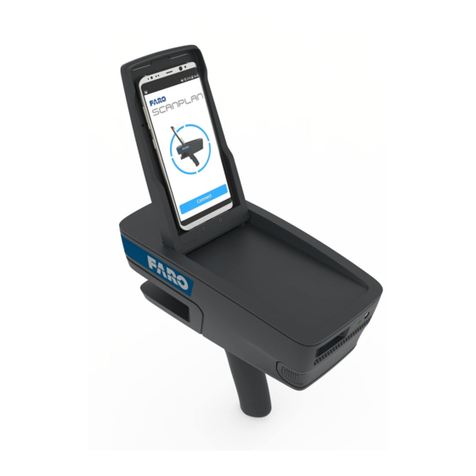
Faro Freestyle 3D User manual

FARO®Scanner Freestyle3D
Quick Start Guide

Standard Equipment
Transport and carry case
Quick Start Guide
Freestyle3D
USB stick with the SCENE Cap-
ture, SCENE Process and SCENE
installation les, Quick Start
Guide and the User Manual
Red microSD card to save scan
projects, and green microSD
card which provides the cali-
bration plate number.
Calibration plate which may
also be useful when it comes to
placement and measurement
Tablet PC
Tablet hand-holder
Optical cleaning kit
USB card reader
1
2
3
4
5
6
7
8
9
10
Equipment
3
7
1045
6
8
1
9
2
Start/Stop button and status LED light
USB line with USB3.0 plug
Infrared cameras
Infrared projector with class 1 laser
LED stroboscope light
Color camera
That’s Freestyle3D
1
3
3
5
6
2
4
2
1
2
3
4
5
6
Connect Freestyle3D to the computer
The blue and the red LED will light up. Once the
device is detected by the software, the red LED
light will turn off.
Ready to capture
Blue LED will light up.
Not ready to capture
Red LED will light up.
While recording
Blue LED will ash.
Tracking lost
Red LED will ash. After tracking resumes, the red
LED will be turned off, and the blue LED will ash
again.
Getting Started

We recommend using the tablet computer which is
shipped together with Freestyle3D. The SCENE Capture
software is already installed on it.
Before you start capturing, insert the microSD card into
the tablet computer. Your scan project will be saved to
this microSD card.
Tap the SCENE Capture tile to start the software. SCENE
Capture starts with the Home screen by default. Its Pro-
ject Selector presents all the scan projects known at that
time.
Plug the Freestyle3D USB cable into a USB3 port on your
computer. The red Status LED will light up. If the speak-
ers of your computer are switched on, you will hear an
acoustic signal as well.
Wait until the SCENE Capture detects Freestyle3D. SCENE
Capture will show a loading message. As soon as Free-
style3D is ready, the red Status LED light will switch off and
the blue LED will light up.
Keep in mind that the tablet computer (or your
own tablet or notebook computer) may be not
as ruggedized as Freestyle3D and may become
damaged under certain environmental conditions.
When scanning outdoors or in dirty surroundings,
protect both Freestyle3D and the tablet computer
from liquids and humidity, but also from dust and
dirt which may damage the electronic compo-
nents and the sealings. Temperatures lower than
0°C and higher than +40°C may also inuence the
performance of both devices.
!
Starting up Start Software
Home Screen and Project Selector
The software starts with the Project Selector window by default. The Project Selector presents all
the scan projects known to the software at that time.
Toolbar – provides a quick and easy way to access the features with the mouse or, on
tablet computers, by tapping.
Project selection bar – contains the dialogs with the project commands.
Available scan projects – open an existing scan project by double-tapping on its preview
picture.
Project information – If the mouse pointer or, on tablet computers, your nger moves over
one of the available scan projects, more information to this scan project is displayed here.
1
2
3
4
1
2
3
4
SCENE Capture
NOTICE
Every time Freestyle3D is detected by SCENE Capture, you will be asked whether to calibrate
the device. In general, you should perform On site calibration as well as the Device White
Balance. Check the Freestyle3D User Manual for those two features.
!

Save
Save the
scan pro-
ject. In
addition to
that, SCENE Capture
saves your work auto-
matically.
Home
Closes any
open scan
projects
and opens
the Project
Selector.
Calibrate
Shows the calibration status.
Tap the button to open the
Calibration dialog.
Help
Shows the User Man-
ual
(a pdf le).
Device White Balance
Device White Bal-
ance: is used to ad-
just the color cam-
eras in Freestyle3D.
Abort the function
with this button.
Measure
Opens a measurement
function. Measure dis-
tances between scan
points in a scan. Tap
the scan points with the tablet’s
pen, double-tap to nish meas-
uring. In SCENE Capture, the
measurement is not saved with
the project.
Abort the function with
this button.
Options
Check the two tabs for these
settings:
Depth Range set the max. scan
distance, starting from 0.5m.
Marker Detection: activate
this if you want to use the
markers of the calibration
plate for placing the scans or
for measurements.
Follow Camera: when deac-
tivated, the Point Cloud View
does not show the camera
movement.
Flash: switches the ash-light
to automatic, on or off.
The ash-light is a strobe
light and can be haz-
ardous to persons who may
be susceptible to epileptic
seizures.
In case of doubt, switch the
ash-light to OFF.
Auto: Flash-light is
switched on if the cam-
era detects that the light is not
sufcient. As soon as the light
situation gets better, the ash-
light is switched off again.
Flashlight is
always switched on.
Flashlight is never
switched on.
Saving location: save to
microSD card (default), or tap
the button and enter a saving
location.
Project Base Name: If re-
quired, delete the default
name and enter a new one.
This name must not include
spaces or some special char-
acters.
Process
Tap this button to
process
the entire scan
project, a selected
cluster, or a scan.
Start or stop capturing
Opens the capturing
window.
While capturing, the
button looks like this.
SCENE Capture Toolbar
!
Export Points
Tap this button to
export all point
clouds of a scan
project.

Commonly used terms
Scan
Frame
The set of three photos, taken at the same
time with the infrared projector and the
infrared cameras, is called a frame.
Features
The software detects useful elements like for
example corners in the color picture. Those
elements are called features.
Tracking
Following the features from frame to frame
is called tracking. With tracking, it is possible
to reconstruct the movement of Freestyle3D
in space, and thereby putting all 3D points
of the individual frames in a common 3D
context.
Scan
A set of frames resulting from one capturing
sequence is called a scan.
1. Start capturing by pressing the
button on top of Freestyle3D, or by
tapping the button. After one or two
seconds, a split window will show up
with the Point Cloud View on the left and the
Video View on the right as well as a progress
dialog. A message box is shown superimpo-
sed in the middle of the window. On the left
side, the ashlight button is shown. Tap it to
switch the ashlight to on or off. On the right
side, the 3D camera button is shown. Tap it
to toggle between 3D Point Cloud View on
the left and the 2D Video View on the right
(default), or only 3D Point Cloud View, or
only 2D Video View. The software will create
a scan project called Freestyle and save the
scan data to the microSD card.
Make sure that the object of interest is within
the specied maximum range and that it is
not closer than the minimum range of
the sensor.
WARNING
Eye injuries caused by laser beams. Al-
though Freestyle3D is classied as a laser
class 1 device, it could be dangerous
if the laser beams are pointed towards
a person’s eyes. Be careful when scan-
ning people or animals. Do not aim at
your eyes or somebody else’s eyes from
a “close-up” distance at anytime.
NOTICE
Static discharge - Do not touch the me-
tal rings around the glass covers on the
lower side of Freestyle3D. Always hold
Freestyle3D by its handle. Do not grab
the device by one of its arms. Freesty-
le3D is a high-precision measuring de-
vice. Even the slightest bending of the
housing will result in inaccuracies.
Stable scanning requires objects and en-
vironments with enough color structure.
Avoid having only plain-colored surfaces in
the device eld of view. Objects must not
move while they are captured.
Move the device slowly and cons-
tantly. Avoid jerky movements. Fast
and jerky movements may lead to
inaccurate data and tracking may
be lost. Avoid capturing longer
sequences. Try to move the device in circles
or loops. Try to nish capturing at the starting
place.
If tracking is lost (by too fast mo-
vement or few recognized featu-
res), you may resume it. Try to move
Freestyle3D so that the Video View
and the view in the small window match.
Then, a green and red cross-shaped icon
appears in the live video picture. Try to move
Freestyle3D so that the red and green crosses
in the live video picture match. Tracking
should then resume automatically.
Ambient light conditions
In scenes with too bright illumination (close
to lights or outdoors), the Freestyle3D will
produce no 3D data or it may only show with
a limited distance range. If the number of
features gets critical, try to move the device
eld of vision to areas with more structures.
2. Finish your scan by pressing the button on
the top of Freestyle3D again, or by tapping or
clicking the button.
SCENE Capture will now need some
seconds to prepare your captured
data. Freestyle3D uses the build
in sensors to level the scan auto-
matically. Once the capturing of a scan is
completed, the scan project will be saved
and you will get the following structure in the
project’s workspace:
Workspace
Folder Scans: Contains all scans.
Folder Scan-x: Contains the scan and, subor-
dinated, its scan path.
In front of the scan name, an icon symbolizes
which processing step was already done.
Double-tap a scan. The 3D View will be
shown.
Repeat the steps 1 and 2 as often as requi-
red. It could be favorable to capture a view
more than one time because it would im-
prove the point density and the coverage of
the whole object or scene.
Close the scan project.
You will be asked to save the scan
project.
Close SCENE Capture.
Scan
!
!
What’s next?
The next step would be processing the scans,
and maybe further steps like placement and
color adjustments. For this, release the microSD
card from the tablet computer and plug it
into a workstation with SCENE Process instal-
led. As soon as you open SCENE Process, you
will be asked if you wish to open the scan
project. All those steps are described in the
Freestyle3D User Manual.
Initialization
Move scanner slowly until the sign
disappears.
Movement
Scanner is moved too fast.
Video blurry
Less features, video image gets
blurr y.
Contrast Problems
Problems with contrast in the video.
Light Problems
Problems with too much / not
enough light in the video.
Tracking is lost
Low storage space
Finish the scan as intended. You do
not need to stop capturing immedi-
ately.
No 3D data
- insufcient 2D or 3D structure,
capturing could not be initialized.
- Invalid device calibration
Start scanning button.
Stop scanning button.
Buttons and displays
This overview shows the buttons and displays
offered by SCENE Capture. SCENE Process
offers more buttons and functions which are
not explained in this Quick Start Guide. You
will nd those in the Freestyle3D User Manual.
Options
Opens the a dialog with two tabs
which offers several settings you
should check before or while captur-
ing. You can change the Follow Cam-
era and Flash settings while capturing.
Manual
Opens the User Manual as a PDF le.
Close the PDF by swiping from the top
to the bottom of the pdf document.
Switch to SCENE Capture by swiping
from the left to the right of the pdf
document.
Home
If a scan project is open: Closes
scan project and opens Project
Selector.
Save
SCENE Capture saves automatically.
Tap this button to save the scan pro-
ject whenever you feel the need to.
Calibration status
Grey: No device detected.
Red: Device is not calibrated.
Yellow: Device needs re-calibration.
Green: Device is calibrated.
Device White Balance
Is used to adjust the color cameras
in Freestyle3D.
Process
Tap this button to process
the entire scan project, a selected
cluster, or a scan.
Export Points
Tap this button to export all point
clouds of a scan project.
Measure
Measure distances between scan
points. In SCENE Capture, measure-
ments will not be saved with the
An object does not appear in my scan, or is
hardly visible.
Problem
Not enough distance to the object (< 0.5 m).
Solution
Need larger distance. Freestyle3D cannot
capture close-up objects.
Problem
Large distance (> 3m, depending on light
situation)
Solution
Take several scans of a scenery or an object,
but in different distances.
Problem
Object has cavities like holes, slots, etc.
Solution
Larger distance in combination with scan-
ning the object from different perspectives
may improve the result.
Problem
Highly absorbing surfaces.
Solution
Use developer spray (as used for crack
detection).
Problem
Shiny surfaces.
Solution
Use anti-glare spray.
Problem
Too much light, especially when scanning
outdoors.
Solution
Avoid scanning in glaring sunlight.
Problem
Not enough light.
Solution
Use light sources which produce bright,
diffused light.
Buttons
Capture Buttons
Displays while scanning
FAQ
Quick Overview

SCENE is specically designed for all FARO laser scanners.
The software processes and manages scanned data both
efciently and easily by using the automatic object recog-
nition and scan registration.
SCENE is an extremely user-friendly software that allows
scans to be automatically combined. The resulting point
cloud can be viewed in three dimensions. All the scans are
available in color and as high-contrast intensity images.
SCENE Capture and SCENE Process
▪Automated target-less scan registration
▪SCENE WebShare Cloud integration
▪Super-crisp visualisation
▪Easy processing of large scan projects
▪Plug-Ins for extended functionality
▪Homogenisation of point clouds
SCENE Capture provides everything you need to record
your scans. It is designed to run on a tablet computer and is
pre-installed on the tablet computer included in the Free-
style3D kit. The scan data is stored on a microSD card which
makes it easy to transfer the data to another computer.
SCENE Process provides everything you need to process
and nalize your entire scan project. Record your scans
with the tablet computer and SCENE Capture, transfer the
data and continue working with SCENE Process. Because
processing 3D data is a heavy operation for a computer,
we recommend you install SCENE Pro-
cess on a workstation or on a notebook
PC with sufcient performance.
Software Options
Freestyle3D and the SCENE software are
compatible with the most common
CAD software applications and can
be used to export scan data to over 50
common software solutions.
SCENE Software
Hear from industry experts on emerging trends in
3D documentation, advancements in 3D metrology
and portable CMMs and best practices without
ever leaving the ofce. If you are unable to attend
any of our live webinars, they are all recorded and
uploaded as podcasts here and are searchable by
broadcast date.
www.faro.com/webinars
FARO Webinars
General information
In the 3D App Center you will nd software dedicated to
the FARO 3D Documentation world. The shop is devided
into two main categories: Stand-alone apps and plug-in
apps:
http://3d-app-center.faro.com
FARO 3D App Center
With SCENE WebShare Cloud, FARO offers a compre-
hensive service to provide users with simple access to 3D
documentation. Neither technical training nor specialist
skills in 3D laser scanning are necessary to work with the
intuitive user interface.
Digital data, such as 3D documentation, often has to be
available to many different project partners. Previously,
users having their own internet server, could use SCENE
WebShare to present their laser scan projects to clients
and project partners. Now FARO goes considerably
further, offering the SCENE WebShare Cloud solution, a
hosting service with various packages at different prices.
▪Easy data sharing and collaboration
▪Minimal set up and maintenance effort
▪Best possible security level
▪Persistent measurements & annotations
▪Hosting service offered by FARO
▪Support for mobile devices
Check it out on our demo server at:
www.websharecloud.com
SCENE WebShare Cloud
Find more information and helpful tips on the use of the
Freestyle3D and SCENE in the Internet at:
http://tutorial.faroeurope.com
Online Tutorials

Notes
United States and Canada
On the phone: Our customer service staff is available
from 8:00 am to 7:00 pm (EST) from Monday to Friday.
Toll Free: 1- 800 -736-2771
E-Mail: support@faro.com
Europe
On the phone: Our customer service staff is available
from 8am to 5pm (CET) from Monday to Friday.
Free call number: 00 800 3276 7378
E-Mail: support@faroeurope.com
Asia
On the phone: Our customer service staff is available
from 8:30am to 5:30pm (SST) from Monday to Friday.
Free call number: 1800 511 1360
E-Mail: supportap@faro.com
Online-Support Center: www.faro.com/support
Customer Service
You are in good hands

www.faro.com/freestyle3D
Revised: xx Xxx 2016 | © 2016 FARO | EU-04REFxxx-xxx-EN
FARO Offices
Distribution (EMEA)
FARO Swiss Holding GmbH
Wiesengasse 20
8222 Beringen
Switzerland
distribution@faroeurope.com
www.faro.com/distributors
European Headquarters
FARO Europe GmbH & Co. KG
Lingwiesenstrasse 11/2
70825 Korntal-Münchingen
Germany
info@faroeurope.com
Tel: +49 7150 9797 400
FARO Technologies UK Ltd
Great Central Way
Butlers Leap
Rugby
Warwickshire
CV21 3XH
United Kingdom
uk@faroeurope.com
Table of contents
Other Faro Scanner manuals

Faro
Faro Photon 20/80 User manual

Faro
Faro Focus M User manual

Faro
Faro GEO SLAM ZEB Horizon User manual

Faro
Faro Freestyle 2 User manual

Faro
Faro Focus3D 20 User manual

Faro
Faro Photon 20 User manual

Faro
Faro ls 420 he User manual

Faro
Faro Freestyle2 User manual

Faro
Faro Edge FaroArm User manual

Faro
Faro Focus 3D X 130 Installation guide

Faro
Faro FOCUS3D X 130 User manual

Faro
Faro Focus Premium User manual

Faro
Faro FocusM 70 User manual

Faro
Faro Laser Line Probe HD User manual

Faro
Faro PanoCam Manual

Faro
Faro ZEB Go User manual

Faro
Faro FOCUS Core User manual

Faro
Faro ScanPlan User manual

Faro
Faro Freestyle2 Manual

Faro
Faro Focus S 70 User manual