10
8. Treble
The default value of it has been set as 0dB, with the decreasing value of 10KHZ per degree.
Short press vol+ once to increase the treble by one degree and continuously increase by holding
on to it until reaches the maximum of 10dB.
And vice verse, short press vol- once to decrease the treble by one degree and continuously
decrease by holding on to it until reaches the minimum of -10dB.
9. Bass
The default value of it has been set as 0dB, with the decreasing value of 100KHZ per degree.
Short press vol+ once to increase the bass by one degree and continuously increase by holding
on to it until reaches the maximum of 10dB.
And vice verse, short press vol- once to decrease the bass by one degree and continuously
decrease by holding on to it until reaches the minimum of -10dB.
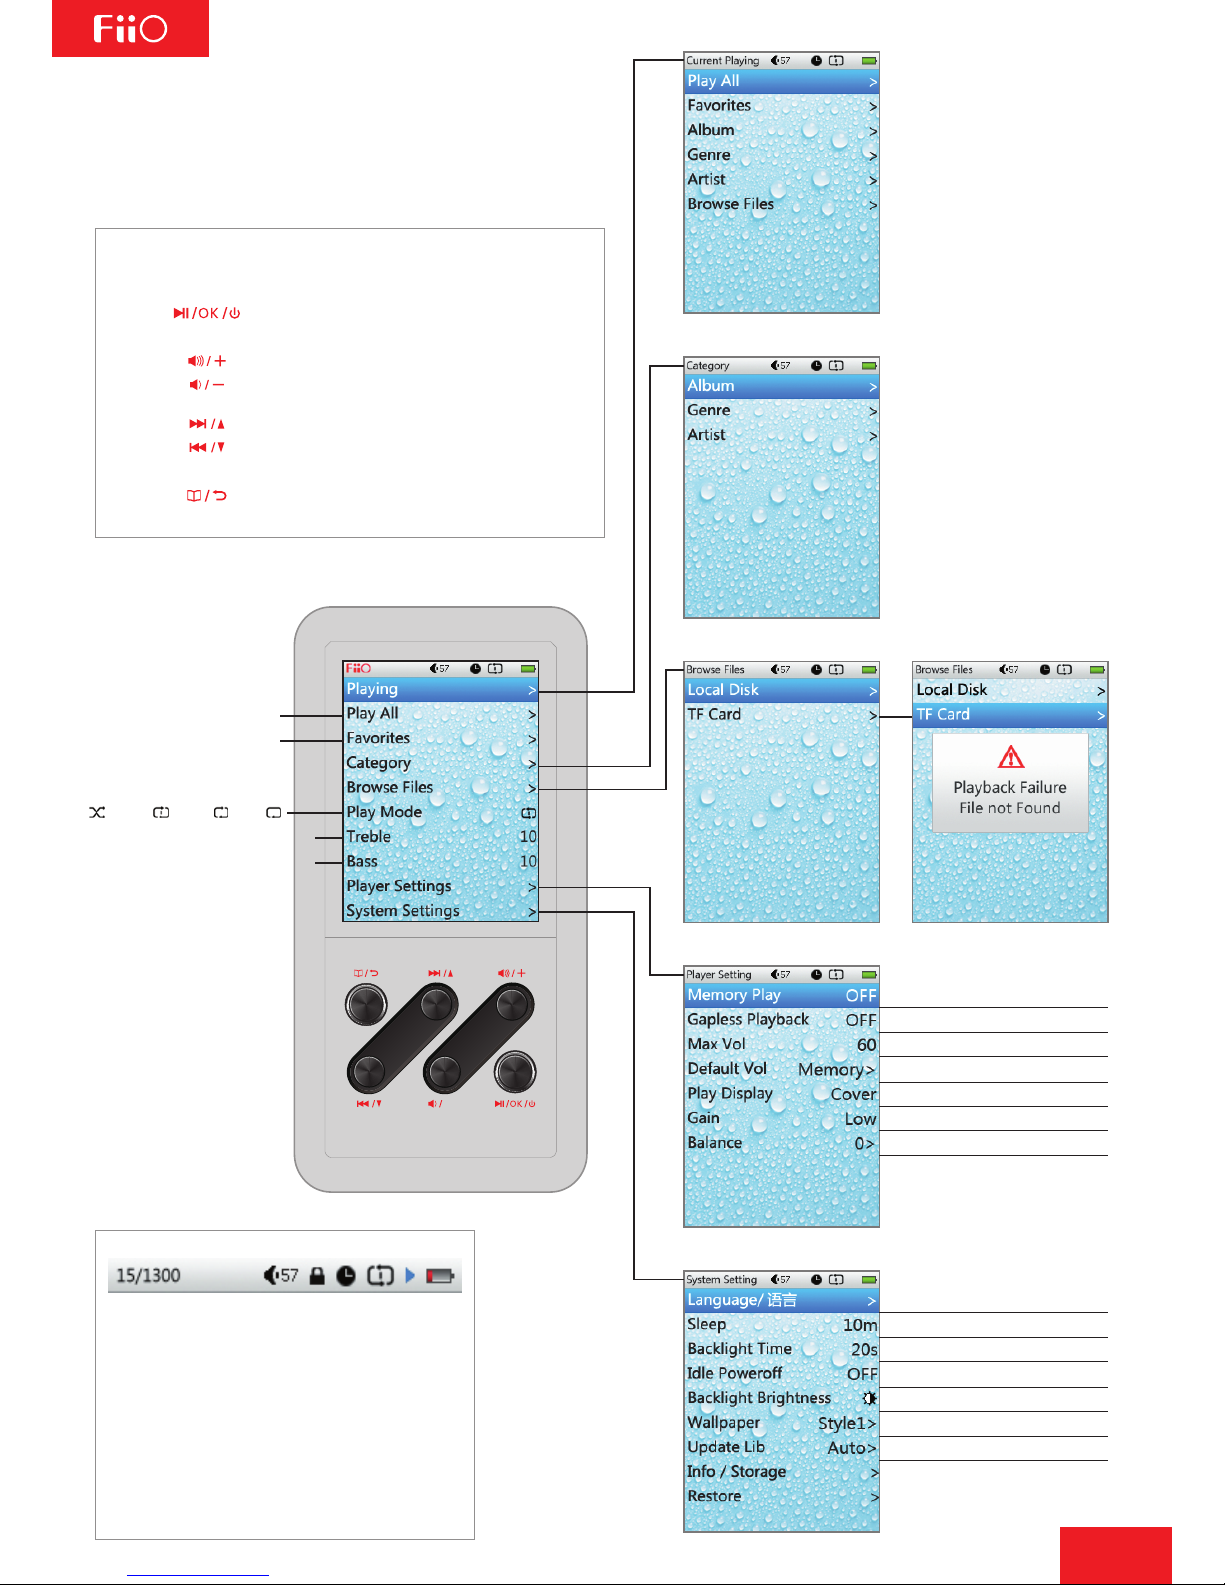
10. Player Settings
A. Memory Play
There are three options: OFF, Track and Position. Press vol+ or vol- button to switch.
Track: It memorizes the track where it stops, and play from the start when turns on next time.
Position: It memorizes the position of the track where it stops, and play from that position when
turns on next time.
B. Gapless Playback
This function mainly focuses on file with CUE index while not so smooth in playing. Turn it on to
shorten the delay so as to bring convenience to end-users; press vol+ or vol- button to switch.
C. Max Vol
The maximum volume limit is from 31 to 60. The reason we do not set its minimum as 0 is to
avoid being regarded as faulty machine; press vol+ to turn up and vol- to turn down.
D. Default Vol
There are two options: Memory and Custom.
Memory: The volume would display as last time.
Custom: The volume would display as the set value.
Short press the “OK” button, get to the default volume settings and press “Next” or
“Previous” button to switch.
When lock on “Custom”, press vol+ to turn up and vol- to turn down; check the set value by
short pressing the “OK” button.
While the vol+ and vol- button would be out of use when lock on “Memory”.
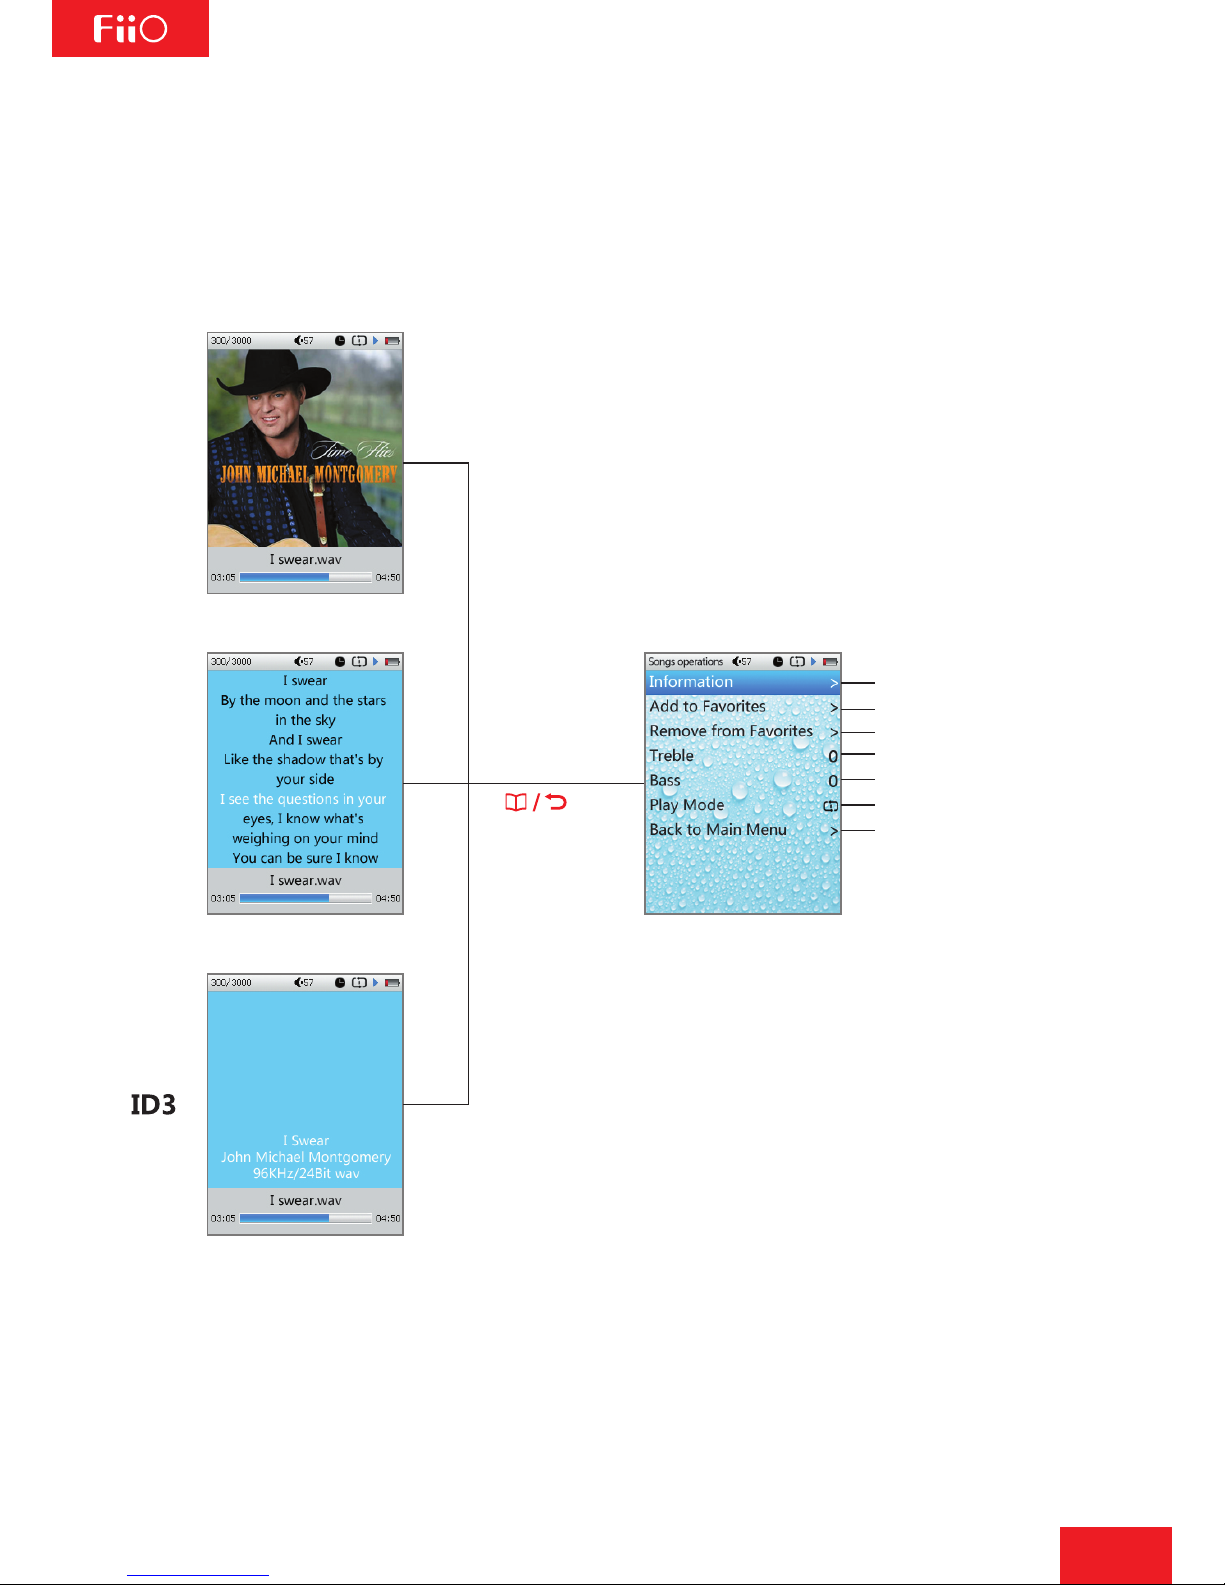
E. Play Display
There are three options: Cover, Lyrics and ID3 (The priority of the three ranks in this sequence);
press vol+ or vol- to switch.
*Cover: Display cover>Display lyrics>Display ID3(Display cover if there is one; display lyrics if there is no cover; display ID3 if there is no lyrics).
*Lyrics: Display lyrics>Display ID3(Display lyrics if there is one; display ID3 if there is no lyrics).
*ID3: Display ID3 if there is one; display blank if there is no ID3 information; but requires for data and bit rate of the file.