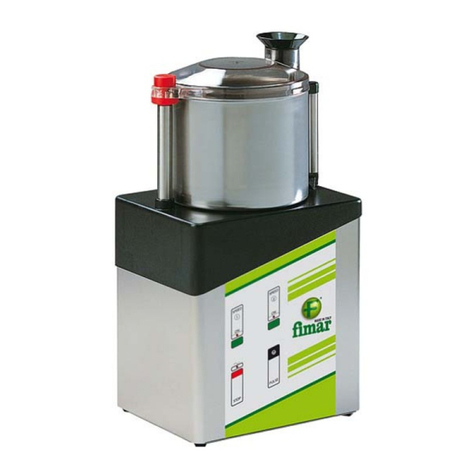
Fimar T22REF User guide

IT
EN
FR
DE
ES
PT
RU
uso e manutenzione
MOD164V00
use and maintenance
emploi et entretien
benutz und Wartungsanleitung
uso y mantenimiento
uso e manutenção
использованиe и
T22-32 REF

INTRODUZIONE
1-1. MODALITA’ DI GARANZIA
L’installazione, la messa in funzione e l’avviamento devono essere eseguiti solo da
personale qualificato con una conoscenza tecnica specifica della macchina.
Il personale di controllo e di servizio addetto alla manutenzione della macchina dovrà
familiarizzarsi con le procedure per l’installazione, l’uso e la pulizia seguendo con
scrupolo le relative istruzioni contenute in questo manuale.
Questa macchina deve essere utilizzata solo da personale addetto. Se necessario, le
istruzioni devono essere ripetute al fine di assicurare una completa conoscenza della
macchina e garantire un uso corretto.
Si declina ogni responsabilità in caso di:
•Montaggio delle parti della macchina e collegamento elettrico non effettuati
secondo le procedure stabilite;
•Impostazione comandi errate;
•Uso improprio della macchina:
•Manomissione;
•Mancato rispetto delle norme di sicurezza;
•Utilizzo di parti di ricambio o accessori non originali.
In questi casi, l’utilizzatore agisce a suo rischio e pericolo e sarà il solo responsabile
dei danni che ne possono derivare.
La garanzia non risponde inoltre in caso di normale usura delle parti.
GENERAL INFORMATION
1.1 WARRANTY
This manual reflects the preset state of the machine technique (state of the art) and it
cannot be considered inadequate only because updated according to new
experiences.
We have the right to update its production and its manuals without any obligation to
update former manuals.
The features of the materials can be modified at any time without notice according to
the technique evolution.
We are not liable in case the machine is:
•Improperly used:
•Used by untrained personnel
•Used contrary to what stated in this manual
•Used contrary to present Regulations and Legislation
•Used with incorrect power supply
•Used with lack of predicted maintenance
•Used with either fake spares or not suitable for this type of machine.
•Used without referring either totally or partially to this Manual.
•The warranty expires in all the cases mentioned in former point 4 and
when:
•The machine has no proper upkeep
•Not properly trained personnel is allowed to use the machine.
•The machine is used beyond its performance limits.
•Either excessive mechanical and/or electrical stress is exerted on the
machine.

1-2 NORME DI SICUREZZA
In caso di uso improprio o non conforme alle norme è possibile procurarsi, con
questa macchina, gravi ferite alle dita o alle mani.
Vi preghiamo quindi di osservare attentamente le seguenti norme di sicurezza.
•Assicurarsi che il personale non autorizzato o non addestrato e, in modo
particolare i bambini, non tocchino o mettano in funzione la macchina.
•Esistono seri pericoli d’infortunio per il personale addetto all’uso della
macchina se vengono rimossi, modificati o elusi i dispositivi di sicurezza.
•Verificare quotidianamente che i dispositivi di sicurezza siano presenti e
funzionanti. (Interblocco fra la tramoggia di carico e i comandi)
•Lavorare con concentrazione evitando di distrarsi.
•Tritare solo i tipi di prodotti indicati in questo manuale.
•Non tritare prodotti surgelati o materiale estraneo. Non tentare alcun
esperimento di questo genere.
•Nel caso si dovesse guastare il cavo di alimentazione, provvedere alla sua
sostituzione rivolgendosi ad una persona qualificata per tale compito o al
rivenditore.
•Tenere sempre pulita e asciutta la zona di lavoro affinchè la superficie di
appoggio non diventi sdrucciolevole.
•Non appoggiare parti estranee sulla macchina e non utilizzarla come piano
di appoggio.
•Togliere sempre la spina della presa di corrente prima di iniziare la pulizia
della macchina.
•Spegnere immediatamente la macchina quando si avvertono rumori atipici o
si teme la possibilità di infortunio.
Contattare il competente servizio di assistenza tecnica se non si è in grado di
eliminare da soli un eventuale guasto.
1-2 SAFETY INFORMATION
We are not liable in the case when:
•The machine is used by untrained personnel.
•The machine is either not correctly used or used for purposes for which it
has not been designed.
•The indications given in this manual are not taken into consideration and
this leads to damages and accidents.
•The machine is modified, also partially, without prior authorization.
•The machine operates with fake components without authorization.
•The standard and extraordinary maintenance is not carried out by skilled
and authorized personnel.
•Signs and decals are removed.
•The nameplate is removed
•The safeguards are either tampered or removed.
•Unauthorized actions are taken to invalidate the active and passive
safeguards on the machines.
•The machine is cleaned with either water jets or high pressure waterjets.
The warranty on the machine expires in all the cases mentioned above.
Any use that differs from that for which the machine has been designed
represents an irregular condition, it might generate damages to to machine
itself and seriously jeopardize the operator.
The machine has not been designed to operate in an explosive environment, THUS
IT IS STRICLY PROHIBITED TO USE THE MACHINE IN SUCH ENVIRONMENTS.
For either any unpredicted use of the machine or any intervention on it, we must be
contacted to receive information about dangers that might arise by an improper use
of the machines and damages to the user.
During the functioning of the machine, do not bypass or eliminate the safeguards.

2 SCHEDA TECNICA / Technical sheet
T22REF
T32REF
Dimensioni (corpo macchina/totali esterni)
Dimensions
Larghezza mm 360/415 415/520 Width mm
Profondità mm 248/295 314/360 Length mm
Altezza mm 490/530 510/550 Height mm
Peso kg 43 56 Weight kg
Prestazioni
Volume tramoggia 3,5 lt 8 lt Hopper capacity
Produzione oraria 280 kg/h 450 kg/h Hourly output
Livello di rumorosità Inferiore a 70 dBA Noise level
•Tensione di alimentazione
•Potenza motore
•Assorbimento
•Isolamento motore
V230 (mono) – V400 (trifase)
1,1 Kw
A 2.5
Classe F
V400 (trifase)
1,87 Kw
A 4.6
Classe F
•
Phase motor
•Motor power
•Ampere
•Motor insulating
Caratteristiche compressore frigo
Cooling system details
Potenza 0,14 kW Power
Tensione / frequenza 220-240V 50 Hz Frequency
Gas refrigerante R 134a – 80 g R 134a - 90 g Cooling gas
2-3 IMPIEGO DELLA MACCHINA
I tritacarne servono per la preparazione di carni tritate; non possono essere utilizzati
per macinare verdure, frutta, noci, pane, ecc.
Inoltre essi non possono macinare prodotti che non siano per uso alimentare;
prodotti contenenti ossa o prodotti congelati.
2-4 DISIMBALLAGGIO DELLA MACCHINA
Dopo aver rimosso la scatola d’imballaggio, rimuovere la macchina dalla base della
scatola utilizzando un carrello elevatore.
L’imballaggio è costituito da legno, carta, cartone e sacchetti protettivi antiurto.
Questi materiali non devono essere bruciati né dispersi nell’ambiente, ma devono
essere smaltiti seguenti le norme vigenti.
2-3 USE OF THE MACHINE
This machine has been designed and manufactured for: grinding of animal meat of
any kind, of suitable size and with no bones.
Don’t use the mincer to grind fruits, vegetables, bread, nuts and other products which
may not be alimentary.
2- 4 UNPACKING OF THE MACHINE
The machine is delivered packed in a carton box that can be easily handled with a
stake suitable to transport the whole packing.
The packing is made of wooden, paper, carton and shockproof protection cushions,
which have to be wasted as per the law of your country.

3-4 DISP
O
Sistema di
(NVR)
3-5 DESC
Pannello di
1. Termost
a
2. Pulsante
Il pulsante
tritacarne
3. Pulsante
ll pulsante
tritacarne
4. Pulsante
Il pulsante i
necessario
inserito as
s
Il termost
a
refrigerazio
accension
e
impostata
a
da una so
n
bocca di m
anche il te
display del
momento (
t
alto a sinis
t
Quando l
a
frigorifero s
Quando la
t
riparte auto
Se si desid
e
Per preser
v
compromet
t
eccedere n
e
O
SITIVI DI PROTE
Z
comando con spegn
RIZIONE COMAN
D
controllo in acciaio in
a
to
luminoso ON (verde)
serve per avviare
luminoso OFF (ross
o
serve per spegner
e
luminoso a impulsi, i
n
nstabile di retromarci
a
invertire il senso di r
o
s
ieme alla carne nel c
o
a
to serve per la re
g
ne , nella posizione
è
e
e spegnimento. T
a
a
l montaggio della ma
n
da inse
r
ita nella se
r
acinazione. All’accen
s
e
rmostato che fa par
t
termostato mostra
t
emperatura ambient
e
t
ra sullo schermo indi
c
a
temperatura arriv
a
i arresta e va in paus
a
t
emperatura risale a
“
o
maticamente.
e
ra spegnere il termo
s
v
are i componenti dell
’
tere il risultato della
m
e
ll’impostare tempera
t
Z
IONE E SICUREZ
Z
imento in mancanza
D
I
ox, con i seguenti co
m
il gruppo di maci
n
o
)
e
il gruppo di maci
n
n
versione di marcia
a
serve solo nel caso
f
o
tazione della coclea (
e
o
llo di alimentazione).
g
olazione della tem
p
è
fornito un interruttor
e
a
le temperatura è n
o
cchina. La temperatu
r
r
pentina di raffredda
m
s
ione della macchina
t
ire il compressore f
r
la temperatura rilev
a
e
) e il simbolo blu’ del
c
a che il frigorifero è
a
a “0” gradi il c
o
a
.
“
+4 °C), il compresso
r
s
tato premere il pulsa
n
’
impianto frigorifero e
m
acinazione, si consig
ture troppo basse.
ZA
di tensione
m
andi:
n
azione del
n
azione del
f
osse
e
s. un osso
p
eratura di
e
per la sua
o
rmalmente
r
a è rilevata
m
ento della
si accende
r
igorifero. Il
a
ta in quel
ghiaccio in
in funzione.
o
mpressore
r
e frigorifero
n
te
per non
lia di non
14
ON/OFF
23
3-4 SAF
E
NVR - N
O
3-5 PAN
E
The stainl
e
selectors:
1. Therm
o
2. Light u
p
The pu
s
3. Light u
p
The pu
s
mincer.
4. Light u
p
The rever
s
reverse th
e
along with
The ther
m
Such te
m
assemble
d
refrigerati
n
When the
thermosta
t
not workin
The push
thermosta
t
holding it
and the d
i
(room te
m
the refrige
When the
and holdi
n
the ice
b
To guara
n
the best
m
low temp
e
E
TY
A
ND PROTE
C
O
-Volt system rele
a
E
L CONTROL
e
ss steel panel contr
o
o
stat
p
push button ON (gre
s
h button ON is used
t
p
push button OFF (re
d
s
h button OFF is use
d
p
push button REVER
S
s
e push button is use
d
e
rotation of the wor
m
the meat into the thr
o
m
ostat is used to adj
m
perature is usually
d
. The temperature i
s
n
g coil of the barrel.
plug is connected
t
t
shows “OFF”, this
m
g.
button is used eit
h
t
and the refrigeratio
n
pressed for 3 or 4 se
i
splay shows the tem
m
perature) and the ice
ration unit is working.
refrigeration unit is w
o
n
g it pressed 3 or 4 se
b
lue icon disappear
s
n
tee a long lasting life
m
inced meat, it is adv
i
e
ratures.
C
TION DEVICES
a
se
o
ls contains the followi
en)
t
o start the mince
r
d
)
to stop the grinding
u
S
E GEAR
d
only in case it is nec
m
(e.g. if a bone has b
e
o
at).
u
st the refrigerating
t
preset when the
s
detected by a pro
b
t
o the socket, the di
m
eans that the refrige
h
er to start or to s
w
n
unit it controls: by p
u
conds, the refrigerati
o
perature detected in
t
blue icon on top left i
n
o
rking, by pushing th
e
conds, the refrige
r
ati
o
s
and the display
s
of the refrigeration u
n
i
sable not to exceed i
ng
u
nit of the
essary to
e
en fed
t
emperature.
machine is
b
e inside the
splay of the
ration unit is
w
itch off the
u
shing it and
o
n unit starts
t
hat moment
n
dicates that
e
push button
o
n unit stops,
s
hows OFF.
n
it and to get
n setting too

4 - INSTAL
4.1 POSIZI
O
Prima di i
n
d’appoggio
•
O
•
N
•
P
•
S
Si raccom
a
capovolger
l
posizione v
4-2 COLL
E
Confrontar
e
tensione di
Nel caso n
o
corrente m
a
La presa di
A monte d
e
protezione
c
4-3 DATI T
E
Numero
D
1
C
2 T
3
S
4
P
5
P
6 L
e
7
S
8
S
L
LAZIONE
O
NAMENTO DELLA
n
stallare la macchin
a
sia:
O
rizzontale e in piano
N
on sdrucciolevole
P
riva di asperità
S
ufficientemente solid
o
a
nda di non appoggi
a
l
a. Se ciò dovesse a
c
erticale corretta per a
l
E
GAMENTO ELETTR
I
e
i dati riportati sulla
t
rete.
o
n corrispondano, no
a
contattare il servizio
corrente deve corris
p
e
lla presa di corrente
c
ome indicato nella t
a
E
CNICI GENERALI
D
escrizione
C
arena in inox
T
ramoggia fissa
S
alvamano mod. 32
P
estello
P
annello comandi
eva bloccaggio/sbloc
c
S
istema di taglio enter
p
S
istema di taglio Unge
r
MACCHIN
A
a
, assicurarsi che l
a
o
da evitare cedimenti
a
re mai la macchina
c
cadere, lasciare la
m
l
meno 4 ore prima di
a
I
CO
t
arghetta di identifica
z
n inserire la spina n
e
di assistenza.
p
ondere alle norme C
E
si consiglia l’impiego
a
bella a lato.
c
aggio bocca
p
rise
r
parziale
a
superficie
di lato o di
m
acchina in
a
vviarla.
z
ione con la
e
lla presa di
E
E.
di fusibili di
V
OLTAGGIO TRIFA
S
(3phase)
V400 (Y)
V230 (∆)
V
OLTAGGIO MONO
F
(1phase)
V230 (240)
7
F
S
E
8
A
16
A
F
ASE
8A
6
5
1
8
F
USIBILI/Fuses
A
h 16Ah
A
h 35Ah
h
35Ah
2
3
4 – INST
A
4.1 POSI
T
Before ins
•
•
•
•
It is advis
a
upside do
position a
n
it.
4-2 ELEC
T
Compare
power su
p
If they do
Post-Sale
s
The powe
r
It is reco
m
be used
machines.
4-3 GEN
E
Ref. No.
1
S
2
3
4
5
6
7
8
3
4
A
LLATION
T
IONING OF THE M
A
talling the machine,
m
Horizontal and plane
Not slippery
Obstacle free
Sturdily built
a
ble not to lay the ma
c
wn. If that happens,
n
d leave it that way f
o
T
RICAL CONNECTI
O
the voltage data on
p
ply voltage.
not coincide, do not
p
s
Assistance.
r
socket must be conf
o
m
mended that protect
i
up-stream of the so
c
E
RAL TECHNICAL F
E
Description
S
tainless steel coatin
g
Fixed tray
Handsafeguard (32 t
y
Pushe
r
Panel control
Locking/blocking barr
e
Enterprise cutting sys
t
3
-elements Unger cut
t
CHINE
m
ake sure that the sur
f
c
hine on one of its sid
e
place the machine i
o
r at least 4 hours b
e
O
N
the nameplate with
t
p
lug in the machine a
o
rming to the EEC re
g
on fuses as specifie
d
c
ket in the case of
E
ATURES
g
y
pe only)
e
l lever
t
em
t
ing system
f
ace be:
e
or to turn it
n its vertical
e
fore starting
t
he electrical
nd contact a
g
ulations.
d
in the table
three-phase

4-4 PROV
A
ROTAZIO
N
La macchi
n
per quanto
Prima della
1. Verificar
e
sede e che
2. Allentar
e
alcuna pre
s
3. Avviare l
a
4. Controll
a
Nelle macc
ruota in s
e
posizione
d
o da una p
e
5. USO DE
1. Accend
e
anche il c
o
temperatur
a
2. Verificar
e
3. Avvitare
leggera pre
Non avvi
t
altrimenti
coltello po
5. Sollevar
e
6. Caricare
7. Avviare i
l
8. Introdur
r
spingendol
a
schiacciare
della stess
a
carne nel c
o
IMPORTA
N
Si racco
m
tritacarne
a
A
DI FUNZIONAME
N
N
E DELLA COCLEA
–
n
a viene fornita imball
a
riguarda il gruppo di
m
messa in funzione, p
r
e
che il gruppo di
m
la leva di chiusura (1
)
e
il volantino di chius
u
s
sione sulla piastra e
c
a
macchina.
a
re che la coclea ruoti
hine con alimentazio
n
e
nso inverso (orario
)
d
i due fili all’interno d
e
e
rsona qualificata.
LLA MACCHINA
e
re il termostato con
o
mpressore del frigor
a
ottimale di esercizio
e
che il gruppo di ma
c
il volantino di serrag
g
e
ssione sulla piastra f
o
t
are mai troppo il
l’eccesso di pressi
o
rta ad una loro rapi
d
e
il coperchio traspare
la carne nella tramog
l tritacarne
r
e la carne dalla tra
m
a
con il pestello (4)
troppo la carne ed
o
a
, si consiglia di intr
o
o
llo di alimentazione.
N
TE
m
anda vivamente d
i
a
vuoto e cioè senz
a
N
TO (
V
ERIFICA DEL
–
motori trifase)
a
ta e completamente
m
m
acinazione che la tr
a
r
ocedere come segu
e
m
acinazione sia corre
t
)
sia posizionata vers
o
u
ra (2) in modo che
n
c
oltello
in senso delle frecce
n
e a corrente trifase,
s
)
, è necessario far
e
lla spina dal servizio
il pulsante I (e di c
o
ifero) e attendere ch
(circa 10 minuti).
c
inazione sia bloccato
g
io (2) in modo che
e
o
rata e quindi sul colt
e
volantino di ser
o
ne sulla piastra f
o
d
a usura.
nte
gia (3).
m
oggia nel collo di ali
verso la coclea. Pe
r
o
ttenere una buona
m
o
durre con continuità
i
evitare di far fu
n
a
l’introduzione di ca
r
SENSO DI
m
ontata sia
a
moggia.
e
:
t
tamente in
o
il basso.
n
on eserciti
(antiorario)
s
e la coclea
invertire la
assistenza
o
nseguenza
e si crei la
e
serciti una
e
llo.
raggio (2)
o
rata e sul
mentazione
r
evitare di
m
acinazione
costante la
n
zionare il
r
ne
2
I
2
3
4
1
1
4-4 TEST
MACHIN
E
The mac
h
also the
m
1. Make
s
locking le
v
2. Loosen
hole plate
3. Start th
e
4. Make
(countercl
o
If the fe
e
clockwise
)
plug be r
e
Sales Ass
5 USE O
F
1. Switch
wait abo
u
achieved.
2. Make s
u
3. Turn th
knife and
p
Don’t tig
h
plate and
5. Lift the
h
6. Load th
e
7. Switch
o
8. Feed t
h
order to a
v
a better g
r
continousl
IMPORT
A
It is stro
operated
plate and
RUN (FEED WORM
E
S ONLY)
h
ine is delivered pa
c
m
eat tray and the grind
s
ure that the groundi
n
v
er (1) properly “close
d
the locking ring (2)
s
and knife.
e
mincer.
sure that worm
o
ckwise).
e
ding worm rotates
)
, it is necessary tha
t
e
versed. This operati
o
istance specialist or a
F
THE MACHINE
the thermostat on,I (
t
u
t 10 minutes unti
l
u
re that the grinding u
e locking ring (2) so
p
late.
h
ten the locking rin
knife.
h
opper cove
r
e
meat in the hopper
(
o
n the mince
r
h
e meat to the worm
v
oid an excessive pr
e
r
inding, it is suggeste
d
y into the feed throat
h
A
NT
ngly recommended
without meat infee
knife overheating.
ROTATION FOR TH
R
c
ked and completely
ing unit.
n
g unit is correctly fi
t
d
” (downwards).
s
o that no pressure i
s
rotates as shown
in the opposite d
t
the position of two
o
n must be pe
r
forme
d
qualified electrician.
t
he refrigeration unit
l
the operating te
m
nit is properly locked
that it exerts a light
g (2) to avoid a qu
(
3)
using the provided pl
e
ssure on the meat a
n
d
to feed the meat c
o
h
.
that the meat mi
n
d
. This is essential
R
EE-PHASE
assembled,
t
ted and the
s
exerted on
by arrows
irection (i.e.
wires in the
d
by a Post-
as well) and
m
perature is
.
pressure on
ick wear of
unger (4). In
n
d to achieve
o
nstantly and
n
cer be not
to prevent

6 PULIZIA DELLA MACCHINA
6.1 INFORMAZIONI GENERALI
Si raccomanda di eseguire un’accurata pulizia della macchina prima della sua messa in
funzione, dopo ogni uso, più volte al giorno nel caso fosse molto sporca o dopo lunghi
periodi di inattività.
Prodotti per la pulizia e metodi per eseguirla
Come prodotti per la pulizia utilizzare esclusivamente saponi e detergenti per stoviglie.
Pulire con strofinacci e spugne.
Dopo aver rimosso eventuali residui di carne, lavare ogni singolo pezzo con acqua calda e
detergente.
Risciacquare con acqua calda corrente ed asciugare.
Al fine di evitare danni meccanici, non sovrapporre od urtare i vari pezzi fra loro.
Per una maggiore e più efficace azione disinfettante, si consiglia di porre i vari componenti
in una bacinella d’acqua contenente una soluzione ipotonica al 3% di NaCl (Cloruro di
Sodio) e di lasciarli per circa 30 minuti, quindi risciacquare con acqua calda ed asciugare.
Tutte le parti amovibili possono essere lavate anche in lavastoviglie.
ATTENZIONE
La macchina non è protetta contro i getti d’acqua. Non eseguire la pulizia con getti di
vapore o getti ad alta pressione o metodi simili.
Nel modo più assoluto NON mettere la macchina sotto un rubinetto o in un lavello
perché ciò può causare corto circuiti o danni gravi alla macchina.
6.2 SMONTAGGIO DELLA MACCHINA PER LA PULIZIA
1. Spegnere la macchina.
2. Togliere la spina dalla presa di corrente.
3. Rimuovere il coperchio trasparente e rimuovere il pestello.
4. Allentare il volantino, sbloccare il gruppo di macinazione sollevando la leva sul lato della
macchina ed estrarlo dalla macchina.
Non cercare MAI di estrarre il gruppo di taglio e la coclea avviando la macchina in
quanto esiste il pericolo di procurarsi gravi ferite alle mani.
5. Disassemblare i componenti del gruppo di taglio.
6 CLEANING OF THE MACHINE
6.1. GENERAL INFORMATION
It is recommended that the machine is carefully cleaned before it is first operated, after use,
several time a day if it is very dirty and after long periods during which it has remained off.
Cleansing agents and methods
The only allowed cleansing agents are detergents suitable for kitchenware.
Clean with cloths and sponges.
After removing any debris of meat, wash each component in warm water and detergent.
Rinse with warm running water and wipe dry.
Do not stack or hit components against each other to prevent damages.
For a better and more effective disinfection, it is recommended that components are placed
in a basin containing a 3% NaCl (Sodium Chloride) hypotonic solution, and kept immersed
for approximately 30 minutes. Then rinse in warm running water and wipe dry.
All removable parts are also suitable for cleaning in dishwashing machine.
CAUTION:
The machine is not protected against water jets. Do not clean it with steam jets or
high pressure air blast or similar methods.
Positevely do not put the machine in a wash basin or under a faucet, short circuit or
serious machine damage may occur.
6.2 MACHINE DISMANTLING FOR CLEANING
1. Switch the machine off.
2. Remove the plug from socket.
3. Remove the transparent lid and remove the plunger.
4. Remove the front locking ring, before unlocking the mincing group by the side lever.
POSITEVELY do not try to pull the grinding unit and feed worm out of the barrel by
starting the machine as this may result in serious injuries to hands.
5. Remove the components of the mincing unit.

6.3 RIMO
N
Il rimonta
g
inversa ri
s
Si racco
m
attenzion
e
Rimonta
g
1. Verifica
APERTA
(
2. Inseri
r
alloggiam
e
chiavetta
spingerla
v
3. Blocca
r
di chiusu
r
chiusura.
Rimonta
g
1. Rimo
n
macinazio
2. Rimont
a
Prestare l
a
coltello si
a
NOTA
Se si pr
e
p
rima di r
im
che va i
n
vaselina.
3. Rimont
a
la macchi
n
Rimonta
g
1.Rimont
a
richiuderl
o
7. OPER
A
Controllar
e
coltello e
p
Rivolgersi
sostituzio
n
N
TAGGIO DELLA
M
g
gio dei vari com
p
s
petto allo smontag
g
m
anda di esegui
r
e
al fine di evitare d
a
g
gio della bocca d
i
re che la leva di c
h
(
verso l’alto).
r
e la bocca di
e
nto nella macchi
di riferimento allo
g
v
erso l’interno (sen
s
r
e la bocca di mac
i
r
a (1) verso il ba
s
g
gio della coclea
n
tare la coclea
o
ne.
a
re il gruppo di tagl
i
a
massima attenzi
o
a
rivolta verso l’este
e
vede un periodo
i
montare la piastra
f
n
contatto con il
a
re il volantino di
s
n
a non è usata im
m
g
gio del coperchio
a
re il coperchio t
r
as
p
o
.
A
ZIONI DI MANUT
E
e
periodicamente
l
p
erno elica.
all’Assistenza
T
n
e del perno elica.
MACCHINA
p
onenti avviene in
g
io.
r
e le varie oper
a
a
nni o infortuni
i
macinazione
h
iusura (1) sia nella
macinazione (2)
na facendo atten
z
g
giata nel support
o
s
o della freccia).
i
nazione (2) ruotan
s
so, nella sua po
all’interno della
i
o.
o
ne che la parte ta
g
e
rno (4).
di inatt
i
vità della
f
orata, lubrificare la
coltello con del
s
erraggio (3). Non
s
m
ediatamente.
trasparente
p
arente sulle sue c
e
E
NZIONE
l
o stato di usura
d
T
ecnica di zon
a
sequenza
a
zioni con
posizione
nel suo
z
ione alla
o
bocca e
do la leva
sizione di
bocca di
g
liente del
macchina,
superficie
grasso di
s
errarlo se
e
rniere e
d
i piastra,
a
per la
3
2
4
1
6.3 MAC
The ma
c
dismantli
It is rec
o
paying t
h
accident
s
Re-insta
1. Open
t
2. Insert
attention
support.
by the ar
r
3. Locki
n
its closin
g
Re-insta
1. Re-ins
2. Re-as
s
Install th
e
making s
If it is en
an exten
d
lubricate
the knife
3. Re-as
s
the mac
h
Re-asse
m
1. Re-as
close it.
7. CARE
Check th
worm pin
Apply to
the stoo
d
HINE REASSEMB
L
c
hine reassembly i
s
ng procedure in a r
e
o
mmended that all
h
e utmost attentio
n
s
and incidents.
llation of the barr
e
t
he locking lever (1
)
the barrel (2) into
to the reference
Push the barrel d
e
r
ow.
n
g the barrel, closi
n
g
position.
llation of the feedi
talling the feeding
w
s
embling the minci
n
e
knife on the squ
ure that its cutting
e
visaged that the m
a
d
ed period of time,
the holeplate surf
a
with petrolatum gr
e
s
embling the lockin
g
h
ine is not used im
m
m
bling of the tran
s
sembling the tran
s
e wear and tear st
a
.
the after sales ass
d
worm pin.
L
Y
s
carried out by f
o
e
ve
r
se order.
operations be car
r
n
in order to avoi
d
e
l
)
(upwards).
its seat in the mi
n
key located on
e
ep into the machi
n
n
g the leve
r
(1) do
w
ng worm
w
orm on the drive s
h
n
g unit.
are section of the
e
dge is facing outw
a
a
chine will not be
u
before installing th
e
a
ce that come in
c
e
ase.
g
wheel (3). Do not
m
ediately
s
parent lid
s
parent lid on its
h
a
tus of plates, knif
e
istance for the repl
a
o
llowing the
r
ied out by
d
damages,
n
cer paying
the barrel
n
e as show
w
nwards, in
h
aft.
worm stud
a
rds (4)
.
u
sed during
e
holeplate,
c
ontact with
tighten it if
h
inges and
e
and stood
a
cement of

http:
Via S.Pertini,29
47826 Villa Verucchio ––Rimini (It
///www.fimar rspa.it
aly)


This manual suits for next models
1
Table of contents
Other Fimar Commercial Food Equipment manuals
Popular Commercial Food Equipment manuals by other brands
Rational
Rational SelfCookingCenter SCC Training manual
frost-trol
frost-trol AIRY Series Installation and maintenance manual

YATO
YATO YG-05020 manual
Bartscher
Bartscher 109557 Instructions for installation, use and maintenance
Diamond
Diamond BN129/V-E8/T2 Technical instructions
ROCAM
ROCAM VEGA 1/1 C8+8 instruction manual

Vollrath
Vollrath Stoelting F231-I3 Operator's manual
HL Display
HL Display Multivo Max Mounting instruction
IPinium
IPinium Tina 1200BU installation instructions
Inomak
Inomak MHV711 operating instructions
Polar Electro
Polar Electro UA020-A instruction manual
EVEREST REFRIGERATION
EVEREST REFRIGERATION EPR1 owner's manual
