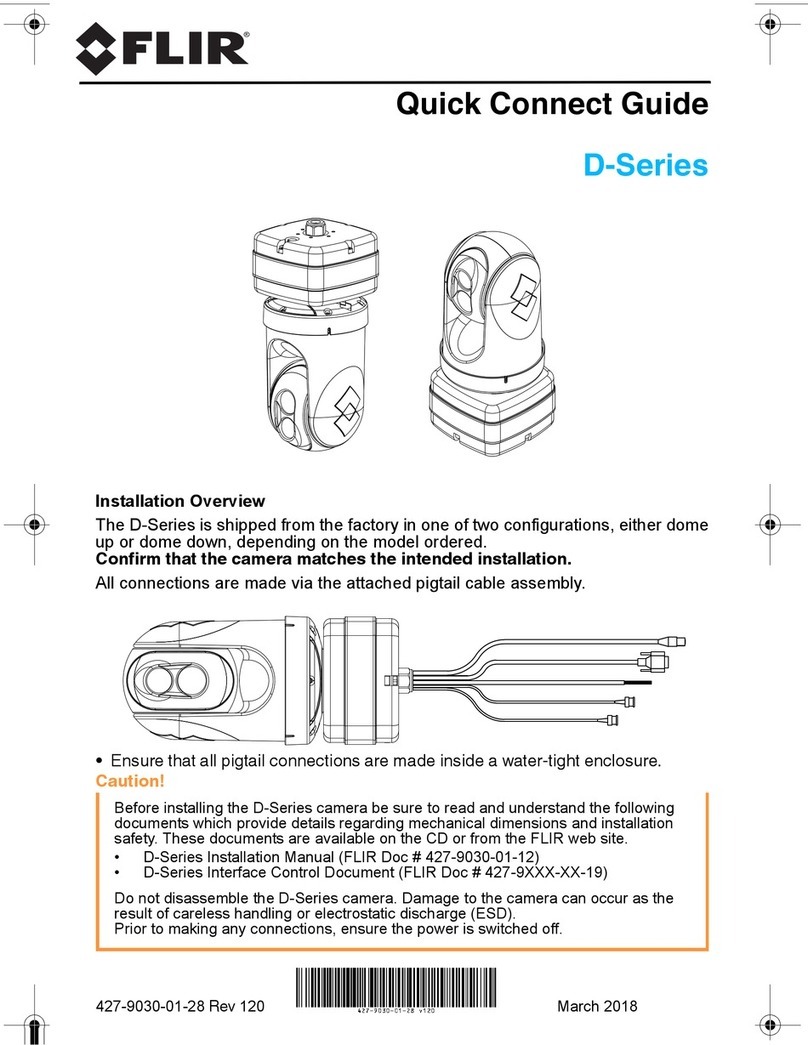
FLIR D-348 User manual

Installation
Manual
D-Series

427-9030-01-12 Version 140 March 2018 2
© 2018 FLIR Systems, Inc. All rights reserved worldwide. No parts of this manual, in whole or in part, may be copied,
photocopied, translated, or transmitted to any electronic medium or machine readable form without the prior written
permission of FLIR Systems, Inc.
Names and marks appearing on the products herein are either registered trademarks or trademarks of FLIR Systems,
Inc. and/or its subsidiaries. All other trademarks, trade names, or company names referenced herein are used for
identification only and are the property of their respective owners.
This product is protected by patents, design patents, patents pending, or design patents pending.
The contents of this document are subject to change without notice.
FLIR Systems, Inc.
6769 Hollister Avenue
Goleta, CA 93117
Support: https://www.flir.com/support-center/support-hq/
Important Instructions and Notices to the User:
Modification of this device without the express authorization of FLIR Commercial Systems, Inc. may void the user’s
authority under FCC rules to operate this device.
Note 1: This equipment has been tested and found to comply with the limits for a Class B digital device, pursuant to
Part 15 of the FCC rules. These limits are designed to provide reasonable protection against harmful interference in a
residential installation. This equipment generates, uses, and can radiate radio frequency energy and, if not installed
and used in accordance with the instructions, may cause harmful interference to radio communications. However,
there is no guarantee that the interference will not occur in a particular installation. If this equipment does cause
harmful interference to radio or television reception, which can be determined by turning the equipment off and on, the
user is encouraged to try to correct the interference by one or more of the following measures:
• Reorient or relocate the receiving antenna;
• Increase the separation between the equipment and receiver;
• Connect the equipment into an outlet on a circuit different from that of the receiver; and/or
• Consult the dealer or an experienced radio/television technician for help.
Note 2: This equipment was tested for compliance with the FCC limits for a Class B digital device using a shielded
cable for connecting the equipment to an analog video output to a monitor and using a shielded USB cable for
connecting the equipment to a personal computer. When making such connections, shielded cables must be used
with this equipment.
Industry Canada Notice:
This Class B digital apparatus complies with Canadian ICES-003.
Avis d’Industrie Canada:
Cet appareil numérique de la classe B est conforme à la norme NMB-003 du Canada.
Proper Disposal of Electrical and Electronic Equipment (EEE)
The European Union (EU) has enacted Waste Electrical and Electronic Equipment Directive 2002/96/EC (WEEE),
which aims to prevent EEE waste from arising; to encourage reuse, recycling, and recovery of EEE waste; and to
promote environmental responsibility.
In accordance with these regulations, all EEE products labeled with the “crossed out wheeled bin” either on the
product itself or in the product literature must not be disposed of in regular rubbish bins, mixed with regular
household or other commercial waste, or by other regular municipal waste collection means. Instead, and in order
to prevent possible harm to the environment or human health, all EEE products (including any cables that came
with the product) should be responsibly discarded or recycled.
To identify a responsible disposal method where you live, please contact your local waste collection or recycling service, your
original place of purchase or product supplier, or the responsible government authority in your area. Business users should contact
their supplier or refer to their purchase contract.
427-9030-01-12, Version 140 March 2018 3
Contents
Contents
D-Series Camera Installation
1.1 Warnings and Cautions .................................................................................................. 4
1.2 References .................................................................................................................... 4
1.3 Camera Overview .......................................................................................................... 5
1.4 Installation Overview ......................................................................................................5
1.5 Camera Connection Options ......................................................................................... 6
1.5.1 Supplied Components .......................................................................................... 6
1.5.2 Required Supplies ................................................................................................ 6
1.5.3 Bench Testing ....................................................................................................... 6
1.6 Location Considerations ................................................................................................ 7
1.6.1 Prior to Cutting/Drilling Holes ................................................................................ 8
1.7 Camera Mounting .......................................................................................................... 8
1.8 Camera Connections ..................................................................................................... 9
1.8.1 Connecting Power ................................................................................................ 9
1.8.2 Camera Grounding ............................................................................................. 10
1.8.3 Analog Video Connections .................................................................................. 10
1.8.4 Ethernet .............................................................................................................. 10
1.8.5 Serial Connection ............................................................................................... 10
1.9 D-Series Camera Specifications .................................................................................. 11
Basic Operation and Configuration
2.1 IP Camera, ONVIF Profile S Compliant ........................................................................ 13
2.1.1 Serial and/or IP Communications ........................................................................ 13
2.1.2 Server Configuration ........................................................................................... 13
2.2 Camera Bench Test ..................................................................................................... 13
2.2.1 Set IP Address using the FLIR Discovery Network Assistant (DNA) ................... 14
2.3 Log into the Camera Web Page ................................................................................... 15
2.3.1 Live Video Page .................................................................................................. 16
2.3.2 Camera Control and Status ................................................................................. 17
2.3.3 Web Control Panel .............................................................................................. 17
2.4 Camera Configuration .................................................................................................. 19
2.4.1 Expert and Admin Accounts ................................................................................ 19
2.4.2 Setup Menu ........................................................................................................ 19
2.4.3 Maintenance Menu ............................................................................................. 24
2.5 Thermal Imaging Overview .......................................................................................... 38
2.6 Troubleshooting Tips ................................................................................................... 39

427-9030-01-12, Version 140 March 2018 4
1D-Series Camera Installation
The D-Series Camera is a multi-sensor camera system on a pan/tilt platform. The system combines an
infrared thermal imaging camera and a visible-light video camera, and is intended for outdoor
installations.
This manual describes the installation of the D-Series cameras. If help is needed during the installation
process, please refer to https://www.flir.com/support-center/support-hq/ for support. All installers and
integrators are encouraged to take advantage of the training offered by FLIR; visit
https://www.flir.com/support-center/training/ for more information.
This manual includes the following topics:
• Installation overview
• Mounting the camera and its components
• Connecting the electronics
• Bench testing the camera
• Basic configuration and operation of the camera
• Camera Specifications
For safety, and to achieve the highest levels of performance from the D-Series camera system, always
follow the warnings and cautions in this manual when handling and operating the camera.
1.1 Warnings and Cautions
Warning!
Caution!
1.2 References
D-SERIES Interface Control Drawing (ICD) (FLIR Doc # 427-9XXX-XX-19)
Available from the FLIR website, provides further details regarding mechanical dimensions and
mounting for the D-Series camera.
If mounting the D-Series camera on a pole, tower or any elevated location, use industry standard safe
practices to avoid injuries.
Except as described in this manual, do not open the D-Series camera for any reason. Damage to the
camera can occur as the result of careless handling or electrostatic discharge (ESD). Always handle
the camera with care to avoid damage to electrostatic-sensitive components.
Prior to making any connections, ensure the power supply or circuit breaker is switched off.
Be careful not to leave fingerprints on the D-Series camera’s infrared optics.
Operating the camera outside of the specified input voltage range or the specified operating
temperature range can cause permanent damage.
Be sure to use a water-tight enclosure for the pigtail connections (rated IP 67 or higher).

427-9030-01-12 Version 140 March 2018 5
1 D-Series Camera Installation
1.3 Camera Overview
The D-Series camera is both an analog and an IP camera. The video from the camera can be viewed
over a traditional analog video network or it can be viewed by streaming it over an IP network using
MPEG-4, M-JPEG, and H.264 encoding. Analog video will require a connection to a video monitor or
an analog matrix/switch. The IP video will require a connection to an Ethernet network switch and a
computer with the appropriate software for viewing the video stream.
1.4 Installation Overview
The D-Series Camera is a multi-sensor thermal imaging camera system intended for outdoor security
applications. The system has a pan/tilt gimbal assembly with a dual payload that includes:
• An uncooled thermal imaging camera with fixed Field of View (FOV)
• A daylight camera with continuous zoom
It is shipped from the factory in one of two configurations,
either ball up1 or ball down, depending on the model
number ordered. The D-Series camera is intended to be
mounted on a heavy-duty fixed pedestal or wall mount
commonly used in the security industry. The camera
mount must support at least 11.4 kg (25 lbs).
The camera can be attached to the mount with a single
1.5” NPT stainless steel threaded coupler which is
supplied with the camera. Optionally the camera can also
be mounted to a surface with M5 fasteners (quantity 6).
The electrical connections can be made with a short pigtail
cable assembly which exits the base of the camera. The
camera will typically be mounted (either directly or via a
short coupler) to a water-tight enclosure for the pigtail
connections. In order to install the camera, it is not
necessary to open the camera’s electronics enclosure.
The pigtail connectors range in length from 300 mm (11.8 in) minimum to 450 mm (17.7 in) maximum.
1. A camera mounted in the ball up position has a limited range of downward tilt. The range of
tilt motion is 25° to -90° when ball down, -25° to 90° when ball up.
Figure 1-1: Pigtail Cable Assembly

427-9030-01-12 Version 140 March 2018 6
1 D-Series Camera Installation
1.5 Camera Connection Options
The camera can be powered with a conventional 24 Vac/Vdc power supply:
21 Vac to 30 Vac, or
21 Vdc to 30 Vdc.
The D-Series Camera produces analog or digital (IP) video output (or both). Analog video will require
at least one connection to a video monitor or an analog video matrix switch. In most analog
installations, two video connections will be used—one for the thermal camera video, and one for the
daylight camera video. The camera pigtail provides two BNC connectors for these video channels.
An Ethernet connection is provided for IP video streaming and for command and control
communications (pan/tilt/zoom/etc.). A PC or laptop with a web browser is also required for camera
configuration and maintenance (software/firmware updates).
For analog installations that are not using Ethernet/IP, a serial cable (RS232 or RS422) can optionally
be connected and used for command and control communications, supporting either Pelco D or Bosch
protocols. In installations using analog video and serial communications, it is recommended an
Ethernet cable is installed for camera configuration and troubleshooting using a PC with a web
browser.
For installations where the camera is mounted on a tower or pole or other location that may be difficult
to access, it is recommended the Ethernet connection should be installed from the camera down to
ground level at a minimum, to allow easier access.
1.5.1 Supplied Components
The D-Series camera package includes these standard components:
• Multi-sensor Pan/Tilt Camera Gimbal Assembly
• Stainless Steel threaded coupler (1.5” OD)
• Power connectors (qty 3)
• Ethernet coupler (RJ-45 jacks at each end)
Accessories are available from FLIR Systems, Inc. Contact your FLIR Dealer or integrator for up-to-
date information.
1.5.2 Required Supplies
The installer will supply the following items, as needed (specific to the installation).
• Water-tight enclosure for the connections
• 24 Vac or 24 Vdc power supply
• Power cable for system power; 3-conductor, shielded, gauge determined by cable length and
supply voltage
• Cat5e Ethernet cable for digital video and/or communications
• Coaxial RG59U cables for analog video (up to 2, with BNC male connector at the camera end)
• Serial cable for serial communications
• Camera grounding strap, camera mount, miscellaneous connectors and tools
1.5.3 Bench Testing
Connect the power, video, serial, and Ethernet connections and confirm that the video is displayed on
a monitor when the power is turned on. Confirm the camera can be controlled by moving it (pan/tilt).
Refer to Basic Operation and Configuration, pg. 13.

427-9030-01-12 Version 140 March 2018 7
1 D-Series Camera Installation
1.6 Location Considerations
The camera will require connections for power, video and communications. Ensure that cable
distances do not exceed the specifications and that cables adhere to all local and industry standards,
codes, and best practices. The D-Series camera should be mounted upright (ball up) or upside down
(ball down), depending on the model ordered. The camera should be mounted such that the FLIR logo
on the side of the camera is right-side up and readable.
A ball-up camera model can be mounted on top of the mounting surface. A ball-down camera model
can be mounted under an overhanging mounting arm, or underneath an overhanging mounting
surface such as eaves or an awning.
Note
If the camera is to be mounted on a pole or tower or other hard-to-reach location, connect and operate
the camera as a bench test at ground level prior to mounting the camera in its final location.
7.38
187.5
15.92
404.4
0.81
20.6
11.94
303.4
13.83
351.4
Cables (not shown)
exit at center of base
All dimensions are
in mm and (inches)
Cable Gland
Do not loosen
or remove

427-9030-01-12 Version 140 March 2018 8
1 D-Series Camera Installation
1.6.1 Prior to Cutting/Drilling Holes
When selecting a mounting location for the D-Series camera, consider cable lengths and cable routing.
Ensure the cables are long enough, given the proposed mounting locations and cable routing
requirements, and route the cables before you install the components.
Use cables that have sufficient dimensions to ensure safety (for power cables) and adequate signal
strength (for video and communications).
Caution!
1.7 Camera Mounting
The camera mount must nominally be rated to support at least 11.4 kg (25 lbs). For some installations,
the mount must support even greater weights. Use a mount which will provide adequate support in
adverse weather and environmental conditions. The D-Series camera can be secured to the mount
two ways:
• 1.5 in. NPT threaded coupler
Intended for rigid mounting with the supplied NPT stainless steel coupler, or equivalent.
Use PTFE pipe seal tape or equivalent on the coupler.
• M5 x 0.8 fasteners (quantity 6)
If using four M5 x 0.8 fasteners, the maximum depth of the fastener should not exceed 10.0 mm
(0.394 in). Use Loctite 222 low strength threadlocker for the M5 fasteners.
Refer to the ICD for additional information (FLIR Doc. # 427-9XXX-XX-19).
There is no need to open the electronics enclosure. All settings and adjustments are done through
software. There are no user-serviceable parts inside the camera enclosure.
Figure 1-2: D-Series Camera Bottom Mounting Holes
(7.38)
187.5
square
(2.598)
66.00
bolt circle
60.0°
6X M5 X 0.8
equal spacing
10 mm (0.394 in.) max
fastener engagement
1-1/2 NPT
All dimensions are
in mm and (inches)

427-9030-01-12 Version 140 March 2018 9
1 D-Series Camera Installation
Select a water-tight enclosure for the connections that allows adequate space for the cable
connections. This requirement may vary, depending on the installation. Do not exceed the bend radius
per the recommendation of the cable manufacturer. The typical cable bend radius is 50 mm to 75 mm
(2-3 in).
1.8 Camera Connections
Do not disassemble the camera, as it will void the camera warranty and could lead to damage if the
camera is not resealed properly.
1.8.1 Connecting Power
The camera can be powered with a conventional AC or DC power supply. Prior to making any
connections, ensure the power supply or circuit breaker is switched off.
The power cable supplied by the installer must use wires that are sufficient size gauge for the supply
voltage and length of the cable run, to ensure adequate current carrying capacity (for most installations
18 AWG is recommended). Always follow local building/safety codes.
Note
Table 1-1: Mounting Specifications
1M5 bolt circle diameter 66 mm (2.598 in)
26X M5 X 0.8 fasteners, equally spaced at 60°; maximum fastener engagement 10 mm (.394 in)
31-1/2 in NPT threaded opening
4Do not loosen or remove the cable gland nut; doing so could result in damage to the camera unit
Table 1-2: Power Connections
Wire Color Vac Vdc
Red Line DC +
Black Neutral DC -
Clear Chassis Chassis
The supplied connectors for the power connections will accept 16 AWG to 24 AWG wire size.
Figure 1-3: Power Cable (3 conductor)

427-9030-01-12 Version 140 March 2018 10
1 D-Series Camera Installation
The camera itself does not have an on/off switch. Generally the D-Series camera may be connected to
a circuit breaker and the circuit breaker will be used to apply or remove power to the camera. If power
is supplied to it, the camera will be powered on and operating.
1.8.2 Camera Grounding
Ensure the camera is properly grounded. Failure to properly ground the camera can lead to permanent
damage to the camera. Typical to good grounding practices, the camera chassis ground should be
connected to the lowest resistance path possible.
Grounding of the camera is accomplished by terminating the ground wire (clear wire of the power
cable pigtail). Additional grounding can be accomplished by connecting a grounding strap to one of the
6X bolt locations on the unit's mounting surface, with the other end connected to the nearest earth-
grounding point.
1.8.3 Analog Video Connections
The analog video connections from the camera use female BNC connectors. The video cable supplied
by the installer should be rated as RG-59/U or better to ensure a quality video signal and should be
terminated with male BNC connectors.
1.8.4 Ethernet
The Ethernet pigtail cable is terminated with an RJ-45 plug. Connect the supplied Ethernet coupler to
the pigtail cable, then connect a shielded cat5e/6 Ethernet cable to the other end of the Ethernet
coupler. Connect the far end of the Ethernet cable to a network switch.
1.8.5 Serial Connection
By default, the serial interface uses the Pelco D protocol, RS-422 standard, 9600 baud rate (8/none/1),
and address 1. The pigtail serial connection provides a female DB9 connector. The pinouts are as
follows:
Table 1-3: Serial Connector
Signal DB9F Pin Color wire
TxA 2Green
TxB 7White
RxA 8Black
RxB 3Red
Ground 4Brown

427-9030-01-12 Version 140 March 2018 11
1 D-Series Camera Installation
1.9 D-Series Camera Specifications
Thermal Camera
Specifications
Array Format 320 × 240 640 × 480
Detector Type Long-Life, Uncooled VOx Microbolometer
Effective Resolution 76,800 307,200
Pixel Pitch 25 µm 17 µm
Thermal Frame Rate NTSC: 30 Hz or 7.5 Hz or PAL: 25 Hz or 8.33 Hz
Optical
Characteristics
Model FOV Focal
Length Model FOV Focal
Length
D-348 48° × 39° 9 mm D-645 45° × 37° 13 mm
D-334 34° × 28° 13 mm D-625 25° × 20° 25 mm
D-324 24° × 19° 19 mm D-618 18° × 14° 35 mm
D-313 13° × 10° 35 mm
Zoom 2× & 4x E-zoom
Spectral Range 7.5 μm to 13.5 μm
Focus Range Athermalized, Focus-Free
Visible Camera
Specifications
Detector Type 1/4” Exview HAD CCD
Effective resolution 380,000 (NTSC), 444,000 (PAL)
Field Of View Field of view: 57.8° (H) to 1.7° (H)
Lens 3.4 mm (wide) to 122.4 mm (narrow),
F1.6 to F4.5
Video
Composite Video NTSC or PAL Standard
Video Compression Two independent channels of streaming MPEG-4, H.264, or
M-JPEG; for each camera.
Streaming Resolution
NTSC:
D1 (720 × 480), 4SIF (704 × 480), VGA (640 × 480),
SIF (352 ×240), QVGA (320 × 240)
PAL:
D1 (720 ×576), 4CIF (704 × 576), VGA (640 × 480),
CIF (352 × 288), QVGA (320 × 240)
Thermal AGC Modes Preset AGC modes and manual Brightness (ITT Mean), Contrast
(Max Gain), Sharpness (DDE Gain), and AGC Filter controls.
Thermal AGC Region of
Interest (ROI)
Default Presets and User definable to insure optimal image quality for
subjects of interest
Image Uniformity
Optimization
Automatic Flat Field Correction (FFC) - Thermal and Temporal
Tr i g g e r s
System
Integration
Ethernet Ye s
Serial Control Interfaces RS-232/-422; Pelco D, Bosch
External Analytics Compatible Ye s

427-9030-01-12 Version 140 March 2018 12
1 D-Series Camera Installation
Pan/Tilt
Pan Angle/Speed Continuous 360°; 0.5° to 60°/sec
Tilt Angle/Speed Tilt from horizontal: 25° to -90° when ball down,
-25° to 90° when ball up/0.5° to 30°/sec
Programmable presets 128
General
Weight 18.2 lb (8.3 kg)
Dimensions (L,W,H) 8” x 8” x 17" (Nominal)
(203mm x 203mm x 432mm)
Input Voltage 24 Vac (21-30 Vac)
24 Vdc (21-30 Vdc)
Power Consumption Maximum power at 24 Vdc = 75 W
Maximum power at 24 Vac = 85 VA
Environmental
IP rating (dust and water
ingress) IP56
Operating temperature range -25 °C to 70 °C (-13 °F to 158 °F)
-25 °C to 58 °C (-13 °F to 136 °F) black finish
Storage Temperature Range -55 °C to 85 °C
Humidity 0-95% relative
Shock MIL-STD-810F Transportation
Vibe IEC 60068-2-27
De-Icing / Anti-Icing MIL-STD-810F, Method 521.1
Compliance &
Certifications
EN 61000-6-4: 2007 Class A/CISPR 22: 2005 Class A
EN 61000-3-3: 1995+A1:2001+A2:2005
EN 61000-3-2: 2006
EN 50130-4: 1996+A1:1998+A2:2003
FCC Part 15, Subpart B, Class A
IP 66 (IEC 60529)
IEC 60068-2-27)

427-9030-01-12, Version 140 March 2018 13
2Basic Operation and Configuration
This chapter provides basic information on how to operate the D-Series camera. A bench test can be
used to verify camera operation before the camera is configured for the local network. This chapter
also provides general configuration information.
2.1 IP Camera, ONVIF Profile S Compliant
When the camera is connected to the network it functions as a server; providing services such as
camera control, video streaming, network communications, and geo-referencing capabilities. The
communications protocol used is an open, standards-based protocol that allows the server to
communicate with a video management client, such as FLIR Latitude or with a third-party VMS client,
including systems that are compatible with ONVIF Profile S. These clients can be used to control the
camera and stream video during day-to-day operations. Refer to the individual product web page at
https://www.flir.com/browse/security/thermal-security-cameras/ for a listing of supported VMS clients.
2.1.1 Serial and/or IP Communications
For a camera that is installed in a legacy-type CCTV network using analog video, the camera may
commonly be controlled with serial communications. The serial cable from the camera will be
connected to a keyboard/joystick device, or to a video switch, encoder, or DVR that has a serial
communication port. In this case the installer may want to configure parameters such as the address of
the camera, the baud rate, and so on. These parameters can be set through software using a web
browser. The parameters can also be set using DIP switches when IP communications are not used.
2.1.2 Server Configuration
It may be necessary for the installer to make a limited number of configuration changes to the camera
server, such as setting the IP communication parameters, setting new login passwords, as well as
some scene specific parameters. For example, each camera comes from the factory with the same
default IP address, so adding more than one camera to an IP network requires each camera to be
configured with a different IP address. On the other hand, many of the configuration parameters will
remain unchanged from the factory default settings.
2.2 Camera Bench Test
Since the camera offers both analog video and IP video, it is recommended that the installer test the
camera using the same type of connections as the final installation. If using analog video and serial
communications in the final installation, also test the IP communications when performing the bench
test. If any image adjustments are necessary, they can be done using a web browser over the IP
connection, and saved as power-on default settings.
Test serial communications by connecting a serial device such as a keyboard and confirm the camera
is responding to serial commands. It may be necessary to configure the serial device interface to
operate with the camera.
Once the camera is connected to a network and powered on, set camera network parameters using
the FLIR Discovery Network Assistant (DNA) software, perform a bench test by using a web browser to
view the video and control the camera, or view video in the local Network Video Management System
(for example, FLIR Latitudetm). The FLIR Discovery Network Assistant (DNA) software does not
require a license to use and is a free download from the individual product web page at:
https://www.flir.com/browse/security/thermal-security-cameras/.

427-9030-01-12 Version 140 March 2018 14
2 Basic Operation and Configuration
2.2.1 Set IP Address using the FLIR Discovery Network Assistant (DNA)
The D-Series camera is shipped with a static IP address: 192.168.250.116. Assuming the existing
network uses IP addresses that are unique and different than the default address on the camera,
configuring the camera for IP communications generally involves the following steps:
Step 1 Connect the Ethernet port of the camera to the existing IP camera network.
Step 2 Connect a PC or laptop to the same network.
Step 3 From the PC connected to the camera network, use the DNA utility to discover and display
the camera’s current IP address.
a Download the DNA utility.
b Unzip the utility, then double-click to run the executable file ( DNA.exe). All the units on
the VLAN are discovered.
c For additional instructions on using DNA, refer to the DNA User’s Manual available in the
Help ( ) link while the software is running.
Step 4 Select Assign IP to change the IP
address or to set IP addressing to DHCP.
Step 5 Double-click the camera in DNA’s
Discovery List to open the camera’s web
server Login page in Internet Explorer or
point your web browser to the camera’s IP
address.
Step 6 Using a web browser, configure the camera
settings, such as camera date/time, and
other parameters, so the camera is
compatible with the existing network.
Online manual
Select a filter
Click to sort
Select Assign IP
Right-click

427-9030-01-12 Version 140 March 2018 15
2 Basic Operation and Configuration
2.3 Log into the Camera Web Page
Use a web browser to connect to the camera’s web server using one of three User Names: user,
expert, or admin (the default passwords are user, expert, and admin respectively). The user login
can be used to do the initial bench test of the camera. The expert login may be used to make
configuration changes such as setting the IP address and other server settings. The admin login has
access to all configuration, setup, and maintenance settings. The login passwords should be changed
(admin login required) to prevent unauthorized access. Two web sessions can be active at once. An
inactive session will be logged out after 20 minutes.
For information on how to change the passwords, refer to Server > Security Options, pg. 27.
Note
Open a web browser and enter the camera IP address. The login screen with a picture of the camera
will appear. Enter user for the User Name and user for the Password, and click Log in.
A VMS Remote to the camera, ONVIF or Nexus CGI, uses the same password as the web interface.
Refer to Sensor > Communications > VMS Remote, pg. 32.
Figure 2-1: Camera Web Page Login Screen

427-9030-01-12 Version 140 March 2018 16
2 Basic Operation and Configuration
2.3.1 Live Video Page
The Live Video page displays a live image from the camera on the left part of the screen. Along the
top of the screen are some menu choices, including Live Video (the red text indicates it is selected),
Help and Log out.
On the right side are some control buttons.
In the lower right corner of the web page there is a frame rate selector. This selector allows the user to
change the rate at which the frames are displayed in the browser from the default 8 fps up to 16 fps.
This controls the frame rate of the user’s own web browser only, and does not affect the video streams
to other users or to an NVR. If the live video is not displayed, refer to Troubleshooting Tips, pg. 39.
Help
The Help menu displays software version information. If it is necessary to contact FLIR Technical
Support for assistance, it will be helpful to have the information from this page on hand.
Log out
Use this button to disconnect from the camera and stop the display of the video stream. If a web
session is inactive for 20 minutes, it will be stopped and it will be necessary to log in again.
Toggle PC/Camera time
Use this button to display either the PC time or the camera time.
Figure 2-2: Live Video Web Page – user login
Toggle Time

427-9030-01-12 Version 140 March 2018 17
2 Basic Operation and Configuration
2.3.2 Camera Control and Status
In the lower left of the screen are two indicator lights: Control and Status.
Initially the Control light is off, as in the image above, indicating the user is not
able to control the camera immediately. When multiple users are connected to
a camera, only one user at a time can issue commands to the camera. If
another user has control of the camera, the Control light is yellow.
A user is able to request control of the camera by clicking on the yellow or black
light, or simply by sending a command to the camera. After a short pause, the
Control light should turn green. Be patient, there may be a slight delay between
each command while the browser waits for a response from the camera.
If a command is sent to the camera when the user does not have control, the command will not be
executed, and it is necessary to send the command again once the light is green.
2.3.3 Web Control Panel
The control buttons on the right side of the page can control the camera. When the mouse cursor is
positioned over a button, a tool tip is displayed which explains the function of the button.
When the mouse is positioned over the video window, the video stream source is shown in the upper
left corner of the video image and a snapshot button is shown in the upper right corner of the video
image. The snapshot button will save an image as a .jpg file to the selected destination folder or as
determined by the web browser.
This same web interface is used with various FLIR thermal cameras, some of which have different
capabilities. As a result, different buttons in the control panel will appear for different FLIR cameras.
The functions of the buttons appearing for the D-Series cameras are described below:
Zoom In/Zoom Out
These buttons zoom the active camera (IR or daylight). On cameras with zoom
lenses, digital zoom or E-Zoom extends the ability to zoom in, but at the expense of
resolution. Also, refer to Sensor > Devices > IR > Zoom Slave, pg. 33.
Save snapshot
Video stream
or
Go to Preset position.
Refer to Surveillance > Scan List, pg. 23
Thermal Control Keypad Visible Control Keypad

427-9030-01-12 Version 140 March 2018 18
2 Basic Operation and Configuration
Toggle Video Source
This button causes the active video source to be switched between the thermal IR camera
and the daylight camera. Also, refer to Sensor > Devices > IR > Zoom Slave, pg. 33.
Toggle Polarity—IR only
This button changes the way various objects are displayed in the image, for example, with
hot objects displayed as white and cold objects as black, or vice versa.
Toggle Palette—IR only
This button causes the IR camera to cycle through different color palettes. Each of the
palettes presents the IR image using a different color scheme. Use the Toggle Polarity
button to invert the palette, for example, between white hot and black hot.
Perform IR NUC Calibration—IR only
This button causes the camera to do a manual Non-Uniformity Correction (NUC) operation.
The D-Series camera, by default, does an automatic NUC calibration as required based on
changes in temperature.
Toggle Scene Preset—IR only
This button causes the IR camera to cycle through different image settings. The Scene
Presets cause the image brightness and contrast to adjust. Depending on the time of day,
weather, and other conditions, one Scene Preset may be preferable to the others.
Toggle Automatic Gain Control (AGC)
This button causes the camera to cycle through different AGC options that use a
combination of settings to produce different configurations that could improve the video
image for a given set of conditions.
Freeze Video
This button stops the video on a single frame. Click again to start the video.
Autofocus
This button causes the DLTV camera to toggle the autofocus mode. Clicking the button a
second time reinstates the autofocus mode and causes an autofocus operation.
Function
When the Function button is selected, the keypad changes to a
numeric keypad. A tool tip can be shown when a function has
been assigned to a number. Use the back ( ) arrow to
return to the Control Panel.

427-9030-01-12 Version 140 March 2018 19
2 Basic Operation and Configuration
Pan/Tilt Home
This button causes the camera to go to the Home position. To set a new Home position,
hold the button for approximately 3 seconds.
Go to Preset
The D-Series camera can have a set of predetermined pan/tilt locations, each of which is
known as a preset. For example, a preset may be set for each of the locations where
security surveillance is most needed, a gate, doorway, and other points of access.
When the Go to Preset button is selected,
the keypad changes to a numeric keypad.
To cause the camera to go to a predefined location
view (Preset) select a number.
Use the back ( ) arrow to return to the Control Panel.
2.4 Camera Configuration
The following procedures describe how to do the most common camera configuration steps, such as
setting the camera IP address and hostname and changing the user passwords. To make these
changes, it is necessary to log in using the admin account.
Note
2.4.1 Expert and Admin Accounts
When a user logs in as expert or admin, additional menus, Setup
and Maintenance are available. The Setup menu is used to make
advanced adjustments to the thermal camera, the daylight camera,
and the pan/tilt platform.
The basic camera configuration steps are accessed through the Maintenance > Server menu, using
the menus on the left side of the page. The LAN Settings, Services, and Security Options
selections are described below (Maintenance Menu, pg. 24). The expert login has access to the
Server pages. The admin login provides access to all configuration options. The login passwords
should be changed (admin login required) to prevent unauthorized access.
2.4.2 Setup Menu
The Setup menu is used for GEO Settings, camera setup, and defining parameters for surveillance
zones.
When configuration changes are made with the web browser, the settings are saved to a configuration
file. It is a good idea to make a backup of the existing configuration file prior to making changes, and
another backup once the changes are finalized. If necessary the camera can be restored to its original
factory configuration or one of the saved configurations (refer to Files > Configuration, pg. 37).
In most installations, the only camera settings needed are available from the Live Video page
(using Scene Presets or Polarity). Use caution when modifying the camera settings described in
this section. Some settings may adversely affect the thermal image over time or may completely
disable the camera or the network interface.

427-9030-01-12 Version 140 March 2018 20
2 Basic Operation and Configuration
It is necessary to have control of the camera to make Setup changes. Changes made through the
Setup menu have an immediate effect (it is not necessary to stop and restart the server). To use these
settings at power up, it is necessary to save the changes.
Adjustments to the IR settings should only be made by someone who has expertise with thermal
cameras and a thorough understanding of how the various settings affect the image. In most
installations, the only camera settings needed are available from the Web Control panel on the Live
Video page (Scene Presets, Polarity, Palettes, and AGC). Haphazard changes can lead to image
problems including a complete loss of video.
Camera Control
This manual suits for next models
3
Table of contents
Other FLIR Thermal Camera manuals

FLIR
FLIR MS24 User manual

FLIR
FLIR FC-Series S User manual

FLIR
FLIR D-Series C User manual

FLIR
FLIR F-Series User manual

FLIR
FLIR C Series User manual

FLIR
FLIR Titanium DC019U-F User manual

FLIR
FLIR D-Series C User manual

FLIR
FLIR FLIR H Series User manual

FLIR
FLIR SR-100 User manual

FLIR
FLIR 614004898 User manual

FLIR
FLIR E series User manual

FLIR
FLIR TruWITNESS User manual

FLIR
FLIR K 5 Series User manual

FLIR
FLIR HM-Series User manual

FLIR
FLIR ThermaCAM SC640 User manual

FLIR
FLIR Exx series User manual

FLIR
FLIR HM-Series User manual

FLIR
FLIR A700 Series User manual

FLIR
FLIR M300 Series User manual

FLIR
FLIR M400 User manual