Manuel d'installation UTOPIA / UTOPIA User manual
Contenu du packaging
ìER°WHGHUDQJHPHQW
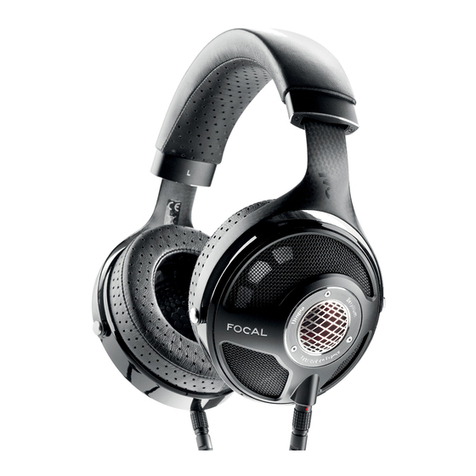
ìFDVTXH8WRSLD
ìF¤EOH02)&$:*DYHF
FRQQHFWHXU/(02
ìHQYHORSSHFRQWHQDQW
PDQXHOGåXWLOLVDWLRQ
EUDQGFRQWHQW
PDQXHOGHSU«FDXWLRQVGåHPSORL
%«U\OOLXP
PDQXHOGHJDUDQWLH
Package contents
ì1 case
ì1 Utopia headphones
ì1 OFC (4m; AWG 24) cable with
LEMO connector
ì1 envelope containing:
1 user manual
1 brand content
1 Berryllium warning
1 warranty guide
Branchement du casque
&KDTXHH[WU«PLW«GXF¤EOHSRVVªGHXQLQGLFDWHXU/SRXUJDXFKHHW5SRXUGURLWH
fig. 2YHLOOH]¢ELHQOHUHVSHFWHUORUVTXHYRXVEUDQFKH]OHF¤EOHDX[HQWU«HV/HW5
GHYRWUHFDVTXHLQGLTX«HV¢OåLQW«ULHXUGHOåDUFHDXfig. 1
5HPDUTXHOHVFRQQHFWHXUVGHF¤EOHQHSHXYHQW¬WUHLQV«U«VGDQVODSULVHGXFDVTXH
TXHGDQVXQVHXOVHQVfig. 2
Connecting the headphones
Each end of the cable is labelled with either an "L" for left, or an "R" for right (fig.2). Make
sure you connect each end of the cable to the correct headphone inputs which are also
labelled "L" and "R" inside the headband (fig.1).
Note: cable connectors can be plugged into the headphones in one sense only (fig.2)
Amplification
3RXUSURILWHUDXPLHX[GHVTXDOLW«VVRQRUHVGXFDVTXH8WRSLDQRXVYRXVFRQVHLOORQV
GHYRXV«TXLSHUGåXQDPSOLILFDWHXU'$&VS«FLILTXH7\SH'$&9GH1DLPfig. 3
5HOLH]OHFDVTXH¢OåDPSOLILFDWHXUJU¤FHDXFRQQHFWHXUMDFNPP
Amplification
To get the best sound quality out of your Utopia headphones, we recommend equipping
yourself with a specific amplifier/DAC (such as Naim’s DAC V1) (fig.3). Connect the
headphones to the amplifier using the 1/4" (6.35mm) jack.
Rangement
9RXVSRXYH]UDQJHUOHFDVTXHDYHFOHVF¤EOHVFRQQHFW«VGDQVODER°WHGHUDQJHPHQW
6L YRXV G«VLUH] G«FRQQHFWHU OHV F¤EOHV WHQH] OHV FRQQHFWHXUV SDU OH JULS fig. 2
SRXUG«EORTXHUODV«FXULW«HWSODFH]OHVGHX[SLªFHVGDQVOHVHPSODFHPHQWVSU«YXV¢
OåLQW«ULHXUGHODER°WHGHUDQJHPHQW
Storage
You can place your headphones with the cable plugged in into its case. If you want to
disconnect the cable from the headphones, hold the ends of the cable by the "grip"
(fig.2) to unlock the security. Then place the separate components in their relative
compartments in the case.
Soin et entretien
,OHVWSU«I«UDEOHGHQHWWR\HUU«JXOLªUHPHQWYRWUHFDVTXHSRXU«YLWHUWRXWULVTXHGåXVXUH
3RXUFHODQRXVYRXVUHFRPPDQGRQVGåXWLOLVHUXQFKLIIRQSURSUHVHFHWQRQSHOXFKHX[
,O SHXW DUULYHU DSUªV GH QRPEUHXVHV XWLOLVDWLRQV TXH OHV FRXVVLQHWV PRQWUHQW GHV
PDUTXHV GåXVXUH 'DQV FH FDV VL YRXV OH G«VLUH] LO HVW SRVVLEOH GH OHV UHPSODFHU
5DSSURFKH]YRXVGHYRWUHUHYHQGHXUDILQGHYRXVHQSURFXUHUGHVQRXYHDX[,OYRXV
VXIILWHQVXLWHGHG«FOLSVHUODSDLUHXVDJ«HHQWLUDQWHWGHUHSRVLWLRQQHUODQRXYHOOHVXU
OHVRUHLOOHWWHVfig. 4
Care and maintenance
It is advisable to clean your headphones regularly to limit wear and tear. To do so, we
recommend using a clean, dry lint-free cloth. After a lot of use, wear marks may be visible
on the ear cushions. In this case, if you wish to, the ear cushions can be replaced. Ask
your local Focal retailer for replacement parts.The ear cushions are easy to unclip, by
pulling them, and to clip back into place by pushing them back onto the ear-pieces. (fig.4)
