manuals.online logo
Brands
  1. Home
  2. •
  3. Brands
  4. •
  5. Freelap
  6. •
  7. Transmitter
  8. •
  9. Freelap Tx Gate Pro User manual

Freelap Tx Gate Pro User manual

Tx Gate Pro
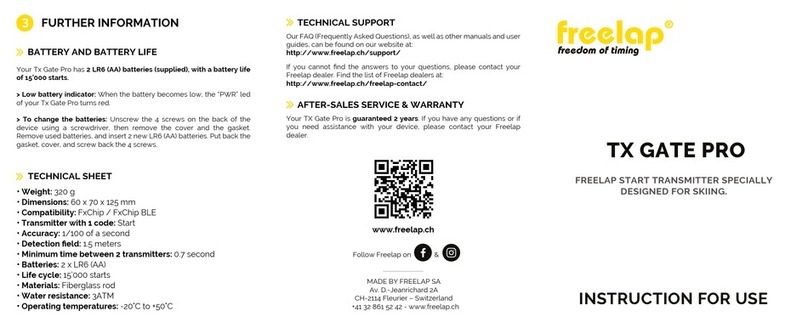
The Tx Gate Pro has 2 LR6 (AA) batteries (supplied), with a battery life of 15’000
starts.
• Low battery indicator: When the battery becomes low, the PWR led of the Tx Gate Pro
turns red.
• To change the batteries: Unscrew the 4 screws on the back of the device using a
screwdriver. Remove the cover and the gasket. Remove used batteries, and insert 2
new LR6 (AA) batteries. Put back the gasket, cover, and screw back the 4 screws.
• Weight: 320 g
• Dimensions: 60 x 70 x 125 mm - Stick lenght: 410 mm
• Compatibility: FxChip / FxChip BLE
• Transmitter with 1 code: START
• Accuracy: 1/100 of a second
• Detection field: 1.5 meters
• Minimum time between 2 transmitters: 0.7 second
• Batteries: 2 x LR6 (AA)
• Life cycle: 15’000 starts
• Materials: Fiberglass stick
• Water resistance: IP67
• Operating temperatures: -20°C to +50°C
Find our FAQ (Frequently Asked Questions), as well as other manuals and user guides,
on our website at: www.freelap.com/support
If you cannot find the answers to your questions, please contact your Freelap dealer.
Find the list of Freelap dealers at: www.freelap.com/freelap-contact
The Tx Gate Pro is guaranteed 2 years. If you have any questions or if you need
assistance with your device, please contact your Freelap dealer.
Further information
Battery and battery life
Technical sheet
Technical support
After-sales service & warranty
V211223
FREELAP SA
Av. D.-Jeanrichard 2A CH-2114 Fleurier – Switzerland
+41 32 861 52 42 - www.freelap.com
@freelap
Tx Gate Pro
PWR
About the Tx Gate Pro
Use of the Tx Gate Pro
Tx Gate Pro transmitter is a start gate specially designed for ski starts. When the skier
crosses the gate (at the moment when his shins move the gate’s stick of 10° according
to the FIS standard), Tx Gate Pro emits a signal that triggers the start of the FxChip’s
timer, automatically and instantly.
1. Prerequisites
Tx Gate Pro transmitter is a part of the Freelap timing system. To get your timing data,
you must attach the transponder to the skier’s ski boot, turn on and place your other
transmitters and your Relay Coach BLE, and use the MyFreelap app (cf corresponding
user manuals).
2. Get to know your device
The Tx Gate Pro does not have any buttons. It turns on automatically, in a fraction of a
second, when the skier takes the start (when the stick is moved by the skier). It turns off
automatically after each start.
• Plant a wooden stake ideally 4x4cm (not supplied) at the start area.
• Attach your Tx Gate Pro to the stake using the Velcro straps. The stick should be
placed at shins height (the snow-to-stick distance should be between 35 and 50 cm),
parallel to the ground. The face of the case of your transmitter must be turned towards
the track.
Stick: Triggers the start
Velcro straps: To attach the transmitter
PWR led: Indicates that the device is on (green)
Indicates when battery is low (red)
3. Turn it on
4. Place it on the track
5. Associate it with other Freelap transmitters
• Put yourself in starting position, both shins just in front of the stick.
• Start by crossing the gate (pushing the stick with your shins). The Tx Gate Pro emits
a signal that triggers instantly the start of the FxChip transponder. The PWR led and a
sound confirm that the start has been triggered.
• The fiberglass stick automatically returns to its initial position after each start.
7. Trigger the start
Tx Gate Pro
PWR
Placing the transmitter at any other location or position may result in
inaccuracies or non-detection.
00:07.71
ID
LastLAP
Ranking
Live•StandardTiming
MIKE
N°
1BA-0000
L1
L2
00:07.88(2)
00:04.5800:04.58
00:07.8800:03.30
00:07.92
2BA-0000
00:07.92(2)
00:07.88
+00.04
60
30
30
7.61
6.55
9.09
607.57
IDLAPSPLIT
(m)DIST.
(m/s)SPEED
00:07.83
3BA-0000
00:07.83(2)
-00.09
00:07.71
4BA-0000
00:07.71(2)
-00.12
607.66
607.7800:07.71
ID
DernierLAP Classement
Live•ChronométrageStandard
LEO
N°
1LEO
L1
L2
00:07.88(2)
00:04.58 00:04.58
00:07.88
00:03.30
00:07.88 60
30
30
7.61
6.55
9.09
ID LAP ÉCART SPLIT
(m)
DIST.
(m/s)
VIT.
00:07.92
1LUCA 00:07.92(2) +00.04 60 7.57
00:07.81
2LEO 00:07.81(2) -00.11
00:07.71
3LEO 00:07.71(2) -00.12
60 7.68
60 7.78
00:07.83
2LUCA 00:07.83(2) +00.02 60 7.66
Optional
Tx Gate Pro
Tx Track Pro
code FINISH
Tx Track Pro
code LAP
LED Display
Relay Coach BLE
Mobile device
FxChip BLE
START
FINISH
TxGate Pro
PWR
Optional
RELAYCOACH
DATA
STATUS
PWR/CHR
EXTPWR
AA-0001
FxChip
• Tx Gate Pro is a START transmitter. To make Freelap system work, you must have a
transmitter set with the code FINISH on your track, so:
- You must add one FINISH transmitter (1 Tx Track Pro transmitter set with the code
FINISH) on the finish line.
- You can add more Freelap transmitters (e.g: 1 Tx Track Pro transmitter set with the
code LAP to get intermediate times) at the desired distance(s).
• The Tx Gate Pro must be at a minimum time of 0.7 second from the next transmitter.
• Your track must contain a maximum of 11 transmitters.
Other Freelap Transmitter manuals

Freelap Tx Track Pro User manual

Freelap

Freelap Tx Track Pro User manual

Freelap TX TOUCH PRO User manual

Freelap

Freelap TX TOUCH PRO User manual

Freelap TX TRACK PRO User manual

Freelap

Freelap TX TRACK PRO User manual

Freelap PowerUnit User manual

Freelap

Freelap PowerUnit User manual

Freelap TX H2O PRO User manual

Freelap

Freelap TX H2O PRO User manual

Freelap TX JUNIOR PRO User manual

Freelap

Freelap TX JUNIOR PRO User manual

Freelap Tx Pad Pro User manual

Freelap

Freelap Tx Pad Pro User manual

Freelap TX GATE PRO User manual

Freelap

Freelap TX GATE PRO User manual

Popular Transmitter manuals by other brands

Goelst 6045 Series manual

Goelst

Goelst 6045 Series manual

WT sensor PCM260H quick start guide

WT sensor

WT sensor PCM260H quick start guide

Honeywell 5802mn2 - Ademco Wireless Panic Installation and setup guide

Honeywell

Honeywell 5802mn2 - Ademco Wireless Panic Installation and setup guide

CYP CH-1106TX & RX Operation manual

CYP

CYP CH-1106TX & RX Operation manual

BMS HELI-CODER 4 Operation manual

BMS

BMS HELI-CODER 4 Operation manual

Ditel Kosmos series manual

Ditel

Ditel Kosmos series manual

Arct PT-01 operating instructions

Arct

Arct PT-01 operating instructions

FAME EZ Wireless manual

FAME

FAME EZ Wireless manual

Doss UB101 instructions

Doss

Doss UB101 instructions

Questtel L-1SDI-NFE-TX user manual

Questtel

Questtel L-1SDI-NFE-TX user manual

Sling Media SlingStudio CameraLink quick start guide

Sling Media

Sling Media SlingStudio CameraLink quick start guide

Sennheiser SK 9000 instruction manual

Sennheiser

Sennheiser SK 9000 instruction manual

Air Monitor MASS-tron II/CEM Installation, operation and maintenance manual

Air Monitor

Air Monitor MASS-tron II/CEM Installation, operation and maintenance manual

ELT Sensor CD-300 Operation manual

ELT Sensor

ELT Sensor CD-300 Operation manual

Emerson Rosemount MCL-220 Reference manual

Emerson

Emerson Rosemount MCL-220 Reference manual

Portos RR-5T instruction manual

Portos

Portos RR-5T instruction manual

PC Electronics TX33-.1s user manual

PC Electronics

PC Electronics TX33-.1s user manual

Siemens SITRANS P LH300 Compact operating instructions

Siemens

Siemens SITRANS P LH300 Compact operating instructions

manuals.online logo
manuals.online logoBrands
  • About & Mission
  • Contact us
  • Privacy Policy
  • Terms and Conditions

Copyright 2025 Manuals.Online. All Rights Reserved.