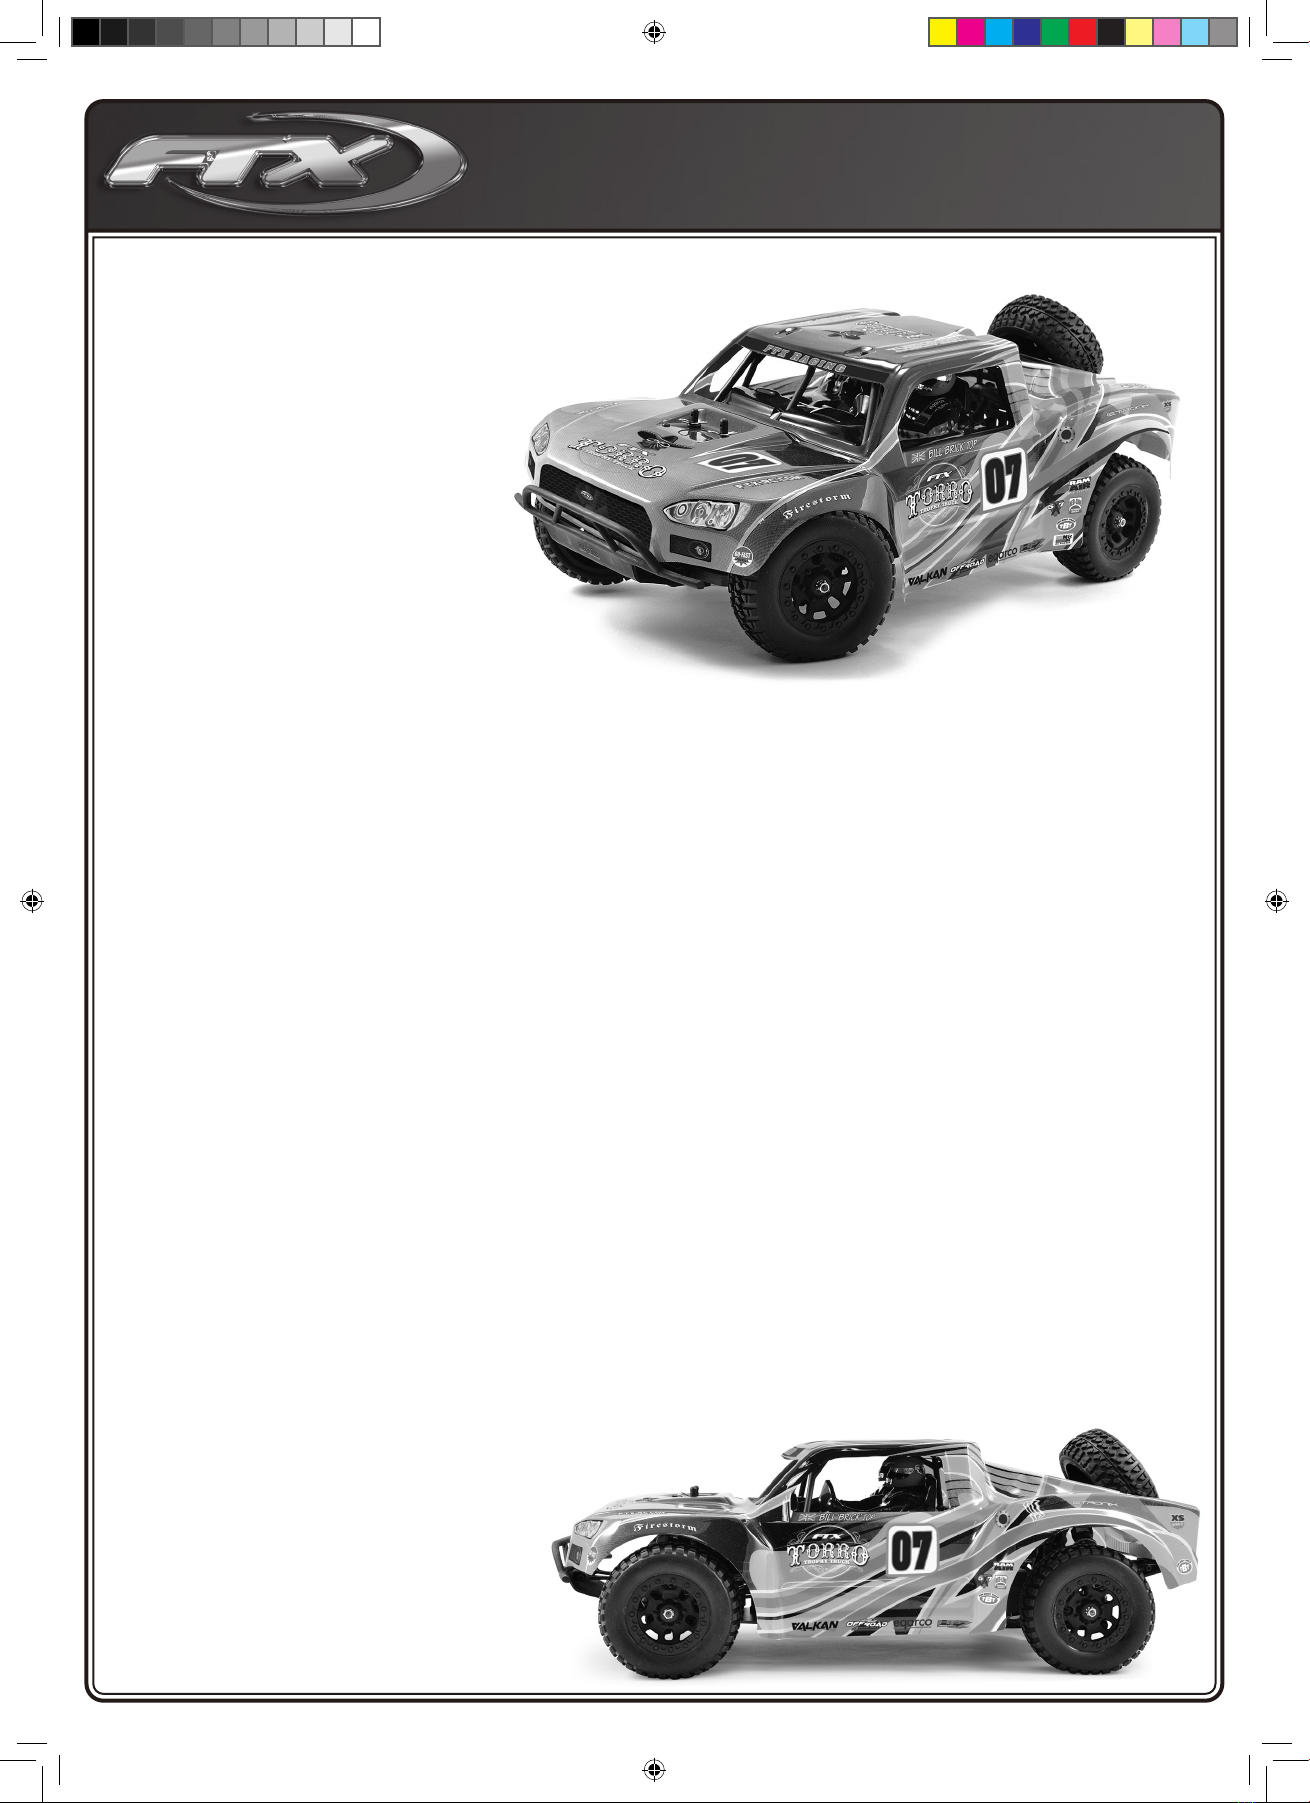
FTX TORRO User manual

1
FTXTorroIDManual.indd 1 12/07/2019 13:26

2
FTX TORRO 1/10TH SCALE 4WD
READY-TO-RUN
TROPHY TRUCK
Congratulations on your purchase of
the FTX ‘FTX Torro 1/10th Scale 4wd
Ready-To-Run Trophy Truck’.
This 1/10th scale model has been factory assembled and all
electrics installed and set up to make it the easiest possible
introduction to the sport of driving RC cars.
WARNING: Read the ENTIRE instruction manual to become
familiar with the features of the product before operating.
Failure to operate the product correctly can result in
damage to the product, personal property and cause
serious injury.
This is NOT a toy and must be operated with caution and common sense.
Failure to operate this product in a safe and responsible manner could result in damage, injury or damage to other property.
This product is not intended for use by children without direct adult supervision.
It is essential to read and follow all the instructions and warnings in the manual, prior to assembly, set-up or use,
in order to operate correctly and avoid damage or serious injury.
Safety Precautions and Warnings
• You are responsible for operating this model such that it does not endanger
yourself and others, or result in damage to the product or the property of others.
• This model is controlled by a radio which is possibly subject to interference which can cause momentary loss of control so it is advisable to
always keep a safe distance to avoid collisions or injury.
• Age Recommendation: 14 years or over. This is not a toy. This product is not intended for use by children without direct adult supervision.
Carefully follow these directions and warnings, plus those of any additional equipment associated with the
use of this model, fuel, starting equipment, engine, radio etc.
• Never operate your model with low transmitter batteries.
• Always operate your model in an open area away from cars, trafc or people.
• Never operate the model in the street or in populated areas.
• Always keep the vehicle in direct line of sight, you cannot control what you cannot see!
• Keep all chemicals, small parts and anything electrical out of the reach of children.
• Although the model includes waterproof servos and receiver, the model and engine are not suited to extensive running in wet weather conditions.
Long term damage can occur to the model and particularly the engine if run in prolonged wet conditions.
• Avoid injury from high speed rotating parts, gears and axles etc.
• Novices should seek advice from more experienced people to operate the model correctly and meet its performance potential.
• Exercise caution when using tools and sharp instruments.
• Do not put ngers or any objects inside rotating and moving parts.
• Take care when carrying out repairs or maintenance as some parts may be sharp.
• Do NOT touch equipment such as the engine heatsink head and exhaust pipe, immediately after using your model because they can generate high temperatures.
• Always turn on your transmitter before you turn on the receiver in the car.
Always turn off the receiver before turning your transmitter off.
• Keep the wheels of the model off the ground, and keep your hands away from the wheels
when checking the operation of the radio equipment or engine set-up.
• Prolong engine life by following the engine set-up and guidelines
outlined within the manual.
Contents:
• FTX Torro RTR Nitro Trophy Truck
• Transmitter - Etronix Pulse EX3G
FTXTorroIDManual.indd 2 12/07/2019 13:26

3
RECOMMENDED TOOLS FOR COMPLETION
Glow Igniter
8 x AA batteries
Air Filter Oil
Fuel Bottle
Nitro Fuel
FAST615
Fastrax 7-Piece Tool Set
Includes 1.5mm,
2.0mm, 2.5mm,
3.0mm hex wrenches,
slotted and phillips screwdriver.
FAST625 Cross Wrench
Five different hex sizes 7mm, 8mm,
10mm, 12mm & 17mm meet a variety
of tightening and loosening
applications for glow plugs, wheel
nuts and bolts.Can also store 4 glow
plugs, in centre section.
FAST691 Nitro Starter Set
The perfect set up pack includes glow starter and
charger, fuel bottle, screwdrivers and
cross wrenches.
ITEMS NOT INCLUDED BUT REQUIRED EQUIPMENT FOR OPERATION
FTXTorroIDManual.indd 3 12/07/2019 13:26

4
QUICK START GUIDE
Step 1
Install 4 “AA” batteries into the transmitter as per the Etronix
instruction booklet noting the proper direction of each cell.
Step 2
Open the radio box and Install 4 “AA” batteries in the battery holder
noting the proper direction of each cell.
Step 3
Insert the antenna tube in the top of the radio box. Feed the receiver
antenna through the tube until several inches extend out the top.
Install the antenna tip. If you choose to cut the tube down to size, do
so without the antenna installed.
Step 5
Apply air lter oil to help keep the dirt
out. The best method is to remove
the end cap (keep the lter connected
to the carb) and remove the foam
element. Dab the treatment all around
the lter, put the lter in a plastic
sandwich bag, and knead it until the
lter issaturated, but not soaked.
Step 6
Starting the Engine
You MUST read the engine running in guidelines and set-up on pages
9-12 before trying to start your engine. Below is a quick overview of
the starting procedure once the engine is RUN-IN.
1. Before attempting to start the engine from cold,remove the
glowplug with an 8mm nut driver prime the engine with fuel pull
the pullstarter rapidly with your nger over the exhaust pipe outlet
(IMPORTANT- only when cold!) until the
fuel has travelled to the carb, and then a
further 10-20 times to lube the engine.
Do not extend fully the pull start beyond.
Keep the extension to around 20cm with
short sharp pulls.
Do not extend fully the pull start beyond.
Step 4
Turn on the transmitter and then the receiver. Check to make sure
that the servos are operating correctly and that the carburetor closes
when the throttle trigger is released.
AT THIS POINT PLEASE FOLLOW THE SEPARATE ETRONIX RADIO
INSTRUCTION BOOKLET FOR RADIO SET-UP. MAKE SURE THAT YOU
SET THE FAILSAFE FEATURE ON THE TRANSMITTER.
FTXTorroIDManual.indd 4 12/07/2019 13:26

5
2. Then turn the car upside down and pull the pullstarter rapidly until
all the excess fuel has emptied onto the oor through the glowplug
hole. Make sure you do this outside safely. This process is really only
necessary when the engine is cold or brand new and tight.
Ret the plug ensuring the copper gasket washer is also retted.
Wind it all the way in and then re-wind 1 to 1.5 turns. This allows
gases to escape thus lowering the engines initial compression.
3. Start engine. Add fuel to the fuel tank using a suitable fuel bottle.
Use a glow plug heater to ignite the engine plug as illustrated and
start to pull the the pull starter (be careful not to extend too far as
mentioned previously). Ensure you have a small amount of carburetor
open (around 2mm) to allow for air intake to help starting.
NB: Images of Carnage NT used for
illustration purposes.
Warning! Flooding of the Engine
The most common cause of engine and pullstarter damage is from the
‘ooding” of the engine or a hydro-lock. More accurately this is too
much fuel inside the engines crankcase causing the piston to lock.
The piston rises to the top of the combustion chamber and instead
of compressing a gas i.e. fuel/air mixture it has to try and compress a
liquid, fuel only, which isn’t possible. This puts massive strain on the
piston, conrod and crankshaft as well as the starter. Invariably one
component will fail, usually the conrod causing massive damage to
the engines internals.
To avoid ooding the engine, always start the engine from cold using
the methods mentioned above and if at any time the engine becomes
dicult to turn over with the pullstarter, then remove the glowplug and
empty all excess fuel out and start again. The pullstarter assembly
can only be damaged by either over extension or a ooded engine.
So if you break a pull start this is possible warning of a ooded
engine.
IMPORTANT
– make sure the car is secured or o the ground while attempting to
start.
The engine will run “lumpily” or stop after a few seconds so try and
keep it running by blipping the throttle. Tighten the glowplug while the
engine is running if possible. If the engine has stalled restart with the
plug tightened. The above procedure should always be followed from
cold or if diculty with starting is being experienced.
4. Stopping the engine. To stop
the engine either use a stop tool to
cover the exhaust outlet or use a
ywheel stop tool.
IMPORTANT – Do not use ngers
as the exhaust will be HOT and the
ywheel ROTATING!
FTXTorroIDManual.indd 5 12/07/2019 13:26

6
Force .18 Nitro Engine Information
IMPORTANT - READ THIS BEFORE STARTING YOUR ENGINE!
For your safety - Your engine is not a toy!
• You will be working with highly ammable fuel, so keep it away from exposed ames
or any thing which might ignite it. Read the safety
info on the fuel container.
• Do not use fuels that were not designed for glow plug engines.
• Keep the fuel out of reach of children!
• Deadly carbon monoxide gas will be released, so do not operate the engine in an
enclosed area where exposed ames or sparks can
ignite it, or where it causes you to inhale it for prolonged periods.
• During operation, the engine may be dangerously hot to the touch
• Do not use the engine for purposes other than in model cars designed for them.
• Mount the engine securely.
Before Starting Your Engine
Oiling the lter
The air lter is essential for keeping dirt out of the engine. A foam lter must be
oiled before running the engine. We recommend using Fastrax FAST63 Filter
Oil treatment. Dab the treatment all around the lter, put the lter in a plastic
bag and knead it until the lter is saturated, but not soaked. NEVER RUN
YOUR VEHICLE WITHOUT THE AIR FILTER.
Adjustments
Your engine has come factory set to allow for an easy start and rich running .
DO NOT alter any of the settings until the running in period has been complet-
ed.
Putting fuel in the fuel tank
Squeeze the fuel bottle, put the bottle’s tube into your fuel container, and draw
out some fuel. Lift up the lid on the fuel tank, and slowly squeeze the fuel
bottle until the tank is full. Be careful here. If you overow the tank it might get
on your radio gear or on your brakes and you may create an unsafe driving
situation. Always keep your fuel bottle closed when not in use.
Understanding the engine terms “rich” and “lean”
Your carburettor has screws that regulate how much air and fuel enter the
engine together, the air/fuel mixture. An air/fuel mixture that is too “rich”
means there is too much fuel, and a mixture that is too “lean” means that there
is not enough fuel for the given amount of air. When the mixture is too rich,
performance will be sluggish (one symptom of this, is excessive amounts of
smoke from the exhaust). There is also a potential to foul the glow plug when
the mixture is too rich. When the mixture is too lean, there is not enough fuel
to cool or lubricate the internal engine components, and damage to the engine
and/or glow plug is almost certain.
CAUTION:
If, while you are driving, the engine stalls because of an overheating condition,
severe damage may have already occurred. Overheating is caused by the
following conditions.
• Fuel mixture is set too lean
• Air leak around carb
• Loss of muer pressure (line falls o)
• Excessive nitro content in the fuel
• Incorrect oil content in the fuel
• No air lter
• Poor quality of fuel
• Contaminated fuel
• Excessive loads on the engine (locked drivetrain)
Your engine will be short-lived if any of the above conditions are allowed
to exist for any length of time. During the rst few tanks watch closely for
any signs of overheating. These will include:
• Steam or smoke coming from the engine surfaces
• Cleaning out and then lagging during high-speed acceleration, as if it is
running out of fuel.
• Popping or clattering sound when slowing down.
Idle speed will surge or possibly diminish to the point of stalling.
To Test For Overheating
It’s important to check the head temperature during the operation of the
engine. The best method for checking the head temperature is to use a head
temperature gauge. There are several head temperature gauges available, and
the temperature readings between these dierent brands of gauges vary. Due
to this variance , the temperature readings will range between approximately
185 degrees and 225 degrees. About 185 degrees is the normal for the GO.18.
If you don’t have access to a head temperature gauge, you can use water to
check the head temperature. Place a drop of water on top of the cylinder head.
If it sizzles away immediately, shut down your engine. If it takes approximately
3-5 seconds for the water drop to boil away, then the engine is running within a
normal temperature range.
Start Your Engines
Running-In
The modern model car engine requires relatively little running in, due to the
use of ABC piston and liner assembly. The engine should be run on a rich set-
ting for approximately 6-8 tanks of fuel, with another 6-8 at a slightly less rich
setting. Once this has been completed, the internal engine components should
be properly seated and a normal setting can be used.
A good idea is to use a running in fuel as it is especially designed for breaking
in new engines without damage.
The best methods of checking on the running setting of the engine, is to rst
check the smoke trail coming out of the exhaust with the car is running. A
very rich setting would allow the car to pull away slowly or slugglish with a
momentary hesitation and lots of smoke from a standing start. When the car is
accelerating at full throttle, the engine will never “Clean Out”. When an engine
cleans out, the speed and the rpms will increase suddenly and dramatically,
as if the engine has switched to second gear. Also, the amount of smoke that
comes from the exhaust will decrease. Cleaning Out is a desirable characteris-
tic once the engine is fully broken in.
As the engine reaches normal operating temperature, it will speed up and
performance will increase. This occurs because the fuel mixture
is becoming leaner with the increased temperature. You will need to richen the
fuel mixture so that the engine continues to run as described above.
When the rst tank is almost gone, bring the car in and shut o the engine. Al-
low the engine to cool for 8 to 10 minutes before starting the engine up again.
Add more fuel. Start it back up and run the second tank of fuel. Again allow the
engine to cool before starting it up again.
The key to breaking in your engine is patience. During the break in period ,
your engine may appear to malfunction with problems such as stalling, incon-
sistent performance, and fouling out glow plugs. Don’t give up.
FTXTorroIDManual.indd 6 12/07/2019 13:26

7
These are just a few things you may go through during the break in period.
Just keep it running, apply the throttle on and o as smoothly as you can.
Sudden bursts or quick releases of the throttle can stall your engine. Soon
after break in your patience will pay o with a well running engine. The
performance level of the engine will be limited by the “rich’ fuel mixture which
you will use all during the break-in process. Once the engine is fully broken-in
the mixture can be “leaned out,” and speed and acceleration will increase.
Because of the rich fuel mixture and the wearing of the new parts, deposits will
form on the glow plug causing it to fail. Expect to replace the glow plug during
the break in period, and denitely when the engine is fully broken in and the
fuel mixture is leaned out.
Setting Engine for Normal
Tuning High Speed
As you approach the rst 6-8 tanks running you can start to GRADUALLY
adjust you engine for normal performance. PLEASE NOTE any adjustments
need to be very small at 1/8th turn increments. You can then begin adjusting
the fuel mixture to maximize performance for your driving needs. To lean turn
the main fuel control needle in a clockwise direction. This will allow the car
to pull away faster and more cleanly, without hesitation and increase the top
speed. There should however still be a noticeable smoke trail.
If the main needle is screwed in too far thus allowing the engine to run too
lean, it will seem to run strong at rst, but will bog, hesitate, or stall when
running at high speed. The engine will also rapidly overheat when the setting
is too lean. This is because fuel includes lubrication, and that lubrication is
inadequate when the setting is too lean. CHECK THE ENGINE TEMPERATURE
OFTEN AS YOU LEAN THE MIXTURE. DO NOT LET THE ENGINE OVERHEAT.
You should always see smoke coming from
the exhaust.
At the optimum setting, the engine will clean
out; have a strong-sounding, high-pitched
whine at full speed; and there will be a
thin trail of whitish smoke coming from the
exhaust. It is always better to set the engine
a little rich rather than too lean.
If the engine stalls on acceleration, begins
to bog or slow down at full throttle, or if
there is a reduction in exhaust smoke, then
the engine is running too lean. Immediately
turn the high speed mixture screw
counterclockwise 1/4 of a turn and operate
the car at medium speeds for 1 to 2 minutes
to allow the engine to cool.
Tuning Low Speed
The low-speed mixture aects how the
engine will perform in the low to mid
range rpms. Turning the low-speed needle
clockwise will lean the mixture. As with the
high-speed mixture, leaning the low-speed
mixture increases performance. Again, if the
mixture here is set too lean, the engine may
be starved for lubrication in the lowand mid-
rpm ranges, thus causing overheating and
excessive engine wear.
Perform the following test to determine if
the low speed mixture is set correctly. With
the engine warm and running, allow it to idle
for approximately 15 seconds. Now quickly
apply throttle and note the performance. If the engine bogs, accelerates
erratically, and a large pu of blue smokes emitted, then the low speed mixture
is too rich. Turn the low-speed screw clockwise 1/8 of a turn. If the engine
speeds up for a moment then bogs, hesitates, or stalls, then the low speed
mixture is too lean. Turn the screw counterclockwise 1/8 of a turn. Adjust the
mixture screws in 1/8 of a turn increments, wait 15 seconds, and retest after
each change. Adjust for the best acceleration without the car stalling.
Care and Maintenance
When you are nished racing for the day, drain the fuel tank. Afterwards,
energize the glow plug with your glow plug starter and try to restart the engine
in order to burn o any fuel that may remain inside the
engine. Repeat this procedure until the engine fails to re.
Try to eject residue while the engine is still warm. Finally,
inject some corrosion inhibiting oil, and rotate the
engine to distribute the oil to all the working parts.
Do not, however, inject the oil into the carburetor, for
it may cause the O-rings inside to deteriorate. When
cleaning the exterior of the engine, use WD-40. Do
not use gasoline or any solvents that might damage
the silicone fuel tubing.
Cleaning the air lter. When the air lter starts to get
dirty, do the following steps:
Step 1. Clean the foam with fuel. Do this by
pouring a little fuel in a small can and
kneading the lter in the fuel. When it
looks cleaner, then dispose of the fuel.
Step 2. Dry the lter. Squeeze out the fuel with a paper
towel until it’s dry.
Step 3. Fastrax Fast63 Filer Oil to help keep the dirt out.
Dab the treatment all around the lter, put the lter
in a plastic sandwich bag, and knead it until the
lter is saturated, but not soaked.
Troubleshooting
Glow Plug Problems
The glow plug in your engine is an inexpensive consumable
item which must be replaced periodically to maintain peak performance and
starting ease. Most often, any starting problems or erratic performance can
be traced back to the glow plug. The glow plug should also be checked if the
engine’s acceleration and top speed performance suddenly becomes at. The
only sure way to test for a faulty glow plug is simply install a new one to see if
the problem goes away. Remove the plug from the cylinder head with a 8mm
nut driver. Make sure there is no dirt or debris on top of the head which could
fall into the engine. Do not loose the copper gasket which seals the glow plug.
Touch the glow plug to the contacts of the glow plug starter. All of the coils
should glow white. Sometimes the rst few coils will not glow while the rest are
bright, most likely indicating a bad plug. If the glow is dim orange, then the glow
starter battery should be replaced or recharged.
At the high rpm that the engines operate only a top quality plug will cut the
mustard. Therefore we recommend the use of the Fastrax Platinum No.4
glowplug (FAST760-4).
Fuel Mixture
The fuel mixture is the largest variable you have to control while operating your
engine.
Fuel brand, ambient temperature, and humidity all eect how your mixture
should be set. If the engine runs great one day but runs rich or lean the next
day, it is probably the result of a change in the air quality and temperature. This
should be expected and adjusted for.
Although there are many fuels on the market, very few are designed to perform
and protect your engine at the likes of 35,000rpm that some of our engines can
attain.
Keep between 16-20%
nitromethene content for running
and rst use. The single most
popular reason for engine failure or
unreliability is poor or wrong fuel.
HIGH SPEED
ADJUSTMENT
IDLE ADJUSTMENT
LOW SPEED
ADJUSTMENT
FTXTorroIDManual.indd 7 12/07/2019 13:26

8
Pull Starter Hints
The pull starter as tted to most of the entry level engines is, if
treated correctly, the easiest and most cost eective method of starting an
engine. As with every silver lining, there is a cloud. The pullstart system is
similar to that of a lawnmower to look at, but that is where the similarity
ends. The pullstarter is susceptible to breaking if the engine is ooded or
not lubricated enough. To ensure this does not happen, a few simple rules
should be followed.
1. Before attempting to start the engine from cold, remove the
glowplug and then prime the engine with fuel. For cars with a primer
button on the tank, press this until the fuel has travelled along the fuel
pipe to the carburettor and then a further 10-20 presses. For cars without
a primer on the tank, pull the pullstarter rapidly with your nger over the
exhaust pipe outlet until the fuel has travelled to the carb, and then a
further 10-20 times to lube the engine.
2. Then turn the car upside down and pull the pullstarter rapidly until
all the excess fuel has emptied onto the oor through the glowplug hole.
Ret the plug ensuring the copper gasket washer is also retted. Wind it
all the way in and then re-wind 1 to 1.5 turns. This allows gases to escape
thus lowering the engines initial compression.
3. Start engine. The engine will run “lumpily” or stop after a few
seconds so try and keep it running by blipping the throttle. Tighten the
glowplug while the engine is running if possible. If the engine has stalled
restart with the plug tightened.
The above procedure hould always be followed from cold or if
diculty with starting is being experienced.
Flooding of the Engine
The most common cause of engine and pullstarter damage is from the ‘ood-
ing” of the engine or a hydro-locked. More accurately this is too much fuel
inside the engines crankcase causing the piston to lock. The piston rises to the
top of the combustion chamber and instead of compressing a gas i.e. fuel/air
mixture it has to try and compress a liquid, fuel only, which isn’t possible. This
puts massive strain on the piston, conrod and crankshaft as well as the starter.
Invariably one component will fail, usually the conrod causing massive damage
to the engines internals.
To avoid ooding the engine, always start the engine from cold using the meth-
ods mentioned above and if at any time the engine becomes dicult to turn
over with the pullstarter, then remove the glowplug and empty all excess fuel
out and start again. The pullstarter assembly can only be damaged by either
over extension or a ooded engine. So if you break a pull start this is possible
warning of a ooded engine.
Description
Engine will not start
Starter will not pull
Engine starts and
then stalls
Engine sluggish /
poor performance
Engine overheats
Engine hesitates or
stumbles
Engine stalls instantly
when throttle is fully
opened from idle
Engine stalls while
driving around turns
Problem
Out of fuel
Improper or contaminated fuel
Glow starter not charged
Glow plug bad
Engine ooded
Engine overheating
Carburetor incorrectly adjusted
Exhaust blocked
Air cleaner blocked
Engine is ooded
Rope is jammed
Engine seized
Idle speed set too low
Air bubbles in fuel line
Glow plug is fouled
Engine is overheated
Insucient fuel tank pressure
Blockage at exhaust header tting
High-speed fuel mixture is too rich
Leaking glow plug
Fuel bad or contaminated
Carburetor dirty or blocked
Engine overheating
Engine over geared for application
Clutch slipping
Bound up drive train
High-speed fuel mixture is too lean
Cooling air is being blocked
Excessive nitro in the fuel
Excessive load on the engine
Low-speed mixture too lean
High-speed mixture too lean
Low-speed mixture too rich
Engine overheated
Air bubbles in fuel line
Glow plug fouled
Glow plug fouled
Low-speed mixture too lean
High-speed mixture too rich
Fuel level is low
Idle speed set too low
Soloution
Fill fuel tank
Replace fuel
Charge glow starter
Replace glow plug, see “Glow Plug Problems”
See “ ooding” section.
Allow engine to cool, richen fuel mixture, check airow
Readjust carburetor
Clean exhaust system
Clean air lter
Clear excess fuel, see “ooding” Section.
Repair starter.
Examine engine for damage.
Increase idle speed.
Check for holes in the fuel line.
Replace glow plug, see “Glow Plug Problem” section.
Allow engine to cool, richen fuel Mixture, check airow
Replace pressure hose- clear
Check ow to and from the tank.
Set high-speed mixture to a leaner setting
Check glow plug gasket
Replace fuel
Clean Carburetor
Stop the engine- nd the cause
Use a lower gear ratio
Replace clutch shoes
Find the bound item and repair
Richen high-speed mixture
Get air to the head
Use fuel with lower nitro
Check for bound up drive train
Richen low-speed mixture
Richen high-speed mixture.
Lean low-speed mixture.
Stop the engine and nd the cause.
Check for holes in fuel line.
Test or replace plug
Replace glow plug.
Richen low-speed mixture.
Lean high-speed mixture.
Add fuel
Increase idle speed.
FTXTorroIDManual.indd 8 12/07/2019 13:26

9
Cooling Problems
Engine overheating is most often caused by running the engine too lean or
because the cooling air for the cylinder head is blocked. If the mixture is too
lean, simply allow the engine to cool, richen the mixture and try it again. Bodies
must have holes cut in them to allow for cooling air to circulate over the sur-
face of the cylinder head. On most bodies, it is a good idea to cut part of the
wind-shield out and part of the back window to allow for additional cooling.
Factory Settings for Force .18
All new engines are assembled with what we will term ‘factory settings’. These
settings should allow almost all engines to be started up and allow for minimal
adjustment for running in purposes.
Bearing this in mind, we are oering you the opportunity of re-adjusting to the
‘factory settings’ based on engines currently held in stock.
Main Needle Valve – High Speed Adjustment (HSA)
Screw down until resistance is met, and no further movement is apparent. RE-
OPEN 3 1/4 TURNS.
Throttle Adjustment Screw – Idle Adjustment (IA)
Gently shut o carburettor sliding body and slowly re-open by means of ad-
justing screw.
ADJUST SCREW UNTIL APPROX 1 or 1 1/4mm OF APERTURE APPEARS
BETWEEN THE END OF THE THROTTLE BODY AND AIR INTAKE APERTURE.
Sub Throttle Needle Valve –
Low Speed Adjustment (LSA)
With adjustment screw setting in place, close o the throttle body against the
screw. Very gently screw in the needle valve until it closes o the supply fuel
nozzle and is prevented from re-opening by the entry of the needle valve into
the centre hole of the fuel nozzle (work with great care with this one - we are
only looking for minimal frictional contact between both parts).
RE-OPEN VALVE 2 1/2 TURNS.
Glossary of Carburettor Functions
Main Needle Valve (High Speed)
The main needle mixture screw controls how much fuel enters the engine dur-
ing mid- to high-speed operation. The screw is turned clockwise to lean (less
fuel) and anti-clockwise to richen (more fuel)
Sub Throttle Valve (Low Speed)
This screw meters the fuel at low speeds. The low-speed mixture screw is
located in the end of the carburetor, inside the throttle arm.
This screw controls how much fuel enters the engine at idle and low throttle.
This adjustment will smooth the idle and improve the acceleration to mid
speed. Make this adjustment with the throttle closed, after setting the idle. The
screw is turned clockwise to lean (less fuel) and anti-clockwise to richen (more
fuel)
Throttle Adjustment Screw
The throttle adjustment screw regulates the throttle opening to control the idle
speed. The screw is turned clockwise for a higher idle speed and anti-clock-
wise for a lower idle speed.
HSA
IA
LSA
FTXTorroIDManual.indd 9 12/07/2019 13:26

10
FTXTorroIDManual.indd 10 12/07/2019 13:26
••
••
•
P•tsE
EX3G
2.4GHzFHSS
RADIO
SYSTEM
SAFETY PRECAUTIONS
• •••
This radio
system
is
designed
for
use in high
quality
radio-controlled
models.
To
ensure
your
safety
and
that
of
other
people
around
you, please
follow
these
guidelines carefully.
1.
Always
follow
local
laws
or
regulations regarding
the
operation
of
radio-controlled
models.
2.
Always
turn
on
the
transmitter
first,
followed
by
the
receiver. When finished,
turn
off
the
receiver
first
followed
by
the
transmitter.
3.
Please
do
not
attempt
to
modify
this
product.
Etronix
cannot
be
held responsible
for
any
damage
that
might
occur
to
the
product
as a result
of
an
unauthorised
modification.
4. Please
make
sure
the
batteries in
the
transmitter
and
those
used
to
power
the
receiver have
sufficient
power
before using
your
model. Using
batteries
with
insufficient
power
will
reduce
the
range
of
the
radio
and
may
result in a loss
of
control.
5.
Make
sure
that
any
servos
and/or
ESC are securely
connected
to
the
receiver
at
all times.
6.
Please keep
the
radio
system
away
from
moisture, heat, fire
and
sources
of
electronic
interference
at
all times.
7. Please
do
not
make
any
adjustments
to
transmitter
settings
while
the
model
is in
motion.
Always
wait
until
the
model
is
standing
still before
making
any
adjustments
to
the
transmitter
settings.
8. The
low
voltage
warning
will
activate
when
the
battery
in
the
transmitter
is
below
4.4v. The LED on
the
transmitter
will flash blue
and
will
be
accompanied
by
a
beeping
sound.
Please
stop
using
your
model
immediately
if
the
low
voltage
warning
activates
to
prevent loss
of
control.
9.
Etronix
will
not
be
held liable
or
responsible
for
any
damages
caused
by
the
operation
of
your
radio-controlled
model.
QUICK OPERATION GUIDE
Transmitter/Receiver
Binding
1. Turn on
the
transmitter
while
holding
down
the
'3CH'
button
located
on
the
hand
grip. Release
the
button
when
the
LED
on
the
transmitter
starts
flashing blue
and
you
hear a
beeping
noise. The
transmit-
ter
is
now
in it's
binding
mode.
2. Turn on
the
receiver. The LED
on
the
receiver will
be
flashing green slowly. Place
the
transmitter
next
to
the
receiver then
press
the
'Bind'
button
on
the
receiver until
you
see
the
green LED
on
the
receiver
flash
rapidly
then
return
to
a
slow
flash. Release
the
button
on
the
receiver.
3. Turn
the
transmitter
off
then
switch
it
back
on
again;
the
LED on
the
receiver
should
become
solid
green. The
binding
process
is
now
complete.

11
FTXTorroIDManual.indd 11 12/07/2019 13:26
-I
••
••
• • •••
Aux
Channel
(3CH) :
Steering
Dual
Rate
Adjustment
Press
the
3ch
one
time
to
activate
it
and
press
it
again
to
return
the
servo
back
to
neutral
position.
The dial
marked
'ST
D/R' on
the
transmitter
controls
the
amount
of
servo
travel. You
should
adjust
this
to
give
maximum
steering travel
with-
out
the
servo straining. Turning
the
dial
clockwise
gives
more
travel and
turning
it
anti-clockwise
gives
less travel.
Important-
incorrect
Dual Rate
settings
can
reduce
the
life
of
servos
connected
to
your
radio.
If in
doubt
use
slightly
less travel.
Channel
Reversing
1.
To
reverse
the
direction
of
servo
travel, please press
and
hold
the
'ST RIN' (for Channel 1)
or
'TH
RIN'
(for
Channel
2)
on
the
transmitter
for
a
few
seconds
until
you
hear a
beeping
sound,
then release
the
button.
It
is
not
possible
to
reverse
the
direction
of
operation
of
Channels 3
and
4.
Failsafe
Setup
1.
Put
the
throttle
trigger
to
the
desired
failsafe
position
(we
advise
50%
brake
for
nitro
models
and
neutral
for
electric
models) then press
the
'F/S'
button
on
the
receiver until
the
LED on
the
receiver flashes green then
returns
to
solid.
Once
the
LED is solid
the
failsafe has
been set. The failsafe
position
needs
to
be
reset every
time
the
transmitter
and receiver have been
through
the
binding
process.
F/S
bu
tt
on
2.
The failsafe
will
return Channel 2
to
the
set
position
in
the
event
of
signal loss
from
the
transmitter
or
in
the
event
of
low
battery
voltage
supply
to
the
receiver. If
battery
power
to
the
receiver is
lost
com-
pletely
then
the
failsafe
cannot
operate.
1-

12
FTXTorroIDManual.indd 12 12/07/2019 13:26
-I
••
••
•
TH/ST
Trim
Adjustments
1. The
buttons
on
the
transmitter
marked 'TH Trim' and
'ST Trim'
allow
you
to
make
fine
adjustments
to
the
neutral
point
of
the
servo on
your
model. The neutral position
of
the
trim
adjustments
is identified
by
a long beep.
Receiver
Connections
1. The steering servo
should
be
con-
nected
to
Channel 1
of
the
receiver, with
the
throttle
servo
or
ESC
connected
to
Channel2.
2.
Channel 3
of
the
receiver operates as a
two-position
switch,
so
would
normally
be
used
to
control a
forward
and
reverse
gearbox
(if available) on a nitro
powered
model,
or
a
Hi/Low
ratio
transmission
(if available). Please
consult
the
manufacturer
of
your
model
for
details
of
option
parts
available.
• •••
1-

13
EXPLODED DIAGRAM PARTS LISTING
FTXTorroIDManual.indd 13 12/07/2019 13:27

14
FTXTorroIDManual.indd 14 12/07/2019 13:27
•
••
••
R
oun
~
liud
S..
lf
T
.:l
ppirog H
<>><So
r
<>
w
B 0 M
....
C.:>
p He
.>dH
ao<Sor
<>W
1-
....
•
'las
he
r 0
Ny lo
nl
o
e>kNut
•
O
'Ri
~
FAST123
\\
,.
,
I
0
0
I
FTX6415
~~
~
-:
.
--
FASTM3
"
~
'"'i
I
FTX6526
(M3X1
0)
CARNAGE
SINGLE
SPEED
TRANSMISSION
(KIT
STD)
B 0 M
Cap Hu
dH
,.><Sc r
""
~
....
H3
*2Cl
•
h!
3*
;)
E o
lip
n
Ba
ll80!
a
ring
0
FTX6435
(2
speed
option)
FTX6423
~~/
(single
speed)
.
~
·
·
~/~
\
~~
I
FAST114
FTX&2J4
-~~
FTX6436
(two
speed
211)
OPTION
. G
.
..
~
~
·
~
·
.
.~
..,..,
_
......
'
::
'-
·
,'
...
_
-~
..
·
"-'.;
FTX6426
(single
speed
std.)
FAST122
(M3x3)
-~
/
~
~~):._
FTX6428
FTX6427
FTX6418
/
• •••
ENGINE
ASSEMBLY
FTX6149
FORCE
18
PULL
START
ENGINE
(M3X28)
~l
FAST117
(M3X15)
"-,
FASTM3
...
~-u--1
' I
' I
FTX6430
FTX6427
~-~
FTX6516
~\
~ ~
FAST123
(M4X4)
~~~-~
FTX6537
(M3X8)
~~
-
FTBB16
(10X5X4)
~\
:
\I
\\
FTX6429
/
~
\
FAST123
(M4X4)
FTX6542
(M3X10
1121)
FTX6442
FTX6438
~~
CARNAGE
TWO
SPEED
TRANSMISSION
(OPTION)
B 0
iYPE
IC
ON
C
.aplit
..IH
'""S"
'
""
~
....
s
..
t
s.,
,
..
,.
•
Edip
n
One'll;ry B
u,
inc
Q
Ba
l l k
"ri"f
0
M Sl'fC
"'
FTX6437
I I
FAST123
(M4X4)
ll4*4
~~-I
~~
I
• I
I
~
·
.:.;_
·
I
•

15
FTXTorroIDManual.indd 15 12/07/2019 13:27
•
••
••
FTX6543
FTX6530
FTX
Y
~
FTX6513
- i •
FAST114
(M3X8)
-...._
FAST118
/
FTX6527
.
~
~~
,)
I
FTX6506 FTX6517
FTX6231
\
FTX6232
\ .
~
·
FTX6228
~
':S
.·
!\~
FTX6511
FAST123
FT8B15
(15X1
OX4)
FTX6525
FTX6948
If\-
~
/
'
~
\
FTX6235
FTX6237
FTX6537
(M3X12)
--
~
'
FTX6538
'
FTX6502
\
FTX6538
FTX6328
~
,
I
FTX6503/
\ /
'""
' \ ./
FTX6321
,.
_
FTX6506
~
FTX6597
• •••
FTX6235
FTX6966
,~
~
FTX6967

16
FTXTorroIDManual.indd 16 12/07/2019 13:27
••
••
•
FTX6525(M3X
~
~
FTX6559
STEERING
SERVO
FTX6520
ET0255
FTX6407
--
-
FTX6950
-I
'-
~'
FTX6407
• •••
-~~----==----=
FTX6411
..
-.
/j
\
'
/I
\
"'
I \
~,.,,.
\
FTX6535
-
~
'
\
(M3X10)
'
\j
FAST122
(M3X3)
' .
•
-"
-~
FTX6410
------,?"
FTX6525
./
~/~
FTX6559W
FTX6526
""'~
FTX6405
FUEL
TANK
FTX6517
FTX6531
(M3X6)
-~~
.
y
-~
FTX6525
FTX6525
(M3X8)
I
~
'''
FAST940
~-
T
1
-~
FTX6535
I
FTX6535
(M3X8)
~~
~~~
!
1-

17
FTXTorroIDManual.indd 17 12/07/2019 13:27
••
••
• • •••
-I
1-

18
PARTS LISTING
PARTS LISTING
FTXTorroIDManual.indd 18 12/07/2019 13:27

19
PARTS LISTING
FTXTorroIDManual.indd 19 12/07/2019 13:27

20
PARTS LISTING
FTXTorroIDManual.indd 20 12/07/2019 13:27
Table of contents
Other FTX Motorized Toy Car manuals

FTX
FTX OUTBACK XP MINI ROCKVAN UNITRAK User manual

FTX
FTX Surge MT User manual

FTX
FTX Crawler Mini Outback 3.0 Ranger 1:24 RTR User manual

FTX
FTX 5576B User manual

FTX
FTX OUTBACK FURX 2.0 User manual

FTX
FTX FTX5591 User manual

FTX
FTX Buggy Vantage 2.0 Brushed RTR User manual

FTX
FTX Kanyon User manual

FTX
FTX HOOLIGAN JNR User manual

FTX
FTX Outback Hi-Rock User manual
Popular Motorized Toy Car manuals by other brands

REVELL
REVELL Henschel Typ33 D1 Assembly manual

DF-models
DF-models df Crawler 3046 manual

Hunter Products
Hunter Products Rollplay W458 Owner's manual and assembly instructions

Serpent
Serpent S411 Eryx 3.0 instruction manual

Shopify
Shopify BDM0913 Installation and operating instructions

BELKITS
BELKITS Ford Escort Rs1600 Mk1 quick start guide