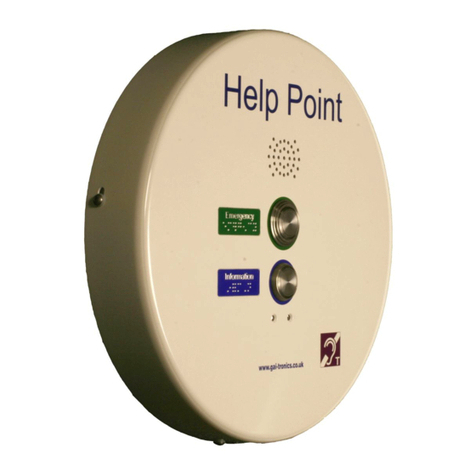
GAI-Tronics Help Point PHP400 GSM User manual

Doc. No. 502-20-0130-015 Iss 1. Apr 2019. (CN42260-008)
Installation and User Guide
PHP400 GSM Help Point
With Ampetronic HLS-DM2 Induction Loop Amplifier
230V AC power supply
GAI-TRONICS
A division of Hubbell Ltd.

PHP400 GSM Help Point. 2
CONTENTS
1. Safety and Care Information.....................................................................................4
2. Product Description and Features ............................................................................5
3. Operation / Testing...................................................................................................7
3.1. Making a Call................................................................................................7
3.2. Answering calls.............................................................................................7
3.3. Ending the Call .............................................................................................7
3.4. Receiving calls..............................................................................................7
3.5. Operating at extreme temperatures ..............................................................7
3.6. Testing the GSM module ..............................................................................7
4. Installation and dimensions ......................................................................................8
4.1. General.........................................................................................................8
4.2. Units dimensions and weight ........................................................................8
4.3. Site requirements..........................................................................................9
4.4. Important Notes for Installers and Maintainers..............................................9
4.5. Opening the Unit...........................................................................................9
4.6. Installation method......................................................................................10
4.7. Remote aerial. ............................................................................................10
5. Connections & Set-up.............................................................................................11
5.1. Connections between Front and Rear Sections..........................................11
5.2. Power connections......................................................................................11
5.3. Earth connections.......................................................................................11
5.4. Internal power connections.........................................................................12
5.5. Relay outputs..............................................................................................12
5.6. Internal connections....................................................................................12
5.7. Installing the SIM ........................................................................................13
5.8. LED indications and operating states..........................................................13
5.9. Switch on and test.......................................................................................14
5.10. Switching the phone off (power down) ........................................................15
5.11. Operating states of the phone.....................................................................15
6. Programming, configuration and diagnostics..........................................................15
6.1. Sending Commands by SMS......................................................................16
6.2. Sending Commands via USB port...............................................................16
6.3. List of Commands (for use with either SMS or USB)...................................17
7. Troubleshooting......................................................................................................28
7.1. Phone not responding to 1234stat0 request via SMS:.................................28
7.2. ERROR light is permanently ON.................................................................28

PHP400 GSM Help Point. 3
7.3. ERROR light flashing Long/Fast .................................................................28
7.4. FUNCTION and ERROR lights flashing Long/Fast......................................28
7.5. FUNCTION and ERROR lights flashing Short/Slow....................................28
8. Induction Loop Amplifier.........................................................................................29
9. Cleaning.................................................................................................................29
9.1. Normal Cleaning.........................................................................................29
9.2. Stainless Steel Push-buttons......................................................................29
9.3. Graffiti.........................................................................................................30
9.4. Anti-Graffiti Coating.....................................................................................30
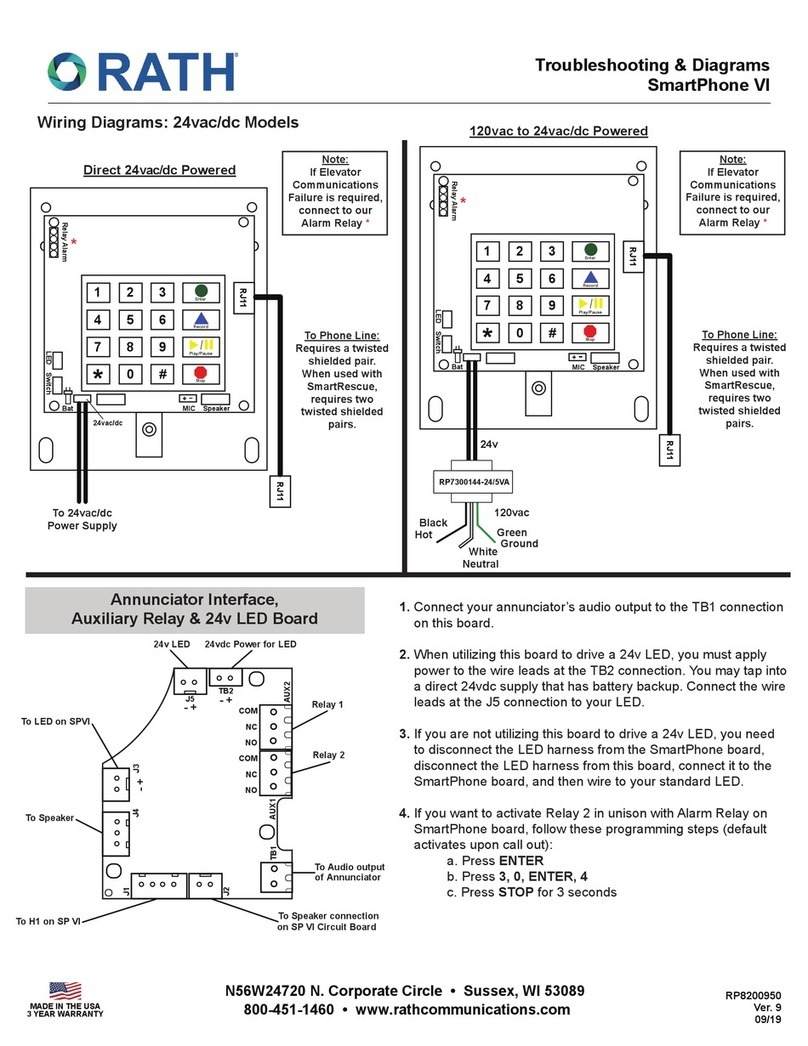
10. Aftercare.................................................................................................................30
11. Repairs and Spare Parts. .......................................................................................30
12. Technical Specifications.........................................................................................31
13. CE Declaration.......................................................................................................32

PHP400 GSM Help Point. 4
1. Safety and Care Information
▲
Please read these instructions thoroughly before starting installation. These
products must only be installed and maintained by competent personnel
familiar with electrical and telephone installation.
▲
IMPORTANT: THIS EQUIPMENT CONTAINS HAZARDOUS VOLTAGES
▲
THIS EQUIPMENT MUST BE EARTHED
▲
MAINS SUPPLY MUST BE ISOLATED ELSEWHERE BEFORE OPENING THE
CASE.
▲
Cabling and connections must be in accordance with local electrical safety
regulations (such as BS7671 IEE regulations, latest edition).
▲
Mains connection must be made via a 2 pole disconnection device, with a
minimum contact clearance of 3mm in accordance with EN 62368-1 Annex L.
▲
IMPORTANT! This phone, like any wireless phone, operates using radio signals
and the wireless network, which cannot guarantee connection in all conditions.
Therefore, you should never rely solely upon any wireless phone for essential
communications (e.g. medical emergencies).
Remember, to make or receive any calls, the phone must be switched on,
appropriately configured and in an area with adequate cellular signal strength.
Emergency calls may not be possible on all wireless phone networks, when certain
network services or phone features are in use or on phones without a full keypad
unless an auto-dial button is programmed to call an emergency number. Check with
local cellular service providers. Emergency calls may be made even when a SIM card
is not installed (subject to network availability) using a recognised emergency dialling
code such as 112.
▲
Operating environment
Make sure that no special regulation is in force that imposes restrictions on the use of
mobile phones. Restrictions to mobile phones would also apply to this telephone.
Most modern electronic equipment is shielded from radio frequency (RF) signals.
However, certain electronic equipment may not be shielded against the RF signals
from your phone.
▲
Pacemakers
Pacemaker manufacturers recommend that a minimum separation of 20 cm (8
inches) be maintained between a handheld wireless phone and a pacemaker. The
same restriction should apply to the external antenna of this phone, where fitted. If
you have any reason to suspect that interference is taking place, switch off the phone
immediately.
▲
Hearing aids
The phone’s radio signals may interfere with some hearing aids. In such cases move
the antenna as far away as practical or consult your hearing aid supplier.

PHP400 GSM Help Point. 5
▲
Other medical devices
Operation of any radio transmitting equipment, including the phone, may interfere
with the function of inadequately protected medical devices. Consult a physician or
the manufacturer of the medical device to determine if they are adequately shielded
from external RF energy or if you have any questions. Switch off the phone in health
care facilities when any regulations posted in these areas instruct you to do so.
Hospitals or health care facilities may be using equipment that could be sensitive to
external RF energy.
▲
Radio transmission equipment
While GAI-Tronics GSM products are designed to conform to international standards
regarding the acceptance of radio frequency interference, certain installation
locations may interfere with their proper operation. We recommend that GAI-Tronics
GSM equipment is not installed in close proximity to any equipment that generates
RF signals (for example, radio transmitters), and is located as far as possible away
from it or in a separate room.
▲
Potentially explosive atmospheres
Do not install the phone or site the antenna in any area with a potentially explosive
atmosphere and obey all signs and instructions. Areas with a potentially explosive
atmosphere are often but not always clearly marked. They include chemical transfer
or storage facilities; vehicles using liquefied petroleum gas (such as propane or
butane): areas where the air contains chemicals or particles, such as grain, dust or
metal powders.
▲
The fitted aerial is rugged but has limited resistance to deliberate damage or
vandalism. The aerial can be mounted remotely if appropriate, see section 4.7
2. Product Description and Features
This manual describes the GSM (cellular) version of the GAI-Tronics 400mm circular
Help Point, with features including:
•230Vac powered
•Weather and vandal resistant casing
•Large, palm-operable, vandal resistant buttons
•Raised text and Braille legends
•Internal induction loop
•Integral, vandal resistant aerial (can also be mounted remotely).
•Remote programming and diagnostics via SMS
•Auto-dial numbers are remotely programmable
•Automatic acoustic path mic and speaker testing
•“Rollover” feature to try alternative numbers if the first autodial call does not
connect.
•Penta band WCDMA (3G), quad band GSM (2G) communication, takes standard
(2FF) 2G/3G SIM card (not supplied)
Models are available with different pushbutton options.

PHP400 GSM Help Point. 6
The Help Point casing is a two-part construction with electronics in both sections. The 2
sections are held together with 4 security screws though the sides, and there are
several cables between the 2 sections. Cable entry points are provided to top and
bottom of the casing. Blanking plugs are provided for unused cable entries.
Note: PHP400 Help Points are usually permanently powered from an external power
source, and are therefore not normally fitted with internal batteries. Elements of the
diagnostic software may therefore indicate “battery fault” or similar messages. These
messages do not indicate actual faults if batteries are not fitted.
Speaker
Pushbutton
Microphone
Raised text /
Braille legend
Call progress
LED
Security fixings
(4 positions)
Aerial
Lower cable
entry point

PHP400 GSM Help Point. 7
3. Operation / Testing
3.1. Making a Call
To make a call, press the required button and wait for connection. A brief burst of tones
is heard to signify that the call has been placed to the pre-programmed number.
3.2. Answering calls
To receive a call, press any button when ringing is heard.
3.3. Ending the Call
There is no direct way for a user to end a call from the unit. Calls can only be
terminated by the called party, or by expiry of the call duration timer (CFG6)
3.4. Receiving calls
To receive a call, press a memory dial button or the ON/OFF button when ringing is
heard. The phone can also be configured to automatically answer incoming calls
(CFG26).
Note: It is possible to configure the phone to inhibit incoming calls (CFG5). If so
configured, the sounder will not sound, but the phone can still receive SMS commands,
acknowledge commands via SMS and communicate via USB.
3.5. Operating at extreme temperatures
The telephone has a wide operating temperature range, but there are some points to
note at the very extremes:
Cold temperature performance:
If the transmitter circuit is colder than -39°C when the phone is first turned on, it will
enter a warm up state. It is not possible to make or accept calls in the warm up state.
When the phone is operating, it will suspend low power sleeping to prevent the
transmitter circuit temperature falling below -38°C. The power consumption will rise
slightly to provide the required small level of localised self-heating, in order to maintain
the transmitter circuit at a temperature of at least -39°C.
High temperature performance:
if the main PCB temperature is greater than 68°C when the phone is first turned on, it
will enter a protection state. It is not possible to make or accept calls in the protection
state. When the phone is operating, it will allow any non-emergency calls to continue
while the transmitter circuit is less than 91°C. For emergency calls, there is no thermal
restriction and the phone will continue the emergency call which may result in
irreversible damage to the circuit. This is only likely to occur if the ambient temperature
were significantly above 60°C.
3.6. Testing the GSM module
To check that the GSM module is operating correctly, send an SMS message to it (ie to
the telephone number of its SIM) as follows:
1234stat
It will respond with an SMS containing the following diagnostic information:
•Signal level (must be between -90dBm and -50dBm)

PHP400 GSM Help Point. 8
•Charger status (should say “on”)
•Battery voltage (normally 0V)
•Temperature (now, min & max) Note that min and max will show 127 or 128 on
first reading after power up.
•IMEI (the IMEI number of the GSM module)
•Firmware version
This information will verify that the unit is on the network and can help diagnose various
problems.
In particular if the Signal level is between -110dBm and -91dBm then it is too low –Help
Point operation will not be reliable until the signal level is increased, for example by
repositioning the antenna or choosing a different network.
4. Installation and dimensions
4.1. General
IMPORTANT
All possible measures must be taken to ensure water, fluid or dust does not
contaminate the internal components of the unit whilst unpacking, preparing and
installing it in inclement weather conditions or by negligence.
Do not drill any additional holes in the casing. Make sure any unused cable
entry or mounting holes are properly sealed against water or dust ingress.
Failure to do so may result in an unsafe condition and will invalidate your
warranty.
4.2. Units dimensions and weight
Overall diameter
405mm
Depth (rear surface to front face)
88mm
Pushbutton height from front face
10mm
Unit weight
6.5kg
Mounting centres
4 x 7mm holes on 145 x 270mm centres,
see drawing 112-11-0081-001 appended to
this manual.
Cable entries
5 off 20mm gland entry points are provided,
with blanking plugs to blank off any that are
not used:
2 x rear
2 x lower
1 x upper (used for aerial)
Positions are detailed on drawing
112-11-0081-001 appended to this manual.

PHP400 GSM Help Point. 9
4.3. Site requirements
Ensure that the following are available before installation:
1. Survey the proposed site for GSM signal strength. Using an appropriate testing
device, establish that there is sufficient signal strength at the proposed location for
the network provider being proposed. Note that GSM performance can vary widely
between different providers' networks and can be affected by building structures.
Occasionally there can be "dead spots" where signal is low, but may be adequate a
short distance away. If signal strength is too low it may be necessary to either re-site
the unit, choose a different provider or site the aerial remotely (see below).
2. Ensure that a suitable SIM card is available (no SIM is supplied with the Help Point).
IMPORTANT: Ensure that the SIM is activated and not locked. If the SIM is locked
there is no way of unlocking it from the Help Point and the Help Point will not
function. It is also recommended to disable voicemail on the SIM.
3. Ensure that power is available: 230Vac @ 0.5A (cables must be capable of carrying
5A min).
4. This is normally a two-person installation, due to the size/weight of the unit and due
to the need to connect cables between the 2 sections.
4.4. Important Notes for Installers and Maintainers
•Qualified personnel only
Installation and maintenance must only be carried out by appropriately
qualified and trained personnel. Contact GAI-Tronics if installation service is
required.
•Mains supply
Mains connection must be made via a 2 pole disconnection device, with a
minimum contact clearance of 3mm in accordance with EN 62368-1 Annex L.
•Test tools required
During the testing and commissioning of the GSM Help Point telephone, the use of
another mobile phone will be required in order to send status and configuration
commands via SMS text messages. Alternatively, a laptop computer can be used
connected to the internal USB port, see section 6.2.
•Avoid contamination during installation
All possible measures must be taken to ensure water, fluid or dust does not
contaminate the internal components of the telephone whilst unpacking, preparing
and installing the telephone in inclement weather conditions or by negligence. Failure
to do so may invalidate your warranty. Please retain any screws removed during
installation or maintenance - make sure the correct screws are refitted to ensure the
integrity of any seals.
•Emergency Services warning
If the telephone is configured so that it cannot make a direct call to the emergency
services, check with your telephone service provider or infrastructure maintainer
whether it is necessary to warn users, and if so provide a suitable warning notice.
4.5. Opening the Unit
To open the case, undo the 4 security screws around the edge of the unit. These
screws are normally Torx type with a centre security pin.
The front section is fitted over the rear section and can be gently lifted clear.
PHP400 GSM Help Point. 10
Take care when separating the 2 sections –there are 4 cable sets between the 2 halves:
1. Induction loop audio (2 conductors)
2. DC power (2 conductors)
3. Earth cable
4. Antenna cable.
These cables are deliberately short, but will allow the front section to sit to the left of the rear
for set-up purposes if required.
4.6. Installation method
The Help Point is intended for vertical installation to a solid wall or suitable post as detailed
below.
1. Choose a suitable location for the Help Point, bearing in mind the weight of the unit,
and that the operating button(s) should normally be in the range 1200 –1400mm
from the ground for ease of access by people in wheelchairs.
2. Mark the wall or surface with fixing centres as shown above. If necessary use the
rear section to help mark the centres. Do not use the rear section as a drilling
template.
3. Select fixing screws or bolts appropriate to the type of wall or surface, suitable to
support the unit. Drill fixing holes to suit.
4. Separate the front and rear sections of the Help Point, taking care to disconnect
interconnecting cables as described in section 4.4.
5. Secure the rear section to the wall, making sure that the fixing holes are sealed to
prevent water ingress using nylon washers or other appropriate sealing methods.
6. Bring the power cable into the unit through one of the cable entry holes. Cables will
normally be contained in conduit, but glands may also be used.
7. The power cable is terminated directly to the terminal block provided, and secured
using the cable restraint. Do not apply power until the SIM is fitted. If necessary
remove the fuse to disconnect power until the SIM has been fitted.
8. Ensure that all cable entries are sealed to prevent water ingress. The blanking plugs
fitted to unused cable entry positions must be left in place.
9. Fit the SIM to the main GSM PCB in the front section as described below.
10. Connect induction loop audio, dc power, antenna and earth cables between the front
and rear sections of the case as shown below.
11. Apply power.
12. Configure and test the Help Point referring to the appropriate sections below.
13. Fit the front section over the rear section and secure in place using the 4 security
screws.
4.7. Remote aerial.
Occasionally it may be necessary to site the aerial remotely from the Help Point either to
improve signal reception or to reduce the risk of vandal damage. For this reason the unit is
supplied with 3m of aerial cable, tied up inside the casing. In this case, disconnect the aerial
cable from the top of the GSM PCB, free the cable and unscrew the aerial itself from the
Help Point casing. The aerial has a 20mm threaded adapter which will allow it to be
mounted remotely up to 3m away, for example on conduit, and the cable fed back to the help

PHP400 GSM Help Point. 11
point. GAI-Tronics can provide a 2.5m mounting pole that can support the Help Point and
position the aerial at height, to improve reception and make it less vulnerable. Please
contact GAI-Tronics for details.
5. Connections & Set-up
5.1. Connections between Front and Rear Sections
5.2. Power connections
Connect mains power to the terminal block as shown on the
connection label. See drawing above.
The mains supply must be provided by a 2 pole
disconnection device with a minimum contact clearance of
3mm.
The fuse must always be replaced by the correct type, ie
1A(T) HRC ceramic (20x5mm).
5.3. Earth connections
This equipment must be earthed
Important - during maintenance only disconnect the earth
after the disconnection of all other components
The front and rear sections are connected together with an earth cable. Always ensure
this cable is connected before putting the unit into
service. The stack up of fixing nuts and washers on
the earth stud in the rear section is important -
ensure that fixings are in the sequence shown:
Stack up of
fixings on rear
case earth stud
To terminal
block
To front case

PHP400 GSM Help Point. 12
5.4. Internal power connections
The PHP400 Help Point is provided with a mains to 12V power supply unit, required to
power the induction loop and telephone module itself.
The telephone power input is as shown and is connected to the PSU in the rear section
via screw terminals in a 2 way push-in connector.
5.5. Relay outputs
As an option, the PHP400 GSM can be equipped with up to 2 external relay outputs,
controlled by the telephone software. Contact GAI-Tronics for details.
The additional outputs are provided on terminal blocks TB1 & TB2 below the main PCB.
The installer must ensure that any connections do not exceed the following limits:
Max voltage: 30Vdc, 42.4V peak (resistive load)
Max switching current: 3A
5.6. Internal connections
With the exception of the 12Vdc input and the antenna, the internal connections do
not need to be disconnected or disturbed during installation, but for reference they
are shown below:

PHP400 GSM Help Point. 13
Note that connections differ slightly dependant on whether relays are fitted or not.
5.7. Installing the SIM
IMPORTANT: before installing or changing a SIM card, always make sure that the
telephone is powered down by ensuring that the DC power source cable is
disconnected from the main PCB.
Carefully insert a SIM card into the holder:
5.8. LED indications and operating states
Located at the base of the main circuit board are three red LED indicators that
provide useful status information.
Note that, to save power, the LEDs will all go off after 5 minutes of inactivity.
Pressing the ON/OFF button briefly will reactivate the LEDs for a further 5 minutes
for diagnostic purposes.
The indicator functions are as follows:
•CHARGE - On if internal batteries are fitted (and charging), flashing if batteries
are not connected.
•FUNCTION - Indicates the current operation. See the table below.
•ERROR - Indicates problems with operation. See the table below.
FUNCTION
ERROR
Meaning
Off
Off
Phone switched OFF.
(or power save mode –press ON/OFF button
briefly to be certain)
Short/fast
Off
Initialising/searching.
Short/slow
Off
Standby –ready for use.

PHP400 GSM Help Point. 14
FUNCTION
ERROR
Meaning
Long/fast
Off
Incoming call.
On
Off
Call in progress.
Off
Long/Fast
SIM card is locked, PIN code
required. *
Long/fast
Long/Fast
SIM card is blocked, PUK code
required. *
Short/slow
Short/slow
Weak signal.
Off
Short/slow
Insufficient power to operate, but
charging.
Off
On
Fault, such as no SIM.
On
On
Momentary indication to
acknowledge a press of the On/Off
button
* It is not possible to rectify these faults from the telephone itself. Please ensure that the SIM is not locked (or
blocked) prior to use.
5.9. Switch on and test
1. Once the SIM card has been fitted and DC power connected, press and hold the
On/Off button located next to the power connector. The FUNCTION and ERROR
indicators will both light and will then go off, when this occurs release the button.
The FUNCTION indicator will flash rapidly to indicate that the phone is initialising
and is searching for a valid mobile network.
2. After several seconds, the FUNCTION indicator should flash less frequently to
indicate that a call may be made or received. If there is an error, for example no
SIM installed, the ERROR indicator will light. See the list above for a full list of
indicator conditions.
3. Using a mobile phone, send an SMS status command to the phone requesting
the current status. Use the following format for your outgoing message:
1234STAT
(where 1234 is the default PIN code.) The reply should be similar to the
following:
Signal: -93dBm
Vin:11.97V
Bat:0V
Temp
Now: 23
Min: 19
Max: 30
Humidity: 40%
Battery: Fault
Audio test: Pass
Ver: 1.0
IMEI: 359998042484305
4. If all is well with the status response, record the information for reference, to
compare with later status reports.

PHP400 GSM Help Point. 15
5. Fit the faceplate:
a. Carefully place the front section over the rear section, taking care not to trap
any cables.
b. Insert the 4 fixing screws and tighten.
c. Check that a good weatherproof seal exists between the front and rear
sections.
6. Make a call to the phone to ensure the sounder operates. Then make an
outgoing call from the phone to an external number. This will only be possible
when an auto-dial number has been programmed, see section 6.
For many installations, the steps outlined so far will result in a fully functioning
phone.
However, the GSM Help Point is also highly customisable for many situations.
Detailed configuration is made possible by either sending specially formatted SMS
messages from another phone or by connecting a computer via the USB port. For
details, please see section 6.
5.10. Switching the phone off (power down)
To power the phone down, press and hold the pushbutton until the FUNCTION and
ERROR indicators extinguish. The phone will now be in the Off (Charge Only)
state. If the phone is to be shipped or stored the battery (if fitted) should then also
be disconnected.
5.11. Operating states of the phone
GSM Help Point has the following operating states:
•On - The phone is fully powered and ready to make and receive calls.
•Charge only - This is the state that the phone will enter when external DC
power is applied. If power is removed, the phone will enter the “Off” state.
•Off - This is the state in which the phone is shipped from the factory to prevent
battery drain in transit and storage (if batteries are fitted).
The SIM card should only be fitted or removed if the telephone is in the OFF state.
If the phone is “Off” and has sufficient battery power or is in “Charge only” mode,
pressing the on/off pushbutton will put the phone into the “On” state.
If the ERROR indicator is flashing Short/Slow, leave the external DC power
connected to fully charge the battery, or at least until the ERROR indicator stops
flashing.
Note: if batteries are fitted it may take in excess of 5 hours to fully charge it
depending on the current charge state of the battery.
If the phone is “On” and the battery charge becomes exhausted, the phone will turn
off. Once the external DC supply is restored, the phone will automatically enter the
“On” state and also start charging the battery.
6. Programming, configuration and diagnostics
The GSM Help Point has numerous features that can be configured using commands
sent to it either via SMS messages from another phone or by a computer connected to
the internal USB port. Most commands entered via the USB port are also accepted

PHP400 GSM Help Point. 16
while the phone is in charge only mode, i.e. switched off but still powered by an external
DC power source.
Note: PHP400 Help Points are usually permanently powered from an external power
source, and are therefore not normally fitted with internal batteries. Elements of the
diagnostic software may therefore indicate “battery fault” or similar messages. These
messages do not indicate actual faults if batteries are not fitted.
6.1. Sending Commands by SMS
The first four characters of an SMS command must be the phone PIN code (the default
is 1234). This is then followed by the command(s).
NOTE the PIN code referred to in this manual is a security code specifically for
programming the GAI-Tronics GSM telephone via SMS commands –it is not a lock
code and is not related to the SIM card. It is not required for making or receiving calls.
Example 1: 1234STAT will return status information about the phone.
Example 2: 1234CFG5=1 configures the phone to inhibit incoming calls.
Notes for SMS commands
•You can enter a space character after the PIN for clarity; this will be ignored by
the phone.
•All commands that do not implicitly require a response are automatically replied
to with a summary of the phone status. This automatic reply may be suppressed
by placing a full-stop character after the pin number. For example, 1234.cfg5=1
will change the configuration without replying. An error in the command will
always result in a reply.
•Commands may be concatenated by entering a semicolon delimiter, for example
1234CFG5=1;STAT
•Commands are not case sensitive.
•To read multiple parameters, a suffix wild card may be used, for example:
CFG*?
6.2. Sending Commands via USB port
Note that the preferred method for sending commands is normally SMS. Use of USB
commands requires a degree of technical skill, a familiarity with serial communications
protocols, including the use of a suitable communication program (for example
Hyperterminal (not supplied)). A micro USB connector lead (not supplied) will be
required to connect the phone to a suitable USB port.
IMPORTANT: Before connecting the GSM Help Point to a computer via USB,
ensure the Silicon Labs USB device driver software has been downloaded from
www.silabs.com/products/mcu/pages/usbtouartbridgevcpdrivers.aspx
Ensure that the correct version for your operating system is installed.
Configure a suitable communication program to connect to the virtual COM port
assigned to the USB driver. Connect at 115200bps 8/N/1.
The first three characters of a USB programming command must be AT! This is then
followed by the command(s).
Example 1: AT!STAT<cr> where <cr> is a carriage return/enter

PHP400 GSM Help Point. 17
Example 2: AT!CFG5=1<cr> sets the phone to inhibit incoming calls.
Notes for USB commands
•The AT! Commands are specific to this product range and are not related to the
Hayes™ AT command set
•Commands may be concatenated by entering a semicolon delimiter, for example
AT!CFG5=1;STAT<cr>
6.3. List of Commands (for use with either SMS or USB)
STATn Returns the status of the phone in one of three different formats specified by
n. If n is omitted it is interpreted as zero. The resolution of the battery display
is 10 millivolts, and the power supply resolution is 50 millivolts.
STAT (or STAT0) for general status, useful during installation:
Signal: -89dBm (or N/A)
Vin: 12.25V
Bat: 0V
Temperature –(in degrees Celsius)
Now: 20
Min: 18
Max: 26
Humidity: 51%
No fault/Fault
Ver: 1.0
IMEI: 357749031743900
Note that normally the signal should be between -90 and -50, the supply
should be between 9 and 18V, and the Battery should be between 4.00 and
4.40V.
The list above is the information returned via SMS. If requested via USB, a
STAT0 command will also return for example:
State: n(phone state, see table 3 below)
DCDC: 3.88V
Bat current: -100mA
If a fault is shown, send stat1 for more details.
State (s) value returned from a STAT0 command:
Value Meaning
1 Outside operating temperature limits.
2 Charge only.
3 Insufficient power to operate in solar charge mode.
4 Error condition, communication failure with wireless module.
5 Phone is initialising.
6 Checking SIM present.
7 No SIM installed.
8 Checking SIM lock.
9 Waiting for SIM PIN.
10 Waiting for SIM PUK.
11 Post SIM unlock initialisation phase.
12 Settle time for reading SMS memory.
13 Flushing SMS memory.
14 Ready for call (always in this state when replying via SMS)

PHP400 GSM Help Point. 18
STAT1 for information about faults:
Hook: On/Off
Power break: No/Yes
Loop: Pass/Fail
Acoustic loop: Pass/Fail
Keyboard: Pass/x stuck on
Battery: OK/Fault
Explanation of stat1 fault results:
Hook: Reserved for handset phones (not applicable to Help Points). Will
always report “On” for a Help Point.
Power break: No = normal, Yes = power has been interrupted
Loop: Pass = normal, Fail = the handset integrity loop is broken, meaning
that the handset has been detached or vandalised
Acoustic loop: Pass = normal, Fail = either the microphone or speaker is
not functioning.
Keyboard: Pass = normal, x stuck on = a pushbutton is permanently stuck
in, preventing anyone from using the pushbuttons.
Battery: OK = normal, Fault = the battery is not holding charge properly,
even if it has the correct voltage.
STAT2 All information in a format intended for a computer:
index:val,index:val... to index 14
The index values are as follows:
0= Signal in –dBm (eg -89).
1= Supply voltage in volts (eg 12.3)
2 = Battery voltage (eg 4.1)
3 = Temperature now (in Celsius) (eg 22)
4 = Minimum temperature recorded (eg -6)
5 = Maximum temperature recorded (eg 37)
6 = Model/HW ver./Firmware ver. (eg 1/2/1.03)
7 = Hook switch state (0 is on-hook, 1 is off-hook)
8 = Power break (0 for none, otherwise 1. Cleared on read)
9 = Handset hardware loop state (0 for OK, 1 for fault)
10 = Acoustic loop test (0 for pass, 1 for fail, 2 for test not applicable)
11 = Keyboard (0 is OK, 1:n for fail where n is the key number)
12 = Call state (0 for idle, 1 for call in progress,)
13 = Battery state (0 for OK, 1 for fault)
14 = IMEI (eg 357749031743900)
STAT3 Network and power information:
Operator: “operator name”
Network: “network name”

PHP400 GSM Help Point. 19
Mode: GSM/GPRS/EDGE/WCDMA/HSDPA/HSUPA/HSPA
Signal: -89dBm
Avg battery current
When Idle: 10mA
During Call: 200mA
STAT4 Environmental information: Temperatures
Transmitter
Now: 25
Min: 23
Max: 43
Main board
Now: 25
Min: 23
Max: 43
Humidity
Now: 53%
Min: 42%
Max: 59%
(the values may be cleared using CLRFAULT or INIT commands)
STAT5 Fault status in a format intended for a computer/monitoring service:
Unlike the other status commands, this format does not send “Stat5:” preceding
the information. Otherwise the information is the same as type 1, but each item is
sent on one line with each field separated by a comma. This is intended for a
monitoring centre
Table 3 state value returned in STAT0 command via USB.
Value Meaning
1 Too hot to make calls.
2 Too cold to make calls
3 Charge only
4 Insufficient power to operate.
5 Error condition, communication failure with wireless module.
6 Phone is initialising.
7 Checking SIM present.
8 No SIM installed (emergency calls possible).
9 Checking SIM lock
10 Waiting for SIM PIN.

PHP400 GSM Help Point. 20
11 Waiting for SIM PUK.
12 Post SIM unlock initialisation phase.
13 Settle time for reading SMS memory.
14 Flushing SMS memory.
15 Ready for call (always in this state when replying via SMS).
CLRTEMP Clears the maximum and minimum temperature memories (as a result,
they will initially show the current actual temperature).
CFGn=x Read and write configuration setting:
CFG0 My number sending. Determines whether the phone number is
declared to the destination being called:
0 = Use the setting defined by the network (default).
1 = Number is always sent (if supported by the network).
2 = Number is always withheld.
CFG1 Dial delay for models with a full keypad, This determines the delay
after dialling the last digit until the call is made:
1 to 9 seconds (default is 3).
CFG2 Ring cadence. Different cadences useful to differentiate between
phones in close proximity:
0= Silent
1= UK style (default).
2 = UK alternate.
3 = US
CFG3 Tone region. The frequency and cadence used for progress tones:
0 =UK (default).
1 = Ireland.
2 = Holland.
3 = USA
.... others on request ....
CFG5 Call restrictions: Restrict use of the phone.
0 =No restriction (default).
1 = Inhibit incoming calls.
2 = Inhibit outgoing calls
3 = Inhibit incoming and outgoing calls.
4 = Restrict dialled numbers to match Memories 0-9 or 112/999/911
CFG6 Call Time restriction. Limit the duration of an outbound call. When
only 30 seconds remain, a beep or announcement is heard in the handset to
warn the caller.
Table of contents
Other GAI-Tronics Emergency Phone manuals

GAI-Tronics
GAI-Tronics 234WM-202 User manual

GAI-Tronics
GAI-Tronics Redalert 392-001 User manual

GAI-Tronics
GAI-Tronics PHP400 User manual

GAI-Tronics
GAI-Tronics Red Alert 300 Series User manual

GAI-Tronics
GAI-Tronics 293-103 User manual

GAI-Tronics
GAI-Tronics RED ALERT User manual

GAI-Tronics
GAI-Tronics PHP400 User manual
Popular Emergency Phone manuals by other brands

Bosch
Bosch Carephone 61 Installation

ClearSounds
ClearSounds CSC600ER user manual

Mytrex
Mytrex MXD user manual

LogicMark
LogicMark Freedom Alert 35911 Installation & operation instructions

DH Wireless Solutions
DH Wireless Solutions PDN LITE OOBM Field manual

Talkaphone
Talkaphone ETP-MT/R Series installation instructions