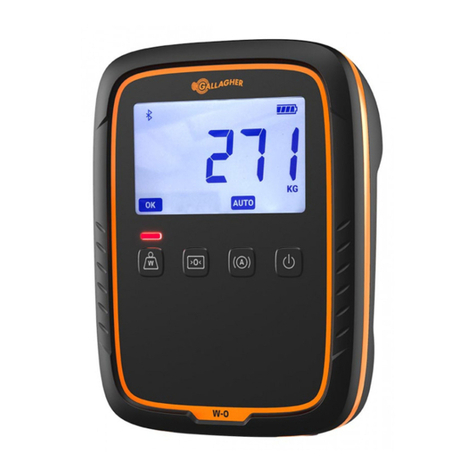
Gallagher SmartScale 300 User manual

SmartScale 300 User Manual
Page i
SmartScale 300

User Manual SmartScale 300
Page ii
PUBLISHED BY
Gallagher Group Limited
Kahikatea Drive, Private Bag 3026
Hamilton, New Zealand
Copyright© Gallagher Group Limited 2004.
All rights reserved. Patents Pending.
SmartScale 300
User Manual
3E1043 - Edition 6 - January 2006
DISCLAIMER Whilst every effort has been made
to ensure accuracy, neither Gallagher Group
Limited nor any employee of the company, shall be
liable on any ground whatsoever to any party in
respect of decisions or actions they may make as a
result of using this information.
In accordance with the Gallagher policy of
continuing development, design and specifications
are subject to change without notice.
Developed and manufactured by Gallagher Group
Limited, an ISO 9001:2000 Certified Supplier.

SmartScale 300 User Manual
Page iii
Contents
Introduction...................................................................................................... 1
Installation........................................................................................................ 2
Installing the Scale bracket .................................................................................2
Installing the loadbars .........................................................................................2
Installing the Scale ..............................................................................................3
Power and batteries......................................................................................... 4
Charging the battery............................................................................................4
Battery charge status ..........................................................................................6
The mode select switch .................................................................................. 7
Setup................................................................................................................. 9
Selecting a setup option....................................................................................10
Drafting .............................................................................................................11
User options......................................................................................................13
Communications ...............................................................................................14
Select country ...................................................................................................15
About weighing.............................................................................................. 16
The Scales measurement process....................................................................16
Zero tracking .....................................................................................................17
Weighing modes ...............................................................................................18
About statistics.............................................................................................. 20
Draft statistics....................................................................................................20
Weight statistics ................................................................................................20
Deleting a weight from the statistics..................................................................21
Clearing the statistics ........................................................................................24
Before you begin weighing........................................................................... 25
The weighing session ................................................................................... 26
Weighing animals - automatic or manual modes...............................................26
Weighing static loads - fine mode .....................................................................28
At the end of the weighing session....................................................................29
Printing ........................................................................................................... 30
Printing weights during a weighing session.......................................................30
Printing statistics during a weighing session .....................................................31
User Manual SmartScale 300
Page iv
Care and maintenance .................................................................................. 32
Loadbar and platform options...................................................................... 33
Gallagher Standard Loadbars ...........................................................................33
Gallagher Heavy Duty Loadbars .......................................................................34
Gallagher Super Heavy Duty Loadbars.............................................................34
Specifications ................................................................................................ 35
SmartScale 300 dimensions .............................................................................35
General .............................................................................................................35
Weight increments ............................................................................................36
Contact details............................................................................................... 37

SmartScale 300 User Manual
Page 1
Introduction
Thank you for purchasing the SmartScale 300 Scale. Gallagher has
been making agricultural weighing equipment for over 60 years and in
that time has earned a reputation for quality equipment that withstands
our tough agricultural conditions.
The SmartScale range of weighing systems is simple, tough,
innovative and reliable.
All Scale's in the Gallagher range can be matched to a choice of
loadbar systems, as well as a range of platforms and crates to make an
accurate and reliable weighing system.
Although designed specifically for agriculture, the SmartScale range
is also suited to many industrial applications.

User Manual SmartScale 300
Page 2
Installation
Installing the Scale bracket
The bracket can be mounted on a flat vertical surface, or on a round
post.
To mount the bracket
on a flat vertical
surface, for example a
square post or board,
use the outer holes.
To mount the bracket
on a round post, use
the inner holes.
Don't mount the Scale bracket on the weighing crate or chute.
Installing the loadbars
To install the loadbars follow these steps.
1. Bolt the platform to the loadbars.
2. Ensure the platform is placed on a flat and level surface. Make
sure it is not touching any rails or gates.
3. Either bolt the loadbars to the concrete pad or locate them on studs
set into the concrete. This will prevent the platform from moving
during the weighing session.

SmartScale 300 User Manual
Page 3
Installing the Scale
The Scale can be placed on a flat surface or mounted on the Scale
bracket supplied.
Position the Scale ;
clear of the platform to ensure it does not interfere with the flow
of animals during the weighing cycle
within easy reach of the loadbar leads
within easy reach of the operator (for manual weighing)
in a well-lit area.

User Manual SmartScale 300
Page 4
Power and batteries
During a weighing session, the Scale can be powered by its internal
battery alone or by its internal battery and either the battery charger or
an external 12 volt battery.
The battery charger connects between an AC outlet and the Scale.
If either the battery charger or an external 12 volt battery is connected
to the Scale, the Scale's internal battery will be charged while the
Scale is in use.
For optimum performance, switch off the Scale and charge its internal
battery for at least five hours. When fully charged, the internal battery
on its own will power the Scale continuously for a minimum of eight
hours. Battery life may be reduced if the Scale is being used to power
an Electronic ID reader.
Charging the battery
The battery in the Scale can be recharged using either a battery
charger or an external 12 volt battery.
Recharging the battery will take up to five hours depending on the
level of charge already in the battery. The Scale can be in use or can
be switched off while the battery is being charged.

SmartScale 300 User Manual
Page 5
Using the battery charger
To charge the battery using the battery charger, follow these steps.
1. Connect the lead between the battery charger and the Scale.
2. Plug the battery charger into an AC outlet and switch on.
3. Open the Scale case and make sure the battery charge icon
on the main screen is flashing. This indicates that the battery is
charging and will be displayed whether the Scale is turned on or
off.
Using an external 12 volt battery
To charge the Scale's internal battery using an external 12 volt battery,
follow these steps.
1. Connect the supplied black and red battery leads to the Scale.
2. Connect the other end of the battery leads to the 12 volt battery.
Connect the Red clip to the Positive terminal
Connect the Black clip to the Negative terminal
3. Open the Scale case and make sure the battery charge icon
on the main screen is flashing. This indicates that the battery is
charging and will be displayed whether the Scale is turned on or
off.

User Manual SmartScale 300
Page 6
Battery charge status
The battery icon displays in the bottom left corner of the Scale's upper
screen.
It is important to note that the battery icon will only ever show the
actual amount of charge left in the battery when the Scale is turned on
and disconnected from external power.
Fully
Charged Battery Icon bars are all
displayed constantly.
Partially
Charged Battery Icon shows first
four bars constantly.
Battery Flat No Battery Icon bars are
displayed.
When the Scale is connected to the external power supply the battery
icon will display the charging status.
Charging Battery Icon shows all the
bars constantly filling and
then disappearing.
Topping Up Battery Icon shows the first
four bars constantly full and
the remainder filling and
then disappearing.
Trickle
Charge Battery Icon shows only one
empty bar that is constantly
travelling the length of the
full Icon.
Low battery warning
When the charge remaining in the battery drops to a very low level,
the Scale will beep and the battery charge icon will start to flash. At
this stage, about 15 minutes remain before the Scale shuts down.
Low voltage shutdown
When the battery charge drops to a critical level, the Scale will shut
down. At this stage it is necessary to recharge the battery.

SmartScale 300 User Manual
Page 7
The mode select switch
The Scale can operate in three weighing modes and a setup mode.
The mode select switch is located on the left hand side of the Scale.
The mode select switch has five positions: , A, M, Fand S.
Immediately after you turn the switch to any position except ,
explanatory information will display on the lower of the two Scale
screens. The explanatory information will display only for a few
seconds; after it disappears, the screen displays information relevant to
the selected option.
This position turns the Scale off.
AThis position selects automatic weighing. After the mode
select switch is first turned to A, the following information
briefly appears.
Automatic weighing is covered under Weighing animals -
automatic or manual modes.
M This position selects manual weighing. After the mode select
switch is first turned to M, the following information briefly
appears.

User Manual SmartScale 300
Page 8
Manual weighing is covered under Weighing animals -
automatic or manual modes.
F This position selects static load weighing. After the mode
select switch is first turned to F, the following information
briefly appears.
Manual weighing is covered under Weighing static loads - fine
mode (p 28).
S This position accesses the setup options. After the mode select
switch is first turned to S, the following information briefly
appears.
The software version used by the Scale is also displayed. Setup
options are covered under Setup.
Note:
The software version shown above may be different from that
used in your Scale.

SmartScale 300 User Manual
Page 9
Setup
The setup menu contains four options:
1. DRAFT MENU - turns Drafting on or off.
2. USER OPTIONS - selects a unit of weight measurement and
enables live printing.
3. COMMUNICATIONS - sets up a connection to a device plugged
into the Scale's communications port.
4. SELECT COUNTRY - for a specific country, sets a language,
country-specific terminology and other option defaults.
To access the setup menu, turn the mode select switch to S.
The setup menu displays on the lower of the two Scale screens. Press
the buttons directly below this screen to select menu options.

User Manual SmartScale 300
Page 10
Selecting a setup option
When you turn the mode select switch to S, one of the setup menu
options described on the previous page will display.
The setup menu items are numbered from 1 to 4.
Press the button to move to the previous setup menu item.
Press the button to move to the next setup menu item.
For example, to move from 2. USER OPTIONS to
3. COMMUNICATIONS press .
To move from 3. COMMUNICATIONS to 2. USER OPTIONS
press .
Press to select the currently displayed item.
For more information about each of the setup menu items, refer to the
following sections.

SmartScale 300 User Manual
Page 11
Drafting
The Draft Menu option lets you turn Drafting on or off and set a
drafting limit.
Turning Drafting on or off
To turn Drafting on or off, follow these steps.
1. Select 1. DRAFT MENU from the setup menu.
2. Depending on how the Scale was previously set up, either the
Drafting Off or the Two Way Drafting screen will display.
3. Depending on the screen displayed, do one of the following.
•If the Drafting Off screen appears and you want to turn
Drafting on, press , then press twice.
•If the Two Way Drafting screen appears and you want to turn
Drafting off, press , then press .
4. After you press the button the final time, you will be
returned to the setup menu.

User Manual SmartScale 300
Page 12
Changing the drafting limit
To change the drafting limit, follow these steps.
1. Select 1. DRAFT MENU from the setup menu.
2. If the Drafting Off screen displays, press the button.
3. The current drafting limit will display on a screen that looks
similar to that below.
4. Press the button to enter the edit mode. The screen will
change to look like that below.
5. Press the or buttons repeatedly to change the
drafting limit one step at a time. If you press and hold down
either button, the limit will change rapidly.
6. Press to save the currently-displayed drafting limit and
return to the setup menu.

SmartScale 300 User Manual
Page 13
User options
The User Options screen lets you select the unit of measurement that
you want to use when weighing animals. You can also turn live
printing on or off.
To display the User Options screen, select 2. USER OPTIONS from
the setup menu.
Changing a user option
Press the button to select the option you want to edit, then
press .
Refer to the sections below for more information on each of the User
Options.
Press to save the displayed user options and return to the
setup menu.
Weight units
You can specify whether the Scale uses kilograms (kg) or pounds (lb).
Live printing
When Live Printing is turned on, the Scale will print the measurement
it makes each time it captures a weight. Refer to Printing (p 30) for
more information.
Live Printing will only occur if you have connected the SmartScale
printer to the Scale and set the port to Printer as described in
Communications (p 14).
Note:
This feature will not work with a standard PC printer.

User Manual SmartScale 300
Page 14
Communications
You can connect a printer to the Scale. Optionally, if you have
selected the NZ/AU country option, you can connect the Scale to a
device that can respond to SmartScale protocols.
Connections are made to the port located on the upper left hand side
edge of the Scale.
If you attach a device to the port, you must configure the port to suit.
You do this from the Communications screen.
To display the Communications screen, select
3. COMMUNICATIONS from the setup menu.
To change the port setting, follow these steps.
1. Press the button repeatedly until the required option is
selected.
2. Press to save the setting and return to the setup menu.

SmartScale 300 User Manual
Page 15
Options are:
Unused The port is unused. This is the default option.
Printer The port is connected to a SmartScale printer.
This option prints weights and statistics during a
session.
SmartScale (This option will only appear when your country
selection is NZ/AU. See Select country (p 15).)
The port is connected to a device that can respond
to SmartScale protocols. When this option is
enabled, the port transmits weight information
continuously.
Select country
From the Select Country screen you chose the country in which the
Scale will be used. Selecting a country changes the language and sets
some country-specific terminology and options.
To display the Select Country screen, chose
4. SELECT COUNTRY from the setup menu.
To change the country, follow these steps.
1. Press the or button repeatedly to select the
required country.
2. Press .

User Manual SmartScale 300
Page 16
About weighing
The Scale has three weighing modes: Automatic, Manual and Fine.
The Automatic and Manual weighing modes are optimised for
weighing live animals. The Fine mode is optimised for weighing static
objects.
The Scales measurement process
Automatic and Manual modes
The weight measurement process starts after an animal has entered the
weighing crate. As the animal moves about, the weighing platform
transmits to the Scale a stream of changing weight values. On the
Scale you can see the weight display change as the values are
received.
The Scale samples these values until it has received enough
information to calculate the animal's static weight. The calculated
weight is called the captured weight.
After capture, the weight display remains frozen at the value of the
captured weight even though the animal may continue to move about.
The time taken to make the analysis depends on the vigour of
movement of the animal being weighed. It takes longer for the Scale
to capture the weight of an animal that is agitated compared to one
that is calm.
Fine mode
The Scale continuously updates the weight recorded.
Table of contents
Other Gallagher Scale manuals

Gallagher
Gallagher DAIRY SCALE XDS5000 User guide

Gallagher
Gallagher TWR-5 User manual

Gallagher
Gallagher W-1 User manual

Gallagher
Gallagher W-0 User manual

Gallagher
Gallagher TWR-5 User manual

Gallagher
Gallagher TW-1 User manual

Gallagher
Gallagher W310 v2 User manual

Gallagher
Gallagher TWR-1 User manual

Gallagher
Gallagher SmartScale 800 User manual

Gallagher
Gallagher W110 User manual

Gallagher
Gallagher W-1 User manual

Gallagher
Gallagher W810 User manual

Gallagher
Gallagher SmartScale 600 User manual

Gallagher
Gallagher 026015 User manual

Gallagher
Gallagher DS5000 User manual

Gallagher
Gallagher W-0 User manual

Gallagher
Gallagher SmartScale 700 User manual

Gallagher
Gallagher W210 User manual