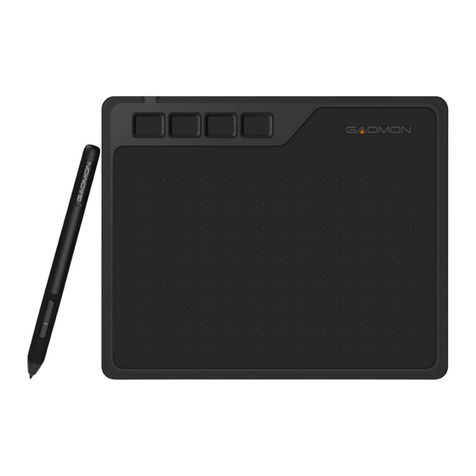
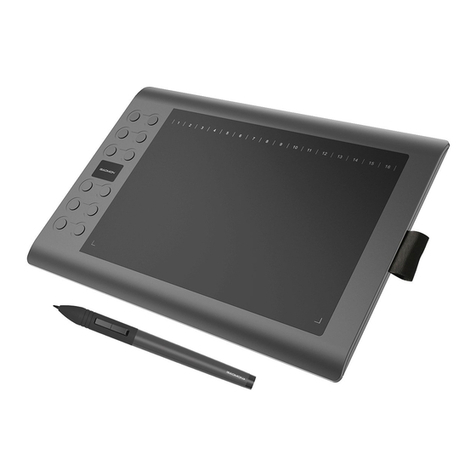
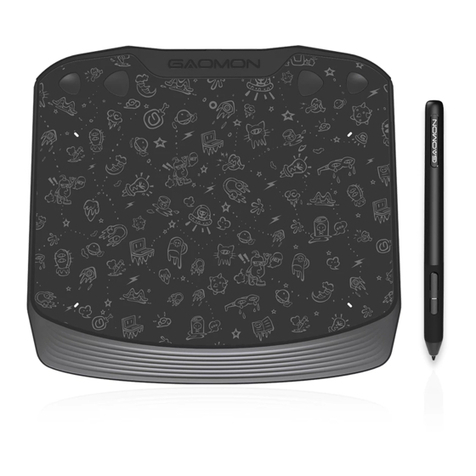
GAOMON S56K User manual

User Manual
Graphic Tablet
For Win
1
1

Contents
* The driver may already be updated to anewerversionpriortobe packaged. If your installation screen does not
match the content of this manual, please refer to your software screen after installation.
Content
I. General Information
1. Overview
2. Pen Tablet Functions
3. System Requirements
4. Installing the Driver Software on Windows
5. Hardware Installation
6.Verifying Hardware and Driver Functions
7. Usage Tips
II. Driver Interface Introduction
1. Control Interface
2. Pen Pressure Test
3. Digital Pressure Sensitive Pen Settings
3.1 Key Functions
4. Workspace and Shortcuts Settings
4.1 Workspace Settings
4.1.1 Express Shortcut Function Settings
5. Digital Pen Pressure Sensitivity Test
III. Storing the Digital pen and changing the Pen Battery & Tip
IV. Question & Answer
.................................................................................
...................................................................................................
...................................................................................
.................................................................................
....................................................
.................................................................................
......................................................
.................................................................................................
................................................................
.....................................................................................
....................................................................................
....................................................
.........................................................................................
............................................................
.................................................................................
.......................................................
........................................................
..............
...............................................................................
4
4
4
5
7
7
7
8
8
9
9
10
10
10
11
10
13
13
15
2
2

I. General Information
1. Overview
Welcome to the world of tablet and digital pen! You are able to discover how easy to control your personal computer
by using a wireless digital pen instead of a mouse:
The function of the digital pen is able to drawa very thin, thick, light or dark (called pressure sensitivity) line. You also
can write, sign, annotate documents, and draw, sketch or paint as easily as you would on normal paper and simulate
the functions like pencil, markpen, brush, or watercolor pen by using the commercial software packages such as
Adobe Photoshop, Corel Painter and Paint Shop. If MSN Messenger is the newer one, you can create and send
digital handwriting sand hand-drawnpictures, making communication much more funny and entertaining.
Note:If you cannot enable the handwriting mode in MSN Messenger, download the relevant handwriting
component from Microsoft's website.
2. Pen Tablet Functions
After installing the device driver, your pen tablet has the following functions:
(1) Direct pointing – You can move the cursor to any are a of the screen by hovering the pen tip
over the tablet’s surface.
(2) Three - buttons mouse commands – Your pen tablet provides all fun ctions of a three-buttons’
mouse by using its pen tip and two buttons.
(3) Pen scrolling – You can scroll documents and Web pages by pressing the middle button of the rechargeable pen
over the tablet’s working area.
(4) Pressure sensitivity – This feature allows you to emulate various brushes and pencils and you can press down
the pen tip harder, lighter, stronger or thicker, and subtle pen cil lines you will receive.
3. System Requirements
Windows 7/Windows 8/Windows 8.1/Windows 10
4. Installing the Driver Software on Windows
For Microsoft Windows 7/Windows 8/Windows 8.1/Windows 10 operating systems:
(1) Insert the Driver CD into the CD-ROM drive, and wait for the main installation screen to appear.
(2) The main installation screen should appearautomatically, or you can manually start the installation by
opening [My Computer] [ CD/DVD Rom] then click on the [Setup] program.
(3) When installing the driver, follow the installation instructions on screenand press the “Enter” key.
5. Hardware Installation
Connecting a tablet with USB interface into the PC after the driver
installation is finished.
After connecting a pen tablet into the PC, you will seeasmall tablet
icon() appears in the system tray, which is normally at the lower
rightcorner of the screen.
3
3
6. Verifying Hardware and Driver Functions
Note: After the tablet's device driver has been properly installed, a small tablet icon ( ) will appear in the system tray,
which is normally at the lower rightcorner of the screen.
7. Usage Tips
* Do not use more than two devices at the same time in case the screen cursor is jittering or not moving.
To store the pen, make sure the pen tip does not touch anything, and especially do not let the pen stand in a cup
or pen holder with the tip down. Even though the possibility is low, constantly put stress on the pen tip might
damage precise configuration of the pen. Place the pen in a pen holder, or turn the pen tip pointing upward or
horizontally with the pen tip free of any pressure by other objects.
6.1 Follow the steps to verify if the wired tablet is installed properly:
Power ON/OFF
Button Pen tip
4
4

II. Driver Interface Introduction
1. Control Interface
2. Pen Pressure Test
When you double click the driver tablet icon ( ) which normally appears in the system tray at the corner of the
screen, you will see the control panel (pictured above). It will display driven-related information.
Controlling the panel by digital graphic tablet can set up functions for the button of the digital pressure-sensitive
pen, regulate the pen’s pressure sensitivity and modify the workspace and shortcut keys.
Click Pen Pressure Test into Pressure Sensitivity Testing
5
5

3. Digital Pressure Sensitive Pen Settings
3.1 Key Functions
Below the key menu shows the defining keys of the digital pressure sensitive pen. Selecting its “left,
middle,right, keyboard keys, no keys, change brush, switch screen” on the corresponding right drop-down
menu of the pen function settings window’s “the first button, the second button” can achieve its functions.
When finished the first key and the second key selecting the keyboard keys, all the other keys
can be freely defined.
When this done, you can achieve all the shortcuts keys functions of the graphic software.
Digital pressure sensitive pen default setting functions: 1.The pen nib is equivalent to the mouse
left button function.
2.When the first key is E, you can switch it to eraser in the graphic software(such as photoshop etc).
3.The second key is equivalent to the mouse right function.
4. Workspace and Advanced Setting
Click the ” Advanced Setting” button in tablet settings(see the selected area above), you can access the working area
and shortcut key settings.
6
6

4.1 Advanced Settings
4.1.1 Express key function setting
Area A: SoftKey key settings area
Area B: Express settings area
Area C: The work area
Area D: Softkey has three settings: “Softkey Disable, Softkeys Enable,Full Area”.
Sofkeys Disable: select this key, the key function will be disabled in the work area. The graphic
tablet’s work area is limited in the C area.
Area A:Softkey
Disable softkey
Area D:Softkey settings area
Area B:
Express key
Area C:the work area
The work area:Area A+Area C
The work area:Area C
Full Area
Click the express keys of the area can enter into the express keys’ function setting screen(pictured above),
the corresponding express key is from K1-K3 and K6-K8 of 6 express keys.
Selecting any express key, and then selecting the keyboard keys can setup functions for the selected express key.
Attention: Select this key of " Disable Express Key" , the key founction will be disabled
7
7

5. Digital Pen Pressure Sensitivity Test
Pressure sensitivity: move the slider from left to right, it can be used to adjust the sensitivity of the tip and the
severity of the stroke when drawing, which affects the change of the handwriting(red box area).
When your computer is connected with two screens and use the extended mode, you can choose the corresponding
work area of the graphic tablet in the setup screen area(green box area).
8
8

The pen tip replacement tool and 4 pen tips
Gently unscrew the pen holder in a
counterclockwise direction.
you will see one pen tip
replacement tool & 4 spare
pen tips inside.
III. Storing the Digital pen and changing the Pen Battery & Tip
Storing the Digital pen properly
To store the Digital pen, make sure that the tip does not touch anything, especially, do
not let the pen stand in a cup or penholder with the tip down. Pressure applied to the
pen tip might damage the precise configuration of the pen, it is recommended to place the
pen in a pen holder or store it with the pen tip pointing upward, or place it horizontally
with the pen tip free of any other objects.
Note: It’s recommended to turn the power off by pressing the power button at top of the pen to save
battery. See below about how to change batteries.
replacing the wireless stylus pen tip
A: Pull out the pen tip from Digital pen by using a Pen Clip that contained inside the pen holder.
Normal Pen Clip
Fig. (A) Unscrew the pen,
Fig. (B) Put an AAA battery into the pen-holder, + pole towards to pen tip end.
Hold down the power on/off button, then the pen works.
Power ON/OFF
Button2
Button1
Pen tip
Unscrew Unscrew
Cathode upward
Anode downward
Pen Tip
Pen Clip
B: Push the pen tip into the digital pen and make sure fit it up to the end properly.
9
9

IV. Question & Answer
Question 1: How can I get the update software?
Answer: You can download the new driver from our website.
(1) Uninstall your old driver: Click [Start] ► [All Programs] ► [TABLET] ► [Uninstall].
(2) Download the latest version of driver in the download section and save it into your hard disk.
(3) Unzip the file in a folder on your hard disk (with Windows built-in unzip utility or a program like Winzip for instance).
(4) Double-click the Setup.exe in the folder where you unzipped the file.
Question 2: The tablet cannot work. How can I do?
Answer: Please follow steps as showing below:
(1) Please pull off the tablet's USB plug from the computer.
(2) Remove the Tablet driver from the system.
(3) Re-connect theTablet's USB to the computer.
(3.1) Test your wireless digital pen on tablet working area, if it can work as a mouse, which means the hardware
is OK. If it doesn't work, please change the battery with a new one.
(3.2) After changing a new battery for the pen, if it still not working, it means that the hardware is faulty.
(4) You can download the latest version of driver directly from our website: www.gaomon.net.
(5) After installing the new version of driver, the system will require you to restart your computer.
(6) After restarting your computer, on bottom right of the screen, you can find the tablet icon ( ) within there.
(6.1) If you can't find the tablet icon ( ) on the bottom right of the screen, it means the driver fail in startup, which might
be due to incompatibility.
(6.2) Check from [My Computer] ► [Properties] ► [Hardware] ► [Device Manager], if there is an exclamation mark
occurs, it means the installed driver of tablet is incompatible with the windows system. If you have this problem,
please contact us for more service.
(7) By clicking the tablet icon ( ) on the bottom right of the screen, you can test the pressure sensitivity to see
whether the pen pressure function works or not. If you do not have the pen pressure, it means the pen might be faulty.
(Please see Chapters 2, Section 6. — Pen Tablet Configuration for more information).
10
10

As the “Support TabletPC” checked, please turn off flicks to get a better using experience.
Support Tablet PC
Also called Electronic Ink Function, which is normally used for supporting pressure sensitivity under Office 2007,
Journal or later version. For Sketchbook 6.0, Photoshop CC2014(or later) on Windows8 or later system,
checking "Support TabletPC" is needed to support pressure sensitivity.
As for other drawing software, please read the software instruction carefully to see whether it supports
windows TabletPC or not, and try to disable Support TabletPC if it is needed.
11
11

Guangzhou Gaomon Electronic Technology Co.,LTD
Room 2708, Buynow Building, No.592, Tianhe Road, Tianhe District, Guangzhou, China
www.facebook.com/Gaomonpentablet
twitter.com/Gaomonpentablet
http://www.gaomon.net
12
12
Table of contents
Other GAOMON Graphic Tablet manuals

GAOMON
GAOMON M1220 User manual

GAOMON
GAOMON M10K 2018 User manual

GAOMON
GAOMON M1220 Installation guide

GAOMON
GAOMON M1230 User manual

GAOMON
GAOMON S830 Installation guide

GAOMON
GAOMON M10K PRO Operating instructions

GAOMON
GAOMON PD1561 Installation guide

GAOMON
GAOMON M10K PRO User manual

GAOMON
GAOMON PD1220 User manual

GAOMON
GAOMON S620 User manual

GAOMON
GAOMON PD1161 User manual

GAOMON
GAOMON M1230 User manual

GAOMON
GAOMON S620 User manual

GAOMON
GAOMON S630 User manual

GAOMON
GAOMON M10K PRO User manual

GAOMON
GAOMON M106K User manual

GAOMON
GAOMON M106K PRO User manual

GAOMON
GAOMON S620 User manual

GAOMON
GAOMON PD2200 User manual

GAOMON
GAOMON M106K User manual