manuals.online logo
Brands
  1. Home
  2. •
  3. Brands
  4. •
  5. Gaspardo
  6. •
  7. Farm Equipment
  8. •
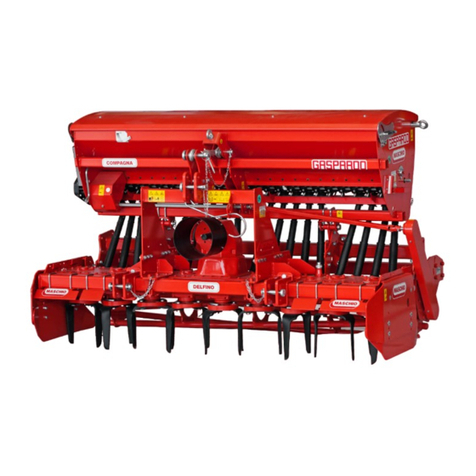
  9. Gaspardo PA1 User guide

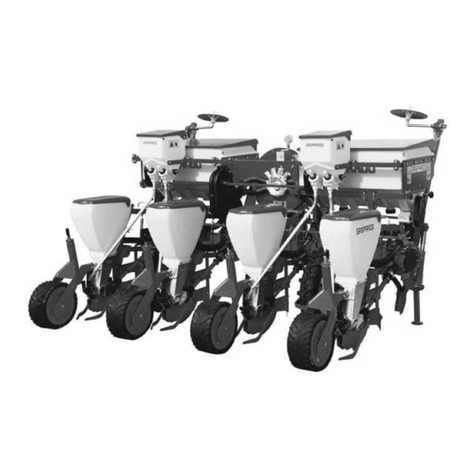
Gaspardo PA1 User guide

PA1
Cod. G19502171 2008-10
*)
*)ValidoperPaesiUE
*) ValidforEUmembercountries
*) Valable dans les Pays UE
*)GiltfürEU-Mitgliedsländer
*)Válido para Países UE
*)ValabilpentrutarileUE
MASCHIOGASPARDOS.p.A.
CONCIME
FERTILIZER
DÜNGEMITTELN
FERTILISANT
FERTILIZANTES
INGRASAMANT
USO E MANUTENZIONE
USE AND MAINTENANCE
GEBRAUCH UND WARTUNG
EMPLOI ET ENTRETIEN
EMPLEO Y MANTENIMIENTO
UTILIZARE SI INTRETINERE
IT
EN
DE
FR
ES
RO
GRINTA
ITALIANO ENGLISH DEUTSCH
INDICE INDEX INHALT
2gcod. G19502171
1.0 Premessa......................................... 5
1.1 Generalità ........................................... 5
1.2 Garanzia ............................................. 8
1.2.1 Scadenza garanzia ............................ 8
1.3 Identificazione dell'attrezzatura ......... 8
2.0 Indicazioni generali di sicurezza .. 9
2.1 Segnali di sicurezza e indicazione..... 9
2.1.1 Segnali di avvertenza......................... 9
2.1.2 Segnali di pericolo .............................. 9
2.1.3 Segnali di indicazione ......................... 9
2.2 Norme di sicurezza e prevenzione
infortuni............................................. 10
3.0 Descrizione della macchina ....... 13
3.1 Dati tecnici ........................................ 14
3.2 Movimentazione ................................ 14
3.3 Disegno complessivo ....................... 15
3.4 Dosatore ........................................... 16
3.5 Azionamento oleodinamico della
soffiante ........................................... 20
3.5.1 Impiantodipendente.......................... 20
3.5.2 Impiantoindipendente ....................... 21
3.5.3 Regolazione del soffiaggio ............... 22
3.5.4 Raffreddamento olio ......................... 22
4.0 Norme d'uso.................................. 23
4.1 Applicazione al trattore .................... 23
4.1.1 Attrezzatura anteriore...................... 23
4.1.2 Attrezzatura posteriore.................... 24
4.1.3 Collegamentocentrale ...................... 24
4.1.4 Collegamentoimpiantooleodinamico 25
4.2 Verifica capacità di sollevamento e
stabilità della trattrice abbinata alla
macchina .......................................... 26
4.3 Chiusura ed apertura dell'attrezzatura
posterior ........................................... 26
4.4 Trasporto stradale............................ 27
4.5 Prima di iniziare il lavoro ................... 28
4.6 Prova di dosaggio ............................. 28
4.6.1 Quantità massima di prodotto distribuito . 29
4.7 Inizio del lavoro ................................. 30
4.7.1 Preparativi per la distribuzione......... 30
4.8 Durante il lavoro ............................... 31
4.9 Fine lavoro ........................................ 31
4.9.1 Scarico della tramoggia .................... 31
5.0 Manutenzione ............................... 32
5.1 Piano di manutenzione...................... 33
5.2 Suggerimenti in caso d’inconvenienti . 34
6.0 Demolizione e smaltimento....... 34
Dichiarazione di conformità ................ 197
1.0 Introduction ................................... 37
1.1 General ............................................. 37
1.2 Guarantee......................................... 40
1.2.1 Expiry of guarantee.......................... 40
1.3 Identification...................................... 40
2.0 General safety rules .................... 41
2.1 Danger and indicator signals ........... 41
2.1.1 Warning signals ................................ 41
2.1.2 Warning signals ................................ 41
2.1.3 Indicator signals ............................... 41
2.2 Safety regulations and accident
prevention......................................... 42
3.0 Description of the machine........ 45
3.1 Technical data .................................. 46
3.2 Handling ............................................ 46
3.2 Assembly drawing ........................... 47
3.4 Doser ................................................ 48
3.5 Oleo-dynamic blower drive.............. 52
3.5.1 Dependent system ........................... 52
3.5.2 Independent system ......................... 53
3.5.3 Blower pump control ........................ 54
3.5.4 Oilcooling ......................................... 54
4.0 Rules of use................................... 55
4.1 Attachment the tractor ..................... 55
4.1.1 Front equipment ................................ 55
4.1.2 Rearequipment................................. 56
4.1.3 Central connection ........................... 56
4.1.4 Hydraulic system.............................. 57
4.2 Check the lifting capacity and stability
of the tractor to which the machine is
hitched .............................................. 58
4.3 Open and close the rear equipment 58
4.4 Transport .......................................... 59
4.5 Before starting work ........................ 60
4.6 Distributor test .................................. 60
4.6.1 Maximum quantity of product
distributed ......................................... 61
4.7 Operation start.................................. 62
4.7.1 Preparations for distributing............. 62
4.8 During work ...................................... 63
4.9 The end of operation ........................ 63
4.9.1 Emptying the hopper......................... 63
5.0 Maintenance .................................. 64
5.1 Maintenance plan - summary table .. 65
5.2 Suggestions in case of inconveniences . 66
6.0 Demolition and disposal ............. 66
Conformity declaration ........................ 197
1.0 Vorwort .......................................... 69
1.1 Allgemeines ...................................... 69
1.2 Garantie ............................................ 72
1.2.1 Verfall des Garantieanspruchs ....... 72
1.3 Identifizierung ................................... 72
2.0 Allgemeine
Sicherheitsanweisungen .......... 73
2.1 Warnsignale und Anzeigesignale .... 73
2.1.1 Warnsignale...................................... 73
2.1.2 Gefahrsignale ................................... 73
2.1.3 Anzeigesignale ................................. 73
2.2 Sicherheits- und Unfallverhütungs-
Bestimmungen .................................. 74
3.0 Beschreibung die Maschine ...... 77
3.1 Technische Daten ............................ 78
3.2 Fortbewegung.................................. 78
3.3 Zusammenfassend .......................... 79
3.4 Dosiervorrichtung............................. 80
3.5 Hydraulischer Antrieb des Gebläses .. 84
3.5.1 Anschluss an die Schlepperhydraulik .. 84
3.5.2 Separate Hydraulikanlage ................ 85
3.5.3 Druckeinstellung ............................... 86
3.5.4 Ölkühlung .......................................... 86
4.0 Betriebs-Anleitungen.................. 87
4.1 Einbau am Schlepper........................ 87
4.1.1 Frontanbaugerät............................... 87
4.1.2 Hinteranbaugerät.............................. 88
4.1.3 Mittiges Verbindungsrohr................. 88
4.1.4 Öldynamische anlagen ..................... 89
4.2 Prüfung der Hubkraft und
Standsicherheit des mit der Maschine
verbundenen Traktors...................... 90
4.3 Schließen und öffnen des Hinteren
Maschine .......................................... 90
4.4 Transport .......................................... 91
4.5 Vor Arbeitsbeginn ............................ 92
4.6 Abdrehprobe .................................... 92
4.6.1 Maximal Ausbringbare Saatmenge .... 93
4.7 Arbeitsbeginn ................................... 94
4.7.1 Vorbereitungen vor dem verteilung.... 94
4.8 Während des Betriebs ..................... 95
4.9 Am Ende der Verteiler ...................... 95
4.9.1 Ablassen des Saatgutes aus dem
Trichter ............................................. 95
5.0 Wartung .......................................... 96
5.1 Wartungsplan - Übersichtstabelle.... 97
5.2 Ratschläge bei Störungen................ 98
6.0 Zerlegen und entsorgen der
Maschine........................................ 98
Konformitätsenklärung ....................... 197
FRANÇAIS
TABLESDEMATIERES
3
g
cod. G19502171
ESPAÑOL
INDICE
ROMANA
CUPRINS
1.0 Introduction ................................. 101
1.1 Généralités ..................................... 101
1.2 Garantie .......................................... 104
1.2.1 Expiration de la garantie ................ 104
1.3 Identification.................................... 104
2.0 Indications générales de
sécurité ........................................ 105
2.1 Signaux de securite d'indication .... 105
2.1.1 Signaux de recommandation.......... 105
2.1.2 Signaux de danger ......................... 105
2.1.3 Signaux de indication ..................... 105
2.2 Normes de securite et de prevention
des accidents ................................. 106
3.0 Description de la machine........ 109
3.1 Donnees techniques ...................... 110
3.2 Movimentation ................................. 110
3.3 Dessin global .................................. 111
3.4 Doseur ............................................ 112
3.5 Installation d'actionnement de la
soufflante ....................................... 116
3.5.1 Installation dependante................... 116
3.5.2 Installation independante ................ 117
3.5.3 Réglage de la pression................... 118
3.5.4 Refroidissement huile ..................... 118
4.0 Normes d'emploi........................ 119
4.1 Attelage au tracteur ....................... 119
4.1.1 Equipementanterieur...................... 119
4.1.2 Configuration graines ..................... 120
4.1.3 Raccordement central .................... 120
4.1.4 Installationdecommandehydeaulique . 121
4.2 Stabilite pendant le transport machine-
tracteur ........................................... 122
4.3 Fermeture et l'ouverture de
l'equipement arriere ........................ 122
4.4 Transport ........................................ 123
4.5 Avant de commencer le travail ...... 124
4.6 Essai de dosage ............................. 124
4.6.1 Quantitemaximumdeproduitdistribue . 125
4.7 Debut du travail............................... 126
4.7.1 Preparation pour le distribution ...... 126
4.8 Durant le travail............................... 127
4.9 Fin de travail ................................... 127
4.9.1 Rideau de vidange.......................... 127
5.0 Entretien ....................................... 128
5.1 Plan d'entretien - tableau récapitulatif.. 129
5.2 Conseils en cas d'inconvenients ... 130
6.0 Demantelement et elimination. 130
Confotmity declaratione ...................... 197
1.0 Premisa ........................................ 133
1.1 Generalidades ................................ 133
1.2 Garantía .......................................... 136
1.2.1 Vencimiento de la garantía ............. 136
1.3 Identificación................................... 136
2.0 Indicaciones generales de
seguridad ...................................... 137
2.1 Señales de seguridad y de indicación 137
2.1.1 Señales de advertencia ................. 137
2.1.2 Señales de peligro.......................... 137
2.1.3 Señales de peligro.......................... 137
2.2 Normas de seguridad y prevención
contra los accidentes..................... 138
3.0 Descripción de la màquina ...... 141
3.1 Datos tecnicos................................ 142
3.2 Manipulación ................................... 142
3.3 Diseño general................................ 143
3.4 Dosificador ..................................... 144
3.5 Accionamiento hidráulico del soplador . 148
3.5.1 Instalación dependiente.................. 148
3.5.2 Instalación independiente ............... 149
3.5.3 Regolación de la presion ................ 150
3.5.4 Refrigeración del aceite ................. 150
4.0 Normas de uso ........................... 151
4.1 Aplicación al tractor ....................... 151
4.1.1 Equipo delantero............................. 151
4.1.2 Equipamientoparasemilla .............. 152
4.1.3 Conexión central ............................ 152
4.1.4 Instalaciones hidráulicas ................ 153
4.2 Estabilidad durante el transporte de la
màquina -tractor ............................. 154
4.3 Cierre y la apertura del equipo
posterior ......................................... 154
4.4 Transporte ...................................... 155
4.5 Antes de iniciar el trabajo .............. 156
4.6 Prueba de dosificación................... 156
4.6.1 Cantidad máxima de producto
distribuido ....................................... 157
4.7 Inicio del trabajo .............................. 158
4.7.1 Preparativos para el trabajo........... 158
4.8 Durante el trabajo ........................... 159
4.9 Final del trabajo............................... 159
4.9.1 Descarga de las semillas desde
la tolva ............................................ 159
5.0 Mantenimiento............................ 160
5.1 Plan de mantenimiento - tabla de
resumen.......................................... 161
5.2 Sugerencias en caso de
inconvenientes ............................... 162
6.0 Desguace y eliminación ............ 162
Declaración de conformidad ............... 197
1.0 Introducere.................................. 165
1.1 Generalitati ...................................... 165
1.2 Garantia .......................................... 168
1.2.1 Expirarea garantiei ......................... 168
1.3 Identificarea utilajului ...................... 168
2.0 Indicatii generale de siguranta. 169
2.1 Adezivi de siguranta si indicare..... 169
2.1.1 Adezivi de avertizare ..................... 169
2.1.2 Adezivi de pericol........................... 169
2.1.3 Adezivi de indicare......................... 169
2.2 Norme de siguranta si prevenire a
accidentelor .................................... 170
3.0 Descrierea masinii ..................... 173
3.1 Date tehnice.................................... 174
3.2 Manipulare ...................................... 174
3.3 Desen de ansamblu........................ 175
3.4 Dozator ........................................... 176
3.5 Actionarea oleodinamica a suflantei180
3.5.1 Instalatie dependenta ..................... 180
3.5.2 Instalatie independenta................... 181
3.5.3 Reglarea suflarii ............................. 182
3.5.4 Racireauleiului................................ 182
4.0 Norme de utilizare...................... 183
4.1 Aplicarea la tractor ......................... 183
4.1.1 Utilajulanterior ................................ 183
4.1.2 Utilajul posterior .............................. 184
4.1.3 Cuplare centrala ............................. 184
4.1.4 Cuplare instalatie oleodinamica ...... 185
4.2 Verificarea capacitatii de ridicare si
stabilitatea tractorului la care este
aplicata masina ............................... 186
4.3 Inchiderea si deschiderea utilajului
posterior ......................................... 186
4.4 Transportul pe drumurile publice.... 187
4.5 Inainte de inceperea lucrului .......... 188
4.6 Proba de dozare............................. 188
4.6.1 Cantitatea max. de produs distribuit 189
4.7 Inceperea lucrului ........................... 190
4.7.1 Pregatiri pentru distributie .............. 190
4.8 Intimpullucrului............................... 191
4.9 Sfarsitul lucrului .............................. 191
4.9.1 Descarcarea bazinului ................... 191
5.0 Intretinere .................................... 192
5.1 Plan de intretinere ........................... 193
5.2 Sugestii in caz de inconveniente .... 194
6.0 Demolare si lichidare................. 194
Declaratie de conformitate.................. 197
cod. G19502171
g
4
37

ENGLISH
g
cod. G19502171
1.0 INTRODUCTION
This Instruction Manual for Operation (hereafter called "the Manual") provides the operator with useful information on how to simplify
EQUIPMENT use by operating it correctly and in safe conditions.
The sections below must not be considered as a long and burdensome list of warnings: they must be regarded as a number of
instructions that improve machine performance and prevent damage to persons, objects or animals originating from incorrect
machine operation and use.
It is essential that each operator in charge of transporting, installing, commissioning, operating, maintaining, repairing and dismantling
the machine consults this manual and read it carefully before carrying out any operation. This will help him avoid incorrect manoeuvres
and prevent inconveniences that may jeopardise the machine integrity and eventually result in risks for operators' safety.
If you are still in doubt or have points to clear on machine operation after reading this manual, do not hesitate to contact the
Manufacturer who will be ready to assist you promptly and carefully for better and most efficient machine operation.
Finally, we would like to point out that existing regulations on safety, hygiene at work and environmental protection must always be
adhered to during all the phases of machine operation. The operator must therefore check that the machine be operated
exclusively in optimised safety conditions for both persons and objects.
This manual is to be considered as an integral part of the product. Therefore, along with the Declaration of Conformity, it must be
stored in a safe place where it can be consulted during the entire machine life and passed on to the new owner.
This manual was drawn up according to the regulations existing at the time when it was printed.
The Manufacturer reserves the right to change the machine without having to promptly update this manual. In the event of
disputes, the valid version is the Italian text.
Some of the pictures in this manual show details or accessories which may be different from those fitted in your machine. Components
or guards may have been removed to make images more useful.
1.1 GENERAL
Conventionalsymbols:
To identify and make different danger types recognisable, the following symbols are used in the manual:
WARNING!
DANGERFOR OPERATORS'
HEALTHANDSAFETY.
WARNING!
RISKOF DAMAGETO MACHINEOR
DRILL PRODUCT.
In the text, symbols are accompanied by safety warning messages: these are short sentences to further exemplify the type of risk/
danger. Warning texts guarantee the safety of operators and prevent damage to the machine or drill product.
The drawings, pictures and diagrams in this manual are not scaled. They exemplify the information provided in the text and are an
addition to it: they are not meant to illustrate the supplied machine in details. For a more comprehensive overview of the machine,
drawings, pictures and diagrams represent the machine, or parts of it, without the protections or guards in most cases.
Finally, a few words on annexes. As they are photocopies of catalogues, drawings, etc., they have the original ID and page numbers
(when provided with it). If they are not originally provided with a numbering, they are not given one.
USEANDMAINTENANCE
38
ENGLISH
gcod. G19502171
Definitions:
Below is a list of definitions of the main terminology used in this Manual. Read these definitions carefully before consulting the
Manual.
•OPERATOR:................................................. The person/s charged with installing, starting up, adjusting, carrying out maintenance,
cleaning, repairing or transporting a machine.
•DANGERZONE: ...........................................any area inside a/o near a machine in which the presence of an exposed person
constitutes a risk for the safety and health of that person.
•DANGERCONDITION: .................................. Any condition in which an operator is exposed to one or several risks.
•RISK:............................................................A combination of likelihood and seriousness of possible injuries or damage to the
operator's health in a danger condition.
•PROTECTIONS ............................................Safety measures consisting in installation of specific technical systems (guards and
safety devices) to protect operators against dangers.
•GUARD:........................................................ An element on the machine which is used in a specific way to protect the operator by
means of a physical barrier. Depending on its construction, it can be a shroud, a cover,
a shield, a door, a fence, a guard, a segregation unit, etc.
•EXPOSEDPERSON: ....................................Any person who happens to be completely or partially in a danger zone.
•USER: ..........................................................The user is the person or the organization or the firm which has purchased or rented
the machine and intends to use it for the purposes it was conceived for.
•QUALIFIEDPERSONNEL: ............................Those persons who have been specially trained and qualified to carry out interventions
of maintenance or repair requiring a particular knowledge of the machine, its functioning,
safety measures, methods of intervention - and who are in a position to recognize the
potential dangers when using the machine and are able to avoid them.
•TRAINEDPERSONNEL: ............................... These are operators that have been informed or trained on the operating tasks and
relating risks.
•AUTHORIZEDSERVICECENTER: ................The authorized Service Center is a structure legally authorized by the manufacturer
which disposes of personnel specialized and qualified to carry out all the operations of
assistance, maintenance and repair - even of a certain complexity - found necessary to
keep the machine in perfect working order.
Responsibility
The Manufacturer declines any direct or indirect responsibility in the following cases:
- incorrect machine operation for non-intended uses;
- machine operation by unauthorised operators who have not been trained and do not have a driving license;
- non-performance of scheduled maintenance;
- unauthorised changes or work;
- installation of non-genuine and specific spare parts;
- non-observance, either total or partial, of the instructions provided in this manual;
- failure to apply regulations on safety, hygiene and health at work;
- unscheduled and unpredictable events.
ATTENTION
• Minors, illiterates and persons under altered physical or psychological conditions must not be allowed to operate the machine.
• Operators who do not have a suitable driving license, or who are not properly informed and trained, must not be allowed to operate
the machine.
• The operator must check that the machine operates correctly, and must replace and repair parts subject to wear that may cause
damage.
• The customer should instruct personnel on accident risks, on the operator safety devices provided, on noise emission risks and on
general accident prevention regulations provided for by the international directives and by the law in the country in which the
machines are used.
• In any case, the machine should be used exclusively by skilled operators who will be held to follow scrupulously the technical and
accident-prevention instructions in this manual.
• The Customer is responsible for finding and selecting the category of suitable PPE (Personal Protection Equipment).
• The machine features pictograms which the operator must keep in perfect readable conditions. When no more readable, they must
be replaced as instructed by European regulations.
• It is the user's responsibility to check that the machine is operated only in optimum conditions of safety for people, animals and property.
• Any change made on the machine without authorisation relieves the Manufacturer from any and all responsibility for damage to
objects or injuries to operators or third partiesi.
The Manufacturer declines any and all responsibility for possible incorrect information in this manual if it is due to printing, translation
or transcription errors. If the Manufacturer deems it necessary to provide the Customer with any additional information to the
instruction provided in this instruction manual for operation must be stored with the manual which it is an integral part of.
USEANDMAINTENANCE
39
ENGLISH
g
cod. G19502171
List of personal protection equipment (PPE) to be used during all the phases of the machine life
Table 1 summarises the PPE (Personal Protection Equipment) to be used during the different phases of machine life (each phase
requires mandatory use of and/or availability of PPE.
The Customer is responsible for finding and selecting the type and category of suitable PPE.
Table 1
Trasportation
Handling
Removal from packaging
Assembly
Routine operation
Adjustments
Cleaning
Maintenance
Disassembly
Demolition
PPE required PPE available or to be used if required PPE not required
The utilised PPE must be CE-marked and be compliant with Directive 89/686/EEC.
The machine life phases (ref. to Table 1) are listed in the table below.
•Transportation:............... Machine transfer from one location to a new one on a suitable vehicle.
•Handling .......................... Machine transfer from and on the transportation vehicle and movements inside the plant.
•Removalfrompackaging . Removal of all the packaging materials.
•Assembly........................ All the assembly operations to initially prepare the machine for setup.
•Routine operation .......... The machine intended (or usual) use according to its design, construction and function.
•Adjustments................... Adjustment, setup and calibration of all those devices that need to be adapted to normal machine
operation.
•Cleaning.......................... Removal of dust, oil and work process residues which may jeopardise correct machine operation and
use as well as the health/safety of operators.
•Maintenance .................. Periodic checking of machine parts which are subject to wear or require replacement.
•Disassembly .................. Complete or partial disassembly of the machine for any reason whatsoever.
•Demolition ...................... Permanent removal of all the machine parts for final machine dismantling in order to enable recycling or
differentiated collection of components according to the methods envisaged by the existing regulations.
ATTENTION
Do not wear protective gloves which may get entangled in the machine moving parts.
Protection
equipment Safety
footwear Gloves Goggles Ear
defenders Mask Hardhat
or helmet
Phase
USEANDMAINTENANCE
40
ENGLISH
gcod. G19502171
fig. 1
(1)
(2)
(3)
(5)
(7)
(4)
(6)
1.2 GUARANTEE
On delivery, check that the equipment has not been damaged during transport and that the accessories are integral and complete.
POSSIBLECLAIMS MUST BEPRESENTED IN WRITING WITHIN EIGHTDAYS OF RECEIPT.
The purchaser will enforce his rights on the guarantee only when he has respected the conditions concerning the benefit of the
guarantee, set out in the supply contract.
1.2.1EXPIRYOFGUARANTEE
Besides what has already been set out in the supply contract, the guarantee expires:
- If the limits set out in the technical data table are overshot.
- If the instructions set out in this booklet have not been carefully followed.
- If the equipment is used badly, defective maintenance or other errors by the client.
- If modifications have been carried out without written authorization of the manufacturer and if non original spare parts have been
used.
1.3 IDENTIFICATION
Each individual machine has an identification plate (Fig. 1)
indicating the following details:
1) Mark and address of the Manufacturer;
2) Type and model of machine;
3) Total unladen mass, in kilograms;
4) Maximum working load capacity, in kilograms (front hopper);
5) Registration of the machine;
6) Year of manufacture;
7) CE mark.
You are advised to note down your data on the form below, along
with the date of purchase (8) and the dealer’s name (9).
8) ____________________
9) ____________________
This information must always be quoted whenever assistance
or spare parts are needed.
ATTENTION
Do not remove, tamper with or make the CE mark affixed on
the machine illegible.
Refer to the information provided on the CE mark for the
manufacturer's contact details (e.g. for requesting spare
parts, etc.).
When the machine is demolished, destroy the CE marking.
USEANDMAINTENANCE
41
ENGLISH
g
cod. G19502171
2.0 GENERAL SAFETY RULES
6) High noise level. Use suitable ear defenders.
7) When using fungicidal chemicals, use suitable means of per-
sonal protection.
8) Danger of getting trapped. Keep away from moving parts.
9) Danger of crushing of the upper limbs while handling mobile
parts.
10)Risk of inhaling harmful sub- stances. Wear a dust mask.
11)Danger of becoming entangled in the fan. Do not remove the
guards and do not come close to the moving parts.
2.1.3INDICATOR SIGNALS
12)Wear safety clothing.
13)Greasing point.
14)Coupling point for lifting.
The Manufacturer declines any and all responsibility in the event that the safety pictograms supplied with the
machine are missing, illegible or moved from their original position.
2.1 DANGER AND INDICATOR SIGNALS
The signs described are reproduced on the machine (Fig. 2).
Keep them clean and replace them if they should come off or
become illegible. Carefully read each description and learn their
meanings by heart.
2.1.1WARNINGSIGNALS
1) Before operating, carefully read the instruction booklet.
2) Before carrying out maintenance, stop the machine and
consult the instruction booklet.
2.1.2WARNINGSIGNALS
3) Pipes with high pressure fluids. Take care if flexible pipes break
as oil could spurt. Read the instruction manual.
4) Danger of getting squashed during closure. Keep at a safe
distance from the machine.
5) Danger of falling. Do not climb onto the machine.
fig. 2
12
10
11
1
2
13
5
8
14
3
13
476 9
8
USEANDMAINTENANCE
42
ENGLISH
gcod. G19502171
2.2 SAFETY REGULATIONS AND ACCIDENT
PREVENTION
Pay attention to danger signs, where shown, in this booklet.
There are three levels of danger signs:
DANGER: This sign warns that the operations described cause
serious lesions, death or long term health risks, if they are not
carried out correctly.
ATTENTION: Thissign warns thatthe operations describedcould
cause serious lesions, death or long term health risks, if they
are not carried out correctly.
CAUTION: This sign warns that the operations described could
cause serious damage to the machine, if they are not carried out
correctly.
Carefully read all the instructions before using the machine; if
in doubt, contact the technicians of the Manufacturer’s dealer.
The manufacturer declines all responsibility for the non-
observance of the safety and accident prevention regulations
described below.
13) Before starting up the equipment, check the area surrounding
the machine to ensure that there are no people, especially
children or pets, nearby, and ensure that you have excellent
visibility.
14) Use suitable clothing. Avoid loose clothing or garments with
partsthat could in anyway get caughtin the rotating ormoving
parts of the machine.
15) Before operating the machine, make sure that all the safety
devices are in perfect operating condition and installed
properly. Replace them if they are malfunctioning or are
damaged. Replace it immediately if it presents signs of
deterioration.
16) Before starting work, familiarize yourself with the control
devices and their functions.
17) Only start working with the equipment if all the protective
devices are in perfect condition, installed and in the safe
position.
18) It is absolutely prohibited to stand within the machine’s radius
of action where there are moving parts.
19) It is absolutely forbidden to use the equipment without the
guards and container covers.
20) During operation, the machine may cause excessive dust.
We recommend working with tractors featuring a cabin with
aventilation system equipped with filters;alternatively, protect
the airways with dust-proof masks or masks equipped with
a filter.
21) Make sure that the machine has not been damaged during
transportation. If this is the case, immediately report the
damage to the Manufacturer.
22) Clean the machine from foreign matter (deposits, tools, misc.
objects) which may jeopardise machine operation or damage
the operator
23) Before leaving the tractor,lower the equipment hooked to the
lifting unit, stop the engine, pull the hand brake and remove
the key from the dashboard, make sure that the chemical
substances safely out of reach.
24) The driver’s seat must never be left when the tractor engine
is running.
25) Before starting the equipment, check that the supporting feet
have been removed from under the machine; check that the
machine has been correctly assembled and regulated; check
that the machine is in perfect working order, and that all the
parts subject to wear and tear are in good condition.
26) Before releasing the equipment from the third point
attachment, put the hoist command lever into the locked
position and lower the support feet.
27) Only operate when visibility is good.
28) All operations must be carried out by expert personnel,
equipped with protective gloves, in a clean and dust-free
environment.
General norms
1) During machine operation, maintenance, repair, handling
and storage, wear suitable personal protection equipment.
2) Maintenance, adjustment and cleaning operations must be
carried out after positioning the machine on the ground (in
stable conditions); the PTO must be disconnected, the motor
of the tractor must be off, the parking brake engaged and the
ignition key disengaged.
3) When operating the machine during the night time or in
reduced visibility conditions, turn on the lighting system of
the tractor.
4) The machine must be operated by one operator only. Any
use other than that intended is considered as incorrect.
5) Pay close attention to the danger signs in this manual and
on the machine.
6) The labels with the instructions attached to the machine give
abbreviated advice for avoiding accidents.
7) Scrupulously observe, with the help of the instructions, the
safety and accident prevention regulations.
8) Avoid touching the moving parts in any way whatsoever.
9) Any work on and adjustment to the machine must always be
done with the engine switched off and the tractor blocked.
10) People or animals must not, under any circumstances be
transported on the equipment.
11) It is strictly prohibited to drive the tractor, or allow it to be
driven, with the equipment attached by persons not in
possession of a driver’s license, inexpert or in poor conditions
of health.
12) Before starting the tractor and the equipment, check that all
safety devices for transport and use are in perfect working
order.
USEANDMAINTENANCE
43
ENGLISH
g
cod. G19502171
Tractor hitch
1) Hook the equipment to a suitable, sufficiently-powered tractor
by means of the appropriate device (lifter), in conformity with
applicable standards.
2) The class of the equipment attachment pins must be the
same as that of the lifter attachment.
3) Take care when working within the range of the lifting arms
as this is a very dangerous area.
4) Be very careful when hooking and unhooking the equipment.
5) It is absolutely forbidden to stand between the tractor and
linkage for manoeuvring the lifting controls from the outside
(Fig. 3).
6) It is absolutely forbidden to stand in the space between the
tractor and the equipment (Fig. 3) with the engine running.
It is possible to work between the tractor and the equipment
only after the parking brake has been applied and a suitably
sized blocking wedge or stone has been placed under the
wheels.
7) The attaching of additional equipment onto the tractor brings
about a different distribution of weight on the axles. Check
the compatibility of the tractor performance with the weight
that the machine transfers onto the three-point linkage. If in
doubt consult the tractor Manufacturer.
8) Comply with the maximum admissible weight for the axle,
the total mobile weight, transport regulations and the highway
code.
Transport on Road
1) When driving on public roads, be sure to follow the highway
code of the country involved.
2) Any transport accessories must be provided with suitable
signs and guards.
3) It is very important to remember that road holding capacity as
well as direction and braking capacity can be influenced,
sometimes con-siderably, by equipment being either carried
or towed.
4) To work in safety the instructions given in the highway code
should be followed; these prescribe that at least 20% of the
weight of the tractor alone should be borne by the front axle
and that the weight on the arms of the hoist should not be
more than 30% of the weight of the tractor itself.
5) When negotiating curves, be aware of the variation in
centrifugal force exerted in a position other than that of the
center of gravity, with and without the equipment in tow. Also
pay greater attention on sloping roads or ground.
6) For transport, adjust and fasten the lateral lifting arm chains
of the tractor; check that the seed and fertilizer hopper covers
are closed properly; lock the hydraulic lifting control lever.
7) All road transport must only be carried out with the tanks and
tanks empty and at max speed of 25 km/h. For the transport
on the road it must be assured the cover with the appropriate
one pulling of coupling (A, Fig. 4). Periodically, it is necessary
to verify the degree of deterioration of pulling and to the
occurrence to replace it.
8) For displacements beyond the work area, the equipment
must be placed in the transportation position.
9) Upon request the Manufacturer will supply supports and
tables for signaling of dimensions.
10) When the dimensions of carriedor partially-carried equipment
conceal the tractor’s signalling and lighting devices, these
must also be installed on the equipment itself, in conformity
with regulations of the highway code of the country involved.
When in operation make sure that the lighting system is in
perfect working order. The transport on the road must be
done with light (B, Fig. 4) turned off. The orientation of the
light (C, Fig. 4) must be done in conformity with regulations
of the highway code of the country involved.
fig. 4
A
BB
C
C
fig. 3
USEANDMAINTENANCE
44
ENGLISH
gcod. G19502171
Safety measures concerning the hydraulics
1) At the moment of connecting the hydraulic tubes to the
hydraulic system of the tractor, make sure that the hydraulic
systems of the operating machine and the tractor are not
under pressure.
2) For the operative hydraulic connections between tractor and
operating machine, the sockets and plugs should be marked
with colours to distinguish them, to avoid them being used
wrongly. There would be a danger of accident if the
connections were to be swapped round.
3) The hydraulic system is under high pressure; because of
the accident risk, when searching for leakage points special
auxiliary instruments should be used.
4) Not to never carry out the search losses with the fingers or
the hands. The liquids that exit from the holes can be nearly
not visible.
5) During transport by road the hydraulic connections between
tractor and operating machine should be disconnected and
secured to the support provided.
6) Do not use vegetable oils under any circumstance. These
could cause a risk of damage to the cylinder gaskets.
7) The operating pressures of the hydraulic system should be
between 100 bars and 180 bars.
8) Never exceed the indicated hydraulic system pressure levels.
9) Check that the quick hook-ups are coupled correctly; parts of
the system could get damaged if they are not.
10) Oil escaping at high pressure can cause skin injury with the
risk of serious wounds and infection. Call a doctor
immediately if such an incident occurs. If the oil with surgical
means is not removed quickly, can take place serious
allergies and/or infections. Therefore, the installation of
hydraulic components in the tractor driver's cab is strictly
forbidden. All the components of the system should be
positioned carefully to avoid parts being damage during use
of the equipment.
11) In case of participation on the hydraulic system, to unload
the hydraulic pressure carrying all the hydraulic commandos
in all the positions some times after to have extinguished the
motor.
Maintenance in safety
During work and maintenance operations, use suitable perso-
nal protection gear:
Overalls Gloves Shoes Goggles Hardhat
1) Do not proceed with maintenance and cleaning if the power
take-off has not been disconnected first, the engine power
off, the hand brake pulled and the tractor blocked with a
wooden block or stone of the right size under the wheels.
2) Periodically check that the bolts and nuts are tight, and if
necessary tighten them again. For this it would be advisable
to use a torque wrench, respecting the values of 53 Nm for
M10 bolts, resistance class 8.8, and 150 Nm for M14 bolts
resistance class 8.8 (Table 2).
3) During assembling, main-tenance, cleaning, fitting, etc., with
the machine raised, place adequate supports under the
equipment as a precaution.
4) The spare parts must correspond to the manufacturer’s
specifications. Use only original spares.
Table 2
USEANDMAINTENANCE
45
ENGLISH
g
cod. G19502171
3.0 DESCRIPTION OF THE MACHINE
This agricultural equipment can operate only with a farm tractor fitted with front and rear lifting units with the relative three-point
universal linkages.
The equipment is suitable for fertiliser spreading machinery in combination with precision planting units and hoeing machine.
The quantities to distribute are set through a fertilizer distributor, the motin of which derives from the crawler wheel through traction.
ATTENTION
The machine is suitable only for the uses indicated. The recommended working speed is 6÷8 km/h. The machine must only be
transported by road with the tanks and hoppers empty and at max speed of 25 km/h. Any other use different from that described
in these instructions could cause damage to the machine and represent a serious hazard for the user.
This machine has been intended for professional use: it must be operated exclusively by preliminarily educated, trained and
authorised operators who hold a regular driving license.
Operating instructions
• The machine was manufactured for dosing and distributing commercial fertilizer of standard quality.
• The machine is intended for professional users: operation must be allowed to skilled operators only.
• The machine must be operated by one operator only.
• The machine is not intended for purposes other than farming applications.
The machine can travel on a gradient up to:
10%10%10%
10%
Conforming machine operation also includes:
• compliance with all the instructions provided in this manual;
• performance of inspection and maintenance operations described in this manual;
• exclusive use of genuine GASPARDO spare parts.
The Customer must ensure that Qualified Operators for routine machine operation are suitably trained and prove competent in
carrying out the tasks assigned to them, taking care of their safety and that of third parties.
Depending on the qualification level and tasks assigned, qualified operators must be duly instructed on the machine functions so as
to operate and manage it correctly and guarantee good machine efficiency.
Regular operation depends on the correct use and adequate maintenance of the equipment. It is advisable therefore to observe
scrupulously what is described in order to prevent any inconveniences that could prejudicate proper operation and duration. It is just
as important to keep to what is described in this booklet since the Manufacturer declines all responsibility due to negligence and
non-observance of these rules.At any rate the Manufacturer is available to assure immediate and accurate technical assistance and
all that may be necessary for the improved operation and better performance of the equipment.
The machine user shall be liable for damage caused by non-compliance with the instructions hereby.
ATTENTION
The machine must be operated by qualified operators of the Customer. The operator must wear suitable personal protection
equipment (safety footwear, overalls and gloves, etc.).
Additional checks before operation
Below is a list of additional checks required before operating the machine:
• ensure that there are no remarkably big stones or rocks (diameter superior to 8 to 12 cm) on the soil;
• ensure that there are no protruding sections of trees (over 10 cm) having a diameter superior to 8 to 12 cm on the soil;
• ensure that there are no metal elements of any type whatsoever, but especially nets, cables, wire ropes, chains, pipes, etc. on the
soil.
USEANDMAINTENANCE
46
ENGLISH
gcod. G19502171
3.1 TECHNICAL DATA
FRONTTANK U.M. PA1
Row number [nr.] 6 - 8 - 12
Load capacity of the fertilizer hopper [l] (kg) 1260 (1500)
Distributor [nr.] 1
Distribution Mechanical (Electrical - Optional)
Weight [kg] (lb) 530 (1166)
Three- point universal joint [nr.] II
Dimensions Height [m] 1,54
Width [m] 2,38
Length [m] 1,30
HYDRAULICALLYOPERATED FAN - TRACTORDEPENDENT
Tractor oil delivery [l/min] 32
The pressure of return circuit [bar] 0 (max. 10)
Max. working pressure (hydraulic blower system) [bar] 150
Acoustic pressure level LpA(A) [dB] 84,2
HYDRAULICALLYOPERATEDFAN - TRACTORINDEPENDENT
PTO (rpm) [r.p.m.] 1000
Acoustic pressure level LpA(A) [dB] 84,2
Power take-off [nr.] 1 (front)
Oil hopper capacity [l] 55
Max. working pressure (hydraulic blower system) [bar] 150
TRACTORSPECIFICATIONS U.M.
Three- point universal joint [nr.] II
Batteryvoltage [V] 12
Tractor pump pressure (max) [bar] 180
Tractor hydraulic connections Hydraulic blower drive: nr. 1 double-acting +
nr. 1 exhaust (without pressure - max 10bar).
Transmission wheel nr. 1 double-acting
12 V electrical connections Lights kit 7-pole connector;
The technical data and the models provided must be considered as non binding. We reserve the right to change them without
notice.
fig. 5
3.2 HANDLING
If the equipment is to be moved, it is necessary to raise each part
and hook it onto the respective mountings shown in (Fig. 5) with
hoisting apparatus of suitable lifting capacity.
As this operation is dangerous, it must be carried out by trained,
responsible personnel. The machine weight is shown on the
identification label (Fig. 1).
The mass of the equipment is shown in the Technical Data table
of the user and maintenance booklet and is determined by the
sum of the weight and the load shown in the table.
Stretch the cable to level the machine.
The hooking points are shown by the graphic "hook" symbol (13,
Fig. 2).
ATTENTION
•Packagingmaterials (pallets,cartons, etc.) must be disposed
of as prescribed by the existing regulations through
authorised disposal companies.
• Parts making up the machine must not be lifted by hooking
themup from movingor weak parts such as guards, electrical
runways, pneumatic parts, etc.
• Standingundersuspendedloadsis not allowed; unauthorised
personnel are not allowed access to the work sites; it is
mandatory to wear overalls, safety footwear, gloves and a
hardhat.
USEANDMAINTENANCE
47
ENGLISH
g
cod. G19502171
3.3 ASSEMBLY DRAWING(Fig. 6)
1) Fertilizer hopper;
2) Load bearing structure;
3) Covering hopper;
4) Distributor;
5) Tube for conveying fertilizer;
6) Inspection footboard;
7) Blower pump;
8) Transmission wheel (mechanical transmission);
9) Lighting kit;
10) Supports feet;
11) Identification plate;
12) Gear box;
13) Metering unit scale position;
14) Agitator;
15) Agitator drive belt;
16) Feeler pin;
17) Hopper discharge hatch;
18) Fertilizer dosing roller;OPTIONAL
19) Monitor GENIUS (electrical transmission);
20) Electrical motor;
21) Oleodynamic blower drive;
22) Three-way regulator with manometer;
23) Multiplier.
6
9
4
53
fig. 6
1
7
8
2
10
19 2018 22 2321
11
17
14
16
15
13
12
USEANDMAINTENANCE
48
ENGLISH
gcod. G19502171
3.4 DOSER
The doser (Fig. 7) the most important part for distribution, is
located underneath the fertilizer hopper.
Motive power is transmitted to it by the drive wheel through
gears (with ratios proportional to the width of the work to be
carried out) and chains.
The Electric Distribution Control can be supplied as an
accessory. In that event, for the metering operation and the
metering adjustment, checking and tests, please refer to the
relevant User and Maintenance Booklet.
The volumetric distributing device, GRINTA, is essentially
composed of four elements for ferilizer distribution:
A) aluminium monobloc frame;
B) agitator element;
C) dosing rollers;
D) Feeler pin.
MONOBLOCFRAME
The monobloc frame is made of aluminium and offers the following main advantages:
- realization of very high precision and high quality over time;
- resistance to the effects of UV rays or to the problems of harsh autside temperatures;
- high resistance to corrosion;
- quick simple maintenance: in a few minutes we can completely remove the components of the doser without fully unscrewing the
screws, using just one spanner.
AGITATORELEMENT
Guarantee of continuous feeding to the dosing rollers.
The agitator has a diameter of 85 mm and consists of 4 elements (curved pins). If the agitator is running too fast, its mixing effect can
be halved, by removing the two center pins (B, Fig. 7).
The agitator can be disabled by simply removing the drive belt.
- To disable the agitator, lift the round belt above the edge of the drive pulley (Fig. 8) and, on the opposite side, rotate the dosing roller
in the driving direction.
- Simply leave the belt on the drive shaft (Fig. 9).
(To fit the belt, see chapter on dosing roller)
fig. 8 fig. 9
fig. 7
B
A
D
C
B
USEANDMAINTENANCE
49
ENGLISH
g
cod. G19502171
DOSINGROLLERS(Fig.10)
- Large diameter to reduce the number of revolutions and avoid fertilizer load losses;
- High number of cells arranged in a steggered pattern to guarantee uninterrupted
delivery;
Assembling and disassembling the dosing roller
All the dosing rollers are compact units constructed in a single block.
Never fit dosing rollers with screws loosening the handwheel! The radial precision
of the wheels, which are calibrated after assembly, could be damaged!
WARNING
Always use gloves: after calibration, the new dosing rollers could have sharp edges
that might injure the operator!
As described above, remove the round belt
of the agitator, then screw the handwheel
to the side of the dosing roller (Fig. 11) and
proceed when the machine is completely
empty. Once the fastening knob of the
dosing roller has been released, it remains
connected to the doser casing, in order to
safeguard against it being accidentally lost.
Slide the dosing roller out sideways (Fig.
12) and remove it from the doser (Fig. 13).
To re-assemble, follow the steps in reverse
order.
fig. 10
fig. 15
fig. 14
fig. 16
fig. 12
fig. 11
fig. 13
During the assembly phase, rotate the
dosing roller in the driving direction and
push it into the doser (Fig. 14), until the
drive pin engages in the gearbox (Fig. 15).
To start up the agitator, first fit the belt on
the small agitator disc, then apply
pressure to the lower edge of the dosing
roller and, on the opposite side, rotate the
dosing roller on the handwheel, in the
drivingdirection until the beltcomes off (Fg.
16).
USEANDMAINTENANCE
50
ENGLISH
gcod. G19502171
FEELERPIN
The feeler pin may also be easily disassembled in a single block in a matter of minutes for cleaning purposes. It consists of 5 single
hatches that are spring-loaded to ensure tight closing. The hatches do not touch the wheel while it is in operation! Thanks to the
separators fixed between one hatch and the next, it is possible to activate each element independently of the others. Moreover, the
separators are shaped in such as way as to act as a shield against foreign bodies that could damage the dosing roller. The hatches
are adjustable, and their shape has been specifically designed to adapt to the fertilizer.
ATTENZIONE
Utilizzare sempre i guanti di protezione. Soprattutto le parti nuove potrebbero pre-
sentare bordi appuntiti e provocare ferite all'operatore!
1) In order to disassemble the feeler unit, loosen the four nuts of the axles (front and
back) (Fig. 17), using a 13 mm spanner....
2) until it is becomes possible to push out the discs fitted inside, remove them from
their seats (Fig. 18) and move the axles.
3) Remove the back part (Fig. 19) of the feeler pin unit, first, followed by the front part
(Fig. 20).
fig. 17
fig. 19
fig. 18
fig. 20
fig. 21
When the hatch is disassembled, it is also possible to remove the emptying hatch, by sliding it out from below.
On completion of cleaning, re-assemble the unit by following the above mentioned steps in reverse order, taking care to position the
flat parts of the axles correctly! Once the hatch has been fitted, slide in the discs and reposition them in their seats. At this stage,
simple screw the hatch into place. Tighten the screws well by hand.
Once the hatch has been mounted, the elements must be mobile. To check that they are, simply push them with your fingers (Fig. 21).
If they do not move, it is advisable to disassemble them and clean them.
During re-assembly, before tightening the various parts, ensure that the rear part of
thehatch (on the spring side) is nottoo high. Install the dosing roller inorder to ensure
that the height is correct.
USEANDMAINTENANCE
51
ENGLISH
g
cod. G19502171
fig. 22
fig. 24
fig. 23 fig. 25
fig. 27 fig. 28 fig. 29
fig. 26
A
DISASSEMBLINGTHEAGITATORAXLE
The agitator can be removed from its housing without the use of tools, with a view to
facilitating cleaning operations and replacing damaged parts.
1) Doser with feeler pin and dosing rollers disassembled (Fig. 22).
2) Remove the various parts of the agitator (Fig. 23).
3) Remove the agitator (Fig. 24), ensuring that the bearing and protection disc on the
opposite side do not drop down.
4) Tilting the shaft slightly and pushing inwards, remove the bearing and the protection
disc from their housing (Fig. 25). Repeat this operation on the other side.
Take the agitator off (Fig. 26), thoroughly clean all the parts and the housings of the
bearings with special care.
Installing the agitator shaft:
1) Slide the shaft into the housing of the bearing (Fig. 27).
2) Fit the bearing on the shaft and the protection disc on the left housing from inside
the metering unit. Then, install the last roll pin on the right (A, Fig. 28).
3) In the right housing of the bearing, fit the bearing, first, followed by the protection
disc. Finally, install the shaft.
4) Use the roll pin on the left side (Fig. 29) to secure the shaft. Then, install the
remaining roll pins on the agitator shaft.
USEANDMAINTENANCE
52
ENGLISH
gcod. G19502171
3.5 OLEO-DYNAMIC BLOWER DRIVE
Safety
The equipment is suitable only for the use indicated. Any use
other than that described in these instructions can cause
damage to the machine and constitute a serious danger to the
user.
Regular operation depends on the correct use and adequate
maintenanceof the equipment. It is advisable therefore to observe
scrupulously what is described in order to prevent any
inconveniences that could prejudicate proper operation and
duration. It is just as important to keep to what is described in
this booklet since the Manufacturer declines all responsibility
due to negligence and non-observance of these rules.
At any rate the Manufacturer is available to assure immediate
and accurate technical assistance and all that may be necessary
for the improved operation and better performance of the
equipment.
The oleo-dynamic blower drive may be used, maintained and
repaired only by personnel with complete knowledge of the
apparatus in question and of the relative dangers. Check the
correct connection of the quick-couplings; failure to do so could
result in damage to the system. Disconnect the oleo-dynamic
unions only after having first depressurized them.
ATTENTION
High-pressure oil leaks can cause serious skin injuries with the
risk of infection. In such cases seek immediate medical attention.
It follows that oleo-dynamic components should not under any
circumstances be installed in the tractor cabin.
All the component parts of the pressurised system should be
carefully installed in order to avoid damage during the use of the
machinery.
There are two types of oleo-dynamic system for the blower drive:
a) dependent system: connected to the tractor’s system.
b) independent system: a system with a self-contained oleo-
dynamic system.
3.5.1DEPENDENT SYSTEM
Characteristics of the tractor necessary for installation
-A sufficient number of distributors on the tractor: the supply
to the blower drive has maximum priority.
-Tractor oil flow rate: the oil required for engaging the blower is
approx. 32 litres/minute with a max. pressure of 150 bar.
- For correct blower operation and sufficient oil cooling we
recommend supplying the circuit with an amount of oil equal to
55÷60 litres.
-Oil cooling: if the tractor is not equipped with a large enough
cooling system, it will be necessary:
a) to install one;
b) increase the oil reserve by means of a supplementary tank
(ratio:1:2 between thepump delivery/minute andthe oil reserve).
- The return circuit must be low pressure (max 10 bar).
- Do not connect the return circuit to the auxiliary distributor.
- Tractors: check the tractor according to the above observations.
If necessary have any modifications carried out by the tractor
dealer.
- Oil supply: follow the data of the table in Fig. 30.
WORKINGDESCRIPTION
The oil flow necessary to drive the blower, is taken from the
tractor distributor, through a pressure tube to a three-way
regulator. The rotational speed of the oleo-dynamic motor, and
therefore that of the blower, is proportional to the flow pressure
shown on the manometer (Table 4). The system is equipped
with a safety valve that allows the blower to continue turning by
inertia even after the system has been disengaged or when
there has been a sudden failure of the system.
The return circuit, which can have a radiator incorporated (on
request), must be low pressure (max 10 bar) otherwise the oil-
seal of the oleo-dynamic motor will be damaged. We recommend
that a 3/4 inch return pipe is connected to the tractor’s oleo-
dynamic system scavenge union in the following way:
a) The return oil must pass through the filter;
b) The return oil must not pass through the distributors but
through a low-pressure return circuit (scavenge);
For further information contact the manufacturer of the tractor.
STARTINGUP
With the engine off and the tractor immobilized, connect correctly
all the quick-couplings. Start the engine and operate the system
at idle for a few minutes bringing constant pressure to the entire
circuit in order to avoid instability of the blower. It is possible to
regulate the pressure only when the oil has reached the right
temperature and the blower does not present changes of speed.
If the equipment is used with more than one tractor and,
consequently, different distributors and oils, it will be necessary
to repeat the calibration procedure for each tractor.
In tractors with variable-delivery pumps (closed hydraulic circuit),
fitted with an oil delivery regulator, first open the three-way
regulator «B» completely and, starting with little oil pressure,
open the internal regulator gradually until the pressure required
is reached. This is indicated on the pressure gauge «C» (see
paragraph 3.5.3).
fig. 30
A - q u i c k - c o u p l i n g
pressure side;
B - three-way regulator;
C - manometer;
D - engine;
E- safety valve;
F - q u i c k - c o u p l i n g
scavenge side;
G - cooler (optional).
Tractor side
F
G
E
D
B
C
A

Other manuals for PA1

4

Other Gaspardo Farm Equipment manuals

Gaspardo PA1 User guide

Gaspardo

Gaspardo PA1 User guide

Gaspardo ALIANTE DD User guide

Gaspardo

Gaspardo ALIANTE DD User guide

Gaspardo F Plus Guide

Gaspardo

Gaspardo F Plus Guide

Gaspardo CENTAURO 5000 User guide

Gaspardo

Gaspardo CENTAURO 5000 User guide

Gaspardo FBR Plus Guide

Gaspardo

Gaspardo FBR Plus Guide

Gaspardo M Guide

Gaspardo

Gaspardo M Guide

Gaspardo DP PRONTA 300 User guide

Gaspardo

Gaspardo DP PRONTA 300 User guide

Gaspardo Vitigreen 1300 User guide

Gaspardo

Gaspardo Vitigreen 1300 User guide

Gaspardo Direttissima 250 User guide

Gaspardo

Gaspardo Direttissima 250 User guide

Gaspardo Primo E2 User guide

Gaspardo

Gaspardo Primo E2 User guide

Gaspardo ALITALIA User guide

Gaspardo

Gaspardo ALITALIA User guide

Gaspardo SD Series User guide

Gaspardo

Gaspardo SD Series User guide

Gaspardo Primavera User guide

Gaspardo

Gaspardo Primavera User guide

Gaspardo PI User guide

Gaspardo

Gaspardo PI User guide

Gaspardo FIORE Guide

Gaspardo

Gaspardo FIORE Guide

Gaspardo DP User guide

Gaspardo

Gaspardo DP User guide

Gaspardo VITTORIA 250 User guide

Gaspardo

Gaspardo VITTORIA 250 User guide

Gaspardo M 250 User guide

Gaspardo

Gaspardo M 250 User guide

Gaspardo CENTAURO User guide

Gaspardo

Gaspardo CENTAURO User guide

Gaspardo SP User guide

Gaspardo

Gaspardo SP User guide

Gaspardo NINA 250 User guide

Gaspardo

Gaspardo NINA 250 User guide

Gaspardo COMBINATA 250 Guide

Gaspardo

Gaspardo COMBINATA 250 Guide

Gaspardo PA1 User guide

Gaspardo

Gaspardo PA1 User guide

Gaspardo SP SPRINT User guide

Gaspardo

Gaspardo SP SPRINT User guide

Popular Farm Equipment manuals by other brands

J&M 32 Series Operator's manual

J&M

J&M 32 Series Operator's manual

Truma Mover XT L Operating instructions & installation instructions

Truma

Truma Mover XT L Operating instructions & installation instructions

Amazone Catros 12003-2TS Operator's manual

Amazone

Amazone Catros 12003-2TS Operator's manual

LEMKEN TAURI 12 operating instructions

LEMKEN

LEMKEN TAURI 12 operating instructions

LeeBoy L600 Operation, service and parts manual

LeeBoy

LeeBoy L600 Operation, service and parts manual

Agria 8100 215 Translation of the original operating instructions

Agria

Agria 8100 215 Translation of the original operating instructions

Palax Power 100S operating instructions

Palax

Palax Power 100S operating instructions

CSS MLGFM2000-2400 Assembling Instruction & Part List

CSS

CSS MLGFM2000-2400 Assembling Instruction & Part List

NAMYSLO EASY FLOW instructions

NAMYSLO

NAMYSLO EASY FLOW instructions

GREAT PLAINS Yield-Pro Air-Pro YP2425A Operator's manual

GREAT PLAINS

GREAT PLAINS Yield-Pro Air-Pro YP2425A Operator's manual

Brinly DT-400 BH owner's manual

Brinly

Brinly DT-400 BH owner's manual

Croplands PEGASUS 7000 Standard Operator's manual

Croplands

Croplands PEGASUS 7000 Standard Operator's manual

DeLaval IPR Instruction book

DeLaval

DeLaval IPR Instruction book

Rotomec TILL-RITE Operator's manual

Rotomec

Rotomec TILL-RITE Operator's manual

Digga DOZER BLADE Operator's & parts manual

Digga

Digga DOZER BLADE Operator's & parts manual

Fransgard GT-300AUS manual

Fransgard

Fransgard GT-300AUS manual

Krone Comprima F 125 Original operating instructions

Krone

Krone Comprima F 125 Original operating instructions

Hillside Cultivator Blueberry Cultivator operating instructions

Hillside Cultivator

Hillside Cultivator Blueberry Cultivator operating instructions

manuals.online logo
manuals.online logoBrands
  • About & Mission
  • Contact us
  • Privacy Policy
  • Terms and Conditions

Copyright 2025 Manuals.Online. All Rights Reserved.