CW
1. Press CW (8.5). A scanning screen is displayed with a
Doppler cursor on the 2D mode image and a Doppler
spectrum in the lower part of the screen.
2. Use the trackball (9.1) to position the Doppler cursor
line over the area of interest.
Tissue Velocity Imaging (TVI)
1. While in 2D mode press TVI (8.6) on the control panel.
2. Use the trackball (9.1) (assigned function: Pos) to
position the ROI frame over the area to be examined.
3. Press Set. The instruction Size should be highlighted in
the trackball status bar.
NOTE: If the trackball control Pointer is selected, press Set to
be able to select between Position and Size controls.
4. Use the trackball to adjust the dimension of the ROI.
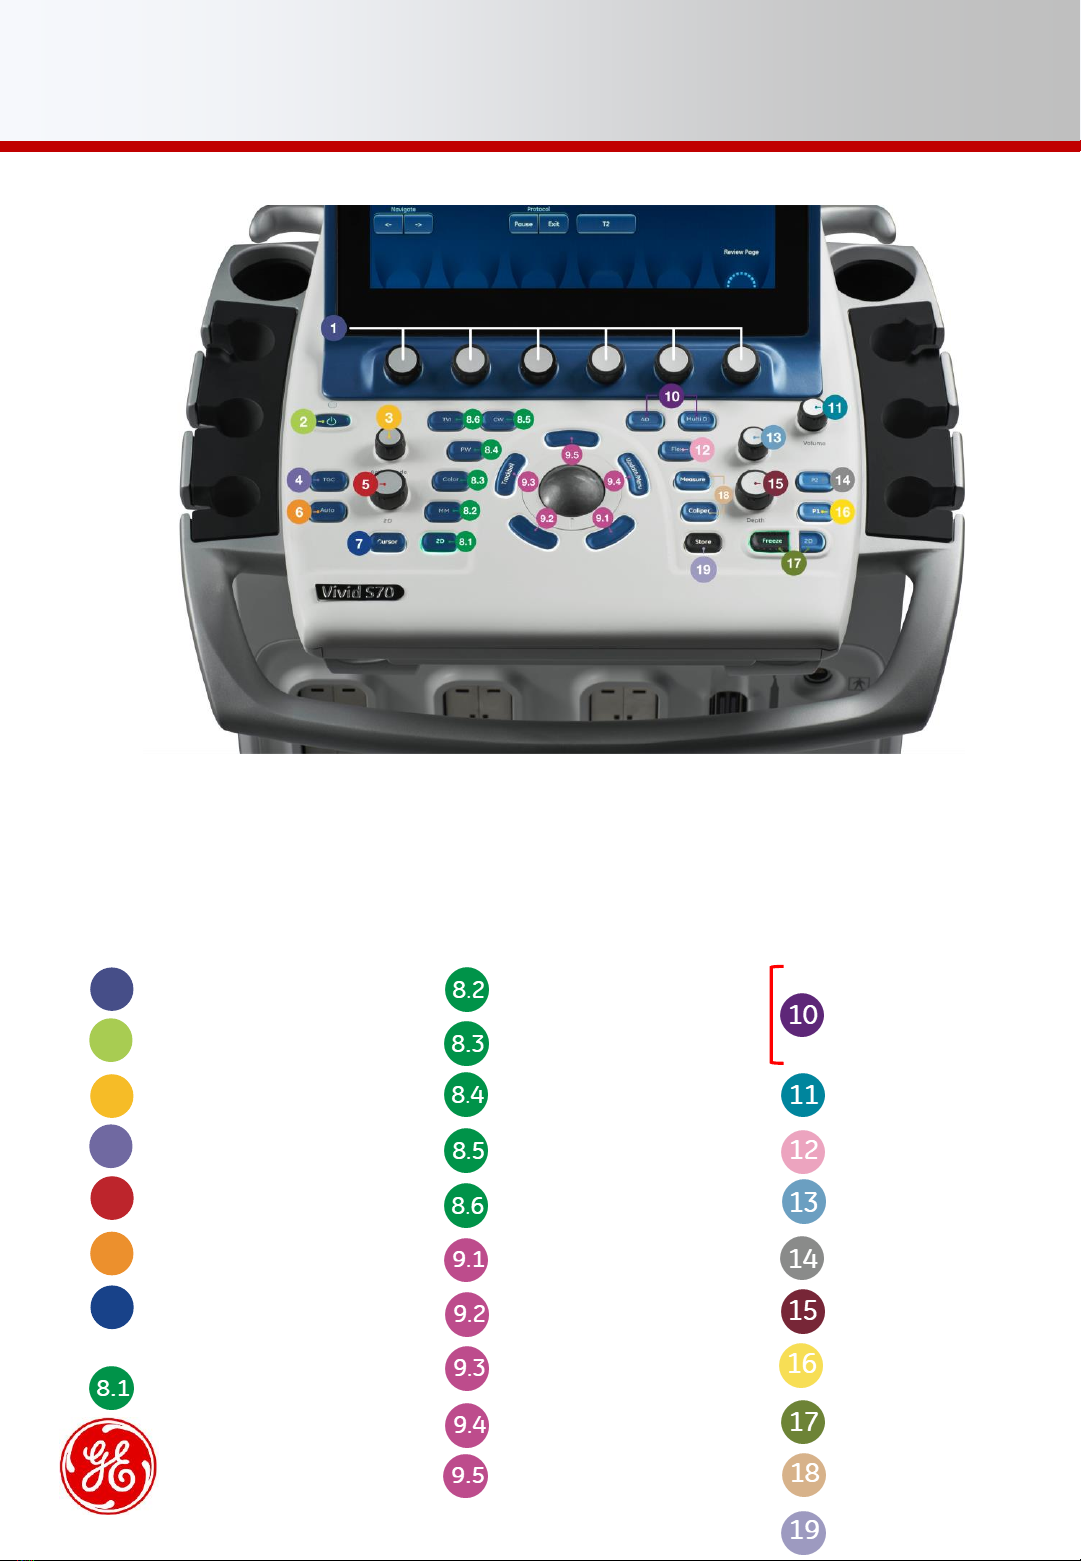
Quick Card Vivid S60 / S70
Trackball and related buttons
Select keys (9.2):
1. Angle: Sets the cut-planes and crop planes to pre-
defined positions.
2. Pos: Adjusts the ROI position
Update/Menu Key (9.3):
In Freeze: displays a pop-up System menu.
In Live duplex mode (Doppler or M-mode): toggles
Live/Freeze between the 2D image and the spectrum
image.
Trackball Key (9.4):
1. Scroll: scroll through the progress bar to watch the
cine loop frame by frame
2. Angle/Pos
3. Ptr: mouse left key
Upper key (9.5):
Configurable as either a select key, a pointer, an Image
store button, or an Image cursor.
To set the function:
1. Press Utility/Config on the Touch panel
2. Select Imaging/Global
4D Control
1. Enter 4D by pressing the 4D button (10)on the
control panel. The volume acquisition is started.
2. Adjust the desired parameters on the touch
panel.
Multi D Control
1. Press Multi-D (10)on the control panel
NOTE: The Bi-plane screen is displayed.
2. Press Tri-plane or Bi-plane on the touch panel to
activate the corresponding mode.
Loudspeaker volume control
Rotate (11)to adjust the volume level of the integrated
speakers.
PW
Color
1. From an optimized 2D image, press Color (8.3).
2. Use the trackball (9.1) (assigned function: Pos) to
position the ROI frame over the area to be examined.
3. Press Set. The instruction Size should be highlighted
in the trackball status bar.
NOTE: If the trackball control Pointer is selected, press
Trackball to be able to select between Position and Size
controls.
Use the trackball to adjust the dimension of the ROI.
1. Press PW (8.4). A scanning screen is displayed with a
Doppler cursor on the 2D mode image and a Doppler
spectrum in the lower part of the screen.
2. Use the trackball (9.1) to position the sample volume
location over the area of interest.
3. In PW, adjust the Sample Volume.
NOTE: Sample Volume adjustment may affect the Scale,
Frame rate and LV rej. settings.
NOTE: Adjustment of the Sample volume may affect the PRF
(Nyquist limit) settings.