manuals.online logo
Brands
  1. Home
  2. •
  3. Brands
  4. •
  5. Gecko
  6. •
  7. Keypad
  8. •
  9. Gecko in.xe Technical manual

Gecko in.xe Technical manual

Other manuals for in.xe

2

Other Gecko Keypad manuals

Gecko in.k300 User manual

Gecko

Gecko in.k300 User manual

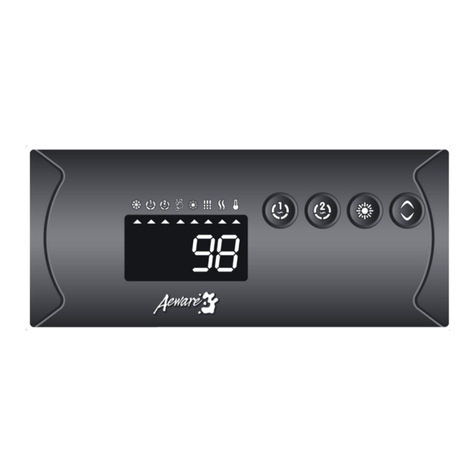
Gecko Aeware in.k100 Series User manual

Gecko

Gecko Aeware in.k100 Series User manual

Gecko k-35-in Series Reference guide

Gecko

Gecko k-35-in Series Reference guide

Gecko in.k1000 Reference guide

Gecko

Gecko in.k1000 Reference guide

Gecko iTouch Reference guide

Gecko

Gecko iTouch Reference guide

Gecko Aeware Advanced in.k600 Reference guide

Gecko

Gecko Aeware Advanced in.k600 Reference guide

Gecko Aeware k-19-in Reference guide

Gecko

Gecko Aeware k-19-in Reference guide

Gecko in.k175 Aeware Operating instructions

Gecko

Gecko in.k175 Aeware Operating instructions

Gecko IN.K19-2OP Reference guide

Gecko

Gecko IN.K19-2OP Reference guide

Gecko in.k800 User manual

Gecko

Gecko in.k800 User manual

Gecko in.k800 Reference guide

Gecko

Gecko in.k800 Reference guide

Gecko in.k1000 Reference guide

Gecko

Gecko in.k1000 Reference guide

Gecko INK 500 Specification sheet

Gecko

Gecko INK 500 Specification sheet

Gecko in.k800 Reference guide

Gecko

Gecko in.k800 Reference guide

Gecko Aeware in.k200 series Reference guide

Gecko

Gecko Aeware in.k200 series Reference guide

Popular Keypad manuals by other brands

AAA 6150RFAAA Installation and setup guide

AAA

AAA 6150RFAAA Installation and setup guide

Fermax MDS Installation and programming manual

Fermax

Fermax MDS Installation and programming manual

ACT ACT PRO 1030 manual

ACT

ACT ACT PRO 1030 manual

Cardin SSB Series manual

Cardin

Cardin SSB Series manual

Harman Kardon KP 1 Specifications

Harman Kardon

Harman Kardon KP 1 Specifications

CYP CR-KP1 Operation manual

CYP

CYP CR-KP1 Operation manual

Aeware k-35 Series Quick reference card

Aeware

Aeware k-35 Series Quick reference card

Aritech CS-175 Series user guide

Aritech

Aritech CS-175 Series user guide

Lenze AC Tech MC SERIES installation instructions

Lenze AC Tech

Lenze AC Tech MC SERIES installation instructions

Burg Wächter secuENTRY 7711 operating instructions

Burg Wächter

Burg Wächter secuENTRY 7711 operating instructions

Aeware in.k450 Tech book

Aeware

Aeware in.k450 Tech book

Lenze EPM-H410 operating instructions

Lenze

Lenze EPM-H410 operating instructions

Toshiba RKP007Z user manual

Toshiba

Toshiba RKP007Z user manual

Elmes Electronic KB1 quick start guide

Elmes Electronic

Elmes Electronic KB1 quick start guide

Clare Controls ClareOne CLR-C1-PNC Installation sheet

Clare Controls

Clare Controls ClareOne CLR-C1-PNC Installation sheet

FM Electronics 4180 quick start guide

FM Electronics

FM Electronics 4180 quick start guide

AMX MIO-PRESTIGE-S Dimensional drawing

AMX

AMX MIO-PRESTIGE-S Dimensional drawing

why pro WHY-KP user manual

why pro

why pro WHY-KP user manual

manuals.online logo
manuals.online logoBrands
  • About & Mission
  • Contact us
  • Privacy Policy
  • Terms and Conditions

Copyright 2025 Manuals.Online. All Rights Reserved.

Quick Start Card
in.xe™
For 120 VAC (*3 wires)
*If connected to a
3 wire system, no
240 VAC component
will work.
For 240 VAC (4 wires)
Correct wiring of the
electrical service box,
GFCI, and pack ter-
minal block is essen-
tial. Call an electrician
if necessary.
2- Connect the spa pack
The heat.wav heater is factory confi gured 240v /
4 KW (or 2KW), but it can be converted to a
dedicated 120v / 1KW by a simply switching the
cable connection port. (Option available on
North American models only).
Heat.wav specifi cation summary:
• Supports 120v or 240v
• Protected by external breaker (not fused)
• Incoloy® or Titanium (optional) heater element
for greater protection against corrosion.
Connections for 120v
heater (1KW)
L2 GroundL1
Connections for 230/
240 VAC heater (4KW)
GroundN L1
It's important to
specify the current
rating of the GFCI
used to insure safe
and effi cient current
management (and no
GFCI trippings).
Press and hold Light
button for 30 seconds
until you access the
breaker setting menu.
The values displayed
by the system corres-
pond to 80% of the
maximum amperage
capacity of the GFCI.

Use Up or Down
button to select the
desired value. Then
press Light button to
set breaker rating.
GFCI Br
60 Amp 48 Amp
50 Amp 40 Amp
40 Amp 32 Amp
30 Amp 24 Amp
20 Amp 16 Amp
1- Connect all outputs & keypads
3- Select breaker
Pump 2
connector
Pump 1
connector Blower
connector Ozonator
connector
Direct
connector
Keypad
connector
Comm
connector
Light
connector
Don't forget that the voltage is determined by the cable used (120 or 240V cable)!
(10-20 AMP
dedicated 120 VAC)
For complete Techbook or more information, see on our website: www.geckoalliance.com
P1: Pump 1
CP: Circulation Pump
Config.
#P1 P2 BL CP config. Ozone configuration Filter Type Heater
Pump
1 2sp 1sp X Always on --- Clean, P1L P1
2 2sp 1sp X Always on --- Purge CP
3 2sp 1sp X --- On during Filter cycle, with P1 Clean, P1L P1
4 2sp 1sp - Duration fi ltration On during Filter cycle, with CP Clean, CP P1
5 2sp 1sp - Always on Always on with CP Clean, P1L CP
6 2sp 1sp - Duration fi ltration On during Filter cycle, with CP Clean, CP CP
7 2sp 1sp - --- On during Filter cycle, with P1 Clean, P1L P1
8 2sp - X --- On during Filter cycle, with P1 Clean, P1L P1
9 2sp - - --- On during Filter cycle, with P1 Clean, P1L P1
10 1sp 1sp X --- On during Filter cycle, with P1 Clean, P1L P1
11 1sp 1sp - Duration fi ltration On during Filter cycle, with CP Clean, CP P1
12 1sp 1sp - Always on Always on with CP Purge CP
13* 1sp - - Always on Always on with CP Purge CP
Press and hold the
Pump 1 key for 30
seconds.


Use the Up/Down key
to choose the new de-
sired low level confi gu-
ration number and
press the Program or
light key to confi rm the
selected confi guration
(consult the confi gura-
tion selection chart
section in this manual).
If the Program or light
key is not pressed with-
in 25 seconds, the unit
will exit this menu with-
out changing any settings.
If at power-up of the
system your keypad
display shows the
following message:
"L _ _ ", it means that
all low level confi gura-
tions have been down-
loaded, but no confi -
guration number has
been chosen.
The keypad display
will show L xx where
"xx" represents the
previous confi guration
number registered in
the system.
Programming the in.xe™ using the keypad
4- Select proper Low Level
Note: This confi guration chart is valid for the sofware #85 revision 1 to 3.
This information is displayed on top side keypad at spa pack power-up.
Software number is displayed fi rst (ex: ), followed by revision (ex: ).
Confi guration selection chart
* Confi guration #13 for software 85 Rev-03
Note: If the keypad in use does not have the
Program key, use the Light key instead.
9919-101154
© 2010 Groupe Gecko Alliance Inc.
TM trade-marks of/marques de commerce
de Groupe Gecko Alliance Inc.