Solo II overviewIntroduction
The Solo II shows real-time information about the electricity
your home is using. It uses a low power radio frequency to talk
to the supplied transmitter connected to your electricity meter.
Using the optional internet bridge you can use energynote® -
geo’s online service - to access real-time information from your
PC, smartphone, tablet or other Internet-enabled device.
Please read the important safety notice in this document
before using your display.
What’s in the box?
Your Solo II CT package contains the following items:
• Solo II energy display
• Solo II removable stand
• Power supply
• Wireless transmitter and batteries
• 3 x CT clips
• Quick Start Guide
If any items are missing, please contact your supplier. A more
detailed user manual is available online - see the back of this
guide for more details.
Setting up your display
Connecting the power supply
Connect the power supply to your Solo II. Your display will turn
on automatically when you plug it into the mains.
Always disconnect the power supply before cleaning your
display.
Do not use any other power supply - you must only use the
power supply that comes with your Solo II.
Wall mounting your display
Your Solo II can be either free standing or wall mounted.
To wall mount, remove the stand from the rear of the display
by sliding it downwards and then secure it to the wall with two
at-head screws.
Connecting the transmitter
Your Solo II uses a low power radio transmitter that is
connected to your electricity meter to receive information on
your energy usage.
jInstalling the transmitter is simple - but if at any point you
are unsure about how to connect the transmitter safely,
please seek professional advice or speak to your energy
provider.
Locate your electricity meter
You will need to know where your electricity meter is located
and have access to the cables that connect to it.
Typically there are four cables: one pair for live (L) and neutral
(N) from outside the home and a second pair that connect to
your fuse panel.
Connecting the transmitter
Your Solo II works with single or three-phase electricity
supplies using one or three CT clips.
For single-phase, connect a CT clip to one of the live (L) cables
that are wired to your meter - the live cable is usually coloured
brown or red. Open the CT clip rst, place it around the cable
and then rmly close it - until you hear a ‘click’ indicating that it
is tightly connected to the cable.
Connect the other end of the CT clip cable in to one of the
three sockets on the bottom of the transmitter.
For a three-phase supply, repeat this process for all three live
(L) cables wired to a single three-phase or multiple single-phase
meters.
Installing the batteries
The batteries are already installed in your transmitter. Remove
the cover by pressing the tab on the back and sliding the cover
upwards.
Pull out the red tab and your transmitter will power on.
Testing the connection
Your Solo II has been pre-paired with the transmitter in the
factory, so as soon as your transmitter is connected and your
display is powered on, you should start to see the speedometer
at the top of the display showing energy being used.
Follow the simple steps later in this guide to tell your Solo II
how much your electricity costs and set yourself a budget.
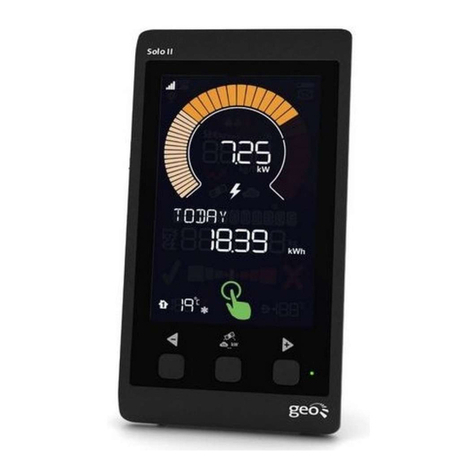
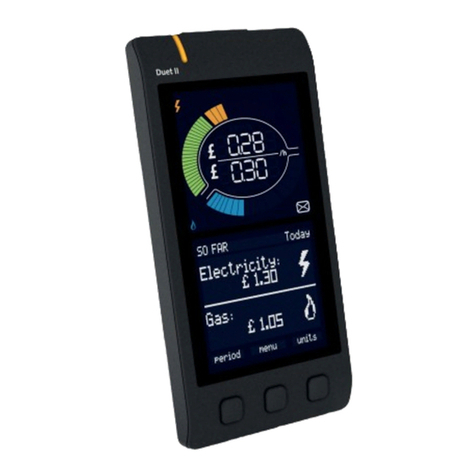
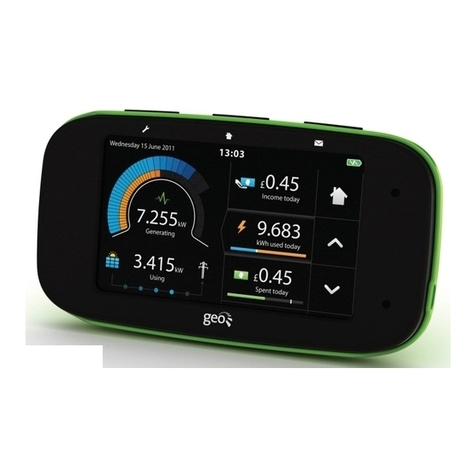
Signal strength
Indicates the quality of the
signal between your Solo II
and the transmitter. Five bars =
maximum strength.
Speedometer
The large dial shows the
current rate of energy
consumption for your home.
The more segments shown, the
greater the amount of power is
being used.
The light orange section shows
up to 1kW of power, the darker
orange up to 8.5kW and the
red (on the right) shows up to a
maximum of 21kW.
As you turn appliances on
and o, the speedometer will
change.
The numbers show the current
power consumption in cost,
energy (kW) and kg of CO2. All
based on an hourly rate.
If you press the b button, you
can switch between cost, kW
and CO2.
Budget
This indicates whether you are
predicted to be over or under
the budget you set.
The more green or red
segments shown, the more you
are under or over your budget.
Buttons
A button changes
the total period.
b switch between
cost, kW and CO2.
Centers the
stopwatch mode.
Total
The middle section of the
display shows how much you
have used over time.
If you press the A button, the
Solo II will show the total for
today, yesterday, day before
yesterday, this week, last week,
this month and last month.
LED
The coloured LED indicates the
rate of consumption.
Green is under 1kW, orange is
between 1kW and 8.5kW and
red is when using over 21kW.
Temperature
Current indoor and outdoor
temperature (if tted).
Stopwatch
Your Solo II has a function to
let you record a specic timed
event, such as using a washing
machine.
Press the C button to enter
the stopwatch mode. Use the
A button to start or stop the
stopwatch. A long press of A
will reset the stopwatch.
Press C to exit the stopwatch.
If the stopwatch is in RUN mode,
a small clock icon will be shown.
Internet
With the optional internet
bridge, the cloud icon indicates
a working internet connection.
Battery
If the batteries need replacing
in your transmitter, this icon will
ash. Replace them as soon as
possible.
Tari
If you have more than one
tari, these three icons show
the current tari. 1 icon =
lowest, 3 = highest.
SOL2-A-QSG-002_1.indd 2 18/11/2014 10:12


